Table of Contents
Advertisement
Advertisement
Table of Contents

Related Manuals for IRiver ACTIVO CT10


Summary of Contents for IRiver ACTIVO CT10
- Page 1 CT10 INSTRUCTION BOOK User Guide...
-
Page 2: Table Of Contents
CONTENTS Getting Started Package Contents Part Names Power Management Charging Connecti ons Updating Firm ware Using the Device Basic Operations Home Screen No tification Panel Purchasing or Streaming Music from Store DLNA Link Listening to Music P laylist Management Settings Connecting to a Wireless Network Using Bluetooth Equalizer Setup... - Page 3 Quick Start Guide: Basic overview of using the product. Warranty Card: This card is required for customer service and technical support. Please keep this card. User Guide: The User Guide can be downloaded from the Activo website: [http://www.iriver.com/cn/ > Support > Download]. Getting Started...
-
Page 4: Part Names
User Guide Part The appearance of the product, as well as the printed and engraved information, may vary depending on the model. Names 5-Pin Micro-USB Port 3.5mm Unbalanced Power Previous/ V olume Rewind Play/Pause T ouchscreen Next/Fast- Forward microSD Home Card Slot Button 5-Pin Micro-USB Port: Connect to a computer or recharge... -
Page 5: Power Management
User Guide Power Turning on/off Power Manage- 1. Long-press the [Power] key of the device to turn it ON. 2. While the device is on, long-press the [Power] button to s ment hut down the device. A confirmation message will appear. 3. -
Page 6: Charging Connecti
User Guide Charging Charging via Computer 1. The device will charge automatically when connected to a computer via the 5-pin micro-USB cable. Depending on computer specifications, the device will charge onl y when the computer is turned on. When charging via computer connection, the charging time may v ary depending on whether the device is turned on or off. -
Page 7: Ons Updating Firm
Mac users need to download and install the MTP program from t he Activo website in order for the device to pair with a Mac OS. ttp://www.iriver.com/cn > Support > Download] Both Windows and Mac, the device only works with USB 2.0. - Page 8 User Guide Disconnecting from the Computer 1. Disconnect the 5-pin micro-USB cable after the transfer between the product and computer is completed. Disconnecting the device from the computer during an operation (e.g., file transfer) may corrupt data on the device. Copy Files/Folders to the Device 1.
-
Page 9: Insert/Remove Microsd Card
User Guide Delete Files (or Folders) from the Device via Computer 1. Right-click the desired file/folder, and then select [Delete]. 2. Select [Yes] in the [Confirm File/Folder Deletion] window to delete the selected files/folders. Insert/Remove a microSD Card 1. Refer to the diagram and gently insert a microSD card into the microSD c ard slot. - Page 10 User Guide Recommended microSD cards SanDisk, Transcend Maximum Capacity: 256GB Notes on Inserting a microSD Card Do not force the microSD card into the slot.This may cause malfunction of the product and damage to the card. Do not repeatedly insert/remove the microSD card. If not inserted properly, the microSD card may cause product malfunctions and may get stuck in the product.
-
Page 11: Ware
User Guide Updating Wi-Fi Update / OTA (Over-the-Air) Firmware 1. Connect to a wireless network. 2. When a new firmware version is available, the screen will display a Firmware Update Guide window. 3. Select [Update] and choose the items for update. 4. -
Page 12: Basic Operations
User Guide Basic LCD Touchscreen Opera- 1. This device features a LCD touchscreen that allows you to perform operations by touch. tions Interact with the device by touching the screen to access various features. To prevent damage to the screen, do not use a sharp object or ex cessive force. - Page 13 User Guide Menus 1. Drag [Left Right] on the Home Screen to display the menu list. Displaying the Notification Bar 1. Drag [Up Down] on the Home Screen to display the Notification Bar. Using the Device...
- Page 14 User Guide View Current Playlist 1. Drag [Right Left] on the Home Screen to display the current playlist. Moving Up/Down on the List 1. Drag [Down Up] / [Up Down] on the List Screen to scroll through the list. Using the Device...
- Page 15 User Guide Displaying the Control Panel 1. Drag [Down Up] on the Home Screen to display the playback control button and current song information. Lyrics: Lyrics for the current song. : Go to the list of menus to which the current song belongs.
-
Page 16: Home Screen No
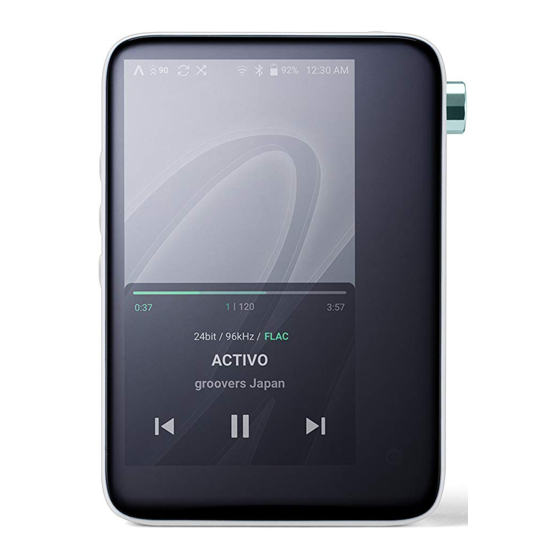
User Guide Home Screen Using the Device... - Page 17 User Guide Album Cover Displays album covers. Title Song title information. The file name is displayed when the title is unavailable. Displays current song Details information. Progress Bar Shows the progress bar. Drag the indicator to move to the desired track time. Song Progress Indicates song duration.
-
Page 18: Tification Panel
User Guide Notifi- cation Using the Device... - Page 19 User Guide Wi-Fi Press [ ] to turn Wi-Fi on/off. Bluetooth Press [ ] to turn Bluetooth on/off. Press [ ] to turn the EQ on/off. The most recent EQ settings are applied by default. Scree Press [ ] to turn the screen lock on n Loc /off.
-
Page 20: Purchasing Or Streaming Music From Store
User Guide Purcha- connected to a wireless network. sing or Streaming Purchasing or Streaming Music Music from 1. Connect to a wireless network. Store 2. Select [Store] from the menu to display the Store options available. 3. Select the desired store. 4. -
Page 21: Dlna Link
Hi-Res Streaming Server Installation 1. Visit the Activo website and download Hi-Res Streaming Server that corresponds to your operating system. [htt p://www.iriver.com/cn/ > Support > Download]. 2. Run the downloaded installer and follow the on-screen instructions. 3. Check the User Guide within the program for detailed information on using the Hi-Res Streaming Server. - Page 22 User Guide 4. A list of libraries/speakers that are on the same network with CT10 will be displayed. 5. Select a library/speaker to connect. 6. After selecting a library/speaker, select a category from the menu to display the corresponding music list.
- Page 23 User Guide Streaming and Downloading Music from Library 1.Select a category from the library menu to see your list of music. 2.Select a song to begin streaming. 3.Press the [ ] at the upper-right corner of the music list. 4.Select the desired music, and pres ] on the top to download the music.
-
Page 24: Listening To Music P
User Guide Listening Selecting Music to Music 1. Select a category from the menu to display the corresponding music list. 2. Select a song from the list to begin playback. Select [Folder] to search music by folder. Continuous Playing Time: Approximately 10 hours (Music: FLAC, 16-bit, 44.1 kHz, unbalanced output, volume 75, EQ off, LCD off) S upported Formats: PCM [8~384kHz ( 8 / 1 6 / 2 4 / 3 2 b i t ) ] DSD [2.8/5.6 /11.2MHz ]... - Page 25 User Guide Press [ ] at the top of the music list to display the Edit Mode. : Add selected items to the current playlist at the beginning / at the end / after the current song of Now Playing : Add selected list to playlist : Delete selected list : Exit Edit Mode...
- Page 26 User Guide Playlist Screen 1 Previous Return to the previous screen. 2 Playlist Displays the playlist for the current location. 3 Edit mode Display the editing options for the music list. 4 Play All Play all songs in the current list. Using the Device...
-
Page 27: Laylist Management
User Guide Playlist Creating a Playlist Manage- 1. Press [Playlists] on the menu to view the playlists. ment 2. Select [ + ] in the upper right corner of the screen. 3. Enter a name for the playlist, then press [Add] to create a new playlist. - Page 28 User Guide Removing a Song from a Playlist 1. Press [Playlists] on the menu to view playlists. 2. Select the desired playlist and press [ ] at the top of the s creen. 3. Select the music to delete, and press [ ] on top to delete it ems from the playlist.
- Page 29 User Guide Renaming a Playlist 1. Press [Playlists] to display a list of playlists, then press [ at the top of the screen. 2. Select the playlist to be renamed. 3. Press [Rename] at the bottom of the screen to display a rename window.
-
Page 30: Settings
User Guide Settings Set up the device according to the user's needs. The settings menu may vary depending on the firmware version. Setup 1. Select [Menu - Settings]. 2. Select the desired item for setup. Wi-Fi Change wireless network settings and turn Wi-Fi ON/OFF. See page 34 of the manual for more information on setting Wi-Fi. - Page 31 User Guide Equalizer Set the equalizer according to the user's preferences. US ER EQ: Adjust the frequencies left and right according to the user's preferences. Preset EQ: Select the Flat, Pop, Club, Classical, Jazz or Rock preset to set up the EQ. Supported Formats for EQ: PCM [8 - 192kHz ( 8 / 1 6 / 2 4 b i t ) ] When using the equalizer, the operation of the product may be sl ower than normal.
- Page 32 User Guide Right-left Balance Adjust the left-right balance for earphones/headphones. Playback Settings Selecting Music from the menu sets the location and way the song is loaded during playback. Device Name Set the name of the device. The maximum name length is 50 characters. Notification Bar You can add/delete Quick Settings buttons or change their order.
- Page 33 User Guide Language Select the display language. Supported languages: English, Korean, Japanese, Chinese (Simplified/Traditional), French, Russian, German Keyboard Select the keyboard language. Supported languages: English, Korean, Japanese, Chinese (Simplified/Traditional), Russian Supported languages may vary depending on your location. Power Automatic power off: The device will be automatically p owered off if there is no user input for a defined period.
- Page 34 User Guide System Information System Information: View model number, firmware version, MAC address and memory usage information. The microSD card can be mounted/dismounted, and data can be deleted. Legal information: Check open source licenses and regul ations. Formatting the microSD card will delete all data on the memory card.
-
Page 35: Connecting To A Wireless Network
User Guide Connec- Connecting to a Network ting to 1. Long-press [ ] from the Notification Bar or turn on Wi-Fi [Menu - Settings - Wi-Fi] to display a list of Access Points (AP). 2. Select the desired AP to connect to the wireless network. -
Page 36: Using Bluetooth
User Guide Using Connect a Bluetooth device to listen to music wirelessly. Bluetooth Turning Bluetooth on/off A Bluetooth device must be paired with a device prior to use. Refer to the Bluetooth device's instruction manual for details. 1. Select [ ] from the Notification B ar, or select [ON] from [Menu - Settings - Bluetooth]. - Page 37 User Guide Removing a Bluetooth Pairing 1. Press [ ] to the right of the pa ired device to go to the settings s creen. 2. Select [Remove Pairing] to complete the process. Bluetooth Support Specifications Profile: A2DP, aptX HD Device performance may be affected during Hi-Fi playback.
-
Page 38: Equalizer Setup
User Guide Equalizer Equalizer Setup Setup 1. Long-press [ ] from the N otification Bar, or turn on [M enu - Settings - Equalizer]. 2. Select the current EQ and press [+]. 3. Enter a name for the custom EQ settings and select [Save]. - Page 39 User Guide 4. Move the sliders to adjust the frequencies according to your preferences. Resetting the Equalizer 1. Select the user EQ to initialize and press [ ] at the top of the screen to revert the EQ to its default settings. Using the Device...
- Page 40 User Guide Deleting Equalizer 1. Select the current EQ to display the EQ list. 2. Press [ ] next to the desired it em to delete the selected eq ualizer. Renaming an Equalizer 1. Select the current EQ to display the EQ list.
-
Page 41: Miscellaneous
In case the device gets wet (rain, water, chemicals, medicine, cosmetics, sweat, moisture, etc.), do not power on the device and allow it to dry thoroughly. Contact the nearest iriver C ustomer Support Center. (Malfunctions due to exposure to li quids will be repaired for a fee regardless of the warranty p eriod and such damage may not be repairable.) - Page 42 User Guide When connecting the 5-pin micro-USB cable, use a USB p ort on the back of the computer. Connecting to a poorly as sembled or defective USB port may damage the product. Di splaying one image for an extended period may cause scr een burn-in (after image).
-
Page 43: Ubleshooting Copyright
User Guide Trouble- Check for solutions to common problems. shooting 1. The device won't turn on. The battery may need to be recharged. Charge the device for at least one hour and try again. Reset the device and try again. (See Page 4.) 2. -
Page 44: Certifications Register
No contents of this user manual may be duplicated or reproduced in any format or by any means without the prior approval of iriver. Using or reproducing, in whole or part, the contents of this docu ment is subject to penalties. -
Page 45: Ed Trademarks Disclai
The information in this user manual was written based on current p roduct specifications. The manufacturer, iriver Limited, is adding ne w complementary features and will continue to apply new technol ogies in the future. - Page 46 User Guide Specifi- General Specifications Model APP11 cations Body Color White Body Material Plastic NEXELL Display 3.3inch WQVGA (480x854) / Touchscreen Supported Audio WAV, FLAC, WMA, MP3, OGG, APE, AAC, ALAC, AIFF, Formats DFF, DSF Sampling Rate FLAC, WAV, ALAC, AIFF: 8kHz - 192kHz (8/16/24-bits per sample) DSD: DSD64/128/256, Stereo (DSD to PCM) 1.9 Vrms...
Need help?
Do you have a question about the ACTIVO CT10 and is the answer not in the manual?
Questions and answers