Table of Contents
Advertisement
ASSEMBLY & INSTALLATION INSTRUCTIONS • INSTRUCTIONS POUR L'ASSEMBLAGE ET L'INSTALLATION • INSTRUCCIONES PARA LA INSTALACION
BEFORE BEGINNING ASSEMBLY
– READ DIRECTIONS THOROUGHLY
– ASSEMBLE NEAR DESIRED LOCATION
– TWO-PERSON ASSEMBLY IS RECOMMENDED
AVANT DE COMMENCER L'ASSEMBLAGE
– LISEZ COMPLÈTEMENT LES INSTRUCTIONS
– ASSEMBLEZ À PROXIMITÉ DE L'EMPLACEMENT SOUHAITÉ
– IL EST RECOMMANDÉ DE SE METTRE À DEUX PERSONNES
POUR L'ASSEMBLAGE
ANTES DE COMENZAR AL ENSAMBLAJE
– LEE LAS INSTRUCCIONES MINUCIOSAMENTE
– ENSAMBLA CERCA DE LA UBICACIÓN FINAL
– SE RECOMIENDAN DOS PERSONAS PARA ENSAMBLAR
WHEN ASSEMBLED, WIDE SIDE SHOULD BE ON THE LEFT.
ASSEMBLE DE COTE DE LARGE DEVRAIT ETRE SUR LA GAUCHE.
EL LADO ANCHO REUNIDO DEBE ESTAR EN LA IZQUIERDA.
TOOLS NEEDED FOR ASSEMBLY*
OUTILS REQUIS POUR L'ASSEMBLAGE*
HERRAMIENTAS NECESARIAS PARA LA
INSTALACIÓN*
*TOOLS NOT INCLUDED
*OUTILS NON COMPRIS
*HERRAMIENTAS NO INCLUIDAS
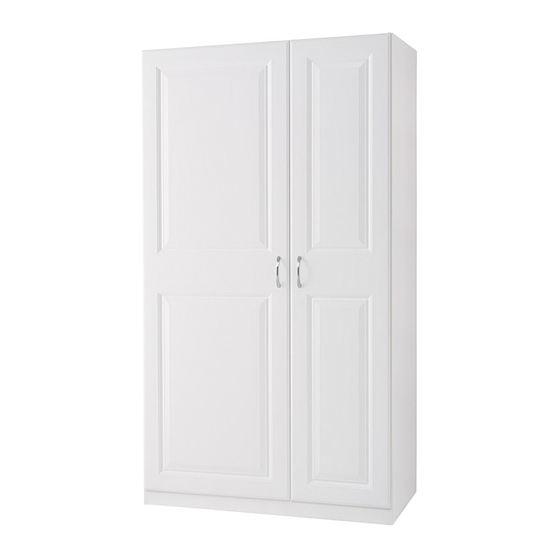
39" MULTI-PURPOSE CABINET
39" ARMOIRE POLYVALENTE
39" GABINETE MULTIUSO
WIDE SIDE
CÔTÉ LARGE
NARROW SIDE
LADO ANCHO
CÔTÉ ÉTROIT
LADO ANGOSTO
U180419 / 0217
Model Number(s):
N
de modèle:
o
Numero(s) de:
ESM3970GRY
ESM3970SW
STUD FINDER
DÉTECTEUR DE
MONTANTS
DETECTOR DE VIGAS
Advertisement
Table of Contents

Related Manuals for Estate ESM3970GRY


Summary of Contents for Estate ESM3970GRY
- Page 1 U180419 / 0217 ASSEMBLY & INSTALLATION INSTRUCTIONS • INSTRUCTIONS POUR L’ASSEMBLAGE ET L’INSTALLATION • INSTRUCCIONES PARA LA INSTALACION Model Number(s): de modèle: Numero(s) de: ESM3970GRY ESM3970SW BEFORE BEGINNING ASSEMBLY – READ DIRECTIONS THOROUGHLY – ASSEMBLE NEAR DESIRED LOCATION – TWO-PERSON ASSEMBLY IS RECOMMENDED AVANT DE COMMENCER L’ASSEMBLAGE...
- Page 2 HELPFUL TIPS SUGGESTIONS UTILES SUGERENCIAS ÚTILES DO NOT RETURN PRODUCT TO THE STORE! If you have any problems or missing parts, please contact our parts department at the number provided. NE PAS RETOURNER LE PRODUIT AU TO CALL FROM THE UNITED STATES: MAGASIN! En cas de problèma ou de pièces 888-774-8062 manquantes, joindre le service des pièces au...
- Page 3 HARDWARE QUINCAILLERIE HERRAJES CAM LOCK CAM BOLT DOWEL (QTY. 18) (QTY. 18) (QTY. 16) VERROUILLAGE À CAME BOULON À CAME GOUJON CIERRE DE LEVA PERNO DE LEVA CLAVIJA #6 x ½" SCREW HINGE PLATE HINGE (QTY. 18) (QTY. 6) (QTY. 6) PLAQUE DE CHARNIÈRE CHARNIÈRE TORNILLO...
- Page 4 EXPLODED VIEW VUE ÉCLATÉE VISTA AMPLIADA Panels are identified on edges. Les panneaux sont identifiés sur les bords. Los paneles están marcados en los bordes.
- Page 5 PANELS PANNEAUX PANELES LEFT SIDE PANEL RIGHT SIDE PANEL (QTY. 1) (QTY. 1) PANNEAU LATÉRAL GAUCHE • PANEL DEL LADO IZQUIERDO PANNEAU LATÉRAL DROIT • PANEL DEL LADO DERECHO TOP / BOTTOM PANEL PARTITION (QTY. 2) (QTY. 1) PANNEAU INFÉRIEUR / ÉTAGÈRE FIXE • PANEL INFERIOR / ESTANTE FIJO PARTITION •...
- Page 6 ATTACH HARDWARE TO PANELS A2 & B2 Attacher la quincaillerie aux panneaux A2 et B2 Sujeta los herrajes a los paneles A2 y B2 CAM BOLT #6 x ½" SCREW HINGE PLATE HANG ROD CUP (QTY. 16) (QTY. 2) (QTY. 6) (QTY.
- Page 7 ATTACH HARDWARE TO PANEL E2 Attacher la quincaillerie aux panneaux E2 Sujeta los herrajes a los paneles E2 CAM BOLT DOWEL #6 x ½" SCREW HANG ROD CUP (QTY. 1) (QTY. 4) (QTY. 1) (QTY. 1) BOULON À CAME GOUJON COUPELLE DE SUPPORT DE TRINGLE PERNO DE LEVA CLAVIJA...
- Page 8 ATTACH HARDWARE TO PANELS C2, F2, G, M2 & P2 Attacher la quincaillerie aux panneaux C2, F2, G, M2 et P2 Sujeta los herrajes a los paneles C2, F2, G, M2 y P2 CAM LOCK DOWEL (QTY. 18) (QTY. 12) VERROUILLAGE À...
- Page 9 ATTACH PANEL C2 & M2 TO PANEL A2 Attacher le panneau C2 et M2 au panneau A2 Une el panel C2 y M2 al panel A2 Notes/Remarques/Notas: • Raw unfinished edges should be facing up. Finished edges should be facing down. •...
- Page 10 ATTACH PANEL E2 TO PANELS C2 & M2 Attacher le panneau E2 aux panneaux C2 et M2 Une el panel E2 a los paneles C2 y M2 #6 x ½" SCREW HANG ROD CUP (QTY. 1) (QTY. 1) COUPELLE DE SUPPORT DE TRINGLE TORNILLO SOPORTE DE LA BARRA PARA COLGAR Notes/Remarques/Notas:...
- Page 11 ATTACH PANELS C2 & F2 TO PANEL A2 Attacher les panneaux C2 et F2 au panneau A2 Une los paneles C2 y F2 al panel A2 Notes/Remarques/Notas: • Raw unfinished edges should be facing up. Finished edges should be facing down. •...
- Page 12 ATTACH PANEL G Attacher le panneau G Une el panel G LOCKED...
- Page 13 ATTACH PANEL P2 Attacher le panneau P2 Une el panel P2 LOCKED Support panel (P2). Soutenez le panneau (P2). Sostenga el panel (P2).
- Page 14 ATTACH PANEL B2 Attacher le panneau B2 Une el panel B2 Notes/Remarques/Notas: • Raw unfinished edges should be facing up. Finished edges should be facing down. • Les bords bruts non finis doivent regarder vers le haut. Les bords finis doivent regarder vers le bas. •...
- Page 15 MARK FIXED PANEL LOCATION ON TOP & BOTTOM PANEL Marquez l’emplacement du panneau fixe sur le panneau supérieur et inférieur Marca la ubicación del panel fijo en los paneles superior e inferior #6 x ½" SCREW #6 X 1B\," SCREW “L”...
- Page 16 SECURE BACK PANEL H Fixez le panneau arrière H Asegura el panel posterior H NAIL GUIDE NAIL (QTY. 1) (QTY. 2) SERRURE DE CAME CLOU BLOQUEO DE LA LEVA CLAVO Notes/Remarques/Notas: • Ensure cabinet is square and secure top two corners first.
- Page 17 SECURE BACK PANEL H Fixez le panneau arrière H Asegura el panel posterior H NAIL GUIDE NAIL (QTY. 1) (QTY. 38) SERRURE DE CAME CLOU BLOQUEO DE LA LEVA CLAVO Notes/Remarques/Notas: Notes/Remarques/Notas: • Secure perimeter of back • Secure perimeter of back panel spacing nails panel spacing nails approximately 8"-10"...
- Page 18 SECURE CABINET TO THE WALL Fixer l'armoire au mur Asegura el gabinete a la pared WARNING! Failure to properly secure the cabinet to the wall can result in serious injury or death. AVERTISSEMENT! Un manque à fixer correctement l'armoire au mur peut entraîner de graves blessures, voire la mort.
- Page 19 SECURE ADJACENT CABINETS Fixer les armoires adjacentes Asegure los gabinetes adyacentes #10 x 1" SCREW (QTY. 2) TORNILLO For multiple cabinet installation, secure cabinet to wall first and then to adjacent cabinet. Pour l’installation de plusieurs armoires, fixez d’abord l’armoire au mur, puis fixez-la à l’armoire adjacente. Para instalar varios gabinetes, fije el gabinete a la pared primero y luego a un gabinete adyacente.
- Page 20 INSTALL HINGES Installer les charnières Como instalar las bisagras #6 x ½" SCREW HINGE (QTY. 12) (QTY. 6) CHARNIÈRE TORNILLO BISAGRA...
- Page 21 INSTALL DOORS Installer les portes Como instalar las puertas IMPORTANT! Cabinet MUST be secured to the wall before installing doors. IMPORTANT! L'armoire DOIT être solidement fixée au mur avant l'installation des portes. ¡IMPORTANTE! El gabinete DEBE estar asegurado antes de instalarle las puertas. Slide hinge onto hinge plate and secure all screws.
- Page 22 INSTALL HANDLES & SHELVES Installer les poignées, étagères Instale las manijas, estantes (24) SCREWS (#8-32 x ¾") BUMPER HANDLE SHELF CLIP BUTÉE POIGNÉE TAQUET POUR ÉTAGÈRE TORNILLO PROTECTOR GANCHO PARA ESTANTE...
- Page 23 LOADING LIMITATIONS* Limites de charge* Limitaciones de carga* 25 lbs (11.3 kg) CAUTION! Do not exceed the maximum weight limitations. 30 lbs 25 lbs (13.6 kg) Doing so can result in damage, (11.3 kg) serious injury, or death. 30 lbs ATTENTION! Ne dépassez pas les (13.6 kg) limitations de poids maximum.
- Page 24 à compter de leur date d’achat original, dans la mesure où ils sont soumis à un usage domestique normal. Cette garantie est offerte uniquement à l’acheteur original et n’est pas transférable. DURÉE DE LA GARANTIE : La garantie de tous les meubles de rangement ESTATE by RSI est valable pendant toute la durée de vie utile de produit.
Need help?
Do you have a question about the ESM3970GRY and is the answer not in the manual?
Questions and answers
i have a 30" x 36" wall cabinet and the front facing had delaminated off the doors. I **** looking to either purchase or have covered under warrant four (4) replacement doors. The doors physically measure 17 3/4" x 29 1/2" white. I purchased these at Lowes but they could not help me. Please send a recommendation how to resolve this issue. Paul
I bought two of these units ESM3970SW from Lowe's of Gaffney S.C. can these be assembled so that the doors can be reversed? In other words if I decide to assemble these side by side I want the small doors to be side by side. I have already assembled one of these units and was slacked 4ea hardware letter (d) #6 x 1/2" countersunk screw & 6ea hardware letter (n) shelf clips. My address is Duane Ramsey 419 First St. Blacksburg S.C. 29702 Please advise, Thanks for your help in this matter Duane