Advertisement
Table of Contents
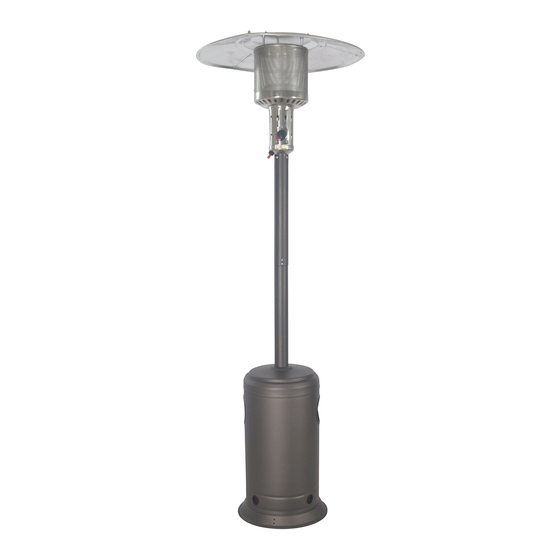
Model No.:PH02-S/CAPH-7SMOCHA/CAPH-7-S
WARNING
Improper installation, adjustment, alteration, service or maintenance can cause injury or
property damage. Read the owner's manual thoroughly before installing or servicing this
result causing property damage, personal injury or loss of life.
Save these instructions for future use. If
you are assembling this unit for someone
else, give this manual to him or her and
read and save for the future.
Intertek
3177588
If you have any question or concerns, please DO NOT RETURN this item before contact with customer service.
Please contact with California Outdoor Design at the below resources:
Toll Free Phone: 800-305-8803 Monday –Friday 8am-4:30pm.
Email:Support@legacyheatcalifornia.com
/CAPH-7-SB/ CAPH-7-S HB
/v-CAPH-7-S/PH02-SS/CAPH-7-SS
Owner's Manual
DANGER
If you smell gas:
1. Shut off gas to the appliance.
3. If odor continues, keep away from
the appliance and immediately call
WARNING
Do not store or use gasoline or other
vicinity of this or any other appliance.
An LP-cylinder not connected for use
shall not be stored in the vicinity of
this or any other appliance.
WARNING
For outdoor use only.
Advertisement
Table of Contents

Related Manuals for Legacy Heating PH02-S

Summary of Contents for Legacy Heating PH02-S
- Page 1 Model No.:PH02-S/CAPH-7SMOCHA/CAPH-7-S /CAPH-7-SB/ CAPH-7-S HB /v-CAPH-7-S/PH02-SS/CAPH-7-SS DANGER If you smell gas: 1. Shut off gas to the appliance. 3. If odor continues, keep away from the appliance and immediately call WARNING Do not store or use gasoline or other vicinity of this or any other appliance.
-
Page 2: Safety Information
SAFETY INFORMATION Before you assemble or operate this unit, please carefully read this entire manual. Failure to do so WARNING • The installation of this unit must adhere to local codes or either the National Fuel Gas Code, ANSI Z223. 1/NFPA54, OR CAN/CGA-B149.1, National Gas and Propane Installation Code. •... - Page 3 damaged parts should this occur. • Do not disconnect any part while unit is in use. • Do not store a spare propane tank on or near this unit. • If the heating unit is indoors, detach the propane tank and leave outdoors. •...
- Page 4 SAFETY INFORMATION BE CAREFUL: WHEN CERTAIN MATERIALS OR ITEMS ARE STORED ABOVE, BESIDE OR UNDER THIS HEATER WHILE IN USE, THEY WILL BE SUBJECT TO RADIANT HEAT AND COULD BE SERIOUSLY DAMAGED. Combustible materials should not be within 24 inches of the top of the unit, or within 36 inches around the entire unit.
- Page 5 HARDWARE Item Description M6x10 Screw M6 Nut M8 Bolt M6x22Bolt Wrench Reflector Stud Wing Nut Washer Anchoring Arm Anchoring Nut Cap Nut Small screw Webbing Before beginning assembly of product, make sure all parts are present. Compare parts with package contents list and hardware contents list. If any parts are missing or damaged, do not attempt to assemble the product.
- Page 6 CONTENTS Item Description Reflector Panel Center Reflector Head Assembly Post Tank H ousing Post S upport Support L egs Regulator Base Wheel A ssembly Page 6...
- Page 7 ASSEMBLY INSTRUCTIONS 1. Align the holes in the wheel assembly (J) with the holes in the base (I), attach the wheel assembly to the base using 2 pcs M6x10 screws (AA) and 2 pcs M6 nuts (BB). 2. Mount the 3 pcs anchoring arms (II) to the holes on the base (I) using 6 pcs M6x10 screws (AA) and 6 pcs M6 nuts (BB).
- Page 8 ASSEMBLY INSTRUCTIONS 4. Attach the post support (F) to the top of the support legs (G) using 6 pcs M6 x 22 bolts (DD) and 6 pcs M6 nuts (BB). 5. Place the tank housing (E) on top of the assembly. (FF) into the top holes of the head assembly (C).
- Page 9 WARNING e e e s m m m b b b n n n i i i l l l ! ! ! g g g semble the outer rim using one small screw (LL) and one cap nut (KK). Repeat this step with the three M6 screws (AA) and three cap nuts (KK).
- Page 10 ASSEMBLY INSTRUCTIONS 10. Remove the pre-assembled screws from the post support (F) and attach post (D) to the post support (F) using those 4 screws. 11. Place the 20 lb gas cylinder in the center of the base, fasten it with the webbing (MM). 12.
-
Page 11: Operation
OPERATION Before performing a leak test, be sure that no sparks can occur and you are in a spacious outdoor area. Connect the propane gas tank to the regulator and turn the valve on the unit to the “off” position. Brush a soap and water mixture on all connections. Turn the gas supply on; if bubbles occur on any connection there may be a leak. -
Page 12: Maintenance
MAINTENANCE • Before performing any maintenance always disconnect propane gas tank. • Keep the heating item free and clear from combustible materials. • Visually inspect burner for obstructions and keep tank enclosure free and clear from debris. • Use a soft brush to get rid of the mild stains, loose dirt and soil after the burner is completely cooled down. -
Page 13: Troubleshooting
TROUBLESHOOTING Problem Cause Solution The burner will not light. The burner injector is clogged. Clean the burner injector. There is low gas supply pressure. Call your gas supplier. The burner flame goes off There is low gas pressure. Call your gas supplier. immediately after ignition. -
Page 14: Warranty
WARRANTY CONTACT Page 14...
Need help?
Do you have a question about the PH02-S and is the answer not in the manual?
Questions and answers