
Summary of Contents for Dune lighting MINI-DMX
- Page 1 MINI-DMX 54 Channels DMX Controller Operating Instructions Read All Instructions Before Use...
-
Page 2: Specifications
This leaflet aims to help you better understand many facets of the device and avoid any defective manipulation. We recommend that you carefully follow the directions below. The "MINI-DMX" allows you to control the most of your devices while enabling complete freedom of movement. In fact, you can control any standard DMX512 line with this compact. -
Page 3: Contents Of Packaging
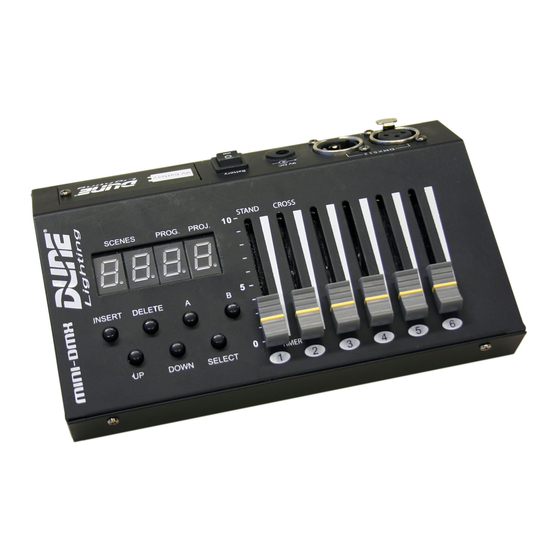
4 CONTENTS OF PACKAGING 1x MINI-DMX 1x Power supply 9 V 1x Manual 5 PRODUCT OVERVIEW (1) INSERT Control Buttons DELETE DOWN SELECT (2) 1, 2, 3, 4, 5, 6 Slider Control (3) SCENES Viewing Scene (4) PROG. Viewing Program (5) PROJ. -
Page 4: Switching On The Product
6 USE OF PROCEEDS Switching on the product In the case of use on mains: Connect the power supply sector. Connect the power supply to the unit by the 9V DC input. Place the power button on the position "External". In the case of use on battery: Insert a 9V battery (6LR61) in the space provided for this purpose;... - Page 5 To activate the internal synchronization of the projectors, press and hold the “SELECT” button 2 seconds. The display of "PROJ." indicates a number of the page which is flashing. The display will indicate whether the internal synchronization is active ("ON") or inactive ("OFF"). To set the value of "ON" or "OFF", press the button "B". You can change the number of active projector 1 to 9 (each projector occupies 6 channels at once) using the buttons "UP"...
- Page 6 blinks rapidly. You can select the program number you want to edit by pressing the 'UP' or 'DOWN'. The device records up 9 programs (1-9), each containing 50 scenes (1 to 50). The display of "SCENES" indicates the last scene ("00" means that no scene has been recorded for this program.) When you select the program you can choose the projector which wants to attribute the scene (from 1-9).
- Page 7 Press the "A" button for 3 seconds to exit programming mode. 6.2.5 - Implementation of a program To run a program, press the "A" button. Use the "UP" or 'DOWN' to select the desired program. The program runs automatically and cyclically from the first to the last scene. To stop a running program, press the "A"...
Need help?
Do you have a question about the MINI-DMX and is the answer not in the manual?
Questions and answers