Table of Contents
Advertisement
Quick Links
Advertisement
Table of Contents

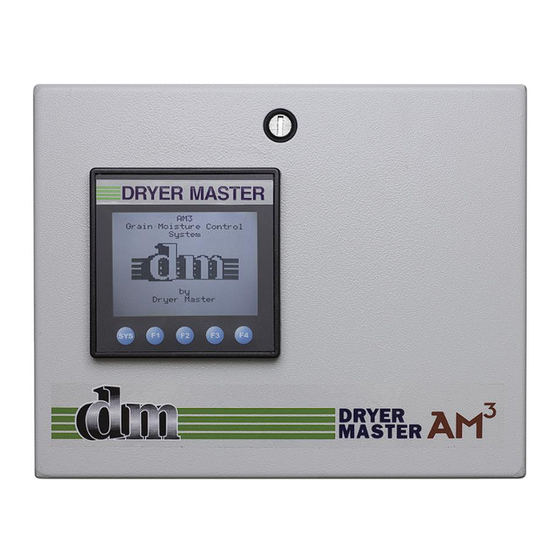
Summary of Contents for Dryer Master AM3
- Page 2 March, 2009 Revision 1.4 September, 2013 Revision 1.5 September, 2014 Revision 1.6 March, 2016 Revision 1.7 June, 2017 Prepared by: Dryer Master Inc. ©Dryer Master Inc. 2008, 2009, 2013, 2014, 2016 Dryer Master® is a registered trademark of Dryer Master Inc.
-
Page 3: Table Of Contents
5.3.4 Calibrate Sensor – Enhanced Method – Online Sample value display ..........30 5.3.5 Calibrate Sensor – Enhanced Method – Sample entry ................30 5.4 S ..............................32 LARMS 5.4.1 Set Alarms – Menu selection ........................32 ©Dryer Master Inc. Page: 1... - Page 4 5.13.1 Trending Options – Menu selection ....................... 53 5.13.2 Trending Options – Clearing data ......................53 5.13.3 Trending Options – Changing Moisture range ..................53 5.13.4 Trending Options – Changing trend time scale ..................54 ©Dryer Master Inc. Page: 2...
- Page 5 10 APPENDIX B – WARRANTY ........................81 11 APPENDIX C - IMO SET-UP GUIDE ......................82 12 APPENDIX D. SENSOR CHUTE W/ ROTARY FEED ................87 13 APPENDIX E MOTOR SPEED CONTROL WIRING DIAGRAM ............... 89 ©Dryer Master Inc. Page: 3...
- Page 6 Figure 46. – Alarm Delay –Entry selection Figure 47. – Alarm Delay – Value Entry Figure 48. – Remote Alarm Delay Figure 49. – Remote Alarm Delay – Enable & Entry selection Figure 50. – Remote Alarm Delay – Value Entry ©Dryer Master Inc. Page: 4...
- Page 7 Figure 104. –Moisture Sensor, Example of a bypass Chute Installation, product feeding back on itself 75 Figure 106. –In Line Chute Example Figure 107. –In Line Chute Example: Dimensions Figure 108. –History file data format Figure 109. –Calibration file data format ©Dryer Master Inc. Page: 5...
- Page 8 The AM is part of the Dryer Master family of moisture monitoring and moisture control systems that have at their heart Dryer Master's stainless steel fin type capacitance based moisture sensors. These sensors were initially developed to drive Dryer Master's industry leading computerized moisture control systems, where they are placed at the inlet and the outlet of the dryer.
-
Page 9: Introduction
Moisture measurement technology The Dryer Master Moisture sensor measures the dielectric properties, in effect the capacitance of the product in the vicinity of the sensor fin. This method is the most effective in measuring the total water in a given volume of product. -
Page 10: System Overview
Dryer Master Product Manual 2. System Overview The system is comprised of 2 key elements, the industry proven Dryer Master Moisture sensor and a Micro PLC with integrated touch screen information display. DRYER Ground cables Optional Instrumentation Printer cables 0 –... - Page 11 24 vdc time delayed alarm output Optional Moisture Dryer Control Sample Start Button Panel ( Discharge Speed ) Outlet Moisture & Temperature Sensor Figure 2. – Typical System with standard display mounted in Dryer Control panel and options ©Dryer Master Inc. Page: 9...
- Page 12 Moisture sensor. The supply may also be used to activate low voltage low current alarm devices or alarm contacts. On systems equipped with a Dryer Master Power supply the unit is capable of supplying 24Volts DC at up to 1 Amp and is current limited and designed to shut down in the event of a short circuit.
-
Page 13: System Operation
PLC (Programmable Logic Controller) or an OCS (Operator Control Station). Corn 15.1% 75 °F 50.00 Rate: 16.0% Mode: 55.00 15.0% 50.00 Manual 14.0% 45.00 Auto Trend Menu Setup SYSTEM Figure 6. –System display items description. ©Dryer Master Inc. Page: 11... - Page 14 Product Moisture display: Actual moisture of the product as detected by the Dryer Master Moisture sensor. Note this will indicate “Empty” when the sensor output is below critical trigger threshold either by being empty, not connected or moisture so low that reading is not possible.
-
Page 15: System Screens Map
SYSTEM Main Operations Screen, CORN selecting the Trend displays 15.1% 75 °F Rate: 50.00 16.0% Mode: 55.00 15.0% 50.00 Manual 14.0% 45.00 Auto Time (10min/DIV) Trend Menu Setup Exit SYSTEM SYSTEM Figure 7. –Screen map ©Dryer Master Inc. Page: 13... -
Page 16: System Start Displays
Manual or Auto Mode. 15.0% 10.00 See Dryer Rate: 75 °F 16.0% Mode: 55.00 15.0% 50.00 Depending on the system state, different information may be Local 14.0% 45.00 Auto Trend Menu displayed Setup SYSTEM Figure 10. –Main Display ©Dryer Master Inc. Page: 14... -
Page 17: Main Operations Displays
Press the “Touch Area” <Rate :> or the rate value <10.00> to display 15.0% the rate entry screen. 75 °F 10.00 Rate: 16.0% Mode: 55.00 15.0% 50.00 Manual 14.0% 45.00 Auto Trend Menu Setup SYSTEM Figure 13. –Main Display – Manual Mode ©Dryer Master Inc. Page: 15... -
Page 18: Main Display - Automatic Mode
75 °F 50.00 Rate: 16.0% Mode: 55.00 See section “Alarm settings” for information on setting the alarm 15.0% 50.00 Automatic 14.0% 45.00 limits. Auto Trend Menu Setup SYSTEM Figure 16. –Main Display – Active Alarm ©Dryer Master Inc. Page: 16... -
Page 19: Moisture Trend Displays
Figure 17. –One (1) hour Moisture Trend 3.5.2 Two Hour Moisture trend display Two (2) hour moisture trend Press the “Touch area” <Exit> to return to the main screen Time (20min/DIV) Exit SYSTEM Figure 18. –Two (2) hour Moisture Trend ©Dryer Master Inc. Page: 17... -
Page 20: Operating The Dryer From The Am
Local Press the “Touch area” <Enter> to select the item and return to the main screen. Press the “Touch area” <Esc > to return to the Main screen. Enter SYSTEM Figure 20. –Mode Select screen ©Dryer Master Inc. Page: 18... -
Page 21: Setting Drying Rate
Speeds are recorded and printed if the printer and compact flash option where ordered as part of the system. 3. “Automatic” – The normal or primary speed is also set from the Dryer Master AM . This is a semi automatic mode. -
Page 22: Auto Setup
(the window between the “high and low moisture target”) or have moved to the other side of the target moisture ( mode dependent) before the speed is again returned to normal mode. 999 seconds or about 16 minutes 39 seconds is the maximum delay available. ©Dryer Master Inc. Page: 20... -
Page 23: Auto Setup -Limits And Rate Mode Selection
The high speed set point and low speed set point track the normal or primary speed to maintain a operating window as a percentage of the primary speed. ©Dryer Master Inc. Page: 21... -
Page 24: Auto Setup - Moisture Targets, Moisture Limits And Rate Settings Selection
In all Automatic modes it is prudent for the operator to operate the dryer manually to attain the desired moisture, before selecting Automatic. It is important to monitor the operation and adjust the settings to permit the dryer and Dryer Master AM to operate effectively. -
Page 25: Auto Setup -Rate Selection Mode A
The system will cycle between the speed settings triggered by the moisture target and limits. In Mode A all 3 speeds are manually set, as well as the moisture target and limits, and the delay time. ©Dryer Master Inc. Page: 23... -
Page 26: Auto Setup -Rate Selection Mode B
The system will cycle between the speed settings triggered by the moisture target and limits. In Mode B the normal or primary speed is manually set, as well as the moisture target and limits, and the delay time and possibly an occasional tweak of the speed offset. ©Dryer Master Inc. Page: 24... -
Page 27: Auto Setup -Rate Selection Mode C
5) The key is to maintain the normal running rate settings where it needs to be and provide a sufficient window with the high and low rate change settings to allow the system to operate effectively. ©Dryer Master Inc. Page: 25... -
Page 28: The Menu Tree
Press the “Touch area” <Exit> to return to the main screen Press the “Touch area” <Back> to return to the previous screen SYSTEM Press the “Touch area” <Next > to move to the next screen Figure 30. –Menu Three (3) ©Dryer Master Inc. Page: 26... -
Page 29: Menu - Screen 4
The product names can Exit Back Change not be changed. It is however possible to copy the calibration parameters form any one product and enter those into any of the others. SYSTEM Figure 33. – Change Product ©Dryer Master Inc. Page: 27... -
Page 30: Calibrate Sensor
Exit Back Press the “Touch area” <Exit> to return to the main screen Press the “Touch area” <Back> to return to the previous screen SYSTEM Figure 35. – Calibrate Sensor (Standard method) ©Dryer Master Inc. Page: 28... -
Page 31: Calibrate Sensor - Enhanced Method - Start Calibration - Enter Calibration
Press the “Touch area” <Enter Calibration> to move to the entry SYSTEM screen. Press the “Touch area” <Exit> to return to the main screen Press the “Touch area” <Back> to return to the previous screen Figure 36. – Calibrate Sensor (Enhanced method) Start & Enter ©Dryer Master Inc. Page: 29... -
Page 32: Calibrate Sensor - Enhanced Method - Online Sample Value Display
Figure 38. – Calibrate Sensor (Enhanced method) Sample Entry How calibration works: The purpose of calibration is to allow the Dryer Master moisture reading to easily mimic the manual tester. Periodic checks against a manual device ensure both are in approximate agreement. Please be sure the product moisture and product temperature are within the specification range for your manual tester. - Page 33 The enhanced method takes the guess work out of doing calibrations. With this method there is usually a Calibration Start push button located near the Dryer Master Moisture sensor where manual samples are taken. When this button is pressed a lamp will flash for the next 30 seconds.
-
Page 34: Set Alarms
Press the “Touch area” <Exit> to return to the main screen Critical High 120.0 Warning High 121.0 Press the “Touch area” <Back> to return to the previous screen Warning Low 20.0 Critical Low 10.0 Exit Back SYSTEM Figure 41. – Set Alarms – Temperature Alarms ©Dryer Master Inc. Page: 32... -
Page 35: Set Alarms - Values Entry
01/ 01 00: 00 ALM W ar n. Low 01/ 01 00: 00 ALM Cr i t . Low screen 01/ 01 00: 00 ALM W ar n. Low Exit Back Act Alm Figure 44. – Alarm Log – Data screen SYSTEM ©Dryer Master Inc. Page: 33... -
Page 36: Alarm Delay
Alarm Delay Press the “Touch area” <Exit> to return to the main screen Time (sec) Press the “Touch area” <Back> to return to the main screen Exit Back SYSTEM Figure 46. – Alarm Delay –Entry selection ©Dryer Master Inc. Page: 34... -
Page 37: Alarm Delay - Value Entry
Press the “Touch area” <Exit> to return to the main screen Press the “Touch area” <Back> to return to the main screen Exit Back Next Press the “Touch area” <Next> to move to the next screen SYSTEM Figure 48. – Remote Alarm Delay ©Dryer Master Inc. Page: 35... -
Page 38: Remote Alarm Delay - Enable & Delay Entry Selection
3) In the event that the value has been set to “0”, and continuous alarms are occurring, momentarily disconnect the Moisture sensor. With the sensor disconnected no more alarms will occur. Once the Alarm Screen stops reappearing return to this screen and reset the time to a few seconds. ©Dryer Master Inc. Page: 36... -
Page 39: Printing
>to display the data entry screen ID Number Press the “Touch area” <Exit> to return to the main screen Press the “Touch area” <Back> to return to the main screen Exit Back SYSTEM Figure 53. – Printing – Set ID ©Dryer Master Inc. Page: 37... -
Page 40: Printing - Set Id Number - Value Entry
ID to identify a batch. Just select the “Set ID Number” and enter a value to have it printed ahead of the information. Select “Print Header” to print this ID Number header. 3) The Column headings are printed with ID header. ©Dryer Master Inc. Page: 38... -
Page 41: Printing - Printout Sample
Temperature values. “C” indicates a critical high or low alarm. “W” indicates a warning high or low alarm. Values can be set, changed in the “Set Alarms” menu. Also displayed directly following the rate value will be “M” for manual speed set point operation and “A” for automatic operation. ©Dryer Master Inc. Page: 39... -
Page 42: Temperature Scale
2) You will “NOT” be able to change the temperature scale while an alarm condition exists. Review the alarm settings, make the necessary changes to the alarms, change the temperature scale, and then return to the alarm settings and adjust the values as needed. ©Dryer Master Inc. Page: 40... -
Page 43: System Settings
Press the “Touch area” <ESC> to return to the previous screen SYSTEM Figure 60. – System Settings – Screen Saver – Items Selection ©Dryer Master Inc. Page: 41... -
Page 44: System Settings -Screen Saver - Timeout
Press the “Touch area” <ESC> to return to the previous screen SYSTEM Figure 62. – System Settings – Date / Time – Items Selection ©Dryer Master Inc. Page: 42... -
Page 45: System Settings - Setting Date
How Contrast settings work: The Contrast adjustment sets the intensity of the back lighting. Set to the desired intensity. To set, use the up down touch arrows to change the value. Press the Enter touch button when done ©Dryer Master Inc. Page: 43... -
Page 46: Eng. Functions
Press the “Touch area” <Enter> to accept the value and enter the engineering screens. Or press the “Touch area” <Esc> to cancel and return to the previous screen Enter SYSTEM Figure 68. – Engineering Functions – Password Entry ©Dryer Master Inc. Page: 44... -
Page 47: Engineering Functions 1 - Slope, Offset Entry
Note the manual test value and the displayed moisture. 2) Calculate the difference. If the Dryer Master sensor was higher than the manual test. The offset value will need to be reduced by the calculated difference. If the Dryer Master sensor was lower than the manual test. - Page 48 3) In current mode the Maximum output current 20 mA and the Minimum output current is 0 mA. 4) For Example: Suppose we have the following application a) The maximum displayed value = 100 and the voltage we need = 20 mA ©Dryer Master Inc. Page: 46...
-
Page 49: Engineering Functions 2 - Slope, Offset Entry
Press the “Touch area” <Back> to cancel and return to the previous screen Exit Back More Press the “Touch area” <More> to move to the next screen. SYSTEM Figure 71. – Engineering Functions 3 – Slope, Offset entry ©Dryer Master Inc. Page: 47... -
Page 50: Engineering Functions 4 - Ff&Tc Corn Value Entry
How the TC Corn, Beans, Wheat, Canola works: TC stands for Temperature Correction for each of the products. This value is typically set to “0”. The standard sensor has temperature compensation correction for the product moisture built into the ©Dryer Master Inc. Page: 48... -
Page 51: Engineering Functions 6 - Input Voltage Diagnostics Display
The user presses the calibration button and gathers samples while the calibration button is flashing. b) The user then takes 3 or more tests from the gathered sample, averages the tests. c) Enter the average value back into the system. ©Dryer Master Inc. Page: 49... -
Page 52: Engineering Functions 8 - Calibration Factor
Press the “Touch area” <Back> to cancel and return to the previous screen Exit Back More Press the “Touch area” <More> to move to the next screen. SYSTEM Figure 77. – Engineering Functions 9 – Moisture Output Scaling ©Dryer Master Inc. Page: 50... -
Page 53: Engineering Functions 10 - Changing Temperature Scale "Deg F" "Deg C
Press the “Touch area” <Exit> to return to the main screen Languages Press the “Touch area” <Back> to return to the main screen Exit Back Next Press the “Touch area” <Next> to move to the next screen Figure 79. – Languages SYSTEM ©Dryer Master Inc. Page: 51... -
Page 54: Languages - Changing Display Language, English, French, Spanish
Press the “Touch area” <Back> to cancel and return to the Exit Back Change previous screen SYSTEM Press the “Touch area” <Change> to change between degrees F and C... Figure 80. – Languages – change language ©Dryer Master Inc. Page: 52... -
Page 55: Trending Options
10% to 20% Press the “Touch area” <Change> to toggle between 0% to 10%, 10% to 20% and 20% to 40% scale options. Exit Back Change Figure 83. – Trending Options – Changing Moisture range SYSTEM ©Dryer Master Inc. Page: 53... -
Page 56: Trending Options - Changing Trend Time Scale
Removable Media CF Status Removable Media CF Capacity 971MB CF Free Space 970MB Exit Back Next Exit Back Figure 86. – Removable Media – Information and status of the micro SD Compact Flash SYSTEM SYSTEM card ©Dryer Master Inc. Page: 54... -
Page 57: Auto Setup
5= Unknown error 5.16 Auto Setup This function is available from 2 locations. “Auto setup” from the main display and the last item in Engineering functions. Refer to the section Automatic operation and setup for information. ©Dryer Master Inc. Page: 55... -
Page 58: Display Unit Installation
The IMO Start-Up Guide is available in Appendix C of this manual. You can also refer to the IMOPC documentation on the web at “http://imopc01.imostatic.net/technical/i3b%20datasheet.pdf “ 6.1.1 Display Dimensions 3.780 " 3.622 " (96 mm) (92 mm) 3.780 “ 2.246" (96 mm) 57.5 mm Figure 87. –Display Dimensions ©Dryer Master Inc. Page: 56... -
Page 59: Display Panel Cut Out
Dryer Master Product Manual 6.1.2 Display Panel cut out Panel 3.622 " Cut Out (92 mm) 3.622 “ (92 mm) Figure 88. –Display Panel cut out ©Dryer Master Inc. Page: 57... -
Page 60: Display (Plc) Electrical Connections
This section describes the connections directly to the display unit (PLC) for those intending to install the unit into an existing control panel. Continue to section 6.2 for wiring to the enhanced system with the display (PLC) already installed in the Dryer Master provided AM panel. -
Page 61: Field Electrical Connections
System Grounding is critical. Ensure the equipment is properly grounded. Long cable runs between the display and field devices increases the danger of damage by electrical storms. Use of instrumentation cable in metal conduit with a ground wire or Tech cable is recommended. ©Dryer Master Inc. Page: 59... -
Page 62: Am 3 Panel
Shield Wire Connection & Earth Ground Local / Remote Output (+24 Vdc 200mA Max) Black Local / Remote Output ( 0 Vdc ) Local / Remote Output Electrical Ground Connection Figure 91. –AM In Panel connection terminal strip ©Dryer Master Inc. Page: 60... -
Page 63: Field Electrical Connections
Green White Calibration Button Black White Signal Outputs Black Signal Output Green Remote Alarm Output 4 Remote Alarm Output Black Local / Remote Output 5 Local/ Remote Output Black Figure 92. –Electrical connections Field devices ©Dryer Master Inc. Page: 61... -
Page 64: Printing Option
One Serial terminal printer c/w universal voltage power supply For those wishing to supply their own printer you will need the following: One Dryer Master MJ2-Rs232-9pinD adapter Your printer must be a serial printer and you will need to set your printer for Baud =9600, parity = none, data bits = 8, and stop bits =1. -
Page 65: Moisture Sensor General Specifications
The temperature conversion formula: For degrees Celsius (Volts * 40) – 60 = For degrees Fahrenheit (Volts * 72) – 76 = ©Dryer Master Inc. Page: 63... -
Page 66: 2200-11-Btc-Rb, Fin Sensor
The Moisture sensor electronics are sensitive to the electromagnetic energy from nearby welding. To reduce the risks of damage remove the sensor before welding in the immediate area. Under no circumstances may the sensor housing or connecting bolts be used as a ground for welding ©Dryer Master Inc. Page: 64... -
Page 67: Sensor Power Requirements
There are no end user replaceable components in the sensor. If the sensor fails or cannot be setup as described on the diagnostics sheet it can be returned to Dryer Master for service. Contact Dryer Master for additional information. - Page 68 Dryer Master Product Manual Figure 94. –Sensor Setup & diagnostics ©Dryer Master Inc. Page: 66...
-
Page 69: Installation Requirements & Specifications
5) If needed install a shut off slide gate above the sensor to shut off the flow to the sensor to allow cleaning out and or servicing the sensor ©Dryer Master Inc. Page: 67... -
Page 70: Bypass Chute Installation Examples
Screw conveyor or rotary metering device. See Table for additional information. Revision History Date: created 07/17/02 Small Fin Sensor chute Checked: Small_Fin_chute.vsd Approved: Page 1 of 1 Figure 95. –Moisture Sensor Bypass Chute design #1 square pipe ©Dryer Master Inc. Page: 68... -
Page 71: Bypass Chute Installation Round Chute With Screw Metering
Screw conveyor or rotary metering device. See Table for additional information. Revision History Date: created 07/17/02 Small Fin Sensor chute Checked: Small_Fin_chute.vsd Approved: Page 1 of 1 Figure 96. –Moisture Sensor Bypass Chute design #2 round pipe ©Dryer Master Inc. Page: 69... -
Page 72: Bypass Chute Metering Screw
Dryer Master Product Manual 8.1.3 Bypass Chute metering screw Figure 97. –Moisture Sensor Bypass Chute conceptual metering screw design ©Dryer Master Inc. Page: 70... -
Page 73: Bypass Chute Screw Metering Rpm Table
Note: Placement at the feed end ensures maximum product flow at the sensor. Leave sufficient space between the conveyor and the sensor to ensure a plug flow at the sensor. ©Dryer Master Inc. Page: 71... -
Page 74: Bypass Chute Installation Rotary Valve Or Airlock Metering
192:1 4” Rotary valve or metering device 120:1 Verify the flow and gear box required. The table is an approximate guideline. Figure 100. – Table of metering device RPM – rotary airlock or rotary valve ©Dryer Master Inc. Page: 72... - Page 75 Sample Return Figure 101. –Moisture Sensor, Example of a bypass Chute Installations Dryer Master also offers a moisture sensor chute with a rotary feed (picture above right). There is more information on this chute in Appendix D. Caution: Placing the sensor in a location where it will not get the full flow may cause an excess of fines or trash to pass through the sensor and will contribute to errors or false readings.
-
Page 76: Bypass Chute Example
Dryer Master Product Manual 8.1.7 Bypass Chute Example Figure 102. –Bypass Chute Example 8.1.8 Bypass Chute Example: Dimensions Figure 103. –Bypass Chute Example: Dimensions ©Dryer Master Inc. Page: 74... -
Page 77: Bypass Chute Example Feeding Back On Itself
Note: The bypass chute entrance is located on the side of the dry grain auger to which the dry grain is pushed. Figure 104. –Moisture Sensor, Example of a bypass Chute Installation, product feeding back on itself ©Dryer Master Inc. Page: 75... -
Page 78: Bypass Chute Example Mechanical Metering
It may seem that this chute design is inexpensive and an easy to design solution that should work for everything. In reality, Dryer Master in its 25 year life has seen many attempts of mechanical flow control not work. This metering method however does work very well for the Corn and Beans and some others natural products. -
Page 79: I Nline Chute Installation Examples
Dryer Master Product Manual 8.2 In Line Chute Installation Examples 8.2.1 In Line Chute Example mechanical metering Sample Acess Bypass Fin Mounting Hole Lexan Viewing Port Figure 106. –In Line Chute Example ©Dryer Master Inc. Page: 77... -
Page 80: In Line Chute Example: Dimensions
It may seem that this chute design is inexpensive and an easy to design solution that should work for everything. In reality, Dryer Master in its 25 year life has seen many attempts of mechanical flow control which do not work. This metering method however does work very well for the Corn and Beans and some others natural products. -
Page 81: History & Calibration Files Data Format
Moisture %, 1 minute averages Moisture_Alarm C or W C = Critical alarm, W = Warning alarm Temperature xxx.xxx Temperature, 1 minute averages, Temperature_Alarm C or W C = Critical alarm, W = Warning alarm ©Dryer Master Inc. Page: 79... -
Page 82: Calibration Data Example
Mode 1, 2, or 3 Operation Mode, 1 = Local (speed set at Dryer), 2 = Manual (Speed set from Dryer Master), 3 = Automatic (Speed set at Dryer master) Product 1, 2, 3, 4 Product selection, 1 = Corn, 2 = Beans, 3 = Wheat, 4 = Canola 9.1.2 Calibration data example... -
Page 83: Appendix B - Warranty
All electrical equipment carries standard manufacturer's warranties. ©Dryer Master Inc. Page: 81... -
Page 84: Appendix C - Imo Set-Up Guide
Dryer Master Product Manual 11 Appendix C - IMO Set-up Guide ©Dryer Master Inc. Page: 82... - Page 85 Dryer Master Product Manual ©Dryer Master Inc. Page: 83...
- Page 86 Dryer Master Product Manual ©Dryer Master Inc. Page: 84...
- Page 87 Dryer Master Product Manual ©Dryer Master Inc. Page: 85...
- Page 88 Dryer Master Product Manual ©Dryer Master Inc. Page: 86...
-
Page 89: Appendix D. Sensor Chute W/ Rotary Feed
Having the motor turn on and off with the dry conveyor will usually accomplish this 3. To ensure proper flow, the transition piece mounted to the bottom of the chute should be the same size as the hole leaving the chute (6”X6”). ©Dryer Master Inc. Page: 87... - Page 90 Dryer Master Product Manual The motor can run either clockwise (CW) or counter clockwise (CCW). Move the black wire to change the direction of rotation ©Dryer Master Inc. Page: 88...
-
Page 91: Appendix E Motor Speed Control Wiring Diagram
Included in this section is a generic wiring diagram for a common motor speed control. If your motor speed control is different and you need guidance with the connections contact the Dryer Master Support Center for assistance. We usually are able to provide you with a more specific diagram for your particular motor speed control.
Need help?
Do you have a question about the AM3 and is the answer not in the manual?
Questions and answers