
Subscribe to Our Youtube Channel
Summary of Contents for Yacht Devices YDHS-01
- Page 1 User Manual Humidity Sensor YDHS-01 also covers models YDHS-01R, YDHS-01N Software version 1.02 2018...
- Page 2 © 2018 Yacht Devices Ltd. Document YDHS01-002. March 15, 2018. Web: http://www.yachtd.com/ NMEA 2000® is a registered trademark of the National Marine Electronics Association. SeaTalk NG is a registered trademark of Raymarine UK Limited. Garmin® is a registered trademark of Garmin Ltd.
-
Page 3: Table Of Contents
Contents Introduction ..................4 Warranty and Technical Support . -
Page 4: Introduction
This Manual contains information on how to install, configure and operate the digital Humidity Sensor YDHS-01 (hereinafter Device) intended for use in NMEA 2000 marine electronics networks. The Device provides chart plotters and instrumental displays with humidity and air temperature measurements and calculated dew point temperature. -
Page 5: Warranty And Technical Support
Warranty and Technical Support The Device warranty is valid for two years from the date of purchase. If a Device was purchased in a retail store, the sale receipt may be requested when applying for a warranty claim. The Device warranty is terminated in case of violation of the instructions in this Manual, case integrity breach, or repair or modification of the Device without manufacturer’s written permission. -
Page 6: Product Specification
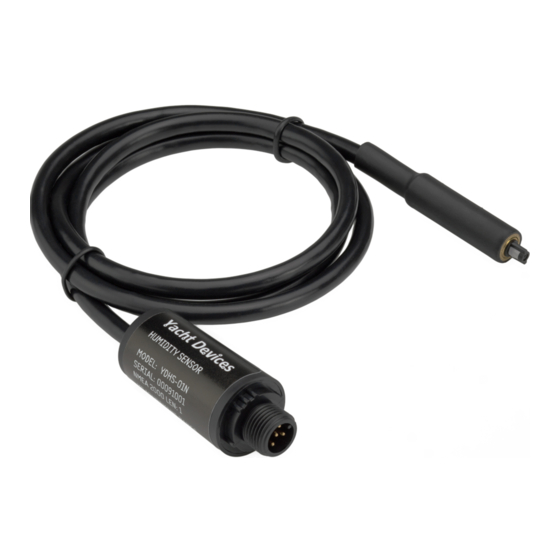
I. Product Specification Figure 1. Drawing of YDHS-01R model of Device Devices are supplied with different types of NMEA 2000 connectors. Models with the suffix R at the end of the model name are equipped with NMEA 2000 connectors compatible with Raymarine SeaTalk NG (as in the picture above). - Page 7 Normal operating range is 0..80 % RH, beyond this limit the sensor may read a reversible offset with slow kinetics (+3 % RH after 60 hours at humidity >80 % RH). Yacht Devices Ltd declares that this product is compliant with the essential requirements of EMC directive 2004/108/EC.
-
Page 8: Sensor Care And Cautions
II. Sensor Care and Cautions As with any sensitive device, sensor must be handled carefully. The sensor membrane may require cleaning from sea salt and dirt. • clean sensor with chemicals remove sensor when painting in the cabin. The sensor should not get in close contact with volatile chemicals... -
Page 9: Sensor Mounting
III. Sensor Mounting When deciding the sensor mounting location, please keep in mind the following recommendations: Choose a well-ventilated area remote from wet surfaces. A sensor located near the deck will detect water evaporation from the wet deck in wet weather. A sensor located in a locker measures the humidity of the air in the locker, but not outside air humidity. - Page 10 Figure 1. Sensor fixed with supplied pads and plastic clamps. A – side view, B – isometric, C – fixing of clamp. — 10 —...
-
Page 11: Device Connection And Testing
IV. Device Connection and Testing The Device requires no maintenance. When deciding where to install the Device, choose a dry mounting location. Avoid places where the Device can be flooded with water, this can damage it. The Device sensor can be mounted inside or outside, see the sensor mounting recommendations in the previous chapter. The Device is directly connected to the bus without a drop cable. - Page 12 Figure 1. Raymarine c125 MFD devices list with Humidity Sensor (YDHS-01) Under the factory settings, the Device shows the data as outside humidity and air temperature, and sends a calculated dew point temperature. Switch to the chart plotter screen, which provides information about the air temperature and humidity, or add this data bar to the screen using the instructions supplied with your equipment.
-
Page 13: Device Programming And Settings
V. Device Programming and Settings Programming of the Device should not be performed at sea. The Device can be programmed by three methods. Table 1 on the next page shows the applicability of the methods for different settings. The following methods are supported: By a special sequence of datum or variation settings on a chart plotter (column [1] at Table 1). - Page 14 Table 1. Applicability of the programming methods Method Number Setting or action NMEA 2000 device instance NMEA 2000 system instance NMEA 2000 data instance Inside / outside Turn on/off transmission of humidity, air temperature Note 3 and dew point temperature Transmission interval for periodic messages Note 1 Humidity and temperature offset...
- Page 15 NMEA 2000 data instance (3) may be used when multiple Devices are installed. For example, “Inside Humidity” with data instance 0, 1, 2 may mean humidity in saloon and in the bow and aft cabins. Chart plotters with factory settings are usually able to show only one value with data instance 0, but manufacturers may supply dealers and professional installers by internal instruments to customize chart plotter screens.
- Page 16 Note that a small number of chart plotters and instrumental displays incorrectly process the “no data available” value if there is more than one data source present on the network. This may cause “flashing” of data on the display when it receives a “no data available” value after a valid value from other source.
-
Page 17: Programming With Installation Description String
VI. Programming with Installation Description String Installation description strings are usually written by installers to specify the device location or to leave notes or contact information. This can be done with professional PC software (with a hardware connector to NMEA 2000 network) and it may be supported by some models of chart plotters. Please refer to your software or chart plotter documentation for details. - Page 18 "Properties" button). You can download this program (runs on Microsoft Windows, Mac OS X and Linux) at http://www.yachtd.com/downloads/, Yacht Devices NMEA 2000 Wi-Fi Gateway or Yacht Devices NMEA 2000 USB Gateway is required to connect the PC with NMEA 2000 network.
- Page 19 Table 1. Special strings String format Examples Description YD:DEV <number> YD:DEV 1 Set NMEA 2000 device instance value (0..255). Factory setting 0. YD:SYS <number> YD:SYS 1 Set NMEA 2000 system instance value (0..15). Factory setting 0. YD:DAT <number> YD:DAT 252 Set NMEA 2000 data instance value (0..252).
-
Page 20: Programming With Datum Or Variation
VII. Programming with Datum or Variation To program the Device with this method, you must connect it to a network with a chart plotter. This method of programming is tricky, but is compatible with virtually all NMEA 2000 chart plotters. Figure 1. - Page 21 If one network includes several chart plotters, turn off all of them except the one from which you will program the Device. If multiple Devices are connected to the network, they will be programmed at the same time. The Device confirms commands received from the chart plotter by lighting LEDs for 3 seconds once or repeatedly.
- Page 22 STEP 2. Putting the Device into programming mode If the Device was put into standby mode by setting the chart datum (magnetic variation), all the subsequent steps should be carried out with the setting of chart datum (magnetic variation). In the standby mode, without turning the Device power off, change the chart datum setting on the plotter to “Australian Geodetic 1966”...
- Page 23 Table 1. Device actions in response to setting changes Magnetic Chart datum Result variation ARC 1950 (Africa) Turn on and off transmission of periodic messages with a 4-bit value (0..15, binary 0000..1111), reset to 0 after 15. 22°E This setting increases the value. See note 1. Bermuda 1957 Increase NMEA 2000 data instance value (0..252), reset to 0 after 252.
- Page 24 Note 1: Unlike the programming method described in the previous chapter, this method does not allow setting the interval for messages with periodic transmission. This method allows turning on and off message transmission only. When transmission is turned on, the interval specified in NMEA 2000 Standard for this message is applied (see Appendix C). 1st bit (least significant) corresponds to PGN 130311 “Environmental Parameters”, 2nd to PGN 130312 “Temperature”, 3rd to PGN 130313 “Humidity”, and 4th to PGN 130316 “Temperature, Extended Range”.
-
Page 25: Led Signals
VIII. LED Signals Signal Meaning Repeated very short Normal operation. It is indicator of periodical messages sending (25 milliseconds) signals (see Table 2 in chapter V). Interval between flashes is 500 milliseconds by default, but can be changed by user. half-second signals, Chart plotter presence indicator. -
Page 26: Appendix А. Troubleshooting
APPENDIX А. Troubleshooting Fault Possible reasons and solution 1. No power supply on the bus. Check if the bus power is supplied The LED does not signal after the Device is turned on (NMEA 2000 network requires a separate power connection and can not be powered by a plotter or another Device connected to the network). -
Page 27: Appendix B. Device Connectors
APPENDIX B. Device Connectors Figure 1. NMEA 2000 connectors of the YDHS-01R (left) and YDHS-01N (right) models — 27 —... -
Page 28: Appendix С. Nmea 2000 Messages
APPENDIX С. NMEA 2000 Messages Message Received Transmitted Period, sec Note PGN 59392 ISO Acknowledgment — PGN 59904 ISO Request — — PGN 60160 ISO Transport Protocol (DT) — — PGN 60416 ISO Transport Protocol (CM) — — PGN 60928 ISO Address Claim —... - Page 29 NOTES ___________________________________________________________________ ___________________________________________________________________ ___________________________________________________________________ ___________________________________________________________________ ___________________________________________________________________ ___________________________________________________________________ ___________________________________________________________________ ___________________________________________________________________ ___________________________________________________________________ ___________________________________________________________________ ___________________________________________________________________ ___________________________________________________________________ ___________________________________________________________________ ___________________________________________________________________ ___________________________________________________________________ ___________________________________________________________________ ___________________________________________________________________ ___________________________________________________________________ — 29 —...
- Page 30 ___________________________________________________________________ ___________________________________________________________________ ___________________________________________________________________ ___________________________________________________________________ ___________________________________________________________________ ___________________________________________________________________ ___________________________________________________________________ ___________________________________________________________________ ___________________________________________________________________ ___________________________________________________________________ ___________________________________________________________________ ___________________________________________________________________ ___________________________________________________________________ ___________________________________________________________________ ___________________________________________________________________ ___________________________________________________________________ ___________________________________________________________________ ___________________________________________________________________ ___________________________________________________________________ — 30 —...
Need help?
Do you have a question about the YDHS-01 and is the answer not in the manual?
Questions and answers