Table of Contents
Advertisement
Advertisement
Table of Contents

Summary of Contents for OnCommand Link
- Page 1 OnCommand® Link v1.3 User Guide Page of 31...
-
Page 2: Table Of Contents
Preparatory Steps ............................5 Maximum Wi-Fi Reception Distances ......................5 Installing OnCommand® Link on a Vehicle ....................6 Connecting Personal User Device to OnCommand® Link ................6 Connecting OnCommand® Link to Internet ....................8 Updating OnCommand® Link Firmware/Application Software ..............12 Programming Cummins Engine with OnCommand®... -
Page 3: Version History Oncommand® Link Device
It can be changed to last 9 of VIN using an option in application page (under MENU). v1.2.27 July 8 , 2016 Rebranded to OnCommand Link, minor fixes and user interface related changes v1.2.31 July 26 , 2016... -
Page 4: Notice
This document describes proper usage guidelines for use of the OnCommand® Link device and the Navistar software loaded on it. Navistar is not responsible for damage caused as the result of tampering with the device. Tampering with the device voids all warranties for both the OnCommand® Link device and the vehicle. -
Page 5: Oncommand® Link Package
3. Connect OnCommand® Link to the Internet by connecting it to an available Wi-Fi access point using device configuration. 4. Use OnCommand® Link to read data from the vehicle CAN bus, send data to the personal user device, check for a calibration update, and perform an update (if applicable). -
Page 6: Installing Oncommand® Link On A Vehicle
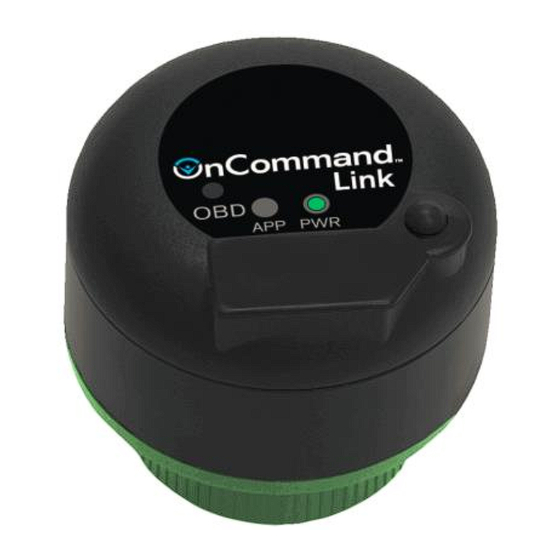
2. Install the OnCommand® Link by connecting it to the 9-pin diagnostic port connector in the vehicle. 3. If the collar is accessible, turn the collar of the OnCommand® Link clockwise to lock it into the 9- pin connector. Confirm that the green PWR light is illuminated. - Page 7 Re-establishing Connection If the personal user device loses the connection to the Link device, a popup message will appear from the application within 30 seconds. You will then be required to repeat this section to re-establish the connection to the OnCommand® Link device. Once you have successful re-connected with the device, this popup will be dismissed automatically.
-
Page 8: Connecting Oncommand® Link To Internet
Changing the SSID to match the last 9 digits of your VIN If you want to change the OnCommand® Link device’s SSID to match the last 9 digits of the VIN it is connected to, go to MENU in the application and select last 9 digits of VIN, and click Apply. - Page 9 Application version is old (1.2.xx or earlier). Try using http://192.168.100.1/navistar) If the OnCommand® Link is already connected to a Wi-Fi network, the SSID will be displayed in the top right corner of the device application page. At this point, skip the remaining part of this section and follow procedure under ‘Programming with OnCommand®...
- Page 10 Security type will be auto-selected, but it can be changed manually if incorrect. You will need to re- establish connection between your personal device and OnCommand® Link (Connecting Personal User Device to OnCommand® Link). Once connected, you should see the SSID displayed in the top right corner of device application page.
- Page 11 OnCommand® Link will save your Wi-Fi hotspot information and will automatically connect to the saved wireless network when in range. List of saved wireless networks can be viewed in ‘Saved Wireless Devices’. OnCommand® Link supports following wireless security protocols to connect to the local Wi-Fi hotspot.
-
Page 12: Updating Oncommand® Link Firmware/Application Software
Internet if there is no personal device (Laptop/Phone/Tablet etc) connected to the OnCommand® Link. If your personal device is connected to the OnCommand® Link and the Link device receives either a firmware or application update package from the Navistar backend servers, you will see the below screen: Figure 10. -
Page 13: Programming Cummins Engine With Oncommand® Link
OnCommand® Link is connected to the Internet. For the first three phases, the OnCommand Link™ only needs to be connected to the Internet for a period of 5-10 minutes. For the ‘Update Calibration’ phase, the OnCommand® Link device should stay connected to the Internet until the user sees the message ‘Engine calibration up-to date’... -
Page 14: Detailed Process To Update/Check Calibrations On Your Cummins-Powered Vehicle
Figure 11. Device Registration phase b. As long as the Link device remains on the same vehicle, the registration process is performed only once for a given vehicle. The registration process must be repeated each time an OnCommand® Link is connected to a different vehicle. During this process, vehicle can be turned off. - Page 15 Figure 12. Checking for update phase 3. Preparing Update phase (Triggered when the OnCommand® Link device connects to the Internet—after the “Checking for Update phase”): a. Connect your personal device to the OnCommand® Link and open the application page. b. If your application displays ‘Engine calibration up-to date’, wait for 5 minutes. If you still see ‘Engine Calibration up-to date’, your vehicle calibration is up-to date.
- Page 16 4. Update Calibration phase (Triggered when the OnCommand® Link connects to Internet— after the “Preparing Update phase”): a. Connect your personal device to the OnCommand® Link and open the OTA application. b. This phase is only required if your vehicle needs a calibration update.
-
Page 17: Rollback Calibration On Cummins Engine
Figure 16. Update Calibration phase: Calibration update in progress Rollback Calibration on Cummins Engine In cases where Cummins engine has been updated with an invalid calibration and needs to be reverted back to an earlier calibration version, backend systems may trigger a rollback command. If you notice a ‘Rollback Calibration’... -
Page 18: Programming With Oncommand® Link
This address must be entered exactly as shown. 3. Application will check for available updates This is the initial message displayed when the OnCommand® Link connects to and collects data from the vehicle CAN bus. Figure 18. Checking for Updates Screen Calibration Update Available This message means that the OnCommand®... - Page 19 Figure 19. Available Updates Screen To complete the calibration programming operation, read and follow the instructions on the popup screen to ensure safe operation, and click Accept and Update Calibration. Page 19 of 31...
- Page 20 Engine Calibration Up-to-Date This message means the OnCommand® Link has read the CAN bus and the ECM calibration is up-to-date. This message is also displayed after a completed OTA programming operation. Page 20 of 31...
- Page 21 Figure 22. Calibration up-to-date Screen Recovery This message indicates that the update process did not complete. Click the Recover button to run the recovery process and repeat the update. Figure 23. Recovery Screen Page 21 of 31...
- Page 22 Battery Error Message This message indicates that the battery voltage is not within the required range. Figure 24. Battery Voltage - Error Condition Screen Connection Error Message This message indicates that a network connectivity error has occurred. Please refer to the Troubleshooting Section of this User Guide for further information or contact Technical...
- Page 23 Updating calibrations on A26 engines needs body controller version to be updated to kernel 708 or higher. OnCommand Link when connected to A26 engine, checks the body controller version first before attempting to do a calibration update. It allows calibration update on A26 engine module only if body controller version is 708 or higher, otherwise it shows an error message indicating that body controller version need to be updated first.
-
Page 24: Switching Between Write-Up Tool Mode And Ota Mode
Figure 27. Could not read body controller version Switching between Write-up Tool Mode and OTA Mode The OnCommand® Link device supports two applications. In OTA (Over-The-Air Programming) mode, it performs calibration updates. In Write-up tool mode, it provides health reports to the Accelerator mobile application. -
Page 25: Standard Health Reports
You can also view health report by connecting to OnCommand® Link and clicking on View Health Report under MENU, to view the latest health report on your personal user device. As soon as this health report is uploaded to Navistar’s backend (Wi-Fi range), it will immediately be available to view in OnCommand®... - Page 26 Link to bootup (~4 minutes). Every time OnCommand® Link is connected to a new (different) vehicle, the first health report it creates can be viewed in OnCommand® Connection immediately as soon as its uploaded to Navistar’s backend systems.
-
Page 27: Troubleshooting
Two beeps have not sounded, or the amber Pull out the OnCommand® Link. • APP light is not illuminated after connecting Plug the OnCommand® Link back in and make sure the OnCommand® Link to the vehicle the green power light is on •... -
Page 28: Technical Assistance
Dealer Support: 800-336-4500 (7AM - 12AM CT, Mon-Sat) Customer Support: 888-661-6272 (7AM - 12AM CT, Mon-Sat) Email: OnCommandLink@navistar.com For further assistance on functions with the OnCommand® Link device, please visit our YouTube Channel for instructional videos. Link to YouTube Channel: https://www.youtube.com/channel/UCuMg8hnqCuadCKwVstwVvuQ... -
Page 29: Oncommand® Link End User License Agreement
(the "Subject Area"). The parties are disclosing the information for the purpose of the use of the OnCommand® Link (the "Purpose"), and are willing to accept each other's information in accordance with the following terms and conditions. -
Page 30: Need To Know
PARTY RESULTING FROM THE USE OF CONFIDENTIAL INFORMATION DISCLOSED TO THE OTHER PARTY, OR RESULTING FROM ANY USE OF OR TAMPERING WITH THE OnCommand® Link HARDWARE OR SOFTWARE, ARISING UNDER THIS AGREEMENT OR THE BREACH THEREOF, WHETHER THE CLAIM IS IN CONTRACT, TORT (INCLUDING NEGLIGENCE), STRICT LIABILITY OR OTHERWISE. -
Page 31: Amendment
NAVISTAR DISCLAIMS ALL WARRANTIES, WHETHER DIRECT OR IMPLIED, ASSOCIATED WITH THE OnCommand® Link HARDWARE OR SOFTWARE IN THE EVENT OF ANY TAMPERING WITH THE OnCommand® Link HARDWARE OR SOFTWARE BY END USER OR ANYONE NOT SPECIFICALLY AUTHORIZED IN WRITING BY NAVISTAR.
Need help?
Do you have a question about the Link and is the answer not in the manual?
Questions and answers