
Summary of Contents for Samsomatic 3962-9
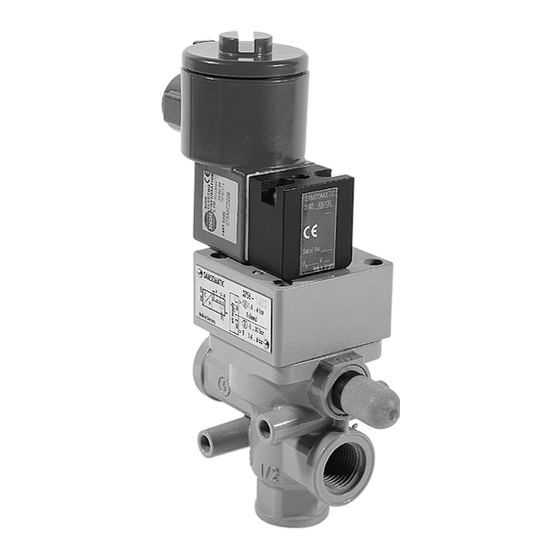
- Page 1 Series 3962 Ex d Solenoid Valve Type 3962-9 Fig. 1 · Type 3962-9 Mounting and Operating Instructions EB 3962-1 EN Edition November 2009...
-
Page 2: Table Of Contents
Contents Contents Page Mounting......................4 Wall mounting....................4 Mounting on rotary actuators with NAMUR interface acc. to VDI/VDE 3845...4 Mounting on linear actuators with NAMUR rib acc. to IEC 60534-6-1 using adapter plates.....................5 Mounting on linear actuators using CrNiMo pipe fittings........5 Pneumatic connections..................6 General......................6 Connecting line....................6 Operating medium for the booster valve..............6... - Page 3 Safety instructions General safety instructions ➢ The solenoid valves are to be assembled, started up or operated only by trained and experienced personnel familiar with the product. According to these mounting and operating instructions, trained personnel is referred to as individuals who are able to judge the work they are assigned to and recognize possible dangers due to their specialized training, their knowledge and experience as well as their knowledge of the applicable standards .
-
Page 4: Mounting
Mounting Mounting Mounting on rotary actuators with NAMUR interface acc. to Wall mounting VDI/VDE 3845 Types 3962-9XXX13 and 3962-9XXX14 Type 3962-9XXX0 The solenoid valves can be mounted using The solenoid valves can be mounted on the through holes and screws. rotary actuators with NAMUR interface us- ing the following adapter plates (Fig. -
Page 5: Mounting On Linear Actuators With Namur Rib Acc. To Iec 60534-6-1 Using Adapter Plates
Mounting Mounting on linear actuators Mounting on linear actuators with NAMUR rib acc. to using CrNiMo pipe fittings IEC 60534-6-1 using adapter Types 3962-9XX0130 and 3962-9XX0142 plates The solenoid valves can be mounted on lin- Type 3962-9XX00 ear actuators (e.g. SAMSON Type 3271 or Type 3277) using CrNiMo pipe fittings The solenoid valves can be mounted on lin- (Fig. -
Page 6: Pneumatic Connections
Pneumatic connections Pneumatic connections Note! Use a larger nominal size for a con- nection length of more than 2 m. General Operating medium for the Make sure the connecting lines and screw booster valve fittings are routed and installed properly. Check them for leaks or damage at regular With internal auxiliary air routing: intervals and replace or repair them, if ne-... -
Page 7: Converting To External Auxiliary Air Routing Through Connection 9
Pneumatic connections Converting to external auxili- 2.5.2 Type 3962-9XXX13 ary air routing through con- Remove the two hexagon socket head nection 9 screws (Fig. 7) and the red solenoid valve head. Make sure the two black O-rings on If the solenoid valve is to be used to switch the CNOMO interface are not damaged the output signal (0 to 8 bar) of a positioner, (Fig. - Page 8 Pneumatic connections Make sure the seals on the booster valve Carefully place the CNOMO interface onto and the CNOMO interface are not dam- the booster valve. Make sure all seals are aged. properly positioned on the booster valve. If one seal is missing, replace the entire Type 3962 Solenoid Valve.
-
Page 9: Electrical Connections
Electrical connections Do not use cable entries and blanking plugs Electrical connections of simple construction. Close unused openings as stipulated in Danger! EN 50018:2000, Clause 11.9. Electric shocks and/or the formation of a potentially explosive atmo- Cable entries sphere may result in serious injury or death. - Page 10 Electrical connections EB 3962-1 EN...
- Page 11 Electrical connections EB 3962-1 EN...
-
Page 12: Certificates
Certificates Certificates EB 3962-1 EN... - Page 13 Certificates EB 3962-1 EN...
- Page 14 Certificates EB 3962-1 EN...
- Page 16 SAMSOMATIC GmbH SAMSOMATIC GmbH Weismüllerstraße 20-22 · 60314 Frankfurt am Main · Germany Weismüllerstraße 20-22 · 60314 Frankfurt am Main · Germany Phone: +49 69 4009-0 · Fax: +49 69 4009-1644 Phone: +49 69 4009-0 · Fax: +49 69 4009-1644...
Need help?
Do you have a question about the 3962-9 and is the answer not in the manual?
Questions and answers