Table of Contents
Advertisement
Advertisement
Table of Contents

Related Manuals for HeroSpeed Coaxial HD XVR

Summary of Contents for HeroSpeed Coaxial HD XVR
- Page 1 Coaxial HD XVR User Manual Version 8.1.52.5...
- Page 2 Declaration Copyright © 2019. All rights reserved. Without the written permission of the company, any company or individual should not extract, duplicate part of or all of contents of this manual and no spreading in any form. As the upgrade of the products or other reason, the contents of manual will be upgraded periodically.
- Page 3 The dust on the circuit board inside the NVR may cause a short circuit after being exposed to moisture. Regularly clean the circuit board, connectors, chassis, and chassis fan with a soft brush. If dirt is difficult to remove, wipe it off with a neutral detergent diluted in water and wipe it dry.
- Page 4 Instruction After receiving the product, please open the packing box, take out the equipment, and confirm the packing product and accessories according to the packing list in the box. If you find any damage to the contents of the box or any missing parts, please contact your dealer promptly.
-
Page 5: Table Of Contents
Content Chapter 1 Outline and Feature ................. 8 1.1 Outline ....................8 1.2 Default ....................8 1.3 Descriptive content agreement ............8 1.4 Function Features ................9 Chapter 2 XVR Appearance ................13 2.1 Front Panel Introduction ..............13 2.2 Rear Panel Introduction ..............14 2.3 Mouse Operation Instructions............ - Page 6 5.3.5 Camera .................. 53 5.3.6 Configuration ................. 67 5.3.7 Maintenance................90 5.3.8 Shutdown ................96 Chapter 6 WEB Operation ................97 6.1 Internet connection ................97 6.2 Browser Login ................... 98 6.3 Active X install .................. 98 6.4 Live View ..................100 6.5 Configuration ..................
-
Page 7: Chapter 1 Outline And Feature
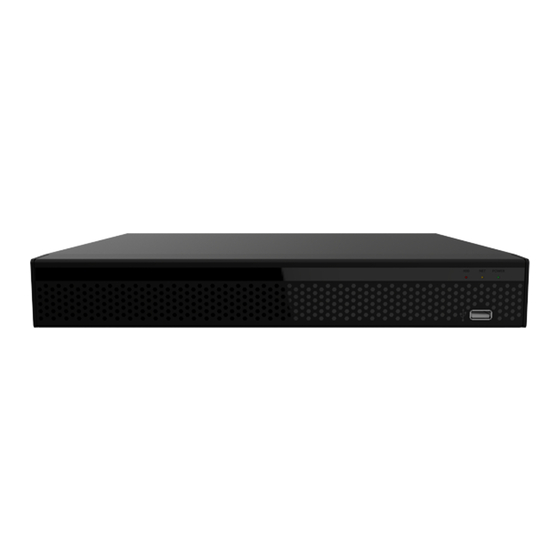
Chapter 1 Outline and Feature 1.1 Outline The item is a five hybrid coaxial HD hard disk video recorder, compatible with HDTVI, AHD and other coaxial HD specifications, free access to HDTVI, AHD, CVI, CVBS, and network signal. You can disable any number of analog channels into IP channel, dual function of both DVR and NVR. -
Page 8: Function Features
Click all the interfaces "Copy" to enter the copy channel interface, select the channel, and copy the current channel configuration to the selected channel. 1.4 Function Features The XVR features are as follows: ● High-definition XVR series, support HDTVI, AHD, CVI, CVBS, IP input (5 in 1 hybrid). - Page 9 Local Monitoring Local Monitoring features as below: ● Supports local VGA and HD homology output, and HD supports up to 4K resolution output. ● Support multi-screen split into different channels and preview & playback. ● 4-channel XVR support 1 / 4 / 8 / 9 screen preview, 8-channel XVR support 1 / 4 / 8 / 9 / 16 screen preview, 16 channel XVR support 1 / 4 / 8 / 9 / 16 screen preview, 32-channel XVR support 1 / 4 / 8 / 9 / 16 / 25 / 32 screen preview.
- Page 10 ● Support pause, fast, rewind (Local) and slow (Web) release in playback, support mouse drag positioning. ● Support 1-4 channel playback(Pure analog support multi-channel playback) and network multi-channel playback Data backup Features as below: Support backup by USB interface. ...
- Page 11 ● Support remote client privileged access, improve system security. ● Support TCP / IP protocol cluster, support DHCP, DNS, HTP, SMTP, RTSP, UPnP and other protocols. ● Embedded WEB SERVER, support HTTPS protocol, improve the security of network access. ● Support remote search, playback, download. ●...
-
Page 12: Chapter 2 Xvr Appearance
Chapter 2 XVR Appearance 2.1 Front Panel Introduction Figure 2-1 Name Description Normal working hours, the corresponding Indicator light indicator light turns Channel button Select single channel full screen display Multi-channel preview Switch and display 4,9,16 channel Move the button up or down, right or left to Direction button select menu USB2.0 or USB3.0... -
Page 13: Rear Panel Introduction
2.2 Rear Panel Introduction The schematic diagram of the rear panel of the common equipment is as follows: Figure 2-2 Name Description Power input DC12V ON/OFF ON/OFF Video output Output by TV/BNC Input Audio input audio input Alarm input 4 /I alarm input Alarm output I/O output for alarm RS 485... -
Page 14: Mouse Operation Instructions
2.3 Mouse Operation Instructions Operate XVR through mouse left button, right button & scroll wheel. Mouse actions Function 1. Select one of the options; Click left mouse 2. Insertion cursor, enter or modify the value of button a parameter. 1. When interface not locking, click right mouse button, system menu pops up;... -
Page 15: Input Method Introduction
2.4 Input Method Introduction Input method includes lowercase and uppercase English letters. Clicking “ ” button on the left can switch the input method and the symbol “ ” represents deleting incorrect input, as shown in Figure 2-4 and Figure 2-5: Figure 2-3 Uppercase English input Figure 2-4 Lowercase English input... -
Page 16: Chapter 3 Connecting Xvr
Chapter 3 Connecting XVR 3.1 Hard Disk Installation Notice Before installation, please confirm that the power has been disconnected. Please use the XVR dedicated monitor hard drive recommended by the device manufacturer. Installation tools A Phillips screwdriver Hard disk installation Hard disk installation guide for XVR PG / PGH series as shown in Figure 3-1: (1)Unscrew the screws and remove upper cover. - Page 17 (1)Unscrew the screws on the back and sides of the chassis and remove the cover. (2)Connect one end of the hard disk power cable and data cable to the motherboard and the other end to the hard disk. (3)Align the hard disk screw holes to the chassis backplane, and then tighten lock the screws.
-
Page 18: Device Connection
Figure 3-3 3.2 Device Connection Use VGA cable or 1080P cable to transmit the XVR signal to the display. If it is a controllable PTZ, use wire to connect RS485 A cable and RS485 B cable to the corresponding RS485 interface on XVR, as shown in Figure 3-4: Figure 3-4... -
Page 19: Chapter 4 Xvr Startup
Chapter 4 XVR Startup 4.1 System Initialization The steps to turn on XVR are as follows: ○ 1 Connect the device to the analog camera, monitor and plug in the mouse and power cord. ○ 2 Turn on the power switch on the rear panel to start the device. The system initialization screen appears, as shown in Figure 4-1. -
Page 20: Boot Wizard
4.2 Boot wizard 4.2.1 Quick Startup Wizard Quickly configuration the NVR as shown in Figure 4-2: ○ 1 After the device starts, enter the "Boot Wizard" and click "Next Step". ○ Figure 4-2 ○ 2 Then select a user name, enter the user password, select the system language and click "Login"... - Page 21 ○ 3 When the login password is too simple, a security password prompt will pop up. Click "Modify ". ○ Figure 4-2 ○ 4 Click the "New password" box, enter a new password, confirm the new password, select the security question, enter the corresponding answer, click "Save";...
- Page 22 ○ Figure 4-2 ○ 6 Go to the "Network" interface, configure the network parameters of the device. Click “Next Step". For details, see "5.3.6.2 Network". ○ Figure 4-2...
- Page 23 ○ 7 Go to the "Add Camera" interface, you can search for and add devices and click "Next Step". For details, see "5.3.5.1 Add Camera". ○ Figure 4-2 ○ 8 Go to the "Record Setup" interface, set the video plan, support the manual drawing schedule, click "Complete", the boot wizard is set up.
-
Page 24: Forget Password
Instruction On the startup wizard screen, click Cancel to exit the startup wizard. When the password is too simple, after the login, a password strength security interface will pop up. You can click "Modify later" to continue using the existing password. ... - Page 25 Figure 4-4 Import key: Select the authentication method as Import Key, as shown in Figure 4-5. Figure4-5 ○ 1 Insert the USB disk (the key file exported when the device setting password is stored) on the device, and click Import to import the key file into the device.
-
Page 26: Preview Interface
Figure4-6 Instruction When you select "Security Issues", the issues and answers must exactly match the settings when you set the password to proceed to the next Modify User screen. When you select "Import Key", the key file in the USB flash drive must be the key file that was exported when the password was set. -
Page 27: Quick Add Device
Figure 4-7 After the device normally starts up, the default setting is to preview in multi-screen display mode. Products with different channels has different amount of split screens to display. On the preview interface, you can set the appropriate date and time. On the bottom left of the screen, it shows the recording status of each video channel or alarm status icon. - Page 28 ○ Figure 4-8 ○ 2 Select the device to add and click “Add”. ○ Figure 4-8 Search: Click to search all online IP devices in the LAN according to the protocol in the "Filter" box. Add: Add selection device. ...
-
Page 29: Channel Shortcut Menu
Instruction Filter Search Add Device: In the Add Device interface, select the corresponding protocol in the "Filter" column →"Search" →Select Device → Click "Add". Manual Add: On the Add Device screen, click "Manual add" → Click "Enable check box"→ Select Protocol, Preview Stream, Enter Password, IP, Port →... - Page 30 interface is displayed as the selected zoom area, and the original image of the channel is displayed in the lower right corner of the screen, which can be set by the blue inside. Adjust the zoomed area by the position and size of the frame;...
-
Page 31: Chapter 5 Xvr Menu
Chapter 5 XVR Menu 5.1 Shortcut menu Log in system, right-click it to pop up the XVR shortcut menu. As shown in Figure 5-1, you can switch the number of preview video windows, or enter the menu, Select Mode, Poll, Record Setup; Add Camera, Playback, PTZ, XVR image color and other interfaces are related to the settings. -
Page 32: Manual Screenshot
Add Camera: Click and enter the add camera configuration menu.(Detailed operation as 5.3.5.1). XVR Image: Click into the image color configuration interface. (Detailed operation as 5.1.5). Instruction Multi-screen display depends on the maximum number of channels supported by the device. For example, there are 9 screens in the shortcut menu of the 9-channel device and 16 screens in the 16-channel device shortcut menu…... -
Page 33: Select Mode
○ 1 In the preview interface, select the channel, click the right mouse button to pop up the shortcut menu, select "Manual screenshot"; ○ 2 Insert a USB flash drive into the device and click Export. The image is saved to the USB flash drive. Or click "Mail", the channel screenshot is sent to the recipient's mailbox as an email attachment. -
Page 34: Poll
“AUTO” and can access any signal of “AHD/CVI/TVI/CVBS”. When the access video signal does not match (the channel does not appear, or the image is abnormal), you can choose the signal that the actual access signal is consistent. 5.1.3 Poll The poll settings are as shown in Figure 5-4 below. - Page 35 PTZ control interface is used to set the PTZ direction rotation (including upper, lower, left, right, upper left, lower left, upper right and lower right) of the gimbal equipment, focusing, zooming, aperture, rapid positioning and cruising, etc., use with the direction keys when setting. ○...
- Page 36 Channel: Select the channel where the PTZ device is located. Zoom: Click to adjust camera zoom in/out. Focus: Click to adjust camera focusing. Iris: Click to adjust camera brightness. Speed: Speed is to control PTZ movement speed. The value ranges from 1 to 7.The speed 7 is faster than speed 1.
- Page 37 ○ Figure 5-6 Preset setting: In the Patrol Setup interface, use the direction button to rotate the head to the position where it stays when cruising, and then click the "set" button below the preset point to complete the preset point setting.
-
Page 38: Xvr Image
Figure 5-7 Preset: Select a preset point. Call: Click on the PTZ to jump to the selected preset point position. Cruise: Select the cruise route you have set and click to turn cruise on/off. Cruise on: Follow the cruise line to start cruising. ... -
Page 39: Main Menu
○ ○ Figure 5-8 Bright: It is to adjust monitor window bright. Contrast: It is to adjust monitor window contrast. Saturation: It is to adjust monitor window saturation. Hue: It is to adjust the overall color of the XVR image. 5.2 Main Menu Main Menu includes Playback, Export, HDD, Record, Camera, Configuration, Maintenance and Shutdown, as shown in Figure 5-9. -
Page 40: Operating
Figure 5-9 5.3 Operating 5.3.1 Playback After entering the main menu, open the "Playback" menu or right-click to choose "Playback" menu in the preview interface, switch to video playback ○ ○ interface, shown in Figure 5-10 ○ Figure 5-10... - Page 41 Figure 5-10 ○ 2 ○ Figure 5-10 Function Description Display searched video, according to different systems, support 1,4,8,16 screen playback at the Display same time, multi-screen playback, double-click a window screen, video playback interface into a single screen playback, right-click at this time, return multi-screen playback.
- Page 42 Shows the recording type under the current conditions and the time period in which it is located. In the four-screen playback mode, four playback time axes corresponding to the selected four Time axis channels can be displayed. In other single-screen playback modes, only one time axis is displayed.
- Page 43 The green highlighted date means there is file. Otherwise, there is no file. Calendar In any play mode, click the date you want to see, you can see the corresponding record file trace in the time bar. Save: Enter the video backup interface. Select the files to be backed up in the 11 file list as needed, and Save/Ret click ”Save”...
- Page 44 Figure 5-11 In the video backup interface, backup the selected file to an external U disk, backup video file for the avi format. At the same time can choose multiple video files for backup, the user can also in the backup operation menu to cancel the file list box "...
-
Page 45: File Backup
playback is different and the functions are different. Please refer to the actual interface. 5.3.2 File backup File backup Click "Export" icon in the main menu, enter the file backup interface, you can copy and delete the video file operation, as followed Figure 5-12 shows: Figure 5-12 Before the backup, insert the USB device into the XVR USB interface, select the file type, channel, format, time range, click "Search", the searched video... - Page 46 Fast export: Set the recording type, channel, file format, and the time range for 30 minutes to automatically cut. Search:According to set the video type, channel, file format and time range to the corresponding video file, and displayed in the file list. ...
-
Page 47: Hdd
File type: Video type, with All, common and motion selection. Channel: Video channel to which the video file belongs. File Format: Backup video file format. Start Time / End Time: The time range of the video file. ... -
Page 48: Record
Device Type: SATA. Refresh: Click update disk list information. Format: Formatting the HDD, select the HDD → click the "Format" button → click the "Confirm" button. Instruction "Not connecting disk" indicates that the device is not connected or the hard disk is not detected. - Page 49 Channel: Select the channel for setting the recording to set a different recording schedule for each channel. If you make the same settings for all channels, select "All". Record Type: Select check the box to select corresponding record type. There are Record and Motion.
- Page 50 You can select the front " " in a week and a week, and edit and draw the time period for the selected days. Input data to set the schedule record Step 1: Click “ ” to enter the Record Schedule interface, as shown in Figure 5-17.
- Page 51 Step 1: In the Menu interface click "Record→Parameters" to enter the Encoding parameters interface, as shown in Figure 5-18. Step 2: According to the actual network bandwidth condition, the video stream parameter settings include resolution, stream type, frame rate, and corresponding channel sub streams.
-
Page 52: Camera
Quality: When connecting an analog camera, set the camera quality, there are ordinary, good, better, the best option. Frame Rate: Set the camera frame rate to 1 frames / sec-25 frames / sec. BitRate (Kb/S): Setting bit rate can change the picture quality, the larger the bit rate and the better the picture quality. - Page 53 ○ Figure 5-19 Bandwidth idle: Real-time display XVR remaining bandwidth. Add: Click to enter the "Device Search" interface, as shown in Figure ○ 5-19...
- Page 54 ○ Figure5-19 Filter: Filter search device type. On the Add Device interface, the XVR automatically searches for all devices in the LAN that comply with the Onvif and Private protocol. Select the protocol or network segment device according to the need to display the filter location. Click "Search"...
- Page 55 Figure 5-20 Enable: The channel enable on/off, defaulting to be off. Tick “Enable” then the related channels can be previewed and recorded normally. Channel: Enter the channel number to connect to the IPC device as needed. Protocol: Select Add Device Protocol with Onvif, Private, and RTSP options.
- Page 56 click the " " icon to select multiple devices and click the "Delete" button to delete all selected devices. Update: Insert the upgrade package U disk that is to be upgraded into the XVR, click the button "Update" to search for IPC, select one or more searched "...
- Page 57 Figure 5-21 Channel: Select to set the channel. OSD Text: Displays the OSD text information obtained to the IPC. Time: Turn on / off the IPC display interface time information. Text: Turn on / off the IPC display interface text message. ...
- Page 58 Figure 5-22 Channel: Users can type in the channel number that needs to be connected to the remote device according to their needs. Brightness: Gets and sets the brightness of the IPC. Contrast: Gets and sets the contrast of the IPC. ...
- Page 59 Channel: Select the channel. Set area: Click to enter the regional settings interface, hold down the left mouse button to select the alarm area, select, the alarm area is gray, select the gray again to cancel the alarm area settings. ...
- Page 60 Figure 5-24 Channel: Select the channel. Enable: Check " " to turn on / off video loss alarm. Screen display: Check " " to turn on / off the device when the screen is displayed. Send e-mail: Check " "...
- Page 61 Figure 5-25 PTZ setup interface is used to set the PTZ direction, speed and lens zoom, focus and aperture settings and cruise settings shortcut button. Channel: Select the channel where the dome camera is connected to the XVR. Zoom: Adjust the camera magnification by key, long-range / wide-angle function.
- Page 62 Figure 5-26 Preset No.: Select preset points. Stay Time: Stay time on the Preset. Speed: Speed for Cruise. Del cruise:Select the cruise line, click to "del cruise", and complete the cruise line to remove. Del all cruise: After clicking, delete all the set cruise lines. Instruction ...
- Page 63 Figure 5-27 Channel: Select the channel with PTZ camera access. Protocol: Select the PTZ protocol for the access device brand model (eg PelcoD). Address: Set the address to access the PTZ. The default is 0. Baud Rate: Select the baud rate used to access the PTZ to control the PTZ and camera of the corresponding channel.
- Page 64 Privacy zone selection: In the left side of the interface video window, hold down the left mouse button to select the area to be blocked. Clear all:Clear all selected occlusion areas. Clear Zone 1,2,3:Clear the selected masked areas 1, 2, 3. ...
- Page 65 Step 1: On the menu page, select "Camera→ Channel Name" to enter the Channel Name interface, as shown in Figure 5-30 below. Step 2: Set the channel name. Step 3: Click "Apply" to save the settings. Figure 5-30 Channel: Click on the right side of the channel corresponding to CHx, pop-up keyboard, set the channel name.
-
Page 66: Configuration
Instruction Some XVRs do not support update camera features. Only some cameras are supported here, and rich IPC and 1080P simulators are not supported. 5.3.6 Configuration 5.3.6.1 General General settings are divided into two parts: Device settings and Date settings. Here you can get and set the XVR language, record mode, record days, video standards, standby time and date settings and other related information. - Page 67 Device name: Fill in the name of the device according to actual needs, the default is XVR. Config import:Insert the U disk that stores the .ini format XVR configuration file into the NVR. Click "Config import → Confirm". The XVR automatically starts data import and waits for the XVR to start importing the data.
- Page 68 Time format: Choose a 24-hour or 12-hour format. Receive date/time from NTP: Check " " to enable NTP time update function. You can also reset the NTP server by setting the server, port, and selecting the time zone and NTP update interval. ...
- Page 69 Figure 5-34 IP Address: Enter the IP address of XVR. Enable DHCP: Enable / disable DHCP (Dynamic Host Configuration Protocol) function. "IP address", "subnet mask", and "default gateway" can not be set when DHCP is enabled. Network Mask: According to the actual situation set. ...
- Page 70 RTSP encryption enable: The default is off, click " " to open, encrypt RTSP stream. Refresh: Click the refresh interface. Instruction The IP address and the default gateway must be in the same network segment. If XVR enabled DHCP is in effect and you turn off DHCP, you cannot display the original IP information.
- Page 71 Figure 5-35 Enable DDNS: Enabling DDNS domain resolving function. DDNS type: Select the DDNS type by dynamic domain name resolution server. (At present, the device supports multiple DDNS, including ORAY, NO-IP, DYN, CHANGEIP, A-PRESS, MYQSEE, SKDDNS, SMART-EYES. These multiple DDNSs can coexist at the same time, and the user can select and set them as needed).
- Page 72 can’t be delivered!" is displayed, the mail configuration fails. Step 4: After the email is sent successfully, click "Apply" to save the email configuration. Figure 5-36 Enable e-mail alarm notifications: Enable / disable mail sending. SMTP server: Please input your email SMTP server IP or server domain name (if the domain name requires confirmation that the DNS settings are correct, the domain name can be parsed correctly).
- Page 73 Message interval (Min): The interval between sending emails. After the email sending interval is set, when the alarm is triggered, the system does not trigger the immediate sending of the email according to the alarm signal. Instead, the email is sent according to the interval time of the same type of event email.
- Page 74 Step2: Make sure that the XVR accesses the external network and click "Enable P2P". Step 3: Click "Apply" to save the configuration. Step 4: Click "Refresh" and the status shows "Online ". This indicates that P2P is enabled and can be used normally. Figure 5-37 ...
- Page 75 Step 2: Run the client and log in to the account (No account is required to register first). Step 3: Add devices to the mobile client. After login, click " " , " " and " Add device" , select "SN Add", enter the device user name, password and verification code after scan the QR code (the verification code printed on the label), click "Add"...
- Page 76 Figure 5-38 Enable FTP: Turn on / off the device FTP function. FTP Server: Host IP address of the FTP server. FTP Port: The default FTP port is 21, if your FTP server is different; you need to use the same port name with your FTP server. ...
- Page 77 the external network IP address to directly access the XVR device on the intranet. Prerequisites 1) Log in to the router and set the IP address of the router's WAN port to access the external network. 2) Make sure that the router is a first-level router (or virtual first-level router) and turn on the UPnP function.
- Page 78 External IP: Enter the router's WAN port address. After the mapping is successful, the IP address will be automatically obtained without setting. Port mapping table: This corresponds to the UPnP mapping table information on the router. Service Name: The web server name. ...
- Page 79 Step 1: On the menu page, select "Configuration → Network → PPPOE" to enter the PPPOE configuration interface, as shown in Figure 5-40 below. Figure 5-40 Step 2: Select "Enable", input the user name and password of the PPPoE. Step3: Click "Apply" to save the configuration. After the PPPoE configuration is successful, the obtained public IP address is displayed in real time.
- Page 80 Set up cloud storage as follows: Step 1: On the main menu page, select "Configuration → Network → Cloud Storage" to enter the cloud storage setting interface, as shown in Figure 5-41 below. Step 2: Enable cloud storage, select the cloud storage type, Dropbox or Google, click Bind, follow the prompts to log in to the corresponding website using a browser on the computer, and enter the obtained "Authorization Code"...
- Page 81 Telnet On the main menu page, select "Configuration → Network →Telnet " to enter the Telnet interface, as shown in Figure 5-42 below. Figure 5-42 Enable:Enable / disable the remote Telnet login function, default is off. 5.3.6.3 Display Set the display effect of the device preview interface, including output resolution, transparency, display OSD time, display channel name, and show after boot.
- Page 82 Show OSD Time: Turns on / off the device time information displayed on the monitor screen. Show channel name: Turns on / off the channel name information displayed on the monitor screen. Show after boot: Select the number of split screen display screen. 5.3.6.4 Exceptions Set the alarm mode of abnormal events.
- Page 83 Network Exception The steps are as follows: Step 1: On the menu page, select "Configuration →Exceptions → Network Exception" to enter the network exception setting interface, as shown in Figure 5-45. Step 2: Select the event type, click "Enable", and enable the sending of mail and buzzer alarm.
- Page 84 The default password of the admin administrator user is 12345. The administrator admin user can add, delete, or edit users, add users in the group, and set user rights control. The user level has two levels, the operator and the ordinary user. The default permissions of the two levels are different.
- Page 85 Authority Instruction Authority are divided into local configuration, remote configuration, channel configuration, "Local Config": Include All, Local Poll, Local HDD, Local Camera Setup, Local Configuration, Local Network, Local Display, Local Exceptions, Local User, Local System Information, Local Log, Local Manual Update, Local Online Update, Local Auto Maintain, Local Restore Default, Local Shutdown Reboot, Local Channel Config, Local Alarm.
- Page 86 Step 1: On the menu page, select "Configuration → User → Modify" to enter the modify password interface, as shown in Figure 5-47. Step 2: Input the new password and confirm password. Step 3: Select security questions 1, 2, 3 and set the corresponding answer, click "Save".
- Page 87 Step 3: Reset security issues and corresponding answers, export keys. Step 4: Click "Save" to complete the password modification. Instruction When you change the device password again, you do not need to set security issues and export keys. 5.3.6.6 Channel config Different models of devices support different numbers of IP channels.
- Page 88 The actual access signal must match the signal mode that checked. If the "HD" mode is selected for one channel, it can be connected to TVI / CVBS / AHD / CVI signals; when the switching signal causes an abnormality to be displayed, the video cable can be reconnected;...
-
Page 89: Maintenance
Week, Time period1&2: The arming time period, select the day of the week, set the time period 1&2, and activate the corresponding configuration item to start the alarm within the set time range. Alarm output: The alarm device (such as light, siren) is connected to the alarm output port. - Page 90 Version Information Here you can view the system version information, including product model, version number and version date. The steps are as follows: On the menu page, select "Maintenance→ System→ Version Info" to enter the Version Information interface, as shown in Figure 5-51. Figure 5-51 ...
- Page 91 Figure 5-52 Type: Select the type of information you request. Start Time/End Time: Enter the time range for the search log. Export: Export the log information under the current search conditions to the USB flash drive. Export all: Export all log information from the device to the USB flash drive.
- Page 92 Step 3: Click "Refresh". Select the upgrade file and click "Upgrade → Confirm". Wait for the interface to go through the progress bar and the device will restart automatically to complete the upgrade. Figure 5-53 Refresh: Refresh the current interface information. ...
- Page 93 Step 3: Set the device update time and click "Apply". When there is a new version in the cloud, the system will automatically detect the version to upgrade the device at the set time. The manual online upgrade steps are as follows: Step 1: On the menu page, select "Menu →Maintenance→...
- Page 94 Step 1: On the menu page, select "Maintenance → Auto Maintain" to enter the automatic maintenance interface, as shown in Figure 5-55. Step 2: Select the time of "Reboot device automatically". Step 3: Click "Apply" to complete the auto maintain setup. Figure 5-55 Instruction ...
-
Page 95: Shutdown
Restore channel default param: Select / Cancel Resume Camera all interface configuration parameters to the default values. Restore configuration default param: Select / Cancel Resume Configuration all interface configuration parameters to the default values. Restore system maintenance default param: Select / Cancel Resume Maintenance all interface configuration parameters to the default values. -
Page 96: Chapter 6 Web Operation
Chapter 6 WEB Operation Instruction Different types of devices have different interface displays. The following screenshots are for reference only. Please refer to the actual ones. The XVR supports accessing and managing devices on the PC through the Web. ... -
Page 97: Browser Login
6.2 Browser Login To make sure XVR connects to Internet successfully, open Browser, input required IP address, the default setting is 192.168.1.88, and enter the login interface, as below Figure 6-1. Figure 6-1 In the upper right corner of the interface, select the system language (currently supports Chinese Simplified, Chinese Traditional, English, German, French, Portuguese, Turkish, Spanish, Italian, Hungarian, Roman, Korean, Dutch, Greek, and Vietnamese, the default is English), enter the user name... - Page 98 Figure 6-2 Instruction After the XVR upgrades to a new version, you need to delete the original control and download and install the control again. For WIN 7 could have problems for backup and recording, if so, please check the Admin setting, procedure as follows: WIN7-1 WIN7-2...
-
Page 99: Live View
Figure 6-3 6.4 Live View After login the client successfully, entering live preview interface. The interface as below Figure 6-4: Figure 6-4 1. System Menu. Including Live View, Playback, Configuration, Help, Logout, and show login user name. 2. Real-time Monitoring Channel. Open/Close Preview, record and stream switching. - Page 100 Mark Specification CH1-CH9 Display all channels of the device. Open or close corresponding preview channel. Start/stop recording, save video on local computer hard drive. Main and sub bit stream switching Table 6-1 3. Preview channel shortcut button Mark Specification Preview window toggle. From left to right are: 1 split screen, 4 split screen, 9 split screen.
-
Page 101: Configuration
Full-screen playback, press the keyboard Esc to exit the full screen Table 6-2 4. PTZ setting operation window Mark Specification PTZ control direction button PTZ self-test Zoom button Focus button Aperture control button The step size is mainly used for speed control. The larger the value, the faster the rotation speed. -
Page 102: Camera
Figure 6-5 6.5.2 Camera 6.5.2.1 Add Camera In the main interface, click "Configuration→Camera→Add Camera" to enter the add camera interface, as shown in Figure 6-6. Here you can add, edit, and delete devices to the device as needed. The relevant parameters are consistent with the XVR-side settings. - Page 103 6.5.2.2 OSD In the main interface, click " Configuration→Camera→OSD" to enter the OSD setting interface, as shown in Figure 6-7. Here you can view and set the device text, date and other related information, the relevant parameters are consistent with the XVR-side settings.
- Page 104 and set the device's motion detection related information, the relevant parameters are consistent with the XVR-side settings. Figure 6-9 6.5.2.5 Video Loss In the main interface, click " Configuration→Camera→Video Loss" to enter the video loss setting interface, as shown in Figure 6-10. Here you can set the channel when the channel video is lost when the device to make the appropriate alarm mode, the relevant parameters are consistent with the XVR-side settings.
- Page 105 Figure 6-10 Instruction The current video loss feature only supports setting up the added analog device. 6.5.2.6 PTZ Setup In the main interface, click " Configuration→Camera→PTZ Setup" to enter the video PTZ Setup interface, as shown in Figure 6-11. Here you can view and set the information about the PTZ control for each channel, the relevant parameters are consistent with the XVR-side settings.
- Page 106 Figure 6-11 6.5.2.7 Volume The volume screen is used to view and adjust the volume of each analog channel. The steps are as follows: Step 1: In the main interface, click " Configuration→Camera→Volume" to enter the volume setting interface, as shown in Figure 6-12. Step 2: Select the configuration channel, check the mute check box or slide the slider of the volume to adjust the size of the audio output.
- Page 107 Figure 6-13 6.5.2.9 Channel Name In the main interface, click " Configuration→Camera→Channel Name" to enter the channel name setting interface, as shown in Figure 6-14. Here you can view and set the channel names, the relevant parameters are consistent with the XVR-side settings.
-
Page 108: Record
6.5.3 Record 6.5.3.1 Record The steps are as follows: Step 1: In the main interface, click " Configuration→ Record→ Record " to enter the record setting interface, as shown in Figure 6-15. Figure 6-15 Step 2: Set the parameters as detailed in the table below. Parameter Description Select the channel number for setting the recording, and... -
Page 109: Hdd
Click one of the set recording time periods, pop up the time Time period setting, select the recording type, set the time period period, and click “Save” to complete the setting. When you setting click “Del”, the selected time period is deleted. Click to enter the pre-record setting interface, set the More pre-recorded action status 0 seconds to 30 seconds before... -
Page 110: System
device disk information, but also format the hard disk, hard disk format and XVR settings consistent. Figure 6-17 6.5.5 System 6.5.5.1 General Device Setting In the main interface, click "Configuration→System→General→Device Setting" to enter the device setting interface, as shown in Figure 6-18. Here you can view and set the device’s language, record mode, record days, resolution and other information, and click "Save"... - Page 111 Figure 6-18 Date Set the system date of the device, and manually set the system time, synchronize with the computer, or set the system date using the Network Time Protocol (NTP) function as required. Set the system date as follows: Step 1: In the main interface, click "Configuration →System →General →Date"...
- Page 112 NTP Port Enter NTP server port. Set the date display format for XVR devices, including Date Format year, month, day, day and month. Set the time format of XVR devices, including Time Format 24-hour and 12-hour. Date Separator Set the separator between year, month, and day. Time Zone Set the time zone of the XVR device.
- Page 113 Step 2: Turn on daylight saving time, set the type, start time, end time, and offset. Step 3: Click "Save" to complete the configuration. Figure 6-20 6.5.5.2 Network IP/Port In the main interface, click "Configure→System→Network→IP/Port" to enter the IP/Port setting interface, as shown in Figure 6-21. Here you can set the IP address of the device, subnet mask, gateway, port, DNS and other network information, IP / Port and XVR settings consistent.
- Page 114 Figure 6-21 DDNS In the main interface, click "Configure→System→Network→DDNS" to enter the DDNS setting interface, as shown in Figure 6-22. Here you can open and set the DDNS function, DDNS and XVR settings consistent. Figure 6-22...
- Page 115 Email In the main interface, click "Configure→System→Network→Email" to enter the email setting interface, as shown in Figure 6-23. Here you can open and set the mail function, the relevant parameters are consistent with the XVR-side settings. Figure 6-23 In the main interface, click "Configure→System→Network→P2P"...
- Page 116 Figure 6-24 In the main interface, click "Configure→System→Network→FTP" to enter the FTP setting interface, as shown in Figure 6-25. Here you can open and set the FTP server function, the relevant parameters are consistent with the XVR-side settings. Figure 6-25...
- Page 117 UPnP In the main interface, click "Configure→System→Network→UPnP" to enter the UPnP setting interface, as shown in Figure 6-26. Here you can turn on and set UPnP function, the relevant parameters are consistent with the XVR-side settings. Figure 6-26 PPPOE In the main interface, click "Configure→System→Network→PPPOE"...
- Page 118 Cloud Storage In the main interface, click "Configuration →System →Network →Cloud Storage" to enter the Cloud Storage setting interface, as shown in Figure 6-28. Here you can turn on and set Cloud Storage function, the relevant parameters are consistent with the XVR-side settings. Figure 6-28 6.5.5.3 Exception In the main interface, click "Configure→System→Exception"...
- Page 119 Figure 6-30 6.5.5.5 Channel Config In the main interface, click "Configure→System→Channel Config" to enter the channel configuration interface, as shown in Figure 6-31 below. Here you can select the device access signal, the relevant parameters are consistent with the XVR-side settings. Figure 6-31...
-
Page 120: Maintain
6.5.5.6 Local Alarm In the main interface, click "Configure→System→Local Alarm" to enter the local alarm interface, as shown in Figure 6-32. Here you can configure the alarm linkage related parameters; the relevant parameters are consistent with the XVR-side settings. After the device is connected to the alarm device through the alarm input port, when the alarm signal is transmitted to the XVR device through the alarm input port, the system performs an alarm linkage action. - Page 121 6.5.6.2 Log In the main interface, click "Configure→Maintain→Log" to enter the log interface, as shown in Figure 6-34. Here you can search the device log; log search is consistent with XVR search. Figure 6-34 6.4.6.3 Manual Upgrade In the manual upgrade interface, you can reboot and upgrade your device. The device system restart and upgrade steps are as follows: Step 1: In the main interface, click "Configuration →Maintain →Manual Upgrade"...
- Page 122 Figure 6-35 6.5.6.4 Auto Maintain In the main interface, click "Configuration →Maintain →Auto Maintain" to enter the auto maintain interface, as shown in Figure 6-36. Here you can set the device reboot time, the auto maintenance settings and NVR settings consistent.
-
Page 123: Playback
Figure 6-37 6.6 Playback In the main interface, click “Playback" to enter the playback interface, as shown in Figure 6-38. Here you can view the equipment, video capture, download and other actions, video query and XVR side of the same set. Figure 6-38 ... - Page 124 Click “ ” to toggle the video playback window. Layout: Play/Pause: After querying the video file, click “ ” to start / pause playback of the searched video. Stop: When the video is played, press “ ” to stop playing the video. ...
- Page 125 Figure 6-38 Full Screen: When the video is played, click “ ” the full-screen playback video. Press "Esc" on the keyboard to exit the full-screen playback interface. Drag and drop: the video playback, the left mouse button click on the time axis to play the position, drag left and right, drag it to the middle of the yellow time point position, playback channel to play the point in time recording.
-
Page 126: Chapter 7 Appendixes
Chapter 7 Appendixes 7.1 Q&A 1. How to do when can’t detect the hard disk? Answer: If the system does not detect the hard disk, kindly please check the data line and the power line of hard disk whether are connected well, whether there is a problem about the interface of hard disk on the motherboard, or kindly please check hard disk whether is supported by the XVR in specification. - Page 127 2. Ensure XVR away from high temperature heat source and place. 3. Remove the dust deposited in the body timing, keep the good ventilation around chassis, it is good for radiating. 4. About the audio/video signal line and RS-485 interfaces, kindly please don’t hot swap, or these port will be damaged easily.
Need help?
Do you have a question about the Coaxial HD XVR and is the answer not in the manual?
Questions and answers