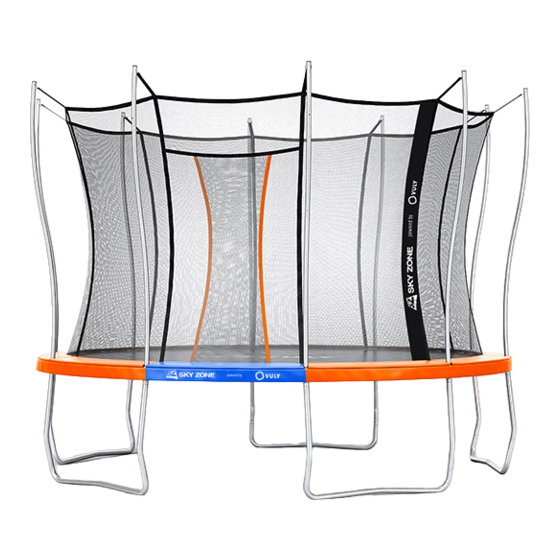
Summary of Contents for Vuly Sky Zone
- Page 1 ASSEMBLY, INSTALLATION, CARE, MAINTENANCE AND USE INSTRUCTIONS WARNING Read these materials prior to assembling and using this trampoline.
-
Page 3: Table Of Contents
Contents Read and follow all instructions in this manual before Responsibility rests with the owner and supervisors of using your trampoline, and do not use the trampoline in the trampoline to make sure that all users are aware of any way that is not described in this manual. the practices specified in this manual. -
Page 4: Disclaimer
The following Conditions of Sale will apply to, and bind the Vuly, its employees, directors and agents are not liable to purchaser of, any Vuly Trampolines Pty. Ltd. ABN: 91 160 793 the customer, their dependents or legal representatives 706 product. -
Page 5: Care And Maintenance
• Wipe dry with an absorbent cloth any water left after rain, Record your date of purchase here: cleaning or use of the Vuly Mister accessory. The mat may discolour or form spots, if left to dry in the sun. -
Page 6: Inspection Checklist
Improper use of, or behavior on, your trampoline can lead to serious injury. Please follow these usage and behaviour If you discover any safety issues, do not use the trampoline. instructions to ensure safe play. Contact Vuly to order and replace any parts. 3.1. WARNING Frame •... -
Page 7: Basic Trampolining Instructions
• Do not intentionally rebound off the barrier. 3.3. Fundamental skills User: Start by getting comfortable with bouncing. Perform • Do not hang from, kick, cut or climb on the barrier. small jumps until your confidence and coordination improve. • Bounce only when the surface of the bed is dry. - Page 8 Arm Actions Arms are also important for proper lift and control. Whenever you’re in the air, your arms should be too. Raise them as you jump – to about shoulder height and width. Keep this position until you start falling, then lower your arms to slightly behind the hips.
-
Page 9: Installation
4.0. Installation 4.1. Location planning WARNING: • Adequate overhead clearance is essential. A minimum clearance of 26 ft. from ground level is recommended. Provide clearance for wires, tree limbs, and other possible hazards. • Lateral clearance is essential. Place the trampoline 6.5 ft from walls, structures, fences, and other play areas. -
Page 10: Assembly Instructions
SKY ZONE POWERED BY VULY TIME REQUIRED FOR ASSEMBLY: 1 HOUR (APPROX). Check that your trampoline bundle NUMBER OF PEOPLE REQUIRED FOR ASSEMBLY: 2 contains the all of following parts: Jump Mat Springs Upper Net Poles Safety Net Lower Net Poles... - Page 11 Frame STEP A. Lay out each Curved Pole in a circle. Ensure that the punch-lines are facing upwards. B. Position each T-Joiner in the gaps around the Curved Poles. Ensure that the push-button holes are facing downwards. C. Place Straight Poles with each T-Joiner. Ensure that the push-button holes are facing downwards.
- Page 12 C. Repeat for each Spring, orange D-shackle and second Spring hole that is to the right of every T-Joiner. Remember: Check that the Vuly logo is horizontal when looking from between two W-Poles and that only orange D-shackles are connected.
- Page 13 Safety Net STEP A. Unravel your Safety Net and lay it atop your Jump Mat. B. Find the the Batch Tag on the Safety Net that is to the left of the door, and rotate the Safety Net so that this Batch Tag lines up with the Batch Tag on the Jump Mat.
- Page 14 Springs. Ensure that all openings in the Safety Padding are over the Net Pole holes in the T-Joiners and that the Vuly logo lines up with the centre of the entrance. STEP A. Lift up the Safety Padding, and completely remove the Spring to the left of a T-Joiner.
- Page 15 STEP A. Choose a Net Pole and find the corresponding U-shackle on the Safety Net. Insert the short end of the U-shackle into one of the holes on the Upper Net Pole. Rotate the U-shackle, and insert the long end into the other hole.
-
Page 16: Warranty
This warranty does not extend to any failure of the product Warranty periods do not reset for any reason, unless caused by installation not in accordance with the Vuly Manual. the customer purchases a new product. In this case, that Customers must assemble their Vuly product by following particular item will be covered by its own warranty period. -
Page 17: Warranty Claims
5.4. Warranty Claims If a customer believes that a Vuly product is faulty or defective, they must discontinue use and submit a Warranty Claim. A customer must not attempt to use a product if any part is faulty or defective, as it may be dangerous. - Page 18 WARNING LABEL PLACEMENT The placard shown above was sewn to the trampoline enclosure netting. Note: The labels and placard shown are not actual size. The labels shown on this page have been attached to the trampoline in the indicated locations. The safety instructions placard will need to be attached by the owner.
- Page 20 Vuly warranty policies, terms and conditions.


Need help?
Do you have a question about the Sky Zone and is the answer not in the manual?
Questions and answers