Advertisement
Quick Links
Flat Panel display Mounts
1-Year Limited Warranty
iPsg warrants that this product is free from any defects in materials or work-
manship within one year of purchase date. if such a defect is discovered within
this warranty's limitations, iPsg agrees at its sole discretion to repair this prod-
uct or to replace it with the same item or one of equal value, free of charge to
the original purchaser. Please return the defective product to the store where
it was purchased.
eXClusions:
this warranty does not apply to this product if the product has been modi-
fied, tampered with, subjected to abnormal conditions, installed incorrectly,
misused or transferred to another consumer other than the original purchaser.
iPsg requires professional installation for all display mounts and does not
accept damages or liability due to improper installation or installation within
and to structures that cannot support the mount and/or display weight.
Product Registration
Please register this product at www.ipsgproducts.com
Click the "RegistRation" link button in the side menu. enter your name, ad-
dress and contact information. Continue to step 2 and select your product
type as "lCd/tV/display accessories". in step 3 choose your model name and
number in the drop down menu and place of purchase to complete your reg-
istration. your personal contact information will remain private and will not be
sold or given to another company.
if you have questons, please contact us through the side bar menu link on
the www.ipsgproducts.com web page. enter all of your product and personal
information in the appropriate fields so we can best respond to your inquiry.
© international Products sourcing group, inc. 2010. no part of this user manual may be reproduced in any form or by any
means, mechanical or electronic, including recording, photocopying, or by any information storage or retrieval system,
without permission in writing from iPsg.
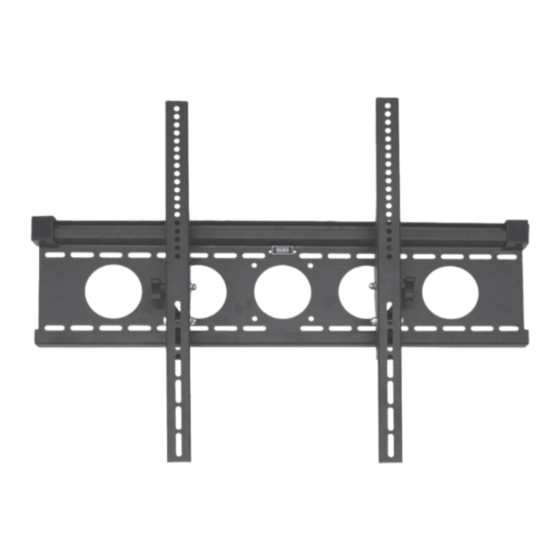
tilting Flat Panel disPlay Mount
installation guide
Model 103M
tV display size Range: 37" to 70" (940mm to 1778mm)
Maximum load Capacity: 165lbs (75kgs)
Professional
Installation
Recommended
TOOLS REQUIRED:
__ Cordless or electric drill
5mm (3/16") Drill Bit for Drywall/Wood Stud Installation
10mm (3/8") Drill Bit for Concrete/Masonry Installation
__ socket Wrench with 13mm socket
__ High Quality stud Finder
Read all instructions carefully before installation.
the installer of this product must verify that the mounting surface, ceiling or wall
will safely support the combined weight of all attached equipment and hardware.
improper mounting installation and/or exceeding recommended tV weight can
result in damage to the tV and may cause injury or death. this product is not
intended to hold more than the maximum weight advised on the packaging. if you
do not understand these directions, or have any doubts about the safe installation
of your television mount please contact a professional installer to install it for you.
__ long & Regular Phillips Head screwdrivers
__ safety goggles
__ Measuring tape
__ level
__ Pencil
Advertisement

Related Manuals for Inland 103M

Summary of Contents for Inland 103M
-
Page 1: Installation Guide
Flat Panel disPlay Mount installation guide Model 103M Flat Panel display Mounts 1-Year Limited Warranty tV display size Range: 37" to 70" (940mm to 1778mm) Maximum load Capacity: 165lbs (75kgs) iPsg warrants that this product is free from any defects in materials or work- manship within one year of purchase date. - Page 2 Hardware Kit/Mount Parts Important: actual appearance may differ from illustration shown here. 1. this mount is intended for use with displays weighing not more than 165lbs (75kgs). use of a heavier display can result in property damage, serious injury Built-in or death.
- Page 3 Step 2: install the Wall Mount (1) to the Wall Important: after determining the height of the wall mount and composition of your walls, use the do not drill into mortar joints! Be sure to mount in solid parts at least 1" (25mm) from following installation instructions to install the wall mount to your wall –...
- Page 4 Fig.7a Use the 35mm M5, M6 or Use the 12mm or 15mm M4, Fig. 5a Fig. 5b Mounting Brackets to a flat-back display M8 bolts lock washers and M5, M6 or M8 bolts, lock washers for mounting brackets washers and square washers to display WITH spacers.
-
Page 5: Display Removal
Step 4: Hang the display Important: a. Check that the top Rotating locking Bar you will need the assistance is flipped up all of the way so that the top of another person to lift your rails have clearance for the brackets to display. - Page 6 Failure to follow these installation instructions or any other abuse, mistreatment, unreasonable use or neglect of the product shall constitute a waiver of all warranties, expressed and implied, and constitute a waiver of all claims of liability against IPSG, its directors, officers, shareholders, parents, subsidiaries, affiliates, agents, customers and licensors, for any direct, indirect, special (including loss of revenue or income, pain and suffering, emotional distress, or similar damages), incidental, punitive, or consequential...
Need help?
Do you have a question about the 103M and is the answer not in the manual?
Questions and answers