Table of Contents
Advertisement
Advertisement
Table of Contents

Related Manuals for Outdoor Cameras Australia Swift ENDURO

Summary of Contents for Outdoor Cameras Australia Swift ENDURO
-
Page 2: Table Of Contents
Contents 1.0 Quick Start Guide ....................- 3 - 1.1 What’s in the Box ............................- 3 - 1.2 Let’s Get Started ............................- 3 - 1.3 How to Setup the Enduro ..........................- 4 - 1.4 Camera Settings ............................- 6 - 2.0 Enduro Layout ......................- 7 - 2.1 Figure 1: Front View ...........................- 7 - 2.2 Figure 2: Bottom View ..........................- 8 - 2.3 Figure 3: Internal, Side and Back View .......................- 9 -... -
Page 3: Quick Start Guide
1.3 How to Setup the Enduro The first few pages of this manual give you a Quick Start Guide as an introduction to the Swift Enduro. However, for more detailed and important camera instructions, please see Part 3. -
Page 4: Camera Settings
1.4 Camera Settings (Default Settings in Red Letters) 3. Connect the Camera to a Network (3G Model Only) The 3G model has a signal “Searching” process when you switch the power switch to SETUP. Other If it comes up with a signal bar and no other pop-ups, it means the network is auto-matched and no manual setup is needed. -
Page 5: Enduro Layout
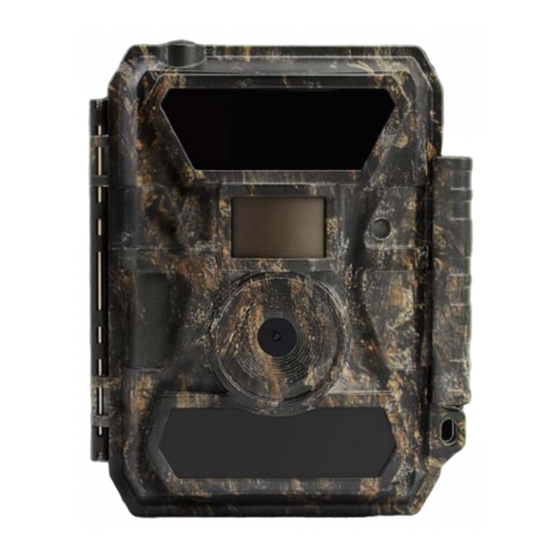
Enduro Layout 2.2 Figure 2: Bottom View Take a few moments to familiarise yourself with the camera controls and displays. 2.1 Figure 1: Front View SIM Card golden part faces front housing side. Antenna SD Card Slot (3G model only) Battery Bay 28 IR LEDs Indicator... -
Page 6: Full Enduro Set Up Guide
3.1 Introduction Thank you for purchasing the Swift Enduro Camera. Now it’s time to capture those images or videos you need from your camera. Just remember, if you are having any difficulties with your camera, or find yourself struggling with the... -
Page 7: Power Supply
3.3 Power Supply b. Solar Panel This camera can be used with the Swift Solar Panel. The solar panel does not charge the batteries in the camera a. Batteries but has its own built in battery that the panel keeps charged. Batteries can still be used in the camera at the same Always ensure you use a quality brand of battery. -
Page 8: Usb Connection
Camera Operations 3.5 USB Connection The camera can be connected to your computer via the USB connection – only use the cable supplied with the camera. 4.1 Video/Photo Playback Leave the camera on OFF and connect it. The camera screen then displays “MSDC”. You can then download the images Turn “Power Switch”... - Page 9 The “Cam” Tab Settings Programmable Options Settings Programmable Options Select “ON”, press “OK”, to set 4 digits/ letters for each camera. This function can help the user to identify High, Middle, Low Cam ID what photos are from what camera. Higher sensitivity is: 1) more sensitive to movements by smaller subjects;...
- Page 10 SMTP Setup Camera comes with default SMTP settings. You only need to enter the receiving email address in “Send to”. If you’ d prefer to use your own SMTP server then you can do so by using the following instructions 1) Enter your mailbox server IP;...
- Page 11 SMTP/FTP Picture Size Pictures sent via SMTP and FTP are optional in size as either 640*480, or 1920*1440. The small size images are approx. 30-40KB and the large are about 300-400KB. Full sized images are still stored on the SD card. Note: 1) camera will only send photos to preset phone numbers via MMS;...
-
Page 12: Trail Camera App (3G Only)
Trail Camera APP There is an App called TrailCamera which is available for free on both iPhone and Android. Download the App. 1. Hit the plus sign in the top right to add your camera. 2. Name your camera in the Top box eg Front Gate. 3. - Page 13 4. Select your camera. 8. Hit the Send button. Depending on whether your phone is Android or iPhone the phone will react differently. iPhones bring up the standard “Messages” App which allows you to then send the message in that App, while Androids bring up send message confirmation screens to which you just hit Confirm.
-
Page 14: Specifications
Specifications Image Sensor 5 Mega Pixels Colour CMOS Camera + Video Effective Pixels 2560x1920 Device Serial No. Day/Night Mode Time Lapse IR range SD Card cycle ON/OFF IR Setting Top: 28 LEDs, Foot: 30LEDs Operation Power Battery: 9V; DC: 12V Memory SD Card (4MB –... -
Page 15: Trouble Shooting
Trouble Shooting 6.2 Camera Stops Taking Images or Won’t Take Images 1. Please make sure that the SD card is not full. If the card is full, the camera will stop taking images. You can turn on 6.1 Photos Do Not Capture Subject of Interest Cycle Recording to avoid this. -
Page 16: Warranty
Warranty We are very happy to offer our customers a two year warranty on the Swift Enduro camera. Our products are warranted against defects in materials and workmanship for a period of two years from the date of original purchase. If a defect exists, we will: 1.
Need help?
Do you have a question about the Swift ENDURO and is the answer not in the manual?
Questions and answers