
Related Manuals for Jamar RAC Geo II

Summary of Contents for Jamar RAC Geo II
- Page 1 RAC Geo II User’s Manual Distance Measuring with GPS JAMAR JAMAR Technologies, Inc. Technologies, Inc.
- Page 2 RAC Geo II User’s Manual WARNING Use of the RAC Geo II while driving could cause an accident, resulting in serious injury or death. As with any in-vehicle instrumentation, the information provided by the RAC Geo II should be observed as part of the normal operation of the vehicle. Changes to the RAC Geo II should only be done in a safe manner.
- Page 3 We are pleased that you have chosen the RAC Geo II for your distance measuring needs. We have strived to develop a unit that is easy to use and has the options that our customers require. The RAC Geo II has undergone extensive testing to verify the accuracy of its operations, and each unit is tested before it leaves our facility.
-
Page 4: Table Of Contents
RAC Geo II User’s Manual Table of Contents Technical Support ............iii Quick Start Guide & Introduction to the RAC Geo II ....1-1 Quick Start ............1-2 What is the RAC Geo II? ............1-3 How Does it Work? ............ -
Page 5: Quick Start Guide & Introduction To The Rac Geo Ii
Chapter 1 — Introduction Chapter 1 Quick Start Guide & Introduction to the RAC Geo II... -
Page 6: Quick Start
RAC Geo II User’s Manual Quick Start Step 1 Install your RAC Geo by mounting it on or near your dash and plugging in the Geo's auto adapter power supply into your vehicle's 12V outlet. Screw the GPS antenna into the top of the unit and mount the antenna on the roof of your vehicle. -
Page 7: What Is The Rac Geo Ii
How does it work? The RAC Geo II has an on-board GPS receiver built into the unit. Once it locks onto the GPS satellites, it can track movement. Power is provided by a 12V auto adapter, which makes the unit completely portable from vehicle to vehicle. - Page 8 RAC Geo II User’s Manual...
-
Page 9: Installation
Chapter 2 — Installation Chapter 2 Installation... -
Page 10: Installing The Rac Instrument
RAC Geo II User’s Manual Installing the RAC Instrument The compact case design of the RAC Geo allows mounting of it in a num- ber of convenient locations. Popular locations include on the front of the dashboard, above or below the dashboard, or on the windshield using the optional windshield mounting bracket. -
Page 11: Connecting Power To The Rac Instrument
Chapter 2 — Installation Connecting Power to the RAC Instrument After mounting the RAC, plug the Geo's auto adapter power supply into your vehicle's 12V outlet and connect the other end to the PWR port on the RAC Geo, as shown below. Fig. -
Page 12: Installing The External Antenna
RAC Geo II User’s Manual Chapter 2 — Installation Installing the External Antenna The RAC Geo comes with an external GPS antenna that screws into the top of the Geo. Note that the antenna is not required when using the Geo, but it is recommended for best accuracy and quickest GPS lock. -
Page 13: Start Up, Key Functions & Menu Options
Chapter 3 — Start Up, Key Functions & Menu Options Chapter 3 Start Up, Key Functions & Menu Options... -
Page 14: Power On
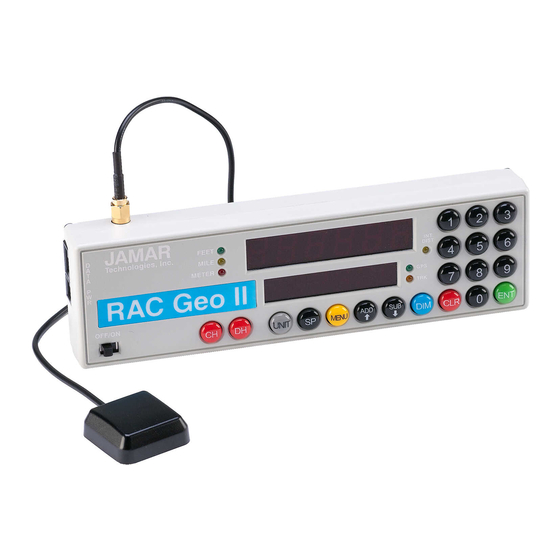
RAC Geo II User’s Manual Fig. 3.1 — RAC Geo Key Layout Your RAC Geo DMI has been designed for simple operation, using large individual keys which provide a click and tone feedback. The two 6-digit high-intensity LED display windows allow flexibility in displaying data to you. -
Page 15: Gps Sensor Mode Start Up
Chapter 3 — Start Up, Key Functions & Menu Options GPS Sensor Mode Start-Up When starting in GPS Sensor mode, the RAC Geo will Display GPSSen in D-1, indicating it is set to GPS Sensor Mode. It will then switch to display GPS FO in D-1 and SEnSor in D-2 and begin to look for GPS satellites. -
Page 16: Key Functions
RAC Geo II User’s Manual Key Functions The Count Hold key will start or stop the computation of dis- tance pulses. When in Count Hold, CH will be displayed in D-2 and the RAC will not accumulate any distance. If speed is... - Page 17 Chapter 3 — Start Up, Key Functions & Menu Options The Menu key allows you to select from a variety of functions. After pressing the Menu button, the Add and Sub keys can be used to scroll through the options, which are displayed in D-2. Menu To select an option, press the ENT (Enter) key.
- Page 18 RAC Geo II User’s Manual The Add key instructs the RAC to count up. It is also used in the Menu function to scroll up through the various options, and is used in the Pre-Distance function. The Sub key instructs the RAC to count down. When in this mode, the LED indicator for the active unit of measurement will flash to indicate that you are subtracting distance.
-
Page 19: Menu Functions
Chapter 3 — Start Up, Key Functions & Menu Options Menu Functions The Menu key allows you to select a variety of functions. After pressing the Menu button, the Add and Sub keys can be used to scroll through the options, which are displayed in D-2. - Page 20 RAC Geo II User’s Manual Menu 4 - Clock Set The RAC Geo will compute & display time as either elapsed time from when the instrument was powered up, or real time if the timer has been set. The timer starts automatically at zero when the RAC is powered-up. Time is displayed in D-1 as hh.mm.ss.
- Page 21 Chapter 3 — Start Up, Key Functions & Menu Options Note: To view the Clock/Timer while in the normal measuring mode (not as a Menu function), press the #1 key. D-1 will then display the clock/timer in hh.mm.ss format. Press the #1 key again to toggle back to distance. This function does not interrupt the distance count.
- Page 22 RAC Geo II User’s Manual Step 2 Using the numeric keys, enter the interval distance that you want the DPO signal generated, based on your selected unit of measurement (feet, Fig. 3.13 — DPO Distance Entered mile, meter). Step 3...
- Page 23 Chapter 3 — Start Up, Key Functions & Menu Options To turn off the DPO signal: Step 1 Press the Menu key, the #5 key then Enter. The current DPO interval dis- Fig. 3.17 — Current DPO Distance tance is then displayed in D-1. Step 2 Press the CLR (clear) key and the DPO distance is removed.
- Page 24 Menu 6 - Memory Store Used with RACPro software The RAC Geo II has the capability to store up to 400,000 events in its internal memory in this mode. Using this feature, you can manually key in numeric codes to identify various events, such as intersections, signs, culverts, bridges, pavement markings, telephone/power poles, etc.
- Page 25 Chapter 3 — Start Up, Key Functions & Menu Options Step 4 Once you have selected the identifier you want, press Enter. At this time, if you wish to start at a distance other then zero, you can enter a starting distance using the numeric keys.
- Page 26 Enter. Note that you can store up to 400,000 Fig. 3.27 — events in the RAC Geo II's memory. Enter Ending Reference Code Step 9 To exit the memory store function, the RAC must be in Count Hold. Press the Menu key, then press Enter.
- Page 27 Chapter 3 — Start Up, Key Functions & Menu Options Menu 7 - Memory Status Used with RACPro software If you are conducting numerous field surveys before downloading the data to a computer, you may want to check the status of the RAC's memory from time to time to make sure you have enough memory left for a new survey.
- Page 28 Used with RACPro software This feature allows you to clear all memory locations that have been stored in the RAC Geo II. Note that when doing this ALL memory locations are cleared. You are not able to clear partial memory or selected surveys.
- Page 29 Chapter 3 — Start Up, Key Functions & Menu Options Used with RACPro software Menu 9 - Store GPS & Menu 10 - Track GPS These options are the same as Menu 6 - Store Memory, but with the addi- tion of storing GPS data.
- Page 30 RAC Geo II User’s Manual Once the RAC Geo has reached an F1 lock the Geo will go to the Date screen. D-1 will display the last date that was used in the Store or Track function. Note: There is no check to ensure that a valid date is entered or correct.
- Page 31 Chapter 3 — Start Up, Key Functions & Menu Options Step 5 Press Enter and the RAC will be ready to begin at the starting distance you entered. Fig. 3.38 — Ready to begin survey Step 6 Align your vehicle with the starting point of the survey.
- Page 32 RAC Geo II User’s Manual Should you key in an incorrect code number, you can overwrite that number by simply keying in the correct number. This must be done prior to press- ing the Enter key. Once you hit the Enter key, the code that was in D-2 is stored in memory.
- Page 33 Menu 11 - Display GPS This feature allows you to record and view GPS information directly on the display of the RAC Geo II, along with distance information. With this feature you do not have to download your data to a computer.
- Page 34 RAC Geo II User’s Manual Once the RAC Geo has reached an F1 lock the Geo will then go into Count Hold mode and wait for you to begin. Step 3 Fig. 3.44 — When you are ready to begin the data...
- Page 35 Chapter 3 — Start Up, Key Functions & Menu Options North/South and East/West are determined by a '-' before the first three GPS digits. If the latitude is North, just the coordinates are shown. If it is South, the coordinates are preceded by '-'. Likewise, if the longitude is East, just the coordinates are shown.
- Page 36 RAC Geo II User’s Manual Menu 12 - Format GPS This feature allows you to select the format for showing GPS information. Step 1 Press the Menu key, then the #1 and #2 key. D-2 indicates that you are in the Format GPS function.
-
Page 37: Additional Features
Chapter 3 — Start Up, Key Functions & Menu Options Additional Features Interval Distance This feature allows you to determine distance between points of interest, such as telephone poles, signs, pavement markings, etc. You can activate Interval Distance at any time as long as you are in the normal measuring mode and not using the menu functions. - Page 38 RAC Geo II User’s Manual 3-26...
-
Page 39: External Sensor Mode
Chapter 4 — External Sensor Mode Chapter 4 External Sensor Mode... -
Page 40: Gps Sensor Or External Sensor
GPS sensor or external sensor... which is right for you? The RAC Geo II contains an internal GPS receiver that allows it to do distance measuring without the need of an external distance sensor like a modular or magnetic sensor. The benefit of using the internal sensor is that it means you do not have to install any wiring in the vehicle or get under the hood. - Page 41 Switching from GPS sensor mode to external sensor mode The RAC Geo II can do distance measuring using either of two modes: GPS sensor mode or external sensor mode. By default, new instruments are shipped set to GPS sensor mode, which means the Geo will use its internal GPS sensor for distance measuring.
-
Page 42: Installation
RAC Geo's internal GPS sensor. Before You Begin The JAMAR RAC Geo II distance measuring instruments are very reliable and highly accurate when used with an external distance sensor. However, when using an external sensor there are some known issues that could affect proper operation and the ability to accurately measure distance traveled. -
Page 43: Installing External Distance Sensor
Chapter 4 — External Sensor Mode Installing External Distance Sensor If you are planning to use an external distance sensor for distance measur- ing, rather than the RAC Geo's internal GPS sensor, install the external sensor using the instructions that came with the external sensor. Fig. -
Page 44: Automatic Calibration Procedure
RAC Geo II User’s Manual Automatic Calibration Procedure Note that calibration is only required if you are using an external sensor, such as a modular or magnetic sensor. If you are using the built-in GPS re- ceiver to do distance measuring you DO NOT need to calibrate the Geo. - Page 45 Chapter 4 — External Sensor Mode the smaller, lower display (D-2). This is displayed for 3-4 seconds while a tone sounds, then 0 is shown in D-1 (0.000 if the mile or meter unit of measurements is selected) while CH is shown in D-2. Step 2 Press the Menu key, the # 1 key and Enter.
- Page 46 RAC Geo II User’s Manual is also recommended that you put this same information on a piece of tape attached to the inside of the vehicle's glove box. Step 7 Press Enter and the unit of measurement will return to your desired unit of feet, mile or meter.
-
Page 47: If Your Rac Fails To Calibrate
Chapter 4 — External Sensor Mode If Your RAC Fails to Calibrate If your RAC fails to count during calibration, perform the following op- erational checks: Step 1 Locate the Sensor Test button on the front upper right of the MDS, shown in Figure 4.8. - Page 48 RAC Geo II User’s Manual Step 2 The Tap Test will determine if the dis- tance pulses being sent from the MDS are getting to, and being processed by, the RAC. The Tap Test is performed using the rotary switch shown in figure Fig.
-
Page 49: Manual Calibration Procedure
Chapter 4 — External Sensor Mode Manual Calibration Procedure It is very common to share one RAC on a plug-in basis between a number of different vehicles that have been equipped to accept the instrument. Installing additional vehicle kits on other vehicles is an inexpensive and cost effec- tive means to greatly expand your measuring capabilities. - Page 50 RAC Geo II User’s Manual Step 3 Press the Enter key and the current cali- bration number for the vehicle selected will be displayed. Press the Clear key (CLR) to clear the current number. Fig. 4.12 Calibration Number Cleared Step 4...
-
Page 51: Troubleshooting
Chapter 5 — Troubleshooting Chapter 5 Troubleshooting... -
Page 52: Frequently Asked Questions
RAC Geo II User’s Manual Frequently Asked Questions Q. When I turn on my RAC Geo II it does not search for satellites. What's wrong? A. If your Geo does not search for satellites when you turn it on it has probably been switched into external sensor mode. - Page 53 Chapter 5 — Troubleshooting of the MDS. Second, turn on the RAC and press the CH key just like you would prior to starting a measurement. Next, using a small pointed object (pen, pencil, screwdriver, etc.) or your finger press the Sensor Test button for a few seconds.
- Page 54 2. Your ground wire may not be connected properly. Double check its connections. 3. Your Modular Distance Sensor may not be working correctly. Contact JAMAR using the information on page iii for information on getting replacement parts. Q. My RAC will not turn on. What’s wrong? A.
-
Page 55: Appendix
Appendix Appendix... -
Page 56: Connection And Output Formats
4 3 2 1 Memory/Serial (RS-232) Output Since the RAC Geo II has a large internal memory, it is usually not practi- cal to try to view the data on the display on an event by event basis. It is necessary to download this data to a computer for processing. -
Page 57: Rac Geo Ii Specifications
Memory Retention: Non-volatile EEPROM, calibration & vehicle numbers. Circuitry: Solid state, surface mount, modular, EEPROM, micro-computer. Case: ABS non-warping plastic. Dimensions: 7.8"W x 2.3"H x 1.2" D Weight: 6.5 oz. Operating Temperature: 0°C to 75°C Warranty: 5-year instrument warranty. GPS: Example: JAMAR Technologies RAC Geo II... -
Page 58: Glossary
Page 3-6. Erase — menu function of the RAC, it is used to clear all memory locations in the RAC. Page 3-16. LED — stands for light emitting diode, the display used with the JAMAR RAC Geo. Page A-3. - Page 59 RAC — Road Analysis Computer. Brand name for JAMAR’s distance measuring instruments. RACPro — software available from JAMAR for use with the RAC Geo. The program can analyze data downloaded from the RAC Geo. Page A-2. SP (Speed) — black button on the RAC, it allows you to show your speed.
-
Page 60: Vehicle Calibration Record
User Initials: ________________ User Initials: ________________ We are pleased that you have chosen the RAC Geo II for your distance measuring needs. We have strived to develop a unit that is easy to use and has the options that our customers require. The RAC Geo II has undergone extensive testing to verify the accuracy of its operations, and each unit is tested before it leaves our facility.
Need help?
Do you have a question about the RAC Geo II and is the answer not in the manual?
Questions and answers