
Subscribe to Our Youtube Channel
Related Manuals for Phantom Miro C110


Summary of Contents for Phantom Miro C110
- Page 1 Miro C110 ® P H A N T O M M A N U A L When it’s too fast to see, and too important not to. ® C110 MANUAL ZDOC-64078-MA-0003 Rev 3...
- Page 2 PN: ZDOC-64078-MA-0003 Rev 3 Last Updated: 27.FEB.2017...
- Page 3 when it’s too fast to see, and too important not to. ® Miro C110 Camera M A N U A L 100 Dey Road Wayne, NJ 07470 USA +1.973.696.4500 www.phantomhighspeed.com...
- Page 4 Written and produced by the Marketing Department at Vision Research. The contents of this manual may be subject to change without notification. PN: ZDOC-64078-MA-0003 Rev 3 Last Updated: 27.FEB.2017...
-
Page 5: Table Of Contents
C o n t e n t s Introduction Connectors Quick Start Guide Control via Phantom Software Download & Image Processing Measurements Support... - Page 6 C to 50 • SDI available through BNC connector on back of camera • Trigger Options: Dedicated BNC, or via Phantom PCC software • Power: Camera: 16 - 28 VDC, 12W; 100 - 240 VAC 65W power supply included •...
-
Page 7: Introduction
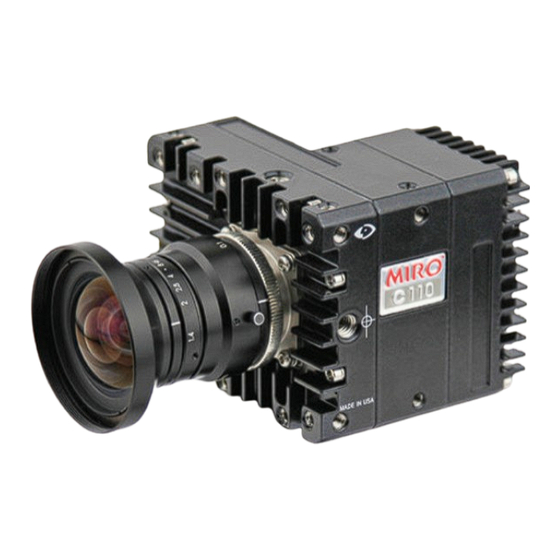
(fps); 1,295 fps at 720p HD; and at a reduced resolution 128 x 8 the camera can capture 52,445 fps. The Miro C110 has a C-mount and a sensor with small, densely packed pixels to capture detail. Its small size of 72mm x 93mm x 82.5mm and light weight of 0.54 kg... - Page 8 Image Storage The Miro C110 is available with 8GB of internal high- speed memory. The Miro C110 uses a CMOS sensor available in color or Sensor Characteristics monochrome. The 5.6 micron (μm) pixels provide a sensitivity, measured using the ISO 12232 SAT method, of ISO 5,000T; 2,500D for monochrome cameras, and 640T;...
- Page 9 Lensing The Miro C110 has a C-lens mount that can be reversed to accept CS lenses. Command & Control The camera is controlled with Phantom PCC software or a handheld Phantom Remote Control Unit (RCU). Detailed information about Phantom cameras, features, and software can be found at: www.phantomhighspeed.com...
- Page 10 Miro C110 Rear View Phantom Miro C110 Camera Manual...
-
Page 11: Connectors
• Default setting: F-Sync (input / output): Connect an external source, including the F-Sync from a second Phantom camera, to drive the camera’s frame rate. Use in combination with Sync; External in the External Sync menu. • Available through drop-down box in PCC: Strobe (input): Signal goes low for the duration of each frame’s exposure... - Page 12 Phantom Miro C110 Camera Manual...
-
Page 13: Quick Start Guide
100.100.100.1 with a 255.255.0.0 subnet mask. Install PCC Software Install the latest version of Phantom Camera Control (PCC) software from the accompanying CD or USB key. Cable the Camera Connect the 16-28VDC power supply to the camera’s power connector. - Page 14 Locate the last image of the cine to be saved. Click the ‘Mark-Out’ button. Select ‘Play, Speed, & Options’ and enable (check) ‘Limit to Range’. Under the Video Control Buttons click the ‘Jump to Start’ button. Phantom Miro C110 Camera Manual...
- Page 15 Review Edited Cine Review the edited cine using the Video Control Buttons. Click the ‘Save Cine...’ button at the bottom of the ‘Play’ panel. Save to Computer In the ‘Save Cine’ window: 1. Navigate to the folder where you want to save the cine file.
- Page 16 Phantom Miro C110 Camera Manual...
-
Page 17: Control Via Phantom Software
Vision Research website: www.phantomhighspeed.com Pre-Installation Phantom control software is certified to operate with the following Microsoft Windows operating systems: Windows 7, 8.1 and 10. The computer and camera must be associated with the same sub-network to communicate with one another. - Page 18 HD-SDI outputs as connected to a compatible SDI monitor. PVP provides the ability to view, capture, review, edit, and/or save a Cine recorded into the camera’s RAM to a hard drive. Phantom Miro C110 Camera Manual...
- Page 19 PTF (Post Trigger Frames) covered later in this section. Double-click the camera(s) to be controlled listed in the ‘Manager’ tab, or select the camera(s) from the ‘Camera’ pull-down list in the ‘Live’ tab. Chapter 4: Control via Phantom Software...
- Page 20 The ‘Zoom Actual Size’ toolbar button resizes the images being displayed in the Preview/Playback panel to their actual size. Phantom Miro C110 Camera Manual...
- Page 21 Just below the ‘Camera’ selector in the ‘Live’ tab are a series of expandable headers, which contain groups of related camera settings. This manual will cover the most commonly used settings, see the ‘Pcc Help’ file for details of other settings. Chapter 4: Control via Phantom Software...
- Page 22 Set Time: Synchronizes the time stamps embedded in the recorded image data to the computer’s clock. & Cine Settings Bit Depth: The Miro C110 operates in 12-bit mode only. Camera Settings are used to set Partitions: Select the number of desired partitions (evenly and recall the overall camera system parameters.
- Page 23 FPS will jump to the closest multiple of the current video rate (23.98, 24, 25, 29.97 or 30). In ‘Loop’ mode to begin recording to the camera’s RAM Recording a Cine click the red ‘Capture’ button. Chapter 4: Control via Phantom Software...
- Page 24 (also places the file under the ‘Cines’ group folder in the Manager tab). The viewing option can be changed via the ‘Play Speed & Options’ and the Cines’ metadata can be viewed in the ‘Frame Info’ and ‘Cine Info’ sections. Phantom Miro C110 Camera Manual...
- Page 25 Under the ‘Video Control’ buttons click the ‘Jump to Start’ button, then review the edited cine. Saving a Cine Click the ‘Save Cine...’ button to save the edited cine to the computer’s hard drive. Chapter 4: Control via Phantom Software...
- Page 26 Phantom Miro C110 Camera Manual...
-
Page 27: Download & Image Processing
PCC software provided by Vision Research. Phantom PCC and PVP software are only compatible with Windows operating systems, however there are third party solutions available for working with Phantom cameras in Mac OSX. Windows-based PCC software provides the ability to PCC Software Solutions convert cine files into a number of other formats. - Page 28 If you are converting the cine file into a ‘movie-like’ formats leave the file name as ‘All selected file.’ The software automatically assigns the original file name to the converted file and appends the appropriate file extension. Phantom Miro C110 Camera Manual...
- Page 29 However, if you are converting the file into a sequence of images, you need to enter the annotation only detailed in the ‘Convert a Cine’ topic earlier in this chapter. Example: +4 The software automatically creates a separate folder for each of the files being converted, assigns the original file name, and appends the appropriate image number and file extension to each image.
- Page 30 Example of three points being tracked. The graph plots and displays, by default, the x-axis coordinate of all points / targets from the Origin point. Phantom Miro C110 Camera Manual...
-
Page 31: Measurements
Measurements Introduction With the PCC (Phantom Camera Control) 2-D motion analysis tools, the end-user can perform timing, position, distance, velocity, angle and angular speed measurements, and track multiple points or objects to compute and graph their XY-coordinates, speed, or acceleration. PCC, for example, provides several edge detection algorithms and image processing tools to improve the measurement process. - Page 32 Top View Bottom View Phantom Miro C110 Camera Manual...
-
Page 33: Support
Support Front View Rear View Chapter 7: Support... - Page 34 Right View Left View Phantom Miro C110 Camera Manual...
- Page 35 3-pin Mini XLR Connector part # REAN RT3FC-B NOMENCLATURE / FUNCTION GND / Power Ground VDC / Provides DC (Direct Current) positive power to the Phantom camera. Valid voltage ranges are +12-28VDC CHGND / Chassis Ground Ethernet Connector Gigabit Ethernet port...
- Page 36 Input / Output: switchable via PCC: • Default setting: F-Sync (input / output): Connect an external source, including the F-Sync from a second Phantom camera, to drive the camera’s frame rate. Use in combination with Sync; External in the External Sync menu. •...
- Page 37 Miro C110 Rear View COLOR CAMERA STATE Trigger LED White Camera is booting up Green Camera is in Preview mode Camera is in Capture mode Red Flashing Camera is in Trigger mode, and saving images COLOR ETHERNET STATE Ethernet LEDs...
- Page 38 (part number VRI-FMNT-CMNT). The C110 looks like the C210. The Miro C110 has many of the design features as the C210, and it is made to be rather tough. However, it is not Is it Hi-G? Can it be used with a...
- Page 39 There are fixed black This is most likely caused by dust particles stuck on the sensor or OLPF (optical low pass filter) surface. The best spots on the image, way to check is to remove the lens and look at the glass particularly at surface with a bright light source.
- Page 40 Never blow on the sensor or OLPF. • Never put sharp objects near the surface of the OLPF or sensor. • Always keep the Phantom body cap on the camera when there is no lens attached. Phantom Miro C110 Camera Manual...
- Page 41 Global Headquarters Vision Research, Inc. - Wayne, New Jersey 100 Dey Road Wayne, New Jersey 07470 USA T: +1.973.696.4500 F: +1.973.696.0560 For answers to most questions, please visit us at: www.phantomhighspeed.com For general product, account, order / RMA status inquires and other non-technical questions please e-mail us at: customer.support@visionresearch.com For technical product support, product operation or...
- Page 42 Phantom Miro C110 Camera Manual...
- Page 44 Vision Research - Corporate Headquarters 100 Dey Road Wayne, New Jersey 07470 Ph: +1.973.696.4500 Toll Free: 800.737.6588 Fax: +1.973.696.0560 Vision Research Ltd. - UK Suite F8, Bedford i-lab Priory Business Park Stannard Way, Bedford MK44 3RZ, United Kingdom Ph: +44 1234 834 850 Fax: +44 1234 834 851 PN: ZDOC-64078-MA-0003 Rev 3 Last Updated: 27.FEB.2017...
Need help?
Do you have a question about the Miro C110 and is the answer not in the manual?
Questions and answers