Le Panyol 83 Assembly Instructions Manual
Hide thumbs
Also See for 83:
- Assembly instructions manual (33 pages) ,
- Assembly instructions manual (30 pages)

Related Manuals for Le Panyol 83

Summary of Contents for Le Panyol 83
-
Page 1: Assembly Instructions
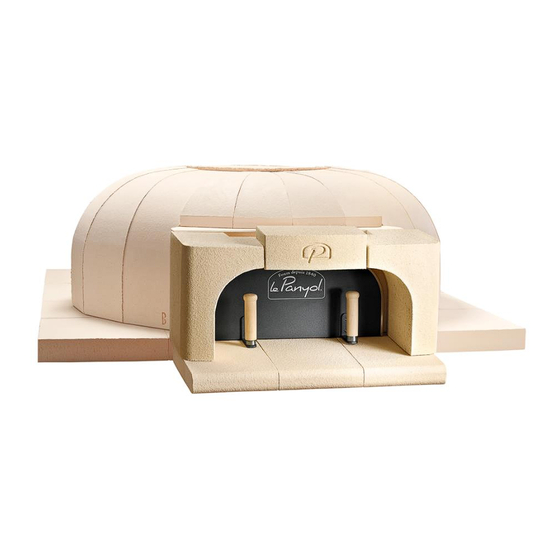
FR EN ASSEMBLY INSTRUCTIONS Le Panyol model 83 Bare oven with no insulation or surround Finished oven with insulation and surround (Sample presentation) November 2015... - Page 2 Build an enclosing wall around the hearth – If the final shape of the “traditional” oven Insulate the oven dome Connect the oven to a chimney pipe Surround / decorate the oven Assembly instructions Le Panyol wood fired oven– Model 83 Page 2...
-
Page 3: Choosing A Site
Outdoor Installation The Le Panyol oven must be protected against bad weather by a roof wide enough to prevent the oven and hearth tiles from getting wet. It must be kept dry in winter as, if it absorbs water, frost would make it unusable. - Page 4 As the hearth tiles in the oven are 6 cm thick and the insulation under the hearth is approximately 7 cm thick, subtract approximately 13 cm to obtain the height of the base (see diagram on page 8). Assembly instructions Le Panyol wood fired oven– Model 83 Page 4...
- Page 5 For the 83 model, the recommended base size for a standard installation is: Width : cm - Depth : cm - Height : 107 cm Measurement in cm Standard construction on a standalone platform (Other types of installation are possible)
- Page 6 Front view Surrounding wall : back Reinforced concrete slab – 10 cm thick FLOOR Top view Surrounding wall Reinforced concrete slab Assembly instructions Le Panyol wood fired oven– Model 83 Page 6...
- Page 7 Once you’ve built the base, insulate the reinforced concrete slab using dry Siporex-type insulation blocks 5 cm thick. Front view Surrounding wall : back Siporex-type insulation block 5 cm Reinforced concrete slab – 10 cm thick FLOOR Assembly instructions Le Panyol wood fired oven– Model 83 Page 7...
- Page 8 Then place the other rows. Front view Surrounding wall : back Floor tiles 6 cm Grog 2cm Siporex-type insulation block 5 Reinforced concrete slab – 10 cm thick FLOOR Assembly instructions Le Panyol wood fired oven– Model 83 Page 8...
- Page 9 Top view Floor tiles Surrounding wall Siporex-type 21 cm insulation block Assembly instructions Le Panyol wood fired oven– Model 83 Page 9...
- Page 10 B marked on it. Wedge the 2 voussoirs in position. Adjust their inner faces to that of the oven entry. Photo 2 Photo 3 Assembly instructions Le Panyol wood fired oven– Model 83 Page 10...
- Page 11 The keystone should ideally be at the same height, but it may sometimes stick out slightly. Photo 5 Place 2 other straight voussoirs (non conical) on the opposite side of the keystone. Photo 6 Assembly instructions Le Panyol wood fired oven– Model 83 Page 11...
- Page 12 Remove the base supporting the keystone and the wedges. Photo 7 Adjust the whole construction. Photo 8 Photo 9 Circle the whole construction with metal wire (to be left in place). Photo 10 Assembly instructions Le Panyol wood fired oven– Model 83 Page 12...
- Page 13 These parts remain visible once the oven has been insulated and surrounded. Order in which they are installed: 1/ shelves boards(page 14) 2/ pillars (page 15) 3/ pediment (page 16) Assembly instructions Le Panyol wood fired oven– Model 83 Page 13...
- Page 14 There’s no need to seal the shelves boards together. Leave to dry for 24 hours Centre line of the oven floor Dalles de sole Surrounding wall Oven entry 15 cm overhang Shelves boards Assembly instructions Le Panyol wood fired oven– Model 83 Page 14...
- Page 15 The gaps between the different parts will be filled with mortar during the “Applying the mortar” stage. Surrounding wall Oven entry Hole for evacuating Oven front pillars smoke 15 cm overhang Shelves boards Assembly instructions Le Panyol wood fired oven– Model 83 Page 15...
- Page 16 Centre the pediment in the space provided. Seal it in place with 2 to 3 mm of mortar. This stage must be carried out with care as the pediment will remain visible. Do not let the mortar run. Assembly instructions Le Panyol wood fired oven– Model 83 Page 16...
- Page 17 The main thing is that the mortar and the oven should be properly dry before adding the insulation. Assembly instructions Le Panyol wood fired oven– Model 83 Page 17...
- Page 18 Finish building the surrounding wall on the sides and back to a suitable height, which will depend on the final shape of your oven. For the front: build a wall 7 cm thick around the doorway. The doorway remains visible. Do not cover it. Assembly instructions Le Panyol wood fired oven– Model 83 Page 18...
- Page 19 Advice : to prevent the grog from accumulating unnecessarily in the corners, build walls at each corner of the surrounding wall. Top view Surrounding wall Oven Cubic shape example Assembly instructions Le Panyol wood fired oven– Model 83 Page 19...
- Page 20 To ensure that any residual moisture can be evacuated, the roof (or shelter) should not hermetically seal the top of the oven (build in an access hatch). Assembly instructions Le Panyol wood fired oven– Model 83 Page 20...
- Page 21 They must be class M0 (French legislation which classifies materials according to their reaction to fire - M0 = non-combustible) Stick the chosen material on the surrounding wall or insulated dome (if the rounded shape). Assembly instructions Le Panyol wood fired oven– Model 83 Page 21...
Need help?
Do you have a question about the 83 and is the answer not in the manual?
Questions and answers