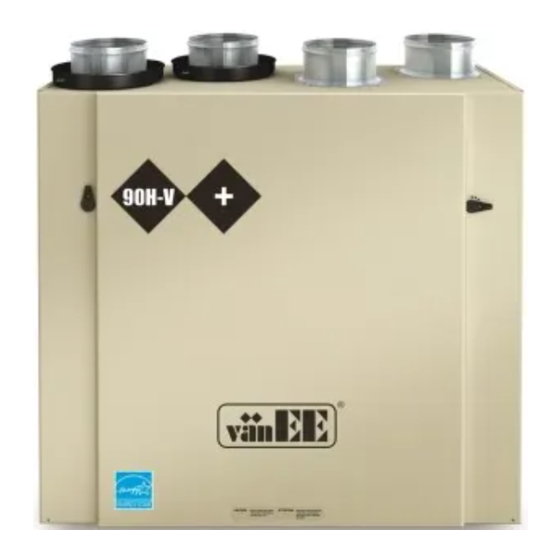
Summary of Contents for vanEE HRV 90H-V
- Page 1 ® User Guide ECOVERY ENTILATORS HRV 90H-V ECM, 90H-V 60H N MODELS Model no.: 43905 Model no.: 1601630 VB0124 VB0125 Model no.: 1601605 VB0127 LEASE READ AND SAVE THESE INSTRUCTIONS 08373 rev. A...
- Page 2 Congratulations! You have made an excellent choice! The operating principle of your Heat Recovery Ventilator will give you personal comfort you have never known before. We have prepared this User Guide especially for you. Please read it carefully to ensure you obtain full benefit from your unit. Over the coming months, you will increasingly appreciate the feeling of living in a more comfortable house.
-
Page 3: Table Of Contents
2.2.1 Platinum Main Control ......6-9 (HRV 90H-V ECM & 60H Novo+) 2.2.2 Lite-Touch Bronze Main Control . -
Page 4: Defrosting Mode
1. Defrosting Mode When the outside temperature is below -5°C (23°F), recovery of heat creates frost in the core. To maintain its proper operation, the unit is programmed to defrost the recovery core. The defrost frequency varies according to the outside temperature. During the defrost cycle, the unit shifts to maximum speed and the dampers close. -
Page 5: Integrated Control
2. Controls (cont’d) 2.1 Integrated Control (cont’d) (HRV 90H-V ECM OOT SEQUENCE ONLY The unit boot sequence is similar to a personal computer boot sequence. Each time the unit is plugged after being unplugged, or after a power failure, the unit will perform a 30-second booting sequence before starting to operate. -
Page 6: Main Controls
NOTES: 1. The integrated control must be turned OFF to use a main control. 2. If an optional auxiliary control is used, if activated, this auxiliary control will override the optional main control. 2.2.1 Platinum Main Control (HRV 90H-V ECM and 60H Novo+ only) CREEN... - Page 7 2. Controls (cont’d) 2.2 Main Controls (cont’d) 2.2.1 Platinum Main Control (HRV 90H-V ECM and 60H Novo+ only) (cont’d) ASING NDICATORS AND MODE SMART PREF VC0100 A SMART key: Enables and disables the SMART mode. B Set key: • Press 3 seconds to access setting periods for Program mode.
- Page 8 (cont’d) 2.2 Main Controls (cont’d) 2.2.1 Platinum Main Control (HRV 90H-V ECM and 60H Novo+ only) (cont’d) The Platinum main control is pre-programmed and ready to go. All you have to do is to set day and time. Then check the settings below and change if needed.
- Page 9 (cont’d) 2.2 Main Controls (cont’d) 2.2.1 Platinum Main Control (HRV 90H-V ECM and 60H Novo+ only) (cont’d) Pressing on MODE / PREF. key (D) successively allows to go from Ventilation mode to Recirculation mode and then to Program mode (VENT...
-
Page 10: Lite-Touch Bronze Main Control (90H-V Only)
2. Controls (cont’d) 2.2 Main Controls (cont’d) 2.2.2 Lite-Touch Bronze Main Control (90H-V only) Activate the push button; the color of the indicator shows INTERMITTENT the unit operating mode. ® VC0080 OLOR UGGESTED REEN NTERMITTENT ELECT THIS MODE WHEN YOU ARE AWAY FROM THE HOUSE FOR A FEW DAYS WHEN YOU DEEM THE INSIDE AIR IS TOO DRY IN HEATING SEASON... -
Page 11: Bronze Main Control (90H-V Only)
2. Controls (cont’d) 2.2 Main Controls (cont’d) 2.2.3 Bronze Main Control (90H-V only) AIR SUPPLY CONTROL DJUSTING Select speed «MIN» or «MAX» using slide switch (A). 5°C+ 41°F+ HUMIDITY • When «MIN» (minimum speed) CONTROL -5°C is selected, if the knob (B) is set 23°F above the click, the unit will -20°C... -
Page 12: Optional Auxiliary Controls
2.3 Optional Auxiliary Controls Contrary to the main controls, up to 5 optional auxiliary controls can be connected to the same ventilation unit. 2.3.1 20/40/60-minute Push-Button Timer (HRV 90H-V ECM and 60H Novo+ only) Location: Located in the bathroom or in other locations where there is temporary humidity excess or pollutants. -
Page 13: Humidity Control (90H-V Only)
2. Controls (cont’d) 2.3 Optional Auxiliary Controls (cont’d) 2.3.3 Humidity Control (90H-V only) Adjust knob to the desired maximum indoor humidity level. HUMIDITY CONTROL CAUTION Do not select a humidity level below 30%. This could lead to excessive DURING FALL, WINTER AND SPRING, SET THE dryness in the air causing discomfort DIAL ACCORDING TO... -
Page 14: Maintenance
3. Maintenance WARNING Risk of electric shock. Before performing any maintenance or servicing, always disconnect the unit from its power source. When cleaning the unit, it is recommended to wear safety glasses and gloves. Refer to picture beside to identify the inner parts of your unit. -
Page 15: Annual Maintenance
8. Slide in the cleaned core into the unit (see illustration beside). 9. Slide in the cleaned filters into the unit. NOTE: For HRV 90H-V ECM only, blue side of filters must be on top. VD0209 10. Reinstall the door. Secure it with both mechanical screws 8-32 x 1” previously removed and plug the unit. -
Page 16: Troubleshooting
• See Controls Section on page 4 to 13. • Install a duct heater. The LED of the a) HRV 90H-V ECM only: There is a problem with integrated control is one of the motors. The unit is OFF. Contact your blinking red.


Need help?
Do you have a question about the HRV 90H-V and is the answer not in the manual?
Questions and answers