Table of Contents
Advertisement
Quick Links
Advertisement
Table of Contents

Related Manuals for Kurzweil KP150


Summary of Contents for Kurzweil KP150
- Page 1 KP150...
- Page 2 INFORMATION FOR YOUR SAFETY! THE FCC REGULATION WARNING (for USA) PRECAUTIONS PLEASE READ CAREFULLY BEFORE PROCEEDING This equipment has been tested and found to comply with the limits for a Class B digital device, pursuant to Part 15 of Please keep this manual in a safe place for future reference. the FCC Rules.
-
Page 3: Table Of Contents
Contents Panel & Display Description DSP..................22 Front Panel................4 Mixer...................22 Rear Panel................4 LCD..................5 Pedal Function..............23 Setup Function Menu Power Supply................6 Tune..................24 Setting a Music Stand............6 KeySplit................24 Using Sustain Pedal..............6 Beat Type................25 Metronome Volume.............25 Connections Pedal Type................25 Connecting a pair of Headphones.........7 EQ Type................25 Connecting an Audio Equipment...........7 Reverb Type................26... -
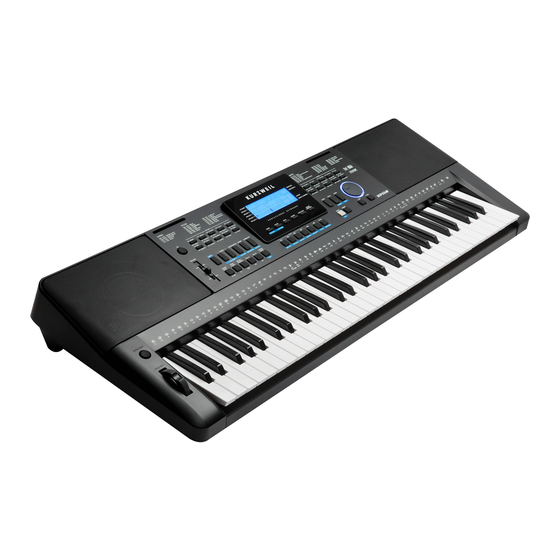
Page 4: Panel & Display Description
Panel & Display Description Front Panel 150 SONGS 200 STYLES 618 VOICES 001~018 Folk&Country 001 010 8Beat 106 135 Soul&Funk 001 051 Piano 209 241 Brass 408 425 Ethnic Misc. 019~076 Golden&Pop 011 030 16Beat 136 145 Country 052 075 Chromatic Percussion 242 269 Reed 426 505 Percussive 077~120 Classical... -
Page 5: Lcd
Panel & Display Description 150 SONGS 200 STYLES 618 VOICES 001~018 Folk&Country 001 010 8Beat 106 135 Soul&Funk 001 051 Piano 209 241 Brass 408 425 Ethnic Misc. 019~076 Golden&Pop 011 030 16Beat 136 145 Country 052 075 Chromatic Percussion 242 269 Reed 426 505 Percussive 077~120 Classical... -
Page 6: Setup
Setup This section contains information about setting up your instrument and preparing to play. Please go through this section carefully before turning the power on. Power Supply You can power the instrument either by batteries or by power adaptor. Follow the instructions described below. Using Batteries 6 pieces of AA (NO.5) or equivalent alkaline batteries must first be installed into the battery compartment. -
Page 7: Connections
Connections Connecting a pair of Headphones A standard pair of stereo headphones can be connected to the PHONES SUSTAIN AUX OUT AUX IN PHONES jack for private practice or late-night playing. The internal stereo speaker system is automatically shut off when a pair of head phones is plugged into this jack. -
Page 8: Power Switch And Master Volume
Power Switch and Master Volume Power Switch Before you switch your instrument on, please turn down the volume of instrument and the connected audio equipment first. Firstly, please make sure you have correctly completed power connection. Press POWER SWITCH, the LCD screen is lit, and displays “Loading!”... -
Page 9: Playing Voices
Playing Voices The keyboard has 618 remarkably realistic built-in voices, including 001 GrandPno 060 Vibra 077 DrawOrgn 101 Harmnica 165 Violin Piano, Woodwind, Saxophone, Drum Kits and many more. Please refer 046 FunkEP 063 Marimba 098 Acordion 106 NylonGtr 184 Strings to Voice List. -
Page 10: Playing Songs
Playing Songs This instrument has featured 150 preset songs, and each song can be practiced in Smart Learning mode. SONG Press the [SONG] button. Enter the song selection mode. It will play all songs circularly. / NO / YES Select a song. Use the data dial or the [+/YES]/ [-/NO] button to select the song you want to play. -
Page 11: Playing Voices
Playing Voices The instrument features 618 build-in voices (Please refer to Voice List). In order to offer you a better performance experience, we programmed many useful effects which can be inserted while playing voices. Selecting a Voice Press the [VOICE] button or Voice Direct Button. Enter the VOICE mode. -
Page 12: Touch
Playing Voices You can use the data dial or the [+/YES]/[-/NO] button to select the lower voice you want to play. You can also use the Voice Direct Button to select a voice. Play the keyboard in different sections, and you will hear two different voices. -
Page 13: Transpose
Playing Voices Transpose Transpose function allows the overall pitch of the instrument to be transposed up or down by a maximum of one octave in semitone increments. Holding down [SHIFT] button, and then press [TRANSPOSE] button to enter transpose settings. LCD displays the current transpose: xxx Transpos. -
Page 14: Auto Accompaniment
Auto Accompaniment The auto accompaniment feature puts a full backing band at your fingertips. To use it, all you have to do is to play the chords with your left hand using your selected accompaniment style, and then the accompaniment will automatically play along, instantly following the chords you play. -
Page 15: Accompaniment Sections
Auto Accompaniment Accompaniment Sections There are various types of Auto Accompaniment sections that allow you to vary the arrangement of the accompaniment to match the song you are playing. They are: Intro, Main (A, B), Fill (A, B), and Ending. By switching among them during your performance you can easily produce the dynamic elements of a professional sounding arrangement in your performance. -
Page 16: Fade
Auto Accompaniment It will start the accompaniment as soon as you start playing in Chord section. When the playback of the intro is finished, it automatically leads into Main A section. Press the [FILL B] button. A fill-in plays, automatically followed by the Main B section. -
Page 17: Chord Fingering
Auto Accompaniment Chord Fingering Fifth How the chords are played or indicated with your left hand (in the auto accompaniment section of the keyboard) is referred to as "fingering". There are 2 types of fingerings as described below. Root Third Chord Basics A chord, in music, is any harmonic set of three or more notes that is heard as if sounding simultaneously. -
Page 18: Tempo
Auto Accompaniment Tempo Each style of the instrument has been set with a default or standard tempo; however, this can be changed by using the [TEMPO +]/ [TEMPO -] button. Use the [TEMPO +]/ [TEMPO -] button to change the tempo. While the tempo data is flashing, use the data dial can also change the tempo. -
Page 19: Harmony
Harmony The harmony function can add harmony effect to the main voice. If you turn the harmony on, the harmony function will automatically add harmony notes to the notes played in the right-hand section, which gives you a rich and harmonic expression. Harmony Switch Press [HARMONY] button. -
Page 20: Enter The Performance Assistant
Performance Assistant Enter the Performance Assistant Holding down [SHIFT] button, and then press [PERFROM] button you can enter the performance assistant mode. The default setting is Guitar Mode and the LCD will display Guitar's voice name. You can use the Data Dial, [+/YES] or [-/NO] button to change the voice you want to perform. -
Page 21: Piano Mode
Performance Assistant Play a free solo in the sub area 2. When the chord type displayed, press a white key in the sub area 2 you can play guitar free solo, sounds like you're playing a real one.Try to change the chord with your left hand, and play your free solo. The last white key B5 is invalid. -
Page 22: Mixer
The DSP is a simulate sounds of sound localization technology in the real environment. Since each sound should be produced in a certain space, so when you at home, in cinema or in the wilderness, even play the same violin you can hear different sounds, the difference sounds are caused by different atmosphere. -
Page 23: Pedal Function
Pedal Function Using pedal function can makes your performance more naturally and with greater expressiveness.You can refer to Pedal Type chapter for details. Sustain Pedal This pedal function performs the same function as the damper pedal on an acoustic piano, letting you sustain the sound of voices even after releasing the keys. -
Page 24: Keysplit
Function Menu Press the [FUNCTION] button to enter function menu. The LCD FUNCTION displays the current function menu option. Use [+/YES]/ [-/NO] button or data dial to set parameter of the current menu.The option and parame- ters are as follows: Content LCD display Range... -
Page 25: Beat Type
Function Menu Beat Type Repeatedly press the [FUNCTION] button to select beat type menu. The LCD displays “xxx BeatType”. Use [+/YES]/ [-/NO] button or data dial to change beat type. The range of beat type: 0, 2~9. Press [+/YES] and [-/NO] buttons simultaneously will set the beat type value to its default setting: 004. -
Page 26: Reverb Type
Function Menu The EQ types are as follows: EQ Type EQ Pop Rock EQ Rock EQ Class Classical EQ Jazz Jazz EQ Dance Dance EQ Reset Reset Reverb Type Repeatedly press the [FUNCTION] button to select reverb type menu. The LCD displays “004 Rev Hall1”. Use [+/YES]/ [-/NO] button or data dial to change reverb type. -
Page 27: Chorus Level
Function Menu Chorus Level Repeatedly press the [FUNCTION] button to select chorus level menu. The LCD displays “xxx ChorusVol”. Use the [+/YES]/ [-/NO] button or data dial to change chorus level, adjustable range: 0-127. Press the [+/YES] and [-/NO] buttons simultaneously to restore its default setting: 000. -
Page 28: Midi In
Function Menu MIDI IN Repeatedly press the [FUNCTION] button to select MIDI in menu. The LCD displays “xxx Midi In”. Use [+/YES]/ [-/NO] button or data dial to change MIDI in channel: 1~16, ALL. Press [+/YES] and [-/NO] buttons simultaneously to restore MIDI in channel to its default setting: ALL. -
Page 29: Register Memory
Register Memory The Registration Memory feature can make your performance more easily and efficiently. It allows you to save virtually all panel settings to a Registration Memory setting, and you can instantly recall custom panel settings by pressing a single button. Registering the Panel Setting There are 8 memory banks, and each bank has 6 memories (M1-M6). -
Page 30: Record
Record With the easy-to-use song recording features, you can record your own keyboard performances as a user song. 5 user songs can be recorded with 6 tracks (1 ACCOMP track, 5 MELODY tracks) each. Start Recording Before you start recording, you need to select a user song to keep the recording song. -
Page 31: Stop Recording
Record Stop Recording When recording is in process, holding down [SHIFT] button and then press the [RECORD] button to stop recording. When recording is in process, if the memory is full, the recording will stop and save automatically, and the LCD displays “Rec_Full”. If you choose the accomp recording, the recording will stop automatically when the ending of the rhythm finishes. -
Page 32: Song
Song The instrument has 150 songs in all, and each song has equipped with smart learning mode. Listen to the songs Press the [SONG] button to enter the song mode. The LCD shows “SONG” indicate and it will play all songs circularly. Use the data dial, [+/YES] or [-/NO] button to select a song. -
Page 33: Smart Learning System
Smart Learning System This built-in smart learning mode provides many different ways in which to help you learning a new song faster and better. It’s function mainly includes: Intelligently and reasonably arrange your learning lessons; Arrange songs specific exercises for your study; Record your learning progress;... - Page 34 Smart Learning System Prompt Message Description Lesson 1 Prepare for the next lesson. Play A Preview the phrase which you ready to learn。 Try A Prompt the phrase which you are learning. Go Ahead You have passed the current period/ phrase, please prepare for the next period / phrase. Try Again You haven’t passed the current period/ phrase, please try again.
- Page 35 Smart Learning System The LCD currently displays your learning score: “SCORE: XX”. If your score is or more than 80 points, you can prepare for the next lesson, the LCD will display “Go Ahead”, or the LCD will display “Try Again”, repeat practicing current phrase.
-
Page 36: Gold Star
Smart Learning System Stop/Start the Lesson In the process of learning you can press the [start/stop] button to stop START / or start to learn, if in the process of learning to press the [start/stop] STOP button will stop and return to you for what you have learn the current courses. -
Page 37: Chord Dictionary
Chord Dictionary If you know the name of a chord but don't know how to play it, you can use the Chord Dictionary function. You can learn the chord and test in this features. DICT 1 (Chord Learning Mode) Press and hold the [SHIFT] button, and then press the [DICT.] button to enter the DICT 1 mode, the LCD displays “Dict.1”... -
Page 38: Midi
MIDI With the MIDI functions you can expand your musical possibilities. This section will let you know what MIDI is, and what it can do, as well as how you can use MIDI on your instrument. What's MIDI? PHONES SUSTAIN AUX OUT AUX IN MIDI (short for Musical Instrument Digital Interface) allows a wide... -
Page 39: Troubleshooting
Troubleshooting Possible Cause and Solution Problem This is normal and is no cause for alarm. The speakers produce a pop sound whenever the power is turned ON or OFF. The R1/R2/L voice volume (Mixer) settings could be set too low. No sound when the keyboard is played. -
Page 40: Specifications
Specifications LCD Display Accompaniment/Song Control Multi-functional LCD Start/Stop, Sync Start (Pause), Intro/Ending (Repeat A/B), Fill A (REW), Fill B (FF), Chord Mode, Fade. Keys 61 Keys with Touch Response Record Record, Start/ Stop, Accomp Track, Melody Track 1~5 Polyphony Control button Power Switch, Volume Slider, Modulation Button, Voices Pitch Bend, Style Direct Button 1~10, Shift, Tempo +/-... -
Page 41: Voice List
Voice List English Name LCD Display Celesta 3 Celesta3 Glockenspiel Glocken Piano Acoustic Grand Piano GrandPno Glockenspiel 2 Glocken2 Acoustic Grand Piano 2 GrandPn2 Music Box MusicBox GrandPnW Music Box 2 MuscBox2 Acoustic Grand Piano (wide) GrandPnD MuscBox3 Acoustic Grand Piano (dark) Music Box 3 Bright Acoustic Piano BritePno... - Page 42 Voice List Acoustic Guitar (nylon) 3 NylonGt3 Synth Bass (rubber) 2 RubbBas2 Acoustic Guitar (nylon + key off) NylGtrOf Attack Pulse AtackPls Ukulele Ukulele Strings & Orchestral Acoustic Guitar (steel) SteelGtr Violin Violin Acoustic Guitar (steel) 2 SteelGt2 Violin2 Violin 2 12StrGtr SlViolin 12-Strings Guitar...
- Page 43 Voice List Tuba 2 Tuba2 Piccolo 2 Piccolo2 Muted Trumpet MuteTrp Piccolo 3 Piccolo3 Muted Trumpet 2 MuteTrp2 2 Piccolos 2Picolos Muted Trumpet 3 MuteTrp3 Sweet Flute SweeFlut French Horn FrHorn Flute Flute FrHorn2 Flute2 French Horn 2 Flute 2 French Horn 3 FrHorn3 Flute 3...
- Page 44 Voice List Massiness Massin Rising Rising Square Square Congregate Congrega Slow Square Lead SlwSquLd Synth SFX Sine Solo SineSolo FX 1 (rain) FXRain Square Lead 4 SquarLd4 FXRain2 FX 1 (rain) 2 ThickSqu Soundtrk Thick Square FX 2 (soundtrack) 2Oscillators Lead 2OscLd FX 2 (soundtrack) 2 Sondtrk2...
- Page 45 Voice List Castanets Castanet Short Guiro ShGuiro Castanets 2 Castant2 Long Guiro LoGuiro Taiko Drum TaikoDrm Claves Claves Taiko Drum 2 TaikDrm2 Mute Cuica MuCuica Taiko Drum 3 TaikDrm3 Open Cuica OpCuica ConBasDm MuTrgle Concert Bass Drum Mute Triangle Concert Bass Drum 2 ConBsDm2 Open Triangle OpTrgle...
- Page 46 Voice List Lasergun Lasergun Flute & Oboe & Bassoon Fl&Ob&Bn Explosion Explosio Flute Octave FluteOct Flute & Oboe Octave Fl&ObOct Combined Voice Stereo Piano & Strings Pad Pn&StrPd Flute & Clarinet Octave Fl&ClOct Pn&Choir Oboe & Bassoon Oboe&Bn Stereo Piano & Choir Pn&SyStr Stereo Piano &...
-
Page 47: Style List
Style List English Name LCD Display Natural Ballad NatulBld Love Ballad LoveBald 8BEAT 8Beat Ballad 8BtBld Easy Ballad EasyBald 8Beat Piano 8BtPiano Miami Folk MiamiBld 8Beat1 Slow Ballad SlowBald 8Beat 1 GtPop1 FolkBald Guitar Pop 1 Folk Ballad 8Beat Hip Hop 8BtHiHop Pop Ballad 1 PopBald1... - Page 48 Style List 70's Disco 70'sDisc Latin Rock LatinRck Club Dance ClubDanc Beguine 3 Beguine3 Euro Dance EuroDanc Slow Bolero SlBolero Garage Garage Disco Samba DscSamba Mambo Mambo SOUL & FUNK Funk1 Meneito Funk 1 Meneito Classic Funk ClasFunk Rumba 2 Rumba2 Jay R&B JayR&B...
-
Page 49: Song List
Song List English Name LCD Display Annie Laurie AnnieLa Turkish March Turkish Piano Toccata Toccata An Die Musik Musik Carry Me Back To Old Virginny Virginny Lieder Ohne Worte Op.62 No.6 Lieder El Condor Pasa ElCondor Red River Valley RedRiver Wedding Forelle Wedding March... -
Page 50: Demo List
Song List Pizzicato Polka Polka Basic Tutorial Beyer Piano 12 Beyer12 Menuett Menuett Basic Tutorial Beyer Piano 13 Beyer13 Rigoletto Rigoleto Basic Tutorial Beyer Piano 14 Beyer14 Serenade Serenade Basic Tutorial Beyer Piano 15 Beyer15 Song Without Words SongNoWd Basic Tutorial Beyer Piano 18 Beyer18 Swan Cuckoo... -
Page 51: Album List
Album List English Name LCD Display Constantly Constant 13 Jours en france 13France Cryin' in the chapel CryChapl A lover's concerto Concerto Dance des mirlitons Mirliton A time for us Timeus Danny boy DannyBoy A whiter shade of pale WhtShade Dark eyes DarkEyes Adios... - Page 52 Album List If I can dream IfDream Mr.lonely MrLonely If I give my heart to you HeartYou My bonnie MyBonnie In the mood InMood My darling clementine Clemtine It's almost tomorrow Tomorrow My old kentucky home Kentucky It's been a long, long time LongTime My shawl MyShawl...
- Page 53 Album List Serenade Serenade The sound of silence Silence Serenata rimpiant Serenata The wabash cannon ball CannBall Siboney Siboney The way we were TheWay Silent night SltNight This land is your land YourLand Singin' in the rain SingRain Those were the days TheDays Lagoon Fountain...
-
Page 54: Chord List
Chord List... -
Page 55: Midi Implementation Chart
MIDI Implementation Chart... - Page 56 Twitter @KurzweilMusic Facebook Http://www.facebook.com/kurzweilmusicsystems 196, Bongsu-daero, Seo-gu, Incheon, Korea...
Need help?
Do you have a question about the KP150 and is the answer not in the manual?
Questions and answers