
Summary of Contents for PADT SCA 1200 HT
- Page 1 User Manual August 1, 2016 Phoenix Analysis & Design Technologies, Inc. (PADT, Inc.) TEL : 1-800-293-PADT FAX : 480-813-4807 sca@padtinc.com www.SupportRemoval.com SCAHTUM-03 SCA 1200HT User Manual...
- Page 2 This page left intentionally blank SCAHTUM-03 SCA 1200HT User Manual...
-
Page 3: Table Of Contents
Table of Contents 1: SITE PREPARATION ..........................4 1.1: L ..........................4 OCATING THE 1.2: P ..................4 REPARATIONS FOR RAINING AND ISPOSAL 2: IMPORTANT SAFEGUARDS ....................... 5 3: SAFETY WARNINGS ..........................6 4: WARRANTY INFORMATION ......................7 5: DECLARATION OF CONFORMITY, REGULATORY INFORMATION ........8 6: UNDERSTANDING YOUR SCA ......................10 6.1: H ..........................10... -
Page 4: 1: Site Preparation
1: Site Preparation 1.1: Locating the Unit • Place the SCA on a sturdy horizontal surface or cart capable of supporting 200 lbs (the weight when filled with water). • Ensure there is no Aluminum or Zinc in the area where the SCA will be used. THE CLEANING SOLUTION CONTAINS SODIUM HYDROXIDE AND REACTS VIOLENTLY WITH ALUMINUM OR ZINC. -
Page 5: 2: Important Safeguards
2: Important Safeguards These notes are intended to draw your attention to risks which only you can recognize and avoid or overcome. They are intended to enhance your own safety consciousness. THE CORRECT UNIT USAGE AND PROPER HANDLING IS SOLELY THE USER’S RESPONSIBILITY. -
Page 6: 3: Safety Warnings
3: Safety Warnings READ ALL INSTRUCTIONS BEFORE OPERATING WHAT TO DO WHAT NOT TO DO Always wear thermal gloves and safety Do not use the SCA for any purpose glasses when working near the unit or other than removing Soluble Support when touching any part of the unit. -
Page 7: 4: Warranty Information
One Year Limited Warranty Coverage All new Support Cleaning Apparatus (SCA) systems are warranted exclusively by PADT, Inc.’s (“Manufacturer”) limited warranty as follows: Each Support Cleaning Apparatus system (“System”) and its components (“Components”), except those listed below under limits and exclusions, is warranted against defects in the materials and workmanship for a period of one (1) year from the date of installation at the end user’s (“Customer”) facility. -
Page 8: 5: Declaration Of Conformity, Regulatory Information
5: Declaration of Conformity, Regulatory Information Declaration of Conformity Manufacturer Phoenix Analysis & Design Technologies, Inc. 7755 S Research Dr, Suite 110 Tempe, AZ 85284, USA Type of Equipment Electrical Equipment for Measurement, Control and Laboratory Use (Support Cleaning Apparatus) Model Number(s) SCA-1200ES and SCA-1200HT We declare under our sole responsibility that the devices mentioned above comply with the following EU Directives:... - Page 9 SCAHTUM-03 SCA 1200HT User Manual...
-
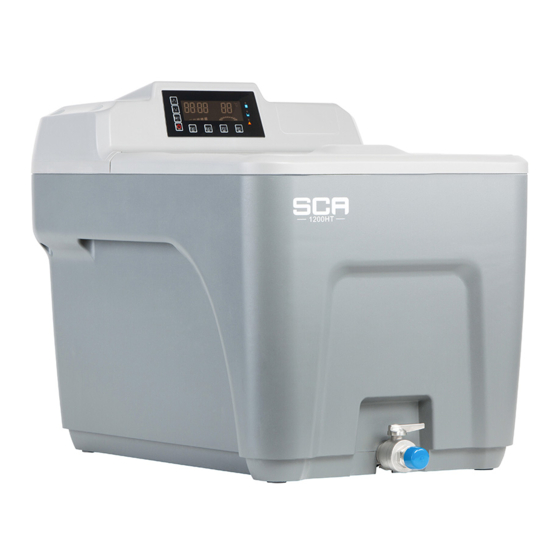
Page 10: 6: Understanding Your Sca
6: Understanding your SCA The Support Cleaning Apparatus (SCA) is a device specifically developed to provide robust and efficient removal of support material from parts created with 3D printers from Stratasys, Inc. that utilize their Soluble Support Technology (SST). This is an improved model based on the feedback received from SCA users in the Stratasys 3D Printer community. - Page 11 Up/Down arrows (Add/Subtract time) Set timer Start/Pause No heat selection Temperature selection Silence alarm Alert indicator Low water indicator High water indicator 10 Temperature LED display 11 Pump operating LEDs 12 Progress LEDs 13 Time remaining LED display 6.2.2: Tank Area Figure 2: Tank Area SCAHTUM-03 SCA 1200HT User Manual...
- Page 12 The tank area is used to hold the liquid and it is where the parts are cleaned. The SCA improves part cleaning by circulating the liquid in the tank. The Large Parts Basket is used to hold parts during cleaning and to lift parts out of the tank.
- Page 13 6.2.3: Unit Side Area Power Cord Receptacle Power Switch Drain Tube Drain Valve (closed position) Figure 5: Front and Side views The Main Power Switch is located on the right-hand side of the unit. This turns power to the unit on and off. The Power Cord (not shown in figure) is used to connect the system to a wall outlet for power.
-
Page 14: Labels
6.3: Labels The SCA includes labels that impart important product and safety information. Users should take the time to familiarize themselves with each label and its meaning. 6.3.1: Product Identification Tag The Product Identification tag is located on the back of the unit. It contains key support information for the SCA including Model Number, Part Number, Serial Number and contact information for support. -
Page 15: Assembly Drawing
6.4: Assembly Drawing Figure 7 shows the entire SCA assembly. Table 1 lists the replaceable components in the system. Please consult this information when calling for support or ordering replacement parts. Figure 7: SCA Assembly Table 1: List of Replaceable Components Large basket Small parts basket Pump subassembly w/nozzle... -
Page 16: 7: Unpacking, Inspecting And Installing Your Sca
7: Unpacking, Inspecting and Installing your SCA THE SCA SHOULD BE INSTALLED BY AN AUTHORIZED DISTRIBUTOR ONLY. INSTALLATION BY THE USER MAY VOID THE WARRANTY. Before removing your SCA from its packaging, completely read this manual. Follow all safety recommendations while unpacking, installing and operating the system. 7.1: Package Contents The SCA is shipped with the following contents: SCA System (1) -
Page 17: 8: Operating Your Sca
8: Operating Your SCA Although the SCA is simple to operate, it is critical that all users follow the instructions in this manual and adhere to all safety guidelines. 8.1: Fill the Unit with Water Make sure that the strainer is clean. Make sure that the drain valve is in the closed position. -
Page 18: Preheating And Starting The Cleaning Cycle
8.3: Preheating and Starting the Cleaning Cycle Recommended Temperature Settings for Dissolving Soluble Support from 3D Printed Parts Build Temperature Setting WaterWorks EcoWorks Material 70°C 85°C Nylon 50, 60 or 70°C** **depending on part wall thickness and desired dimensional accuracy. For Polyjet parts select the ‘HEAT OFF’... -
Page 19: Cleaning The Parts
low level alert to illuminate and the buzzer to sound. If the level sensors are properly working the system will not operate until the liquid level is between the MIN and MAX fill lines. Never operate the tank unless the liquid level is above the liquid level MIN slot on the heat shield. -
Page 20: Readiness For The Next Cleaning Cycle
Remove the parts and rinse them with water to wash away any residual cleaning solution. Air dry or pat dry with a cloth or paper towels. Lower the basket into the tank and close the lid on the tank when part removal is completed. 8.7: Readiness for the Next Cleaning Cycle Once the cleaning cycle is completed and the parts have been removed, the system should be turned off by pressing the ON/OFF rocker switch. -
Page 21: 9: Maintaining Your Sca
9: Maintaining Your SCA As with any piece of equipment, proper maintenance is critical for safety and long life of the SCA. 9.1: Cooling the Tank Liquid Before draining the tank, make sure that all parts have been removed from the unit. If possible, open the lid to decrease the cooling time as well. -
Page 22: Disposing Of Solution
9.3: Disposing of Solution Used solution must be disposed of under applicable local waste disposal regulations. It is the responsibility of the user to determine and verify what the local disposal regulations are and to follow those regulations. Proper disposal requires that the alkalinity (pH) of the solution be reduced to allowable levels before it is disposed of. -
Page 23: Refilling The Tank
Remove the intake screen by pulling down with sufficient force to unseat the fastening clips from the mating surface. Scrub debris from the intake screen using a stiff brush. Rinse with water. Verify all holes are unplugged before replacing the screen on the pump intake. -
Page 24: 10: Troubleshooting
10: Troubleshooting The SCA has been designed to allow the end user to resolve most operating problems. When a problem is encountered, please read through this troubleshooting section. If a resolution is not found, please contact technical support. High Risk of Electrical Shock Always disconnect the unit from power before removing the back panel! Probable... - Page 25 Probable Problem What to Do Causes Liquid temperature is Check the indicator lights on the right side of the too high display control panel. If the Alert light is on, open the lid and lift the part basket from the tank. Let the Error Code: liquid cool and try starting the cycle again.
- Page 26 Probable Problem What to Do Causes EO = over temperature r1 = temperature sensor failure r2 = High level sensor failure r3 = Low level sensor failure Basket is raised or If the basket is lowered into or raised out of the lowered too quickly cleaning solution too quickly, the solution does not fill or empty out fast enough to maintain even water...
- Page 27 Probable Problem What to Do Causes After several The cleaning Drain the tank and add fresh water and cleaning hours parts don’t solution is likely solution. appear to be saturated with much cleaner support material. Type of cleaning If using EcoWorks, try switching to WaterWorks. agent.
-
Page 28: 11: Technical Specifications
11: Technical Specifications Item Specification Model Number SCA-1200HT Power Cord 110 North American 220 International Power Requirements 100-120V~ 50/60 Hz 12A 220-240V~ 50/60 Hz 9A Main Supply Voltage Fluctuation up to +/- 10% Transient Overvoltage 2500V Electrical Protection 15A/250VAC Fuse Heater Power 1,200 Watts 1,700 Watts... -
Page 29: 12: Technical Support
If you prefer to e-mail, you can send an e-mail to: sca@padtinc.com. Please include your full name, company name, phone number and product serial number in all e-mails. If you prefer to call, dial: 1-800-293-PADT and ask for SCA technical support. 12.1: Replacement Parts Send email to sca@padtinc.com or call 1-800-293-PADT for information on obtaining...
Need help?
Do you have a question about the SCA 1200 HT and is the answer not in the manual?
Questions and answers