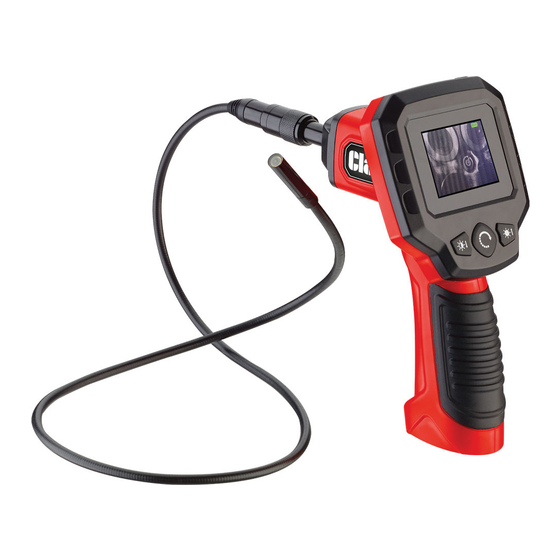
Summary of Contents for Clarke CIC2410
- Page 1 INSPECTION CAMERA MODEL NO: CIC2410 PART NO: 6470385 OPERATION & SAFETY INSTRUCTIONS GC0116...
-
Page 2: Environmental Recycling Policy
INTRODUCTION Thank you for purchasing this CLARKE Inspection Camera. Before attempting to use this product, please read this manual thoroughly and follow the instructions carefully. In doing so you will ensure the safety of yourself and that of others around you, and you can look forward to your purchase giving you long and satisfactory service. -
Page 3: Safety Precautions
2. Never carry out any modifications to this product. If experiencing difficulty of any kind consult your local Clarke dealer. OPERATING ENVIRONMENT 1. Keep the work area clean and well lit. Cluttered benches and dark areas may cause accidents. - Page 4 2. Do not continue using the camera if condensation forms in the camera head. Let any condensation evaporate before use. 3. Do not submerge the camera head and camera cable into corrosive substances such as drain cleaner. 4. Do not get petrol or oil on the camera head or camera cable. 5.
- Page 5 PREPARATION COMPONENTS Open the storage case and check for any damage sustained in transit. Notify your Clarke dealer immediately of any defects. Parts & Service: 020 8988 7400 / E-mail: Parts@clarkeinternational.com or Service@clarkeinternational.com...
-
Page 6: Installing The Batteries
INSTALLING THE BATTERIES CAUTION: POSITION THE BATTERIES IN THE CORRECT POLARITY AND DO NOT INSTALL BATTERIES OF DIFFERENT TYPES, CHARGE LEVELS OR CAPACITIES TOGETHER. The battery compartment is located on the bottom of the handle. 1. Slide the battery cover off, remove the battery case and insert four AA batteries (not supplied). -
Page 7: Connecting To An External Monitor With The Rca Cable
CONNECTING TO AN EXTERNAL MONITOR WITH THE RCA CABLE 1. Plug one end of the RCA cable into the RCA video connection on the camera, then plug the other end into the RCA video port on the monitor. OPERATING INSTRUCTIONS WARNING: ALWAYS READ THE SAFETY INSTRUCTIONS IN THIS MANUAL BEFORE STARTING WORK. -
Page 8: Live Viewing
2. Remove the batteries prior to long term storage. 3. Store the camera and its accessories in the storage case out of reach of children. 4. Refer to your Clarke dealer if any components need replacing. Parts & Service: 020 8988 7400 / E-mail: Parts@clarkeinternational.com or Service@clarkeinternational.com... -
Page 9: Fault Finding
FAULT FINDING PROBLEM POSSIBLE CAUSES SOLUTION Display is on but does Camera cable con- Check that camera cable not show image nection is loose. is connected. Camera head is dirty. Clean camera head. Light is dim at maximum Low batteries. Replace batteries. -
Page 10: Parts List
PARTS LIST DESCRIPTION Hand-held Display Unit Camera cable with 9 mm camera head RCA Cable Mirror Accessory Hook Accessory Magnet Accessory Storage Case Parts & Service: 020 8988 7400 / E-mail: Parts@clarkeinternational.com or Service@clarkeinternational.com... -
Page 11: Declaration Of Conformity
DECLARATION OF CONFORMITY Parts & Service: 020 8988 7400 / E-mail: Parts@clarkeinternational.com or Service@clarkeinternational.com...

Need help?
Do you have a question about the CIC2410 and is the answer not in the manual?
Questions and answers