Table of Contents
Advertisement
Quick Links
Advertisement
Table of Contents

Summary of Contents for Drucegrove DragonFly TFT20 Series
- Page 1 User Manual Document Version 1.4 23/11/2015...
-
Page 2: Table Of Contents
Contents Introduction ................................ 5 Drucegrove TFT Feature Comparison ........................8 DragonFly Driver Hardware and Operating System ....................9 DragonFly Display Settings ........................... 9 DragonFly Core Software and Configuration ....................... 10 DragonFly Boot Sequence ..........................10 Micro SD Card ..............................11 DragonFly System Installation .......................... - Page 3 Tutorial 13: Adding a Dynamic Image Element that updates based on Conditions ........... 88 Tutorial 14: Adding Weather Elements ........................95 Tutorial 15: Animating Elements based on Conditions ..................... 104 Tutorial 16: Adding a Video Element ........................110 Message Library ............................... 116 Drucegrove DragonFly User Manual 1.4 Page 3...
- Page 4 Phone: +44 (0)1992 650 486 (Select Option 3) This document explains the basics of the DragonFly hardware, how the DragonFly core software operates, and describes how the DragonFly can be set up and configured using the DragonFly Designer software. Drucegrove DragonFly User Manual 1.4 Page 4...
-
Page 5: Introduction
TFT20 series but boasts a more powerful processor with graphics accelerating and video decoding hardware, and a DVI / HDMI output. Drucegrove supply a separate open frame TFT screen and a HDMI to DVI cable for connecting the screen to the TFT500 Omni Driver. The screen sizes available range from 10.4” to 42”, in 4:3 standard, 16:9 wide... - Page 6 DVI or HDMI display, so if our standard range of sizes is not enough, choose another! For interfacing to your elevator, the Omni Driver OTIS connects to either the Drucegrove 2-Wire™ System, ® Serial Data, or with the addition of an IND059 input mode, non-proprietary binary / Gray / discrete signals.
- Page 7 DragonFly Open Frame TFT Screens for use with the TFT500 Screen Driver Drucegrove offer a standard range of three open frame industrial grade TFT displays to run from the TFT500 Omni Driver - a 10.4”, 15” or 19” screen with suitable mountings and either toughened glass or polycarbonate protection.
-
Page 8: Drucegrove Tft Feature Comparison
Runs on Windows CE operating system Battery backed, network synchronisable real time clock 2 discrete outputs for driving external LED arrows 2 addition general purpose outputs 4 general purpose inputs for triggering screen events Drucegrove DragonFly User Manual 1.4 Page 8... -
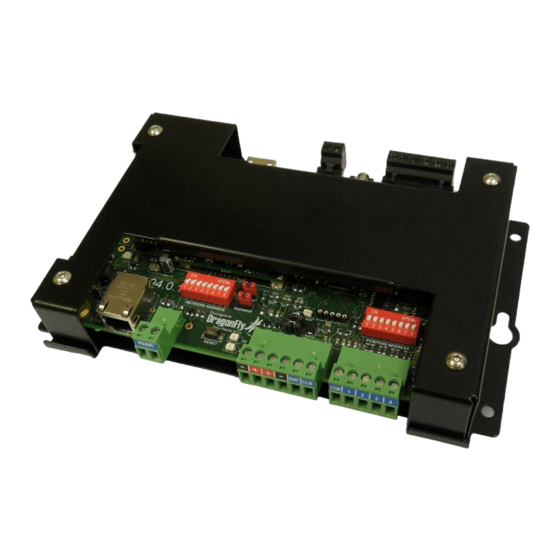
Page 9: Dragonfly Driver Hardware And Operating System
15” screen also has a resolution of 1024×768 pixels 19” screen has a resolution of 1280×1024 pixels Note: All DragonFly screens are driven at 16 bit colour depth (RGB 5-6-5) by default. Drucegrove DragonFly User Manual 1.4 Page 9... -
Page 10: Dragonfly Core Software And Configuration
If there is no micro SD card inserted, the Startup.exe software on the internal flash will not find “\Storage Card\Bin\DragonFly.exe”, and will show an error message on the screen. The unit will then automatically reboot itself after 2 minutes. Drucegrove DragonFly User Manual 1.4 Page 10... -
Page 11: Micro Sd Card
On the TFT500 the micro SD card socket is on the side, and there is a reset button between the RS485 terminal and the input terminals, which should be pressed to perform a reboot: micro SD Card Reset Button Drucegrove DragonFly User Manual 1.4 Page 11... -
Page 12: Dragonfly System Installation
For the most basic operation of displaying the elevator car position and direction, a DragonFly only needs to be connected to a Drucegrove 2-Wire bus. The 2-Wire bus will provide both power and data to the DragonFly driving circuitry. For a TFT20 series position indicator, this 2-Wire bus will also power the TFT screen. For the TFT500 Omni Driver, a separate external screen will be provided and this will have a 12V DC power supply which will need mains 110-230V AC input. - Page 13 The following diagram shows how a TFT500 with an external TFT screen positioned inside the elevator car should be connected back to a Drucegrove IND055 2-Wire controller. Note that a local 12V DC power supply requires a 110-230V AC input inside the elevator car:...
-
Page 14: Connecting To Multiple Elevators
“daisy chained” together. The maximum transmission distance of the RS485 is 4000 feet, but it is recommended that all IND079s be kept local to the TFT500, and any long distance runs be on the 2-Wire bus. Drucegrove DragonFly User Manual 1.4 Page 14... -
Page 15: Rs485 Network
Note: The RS485 wires are polarised so should be connected to each terminal block in the same orientation. Note: All RS485 wiring needs to be twisted pair. If there are untwisted sections, the network will not work. Drucegrove DragonFly User Manual 1.4 Page 15... -
Page 16: Ethernet Network
For certain features, managed Ethernet switches are recommended, and may need to be specially configured for IGMP traffic (see information on the Video Canvas for more information, or contact Drucegrove directly). The following diagram shows how a TFT024 should be networked from an elevator car back via a machine room to a... - Page 17 Ethernet 110-230V Extender AC Input CAT5 PC / Laptop IND055 Controller Interface 110-230V 110-230V AC Input AC Input Ethernet Inputs from 24V DC Switch Elevator Controller Building Management Room Machine Room Drucegrove DragonFly User Manual 1.4 Page 17...
-
Page 18: Dfx Layout And Xml Configuration Files
The input file contains settings for IND21 2-Wire compatibility (floor designation and message table), or input configuration for use with an IND059 binary/Gray/discrete input module. Drucegrove DragonFly User Manual 1.4 Page 18... -
Page 19: Manually Creating And Editing Xml Files
If Microsoft Notepad is used, ensure that the encoding is set to UTF-8 (8 bit Unicode Transformation Format) when the file is saved (this setting is next to the Save button on the Save As dialog). If UTF-8 is not used, the DragonFly software will fail to load the XML file. Drucegrove DragonFly User Manual 1.4 Page 19... - Page 20 Some elements and settings may have attribute settings (shown in red). The attribute name is followed by an equals character, and then the attribute value is placed inside quotation mark characters. Multiple attributes can be defined if necessary, separated by a space. Attributes do not require a closing tag. Drucegrove DragonFly User Manual 1.4 Page 20...
-
Page 21: Settings Xml File
When specified, this setting will limit the floor designation characters that can ValidFloorDesignations be displayed. If a floor designation is received, it will only be displayed if it exists in the comma separated list, or if this list is empty. Drucegrove DragonFly User Manual 1.4 Page 21... - Page 22 Setting this value to true forces the software to use the touch friendly menu, for cases where the RE2 is fitted to a 4.3”, 5.7” or 7” screen. Drucegrove DragonFly User Manual 1.4 Page 22...
-
Page 23: Network Settings
Ethernet network. All units and software on the network should be configured to use the same port, and 3683 is recommended as a standard Drucegrove default. Boolean value, true by default. Enables or disables the UDP receiver and transmitter, which is used to... -
Page 24: Video Settings
Integer value between -5000 and 5000 for left/right audio balance. AudioBalance Negative values are for left balance, positive values are for right balance. (Note: This setting will only be used if OverrideSettings is True) Drucegrove DragonFly User Manual 1.4 Page 24... -
Page 25: Identity Xml File
The Default Gateway of the unit on the Ethernet network. NetworkDefaultGateway This setting is ignored if DHCP is enabled. The DNS Server of the unit on the Ethernet network. NetworkDNSServer This setting is ignored if DHCP is enabled. Drucegrove DragonFly User Manual 1.4 Page 25... -
Page 26: Groups
If we consider the following identity file: <?xml version="1.0" encoding="UTF-8"?> <!-- Drucegrove DragonFly Identity File --> <!-- Copyright (C) 2015 Drucegrove Ltd --> <Identity> <IdentitySettings> <IndicatorType>TFT20</IndicatorType>... -
Page 27: Dragonfly Designer Software
The DragonFly Designer is a free utility, and does not require a licence or registration. It requires a PC with Microsoft Windows XP or later installed (Windows 7 or later is recommended), and the Microsoft .NET Framework 4.0. Drucegrove DragonFly User Manual 1.4 Page 27... -
Page 28: Dragonfly Layouts (Dfx Files)
These elements are all designed into the Designer and DragonFly core software. Additional elements may be added in future software updates. Please contact Drucegrove to request a new element. Note: Dynamic elements cannot be drawn directly on to the background; they must be drawn onto a canvas. -
Page 29: Static Background Image Layer
If a full screen background image is required, draw a Static Image over the entire layout. It will be placed on the background layer automatically behind any dynamic screen elements. Note: Static background shapes filled with a gradient will be dithered automatically for improved appearance. Drucegrove DragonFly User Manual 1.4 Page 29... -
Page 30: Element Canvas' Root Element Layers
H264 playback (rotated MPEG2 performance is not affected). The video element should not be overlapped by any other root element. For more information on using the Video element, refer to the Video Element section of this manual (page 35) Drucegrove DragonFly User Manual 1.4 Page 30... -
Page 31: Dynamic Sub Elements
The data can either be pushed to the feed over a LAN from a server, or pulled directly from an internet based RSS feed. Note: More elements will be made available, and will be fully documented in future versions of this document. Drucegrove DragonFly User Manual 1.4 Page 31... -
Page 32: Element Conditions
The intended next (lantern) direction, as sent by the IND055. Can be one of the following values: None Up Only Intended Next Direction Up Or Both Down Only Down Or Both Up Or Down Both Drucegrove DragonFly User Manual 1.4 Page 32... - Page 33 Can be one of the following values: January February March April May Month Of Year June July August September October November December Drucegrove DragonFly User Manual 1.4 Page 33...
- Page 34 The name of a variable to test needs to be entered between the brackets. As any of these values are selected, the list available operators will be changed accordingly (ie, greater than and less than operators will not be available for text based comparisons). Drucegrove DragonFly User Manual 1.4 Page 34...
-
Page 35: Video Element
Settings.xml file. A VideoSettings section needs to exist in the Settings file with a line to set the OverrideSettings setting to True, as shown below: <?xml version="1.0" encoding="UTF-8"?> <!-- Drucegrove TFT2X Indicator Layout File --> <!-- Copyright (C) 2012 Drucegrove Ltd --> <Layout>... - Page 36 Value between 0 and 10000. Zero will mute the AudioVolume 10000 audio, and 10000 is full volume. Value between -5000 and 5000 for left/right audio AudioBalance balance. Negative values are for left balance, positive values are for right balance. Drucegrove DragonFly User Manual 1.4 Page 36...
-
Page 37: Supported Video Formats
MJPEG Video performance may be drastically reduced if the Video canvas is smaller than the video resolution. H264 performance is drastically reduced if the display is rotated. For rotated displays, MPEG2 is recommended. Drucegrove DragonFly User Manual 1.4 Page 37... -
Page 38: Supported Audio Formats For Video
Container Container File or Network Stream The following table shows current container support: Video Format Software Demux (CPU) *MPEG-TS support only MPEG-TS * available on UDP protocol Drucegrove DragonFly User Manual 1.4 Page 38... -
Page 39: Supported Network Protocols For Video
UDP video, it sends a command to the IGMP Querier, telling it to send it any multicast data destined for the specified multicast IP Address. Drucegrove generally configure multicast video to be sent to 239.0.0.1 by default. Drucegrove DragonFly User Manual 1.4... -
Page 40: Configuring The Dragonfly For Live Network Video
The default value is 10000 (10 seconds). Note: If audio is present but not required to be output, use the noaudio flag for improved video performance. Drucegrove DragonFly User Manual 1.4 Page 40... -
Page 41: Dragonfly Variables
## Boolean Integer value representing the binary value of the GPIO GPIO##_BINARY_VALUE Integer at address ## Date and time after which the input states from address GPIO##_EXPIRE_TIME Date and Time ## are invalid Drucegrove DragonFly User Manual 1.4 Page 41... - Page 42 Current active car message image code Integer (0 to 255) LIFT##_LANDING_IMAGE_CODE Current active landing message image code Integer (0 to 255) LIFT##_EXPIRE_TIME Date and time after which the lift information is invalid Date and Time Drucegrove DragonFly User Manual 1.4 Page 42...
- Page 43 ## WEATHER_DAY##_ICON_INDEX Icon index (between 0 and 32) on day ## Integer WEATHER_EXPIRE_TIME Date and time after which the weather feed is invalid Date and Time Drucegrove DragonFly User Manual 1.4 Page 43...
- Page 44 Full status details for the DLR when it is disrupted Text TFL_DLR_DISRUPTED Boolean value for the disrupted status of the DLR Boolean TFL_EXPIRE_TIME Date and time after which the TfL feed is invalid Date and Time Drucegrove DragonFly User Manual 1.4 Page 44...
-
Page 45: Live Data Feeds
Peachtree","TRIPID":"4853908","VEHICLE":"1442"}] Note: It is possible to parse a web page’s HTML source as a text file, but be aware that the HTML structure of a web page is likely to change without warning. Drucegrove DragonFly User Manual 1.4 Page 45... - Page 46 “WEATHER_TITLE”. This would then mean that DragonFly layout elements can use or display the value of the weather title by referencing the “WEATHER_TITLE” variable. Note: It is possible to nest read actions. A read action will be performed on its parent’s resultant data. Drucegrove DragonFly User Manual 1.4 Page 46...
-
Page 47: Parser Arguments
If colons or semi colons need to be used as part of the string, they should be escaped by a back slash character (eg “\:”). If back slashes need to be used as part of the string, they should be escaped by another back slash character (eg “\\”). Drucegrove DragonFly User Manual 1.4 Page 47... - Page 48 Optional offset value for the month part of the time. Note: This may be positive or negative. AddYears Optional offset value for the year part of the time. Note: This may be positive or negative. Drucegrove DragonFly User Manual 1.4 Page 48...
-
Page 49: Source Url
Format Optional formatting of the resultant value. Can be one of the following values: None LowerCase UpperCase TitleCase SentenceCase Drucegrove DragonFly User Manual 1.4 Page 49... -
Page 50: Xml Read Actions
Optional instance of the element node defined by the Path. NameSpacePrefix Optional name of the namespace to use for the XML path. NameSpaceURL Optional URL of the namespace to use for the XML path. Drucegrove DragonFly User Manual 1.4 Page 50... -
Page 51: Text Read Actions
Optional instance of the text found between StartText and EndText. Contains Optional text value that the text found between StartText and EndText must contain. ContainsCaseSensitive Optional boolean value, false by default. Determines if the Contains test is case sensitive. Drucegrove DragonFly User Manual 1.4 Page 51... -
Page 52: Using The Dragonfly Designer
The layout is shown in the centre of the window. The layout view can be panned and zoomed using the mouse. Scrolling the mouse wheel zooms in and out on the mouse cursor, and clicking the middle mouse button resets the zoom level and view to bring the whole layout into view. Drucegrove DragonFly User Manual 1.4 Page 52... - Page 53 Elements can be selected by either clicking on them in the layout view or selecting them in the Layer panel. If we select all of the root elements inside the root Element Canvas elements and delete them, we can see the root level elements and the background layer. Drucegrove DragonFly User Manual 1.4 Page 53...
- Page 54 Close the template layout (without saving), and re-open it to recover all of the deleted elements. Restore the Properties panel, and zoom in on the Element Canvas that contains the arrow and floor designation: Drucegrove DragonFly User Manual 1.4 Page 54...
- Page 55 Properties can only be configured when a single element is selected. When a group of elements are selected, only the size and position of the group can be configured. Drucegrove DragonFly User Manual 1.4 Page 55...
-
Page 56: Tutorial 2: Previewing The Layout
Drucegrove DragonFly User Manual 1.4 Page 56... - Page 57 A wide range of variables can be configured for a custom preview. If any variables are not overridden in a custom preview, then the default values will be adopted by these variables. Override the floor position and direction variables, and set the floor designation to 1 and the car direction to Down: Drucegrove DragonFly User Manual 1.4 Page 57...
- Page 58 Note that the car direction arrow now points down, and the floor designation element shows 1 rather than LG. Use the preview drop down menu in the Preview toolbar to switch between previews. Drucegrove DragonFly User Manual 1.4 Page 58...
-
Page 59: Tutorial 3: Creating An Sd Card
Note that the More DragonFly Settings... link may be unavailable on this dialog. This will occur if the layout is an unsaved template. To make this link available, cancel the dialog and save the layout to a *.dfx file. Drucegrove DragonFly User Manual 1.4 Page 59... - Page 60 Ensure a micro SD card is inserted into the drive slot, and then click the Create button. The micro SD card will be formatted and all software and files copied to it automatically. Once it has been created, simply insert it into a DragonFly unit and reboot it. Drucegrove DragonFly User Manual 1.4 Page 60...
-
Page 61: Tutorial 4: Creating An Automatic Update Usb Drive
Click the Create button. The micro SD card will be formatted and all software and files copied to it automatically. Once it has been created, simply insert it into a DragonFly unit and reboot it. Note: Only units that have the correct screen resolution for the current layout will be updated. Drucegrove DragonFly User Manual 1.4 Page 61... -
Page 62: Tutorial 5: Broadcasting A Layout Over A Lan
The following dialog will be shown: Click the Broadcast button to send the layout to all DragonFly units on the network. Note: Only units that have the correct screen resolution for the current layout will be updated. Drucegrove DragonFly User Manual 1.4 Page 62... -
Page 63: Tutorial 6: Creating A New Layout
To create a new layout from scratch, click on New under the File menu: The following dialog will be shown: Enter DemoLayout as the layout name, and ensure the layout size is 1024×768. Click on OK to create the layout. Drucegrove DragonFly User Manual 1.4 Page 63... - Page 64 Click on the Elevator Floor Designation in the left hand Toolbox panel. The following message will be displayed: Sub elements can only be drawn inside a root Element Canvas, so we need to add one of these before we can add the floor designation element. Drucegrove DragonFly User Manual 1.4 Page 64...
- Page 65 The element canvas has been highlighted in the toolbox, so click on it to add it: Draw the element canvas in a position as shown below: Drucegrove DragonFly User Manual 1.4 Page 65...
- Page 66 We can now click on the Elevator Floor Designation sub element in the toolbox: Draw the floor designation in a position as shown below: Drucegrove DragonFly User Manual 1.4 Page 66...
- Page 67 Next click on the Elevator Arrow sub element in the toolbox: Draw the arrow in a position as shown below: Drucegrove DragonFly User Manual 1.4 Page 67...
-
Page 68: Tutorial 7: Setting A Background Image
Select an image file to use as the background. For this tutorial we’ll use the Desert.jpg image which can be found under the Sample Pictures folder in the Pictures directory on most Windows based PCs: Drucegrove DragonFly User Manual 1.4 Page 68... - Page 69 0, the Width property is 1024 and the Height property is 768: Once drawn, the image can be changed by clicking on the “...” button on the Image property, or by double clicking on the image in the layout view. Drucegrove DragonFly User Manual 1.4 Page 69...
-
Page 70: Tutorial 8: Drawing On The Background Layer
Background Colour to something non-transparent: Alternatively we could draw our own background behind the element canvas. This is a slightly more flexible method, and allows the background to be made semi-transparent. Drucegrove DragonFly User Manual 1.4 Page 70... - Page 71 Set the element canvas’s Background Colour back to transparent, and then click on Static Rectangle under the Background Drawing Tools in the toolbox: Draw the rectangle in a position as shown below: Drucegrove DragonFly User Manual 1.4 Page 71...
- Page 72 (so is always rear-most). The static background drawing tools can only be drawn to this Background layer, and the Background layer cannot be moved. Change the Opacity property to 60 to make the rectangle 60% translucent: Drucegrove DragonFly User Manual 1.4 Page 72...
- Page 73 Finally, change the Corner Radius property to 20 to give the rectangle rounded corners: Drucegrove DragonFly User Manual 1.4 Page 73...
-
Page 74: Tutorial 9: Adding And Configuring Screen Elements
Add another Element Canvas to the layout. Draw it in the position shown below: Click on the Analog Clock element in the toolbox. The element canvases will be highlighted to show where the clock can be drawn: Drucegrove DragonFly User Manual 1.4 Page 74... - Page 75 Draw the analog clock into the element canvas that we’ve just created, in the position shown below: Next, click on the Dynamic Text Ticker root element: Drucegrove DragonFly User Manual 1.4 Page 75...
- Page 76 Note that the dynamic ticker text is a root level element, so it does not need to be positioned inside an element canvas. We can therefore draw it in the position shown below: Drucegrove DragonFly User Manual 1.4 Page 76...
-
Page 77: Tutorial 10: Adding A Dynamic Text Element
“static” text over the top of dynamically changing elements if desired. First, add an Element Canvas in the position shown below: Then click on the Dynamic Text element in the toolbox. The following dialog will be shown: Drucegrove DragonFly User Manual 1.4 Page 77... - Page 78 The “Hello World” text will be drawn on the layout as shown below: This text will not change, but it can be positioned on top of dynamically changing elements (unlike the Static Text element which is placed on the background layer). Drucegrove DragonFly User Manual 1.4 Page 78...
- Page 79 The font family and style can also be configured here, as well as the text’s fill colour and opacity. The text can also be programmed to show or hide itself based on conditions (Conditional Visibility), or move around its element canvas based on conditions (Conditional Offset). Drucegrove DragonFly User Manual 1.4 Page 79...
-
Page 80: Tutorial 11: Configuring A Dynamic Text Element To Update Based On Conditions
Click on the “...” button on the Dynamic Text element’s Text property, or double click on the Dynamic Text element in the layout view to display the following dialog: Change the category in the drop down box at the top of the dialog from Dynamic Text to Conditional Text: Drucegrove DragonFly User Manual 1.4 Page 80... - Page 81 “Ground Floor”. Text can be split into multiple lines if desired (and the line spacing is configurable in the Dynamic Text element’s properties), so insert a carriage return between “Ground” and “Floor” to split it over two lines as follows: Drucegrove DragonFly User Manual 1.4 Page 81...
- Page 82 Click on the + Or button to add a second condition: Set the second condition to “If Current Floor Designation = 1” and then click on final drop down box to enter a text value “First Floor”, again split over two lines: Drucegrove DragonFly User Manual 1.4 Page 82...
- Page 83 If we now create a micro SD card (File → Create SD Card...), and insert the SD card into a DragonFly TFT500 with an appropriate TFT screen (10.4” 4:3 or 15” 4:3), then the following will be displayed on the screen: Drucegrove DragonFly User Manual 1.4 Page 83...
-
Page 84: Tutorial 12: Configuring A Dynamic Text Element To Act As A Timed Text Slideshow
Change the category in the drop down box at the top of the dialog to Text Slide Show: Click on the + Add button to add a new slide: Drucegrove DragonFly User Manual 1.4 Page 84... - Page 85 Click off the text box to collapse it, and then click on the + Add button to add a second slide: Set the text of this second slide to “My Message 2” as shown below: Drucegrove DragonFly User Manual 1.4 Page 85...
- Page 86 Now the text value “My Message 3” will be shown for 1½ seconds, and the other text values will still be shown for the default 10 second duration (or whatever the Dynamic Text element’s Slide Duration property is set to). Drucegrove DragonFly User Manual 1.4 Page 86...
- Page 87 British/European elevators that start at G/0 for example), then the floor designations will not track the floor levels. For the next tutorial, press Cancel on the Dynamic Text dialog to restore this Dynamic Text element back to Conditional Text. Drucegrove DragonFly User Manual 1.4 Page 87...
-
Page 88: Tutorial 13: Adding A Dynamic Image Element That Updates Based On Conditions
First, add an Element Canvas in the position shown below: Then click on the Dynamic Image / Slide Show element in the toolbox. The following dialog will be shown: Drucegrove DragonFly User Manual 1.4 Page 88... - Page 89 Click Open, and the images will be added. The drop down in the top left corner is set to Image Slide Show by default. This element will therefore show each image one after another in an endless loop. Drucegrove DragonFly User Manual 1.4 Page 89...
- Page 90 7½ seconds. All other images will be shown for the default time (which is 10 seconds by default). We can also configure conditions for slide images. As an example, click on the Slide Conditions tab and then click on the + Only Display If button: Drucegrove DragonFly User Manual 1.4 Page 90...
- Page 91 Set the second condition to “Only Display If Time > 12:00”: The second image (in this case the koala) will now only be included in the slideshow if the elevator is travelling downwards, and it is the afternoon. Drucegrove DragonFly User Manual 1.4 Page 91...
- Page 92 For a conditional image element, the first image will be shown by default. The conditions set up for each subsequent image will then be evaluated, and the first image that has all of its conditions met will be displayed. Drucegrove DragonFly User Manual 1.4 Page 92...
- Page 93 This dynamic image element will now show the jelly fish by default, and will change to the koala when the elevator car is on the ground floor, and the penguins when the elevator car is on the first floor. Drucegrove DragonFly User Manual 1.4 Page 93...
- Page 94 If we now create a micro SD card (File → Create SD Card...), and insert the SD card into a DragonFly TFT500 with an appropriate TFT screen (10.4” 4:3 or 15” 4:3), then the following will be displayed on the screen: Drucegrove DragonFly User Manual 1.4 Page 94...
-
Page 95: Tutorial 14: Adding Weather Elements
Weather Temperature Weather Symbol Dynamic Text We’ll create a new 1024×768 layout called WeatherDemo for this tutorial: Add an Element Canvas to the layout in the position shown below: Drucegrove DragonFly User Manual 1.4 Page 95... - Page 96 Zoom in for a closer look. Centre the mouse cursor on the Element Canvas and scroll the mouse wheel upwards: Click the Weather Symbol element in the toolbox. The element canvases will be highlighted to show where the symbol can be drawn: Drucegrove DragonFly User Manual 1.4 Page 96...
- Page 97 This also means that it is possible to change the colours of the symbol via its properties. Next click on the Weather Temperature element and draw it in the position shown below: Drucegrove DragonFly User Manual 1.4 Page 97...
- Page 98 Change the Weather Temperature’s Temperature Display property to Current Minimum and Maximum: This has added the maximum and minimum temperatures to the element: Drucegrove DragonFly User Manual 1.4 Page 98...
- Page 99 Change the Sub Temperature Font Size property to a value of 30: And then change the Horizontal Alignment property to Left: Drucegrove DragonFly User Manual 1.4 Page 99...
- Page 100 This aligns all of the temperatures to the left of the element as shown below: Next click on the Dynamic Text element: Drucegrove DragonFly User Manual 1.4 Page 100...
- Page 101 The following dialog is displayed. Select the Dynamically updated data field option, and leave the Data Field on the default Weather Description value: Draw the Dynamic Text element in the position shown below: Drucegrove DragonFly User Manual 1.4 Page 101...
- Page 102 Change the Font Size property to 30: And change the Horizontal Alignment property to Left: Drucegrove DragonFly User Manual 1.4 Page 102...
- Page 103 These elements will automatically update themselves on the DragonFly from the following variables: WEATHER_CURRENT_ICON_INDEX WEATHER_CURRENT_TEMP_C WEATHER_CURRENT_TEMP_MAX_C WEATHER_CURRENT_TEMP_MIN_C WEATHER_CURRENT_DESCRIPTION It is possible to show the temperatures in Fahrenheit rather than Celsius by changing its Unit Scale property. Drucegrove DragonFly User Manual 1.4 Page 103...
-
Page 104: Tutorial 15: Animating Elements Based On Conditions
Add an Elevator Floor Designation and Elevator Arrow to this element canvas, as shown below: Draw a second Element Canvas over the large white square, and then select the Dynamic Text tool: Drucegrove DragonFly User Manual 1.4 Page 104... - Page 105 The following dialog will be displayed. Enter the text “Lower Ground Floor” and press OK: Draw the text in the position shown below: Add four more Dynamic Text elements for “Ground Floor”, “First Floor”, “Second Floor” and “Third Floor” as shown below: Drucegrove DragonFly User Manual 1.4 Page 105...
- Page 106 Select the Dynamic Rectangle sub element tool: Draw the rectangle in the position shown below, and change its Fill Colour to a pale yellow: Drucegrove DragonFly User Manual 1.4 Page 106...
- Page 107 Top property, and then delete this extra rectangle). Click on the “...” button on the Top Offset property. Drucegrove DragonFly User Manual 1.4 Page 107...
- Page 108 If we entered a positive value here, the rectangle would move downwards and disappear off the screen. Press OK, and the following conditions will be generated automatically: Press OK to return to the layout view. Drucegrove DragonFly User Manual 1.4 Page 108...
- Page 109 If we now create a micro SD card (File → Create SD Card...), and insert the SD card into a DragonFly TFT500 with an appropriate TFT screen (10.4” 4:3 or 15” 4:3), then the following will be displayed on the screen: Drucegrove DragonFly User Manual 1.4 Page 109...
-
Page 110: Tutorial 16: Adding A Video Element
This means that it cannot be drawn on top of, and it is recommended that Element Canvas elements not be placed on top of a Video element. Draw the Video on to the layout as shown below: Drucegrove DragonFly User Manual 1.4 Page 110... - Page 111 If a local video file on the micro SD card is to be used, then enter the file path of the video file as follows: Note that the micro SD card directory is “\Storage Card\” on the RE2 based TFT20 Series and TFT500 hardware. Drucegrove DragonFly User Manual 1.4 Page 111...
- Page 112 Change the category from Fixed URL to Conditional URL in the drop down in the top left corner of the dialog: We can now set up conditions for the video URL by clicking on the + If button: Drucegrove DragonFly User Manual 1.4 Page 112...
- Page 113 URL at the bottom of the dialog. This default URL will still have our camera feed’s URL in it, so we need to change it. Click on the default URL at the bottom of the dialog: Delete it so that the text box is empty as shown below: Drucegrove DragonFly User Manual 1.4 Page 113...
- Page 114 Under the video element’s properties, tick the Hide If No Video property as shown below: Drucegrove DragonFly User Manual 1.4 Page 114...
- Page 115 TFT screen (10.4” 4:3 or 15” 4:3), then the following will be displayed on the screen when the Alarm Acknowledged message changes state (for example, toggling message image code 255 on a 2-Wire controller): normal operation alarm call is acknowledged Drucegrove DragonFly User Manual 1.4 Page 115...
-
Page 116: Message Library
The message libraries are stored in the “\Storage Card\Data\msglib.dat” file on the micro SD Card. If this file is not present, the image library will not be available. The default library consists of the following images: Drucegrove DragonFly User Manual 1.4 Page 116... - Page 117 Drucegrove DragonFly User Manual 1.4 Page 117...
- Page 118 Drucegrove DragonFly User Manual 1.4 Page 118...
- Page 119 (text is configured via the IND55 controller) Drucegrove DragonFly User Manual 1.4 Page 119...
Need help?
Do you have a question about the DragonFly TFT20 Series and is the answer not in the manual?
Questions and answers