
Summary of Contents for Ops-Core SOTR
- Page 1 SOTR Special Operations Tactical Respirator OPERATOR’S MANUAL FOR INDIVIDUAL RESPIRATORY PROTECTION © OPS-CORE 2018 OMM G055-1000 REV. B...
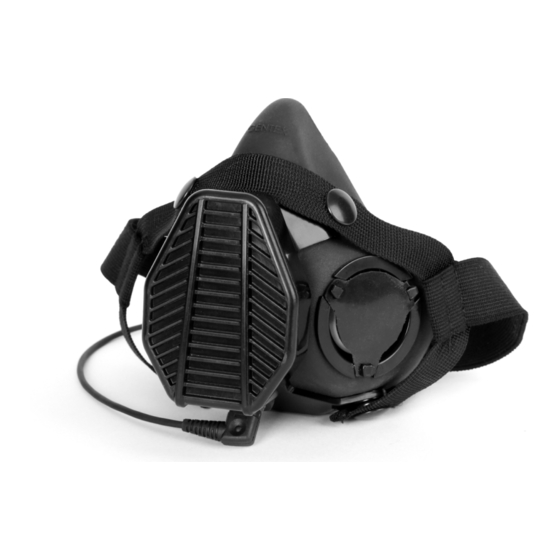
- Page 2 G055-1000-01 SOTR without microphone and communications cable G055-1000-03 SOTR KIT INCLUDES: (1) SOTR, (2) Particulate Filters, (1) Head Harness, (1) Helmet Harness, (1) Communications Cable*,(1) Microphone* *Communications Cable and Microphone are only included with the Microphone Version. Facepiece Yoke Harness...
-
Page 3: Harness Setup
HARNESS SETUP HARNESS CONFIGURATIONS The SOTR comes with both a Head Harness and Helmet Harness. Install one or the other, depending on how you choose to wear the SOTR. TO ATTACH HARNESS Snap the harness onto the mask. Start with one end and work your way around. - Page 4 Don the helmet and fasten the chinstrap as shown. REPOSITION CHIN STRAP Slide the fastened helmet chin strap to below the chin as shown. POSITION SOTR ON FACE While extending the Helmet Harness straps, position the SOTR on your face as shown.
- Page 5 CHECK FACE SEAL Check seal by plugging inhalation opening (filter not installed yet) and attempting to take a deep breath. Mask should collapse uniformly on face. If necessary, adjust placement of SOTR and/or Velcro straps accordingly to ensure seal (repeat steps 3-6).
- Page 6 Top Strap crown of head. Nape Strap POSITION SOTR ON FACE While letting the SOTR hang, position the mask on your face and grab the nape straps as shown. PULL STRAPS AROUND HELMET Uniformly pull the Velcro nape straps around the nape...
- Page 7 Check seal by plugging inhalation opening (filter not installed yet) and attempting to take a deep breath. Mask should collapse uniformly on face. If necessary, adjust placement of SOTR and/or Velcro nape straps accordingly to ensure seal (repeat steps 1-5).
-
Page 8: Filter Installation
FILTER INSTALLATION FILTER INSTALLATION To install the filter, align the tabs to the corresponding slot openings on the back of the filter and rotate the filter 80° clockwise until the filter is in the vertical position. Rotate 80° Clockwise FILTER REMOVAL To remove, rotate the filter 80°... -
Page 9: Maintenance Schedule
Clean the Velcro of dust and dirt by using pressurized air. Visually check the snaps, exhalation valves, inhalation valve, and filter gasket for signs of damage. Visually check the SOTR facepiece for any signs of damage. Check that both harnesses work properly and do not have any damage. -
Page 10: Replacement Parts
REPLACEMENT PARTS Microphone* Facepiece Filter Yoke (Filter) Gasket Inhalation Flapper Exhalation Valve Communications Lock Washer* Cable* Nut* Helmet Harness Head Harness *Available only on communications version. - Page 11 REPLACEMENT PARTS Qty Needed Part Name Part Number per Mask Communications Cable* GW2003-01 Microphone* GW2002-01 Lock Washer* G055-1035-01 Nut* GW1996-01 Head Harness G055-1024-02 Helmet Harness G055-1024-01 Exhalation Valve G055-1023-01 Inhalation Flapper G055-1033-01 Filter Gasket G055-1004-01 Particulate Filter G055-1005-02 Communications Yoke Assembly* G055-1003-01 Non-Comm.
- Page 12 REPLACEMENT PARTS INHALATION FLAPPER REPLACEMENT REMOVE OLD INHALATION FLAPPER While the filter is uninstalled from the front of the mask, use one finger to gently push the inhalation flapper into the mask. Gently pull the lifted portion of the flapper until it becomes free. Discard the flapper accordingly.
- Page 13 Continue to pull the facepiece and push the valve until the valve is free. Dispose of the exhalation valve according to the same rules and regulations as the SOTR filter. NOTE: Always replace both exhalation valves at the same time to ensure your mask will function properly.
- Page 14 REPLACEMENT PARTS MICROPHONE & LOCK WASHER REPLACEMENT DISASSEMBLE MICROPHONE & LOCK WASHER Unscrew the plastic nut at the base of the microphone on the outside of the yoke while maintaining positive control of the nut and lock washer. Then pull the microphone away from the facepiece to remove. Microphone Microphone Image...
- Page 15 REPLACEMENT PARTS FILTER GASKET REPLACEMENT REMOVE OLD FILTER GASKET Gently peel off the used orange gasket and discard according to all state, federal, and unit regulations. Used Filter Gasket INSTALL NEW FILTER GASKET Place the new gasket onto the Yoke Assembly. Be sure that all three filter lock tabs are visible. Filter Lock Tab Filter Gasket...
- Page 16 REPLACEMENT PARTS YOKE ASSEMBLY REPLACEMENT REMOVE EXISTING YOKE ASSEMBLY First, disassemble the microphone by following step 1 on page 14. Next, remove the inhalation flapper by following step 1 on page 12 to avoid damaging it. Lastly, starting on one inside corner, peel the facepiece off of the inside of the yoke until it is free.
- Page 17 REPLACEMENT PARTS INSPECT THE MASK AND REINSTALL MICROPHONE & INHALATION FLAPPER Inspect and verify that the facepiece is flush with the yoke assembly, reinstall the inhalation valve flapper (see step 2 on page 12), and ensure the exhalation valves are properly seated into the mask with proper orientation as shown in step 2 on page 13.
-
Page 18: Operator Notes
OPERATOR NOTES... -
Page 19: Warranty
WARRANTY Unless an individual product is covered by a separately issued warranty, Gentex warrants that all ballistic helmet shells will be free from defects in material or workmanship under normal use and service for a period of five (5) years from the date of delivery. Unless an individual product is covered by a separately issued warranty, Gentex warrants that all helmet components, accessories, peripherals, and parts will be free from defects in material or workmanship under normal use and service for a period one (1) year from the date of delivery.
Need help?
Do you have a question about the SOTR and is the answer not in the manual?
Questions and answers