
Subscribe to Our Youtube Channel
Related Manuals for Master Chef 043-2338-4


Summary of Contents for Master Chef 043-2338-4
- Page 1 Bottom-load Water Dispenser Model No. 043-2338-4 FOR CUSTOMER SERVICE: Call toll-free helpline: 1-855-803-9313...
- Page 3 DIRECTORY PARTS LIST SAFETY PRECAUTIONS GETTING STARTED DISPENSING WATER TROUBLESHOOTING CLEANING MACHINE INSTALLATION LIMITED WARRANTY...
-
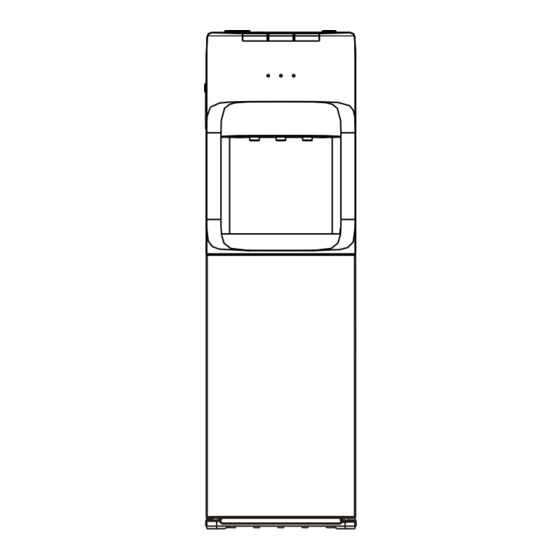
Page 4: Parts List
PARTS LIST PART NAME PART NAME Top Cover Room Temp. Water Faucet Button for Cold Water Hot Water Faucet Button for Room Tamp. Water Water Collector Hea ng Switch Button for Hot Water Cooling Switch Water Shortage Pilot Lamp Power Supply Cord Heating Pilot Lamp Cooling Pilot Lamp Hot Water Outlet... -
Page 5: Safety Precautions
SAFETY PRECAUTIONS To reduce risk of injury and property damage, user must read this en re guide before assembling, installing & opera ng dispenser. Failure to execute the instruc ons in this manual can cause personal injury or property damage. This product dispenses water at above 176 F. -
Page 6: Getting Started
Service should be performed only by a cer fied technician. Warning: Do not damage the refrigerant circuit. The water cooler shall plug into a ground fault circuit interrupter (GFCI) receptacle. This appliance can be used by children aged from 8 years and above if they are supervised or instructed on how to properly use the water dispenser understanding poten al hazards. - Page 7 Install water bo le 19 L Bo le 1. Open cabinet door. 2. Place probe assembly on probe hanger. 3. Place fresh bo le outside of cabinet. 4. Remove en re plas c cap from top of bo le. 5. Clean outside of new bo le with a cloth. 6.
-
Page 8: Dispensing Water
DISPENSING WATER This unit has been tested and sani zed prior to packing and shipping. During transit, dust and odors can accumulate in the tank and lines. Dispense and dispose at least 1 L of water prior to drinking any water. Dispensing Cold Water A er setup, it will take up to 1 hour to get water to maximum cold temperature. -
Page 9: Troubleshooting
TROUBLE SHOOTING Water is leaking. Unplug dispenser, remove bo le and replace it. No water is coming from the spout. Make sure the bo le is not empty. If empty, replace it. Make sure to completely depress the push bu on controls. Cold water is not cold. -
Page 10: Machine Installation
A en on: 1) Cleaning must be performed by someone with experience or an authorized service agent. 2) The dispenser heats water to a temperature of approximately 185 F. It can cause severe burns. Please operate it carefully. 3. Sani zing This machine should be sani zed with a disinfectant and then cleaned with water every three months. -
Page 11: Limited Warranty
LIMITED WARRANTY 1-Year Limited Warranty This product carries a one (1) year warranty against defects in workmanship and materials. If found defective, return to place of purchase, with proof of purchase. This product is not guaranteed against wear, misuse and/or abuse. - Page 12 Imported by Trileaf Distribution Trifeuil Toronto, Canada M4S 2B8...
- Page 13 GUIDE D'UTILISATION Refroidisseur d'eau à chargement inférieur N° de modèle : 043-2338-4 VEUILLEZ LIRE ATTENTIVEMENT CE GUIDE AVANT D'UTILISER CET APPAREIL. SERVICE À LA CLIENTÈLE : sans frais 1-855-803-9313...
- Page 15 TABLE DES MATIÈRES LISTE DES PIÈCES CONSIGNES DE SÉCURITÉ PREMIERS PAS DISTRIBUTION DE L'EAU DÉPANNAGE NETTOYAGE INSTALLATION DE L'APPAREIL GARANTIE LIMIT E É...
-
Page 16: Liste Des Pièces
LISTE DES PIÈCES (AVANT) (ARRIÈRE) NOM DES PIÈCES NOM DES PIÈCES Couvercle supérieur Robinet d'eau tempérée Bouton d'eau froide Robinet d'eau chaude Bouton d'eau tempérée Bac de récupéra on de l'eau Bouton de chauffe Bouton d'eau chaude Voyant du manque d'eau Bouton de refroidissement Voyant d'eau chaude Cordon d'alimenta on... -
Page 17: Consignes De Sécurité
CONSIGNES DE SÉCURITÉ AVERTISSEMENT Pour réduire le risque de blessure et de dommages matériels, il convient de lire le présent guide dans son intégralité avant d'assembler, d'installer et d'u liser le refroidisseur. Le non-respect des consignes pourrait causer des blessures ou des dommages matériels. -
Page 18: Premiers Pas
Toute répara on doit être effectuée par un technicien agréé uniquement. Aver ssement : N'endommagez pas le circuit du réfrigérateur. Le refroidisseur d'eau doit être relié à un disjoncteur différen el. Cet appareil peut être u lisé par des enfants âgés de 8 ans et plus, s'ils sont surveillés ou connaissent son fonc onnement et en comprennent les risques inhérents. - Page 19 Installation de la bouteille d'eau Bouteille de 19 L 1. Ouvrez la porte de l'armoire. 2. Placez l'assemblage du percuteur sur le support Tête du percuteur. Bague Placez une nouvelle bouteille d'eau à l'extérieur de l'armoire. Re rez en èrement le bouchon en plas que situé...
- Page 20 DISTRIBUTION DE L'EAU Cet appareil a été vérifié et désinfecté avant d'être emballé et expédié. Pendant le transport, il est possible que de la poussière et des odeurs se soient répandues dans le réservoir et les tuyaux. Faites couler et jetez au moins 1 L d'eau avant de boire l'eau de la bouteille.
-
Page 21: Dépannage
DÉPANNAGE De l'eau fuit. Débranchez le refroidisseur, re rez la bouteille et remplacez-la. L'eau ne s'écoule pas. Vérifiez que la bouteille n'est pas vide. Si tel est le cas, remplacez-la. Assurez-vous d'enfoncer complètement les boutons. L'eau froide n'est pas froide. Après l'installa on, il faut compter jusqu'à... -
Page 22: Installation De L'appareil
A en on : 1) Le ne oyage doit être effectué par une personne expérimentée ou un représentant agréé. 2) L'appareil chauffe l'eau à une température d'environ 185 °F (85 °C), pouvant causer de graves brûlures. Veuillez l'u liser avec prudence. 3. - Page 23 GARANTIE LIMIT E É Garantie limitée d’un (1) an Cet article comprend une garantie d’un (1) an contre les défauts de fabrication et de matériaux. Si l'article est défectueux, retournez-le au lieu d'achat avec la preuve d'achat. Cet article n’est pas garanti contre l’usure causé par un usage abusif ou inapproprié.
- Page 24 Importé par Trileaf Distribution Trifeuil, Toronto, Canada M4S 2B8...
Need help?
Do you have a question about the 043-2338-4 and is the answer not in the manual?
Questions and answers
Bonjour, l'eau froide, chaude et tiède ne sort pas. Pouvez-vous aider. Est-ce que vous pouvez m'envoyer une vidéo pour faire le nettoyage complet.
If cold, hot, and lukewarm water are not coming out of the Master Chef 043-2338-4, follow these steps:
1. Check the Bottle: A blinking light indicates the water bottle is empty. Replace the bottle promptly. Do not use the dispenser when the light is blinking to avoid overheating.
2. Verify Power Supply:
- Ensure the dispenser is plugged into a grounded outlet.
- Do not turn the machine on until 3 minutes after switching it off.
3. Inspect Tubes and Cables: Make sure all hoses and cables are correctly connected.
4. Clear Ice Blockage: If the machine is frozen, turn off the cooling switch and wait 4 hours before turning it back on.
5. Wait for Heating: After installation, hot water takes 15–20 minutes to become available.
If the issue continues after these steps, servicing may be needed.
This answer is automatically generated
I put a bottle of water in , plugged in the machine. Water began pouring out of little white door button, I assume for the door.
If water is leaking, unplug the dispenser, remove the bottle, and replace it with a new one.
This answer is automatically generated
Le voyant lumineux vert ne vessels de clignoter.
The green light on the Master Chef 043-2338-4 is not blinking because the water bottle is not empty. The light only blinks to indicate that the bottle is empty and needs to be replaced.
This answer is automatically generated
The pump doesn’t seem to be drawing water…. How do you prime the pump
To prime the pump for the Master Chef 043-2338-4 water dispenser, follow these steps:
1. Open the cabinet door and place a new water bottle outside the dispenser.
2. Remove the plastic cap from the bottle and clean the exterior with a cloth.
3. Insert the probe into the bottle and slide the locking ring until you hear a click.
4. Push the probe head down until the tube reaches the bottom of the bottle.
5. Close the cabinet door and dispense water from each faucet until water flows steadily.
This ensures the pump is primed and ready for use.
This answer is automatically generated
What is the part number for the heater element please.
Where can I get a new 90degree fitting to connect the hose to the head on top of the bottle?
Can I buy parts for this model & where?
HOW TO REMOVE THE ANTI LEAK BOTTLE SUPPORT COLLAR
HOW DO I REMOVE THE Anti-leak bottle SUPPORT COLLAR
Can you turn off the hot water?