Table of Contents
Advertisement
Advertisement
Table of Contents

Summary of Contents for Instant Pot Ace
- Page 1 User Manual Free Recipe App...
- Page 2 Welcome to the World of Thank you for selecting an appliance from the Instant Brands family! ™ Our vision is to provide you with the right tools to enhance your food preparation experience. Our appliances are designed to save you time, replace a number of kitchen devices, and prepare healthy and tasty meals in a convenient and dependable way.
-
Page 3: Table Of Contents
Table of Contents Important Safeguards What’s Included Product Overview Product Specifications Control Panel Blending Programs Guidelines Getting Started Blending Programs Manual Blending Blending Dry Ingredients Cold Blending Hot Blending Food Tamping Non-Dairy Milk Making Rice Blending Tips Care & Cleaning Pulse Cleaning Deep Cleaning Troubleshooting... -
Page 4: Important Safeguards
IMPORTANT SAFEGUARDS When using electrical appliances, basic safety precautions should always be followed, including the following: READ ALL INSTRUCTIONS. Do not touch hot surfaces. Handle with care and always use handle on side for carrying. To protect against electrical shock, fire, or personal CAUTION injury, do not immerse power cord, plug, or blender base in water or other liquid. - Page 5 IMPORTANT SAFEGUARDS 11. Do not place the appliance on or in close proximity to a hot gas or electric burner, or a heated oven; heat from an external source will damage the appliance. 12. Extreme caution must be used when moving the appliance containing hot liquids.
- Page 6 IMPORTANT SAFEGUARDS 22. Do not tamper with any of the safety mechanisms. 23. Do not use unit in electric systems other than 120V~60Hz for North America. Do not use with power converters or adapters. 24. Always operate blender with lid in place. The lid and/or lid cap should only be removed when the blender is OFF or Paused, in order to add ingredients to the pitcher or use the food tamper.
-
Page 7: What's Included
What’s Included Before using your new Instant Pot Ace, please remove all items from the box and read over all instructions carefully. Glass Pitcher Base 150 mL / 5 oz Food Tamper Cleaning Brush Measuring Cup Strainer Bag Food Safe Bag with Drawstring... -
Page 8: Product Overview
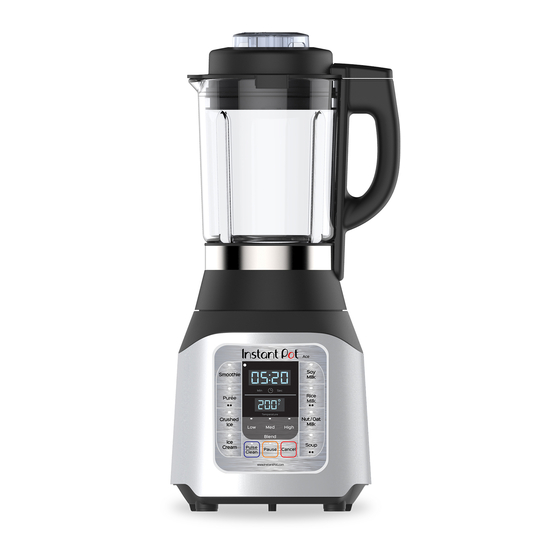
Blade Coupler Position Indicator Blender Base Real-Time Cooking Temperature Display Temperature Control Panel Non-Slip Foot Pads Product Specifications Model: Ace 60 700W Blending 120V ~ 60Hz 60 Ounces 11.7 lb in: 19.2H x 9.2W 600W Heating 1.75 Litres 5.3 kg... -
Page 9: Control Panel
Control Panel The control panel on your Instant Pot Ace is comprised of an LED display, Manual Blending Keys, Hot & Cold Blending Programs keys, and Control keys. Temperature Cold Blending Programs Smoothie Crushed Ice Blending Ice Cream Program keys... - Page 10 Manual Blending Keys Low / Med / High: 3 manual blending speeds Within 5 seconds, blender will beep 3 times and begin blending at the selected speed. Temperature: Fahrenheit & Celsius To change the displayed temperature from °F to °C: 1.
-
Page 11: Blending Programs Guidelines
Blending Programs Guidelines Programs Time Foods (Minutes : Seconds) Fresh or frozen fruits, berries, Smoothie 1:38 seeds, yogurt & more Ice Cream 1:20 Frozen fruits or berries, liquid Crushed Ice 0:30 Designed to crush ice Almond, oat, cashew, pumpkin Nut / Oat Milk 4:36 seed, flax, hazelnut, hemp Hard vegetables –... -
Page 12: Getting Started
Getting Started Before using your Instant Pot Ace, clean the pitcher and lid using the following steps. Unbox Cold 1750 Soup 1500 1400 1250 1200 1000 1000 Temperature Remove all packaging material from in and around the blender. Read Material... - Page 13 Getting Started Fill the Pitcher with Water Turn the lid counter-clockwise and lift to remove the lid from the pitcher. When the lid is removed from the pitcher the display will indicate "Lid". When the pitcher is removed from the blender base the display will remain blank.
- Page 14 Getting Started Select Program Press Pulse/Clean. The blender will run 4 cycles of blending at high speed for 10 seconds, pausing for 4 seconds between pulses. Discard soapy water after the last cycle has completed and rinse with clear water. Start blending! CAUTION Lids and tampers are not interchangeable between...
-
Page 15: Blending Programs
Blending Programs Manual Blending Minimum Maximum Maximum Maximum Liquid Cold Contents Hot Contents Dry Contents 1/4 cup / 60mL / 2oz 1600mL / 54oz 1400mL / 48oz 1000mL / 32oz *Minimum and maximum content guidelines are general recommendations by Instant Brands Inc. For more specific instruction, please refer to a trusted recipe. Select Low / Med / High to choose your desired blending speed. -
Page 16: Cold Blending
Blending Programs Cold Blending Cold blending programs blend at different intervals throughout the countdown, breaking down frozen fruits & vegetables, nuts, seeds, oats, and more. Use these programs to create smoothies, to crush ice for summer drinks, and to create frozen yogurt and small-batch ice cream. Minimum Liquid Maximum... - Page 17 Steps to Cold Blending Remove the lid from the pitcher. “Stack” recipe ingredients in the pitcher. Refer to “Stacking Smoothies”. Temperature Secure the lid to the pitcher. 1200 Select your desired cold blending program Temperature (ex: Smoothie).
- Page 18 Steps to Cold Blending After 5 seconds the blender will beep 3 times and begin. The blades will pulse intermittently as the timer counts down. Temperature Press Cancel to stop blending, or wait for the countdown to complete. Temperature Remove lid, pour, and serve. INSTANT TIP: Thick Blend When blending thick contents, do not fill the pitcher higher than...
-
Page 19: Hot Blending
Hot Blending Hot blending programs combine boiling and blending for optimal one-pitcher performance or meals. The Instant Pot Ace is capable of cooking ingredients from fresh, as well as blending pre-steamed or cooked ingredients into soups, purées, baby food and more. - Page 20 Steps to Hot Blending Remove the lid from the pitcher. 1200 Fill the pitcher with recipe ingredients. Secure the lid to the pitcher. Select your desired hot blending program (ex: Soup). If applicable, press the same key again to Temperature toggle between options 2 and 1.
- Page 21 Steps to Hot Blending The blades will pulse intermittently as the blender heats as well as throughout the countdown. Note: You may see the temperature drop after the blender pulses and the hot contents move to the top; this is normal. When the program has completed, Temperature the blender will beep 10 times and...
-
Page 22: Food Tamping
Food Tamping The food tamper may be used when blending cold food and liquid ingredients. Use the tamper to push food from the sides of the pitcher, or release air bubbles that may form during blending. Steps to Tamping Ingredients Pause the blending program. -
Page 23: Non-Dairy Milk Making
Non-Dairy Milk Making Use the fill lines indicated on the 150 mL / 5 oz measuring cup included with your blender when measuring grains, nuts, and seeds. Non-Dairy Milk Making Guide Milk Program Dry Grain / Nut / Seed Water 3/4 cup (112g) soybeans 1400 mL / 48 oz 1/2 cup (75g) brown rice... -
Page 24: Soy
You Will Need... Soy Milk • 150 mL / 5 oz measuring cup • Strainer Bag • Optional: 500mL / 16oz warm water for soaking • 3/4 cup (112g) soybeans • 1400mL / 48oz water for blending You can soak soybeans in water for up to 1 hour. -
Page 25: Rice
You Will Need... Rice Milk • 150 mL / 5oz measuring cup • Strainer Bag • 1/2 cup (75g) white or brown rice • 1400mL / 48oz water for blending • 1 tsp (5mL) of your favorite cooking oil Remove the lid from the pitcher. Add rice, oil and water to the pitcher. -
Page 26: Nut
You Will Need... Nut Milk • 150 mL / 5oz measuring cup • Strainer Bag • Optional: 500mL / 16oz warm water for soaking • 1 cup (150g) nuts or seeds of choice • 1400mL / 48oz water for blending We recommend soaking nuts or seeds in water for at least 1 hour, up to 24 hours. -
Page 27: Oat
You Will Need... Oat Milk • 150 mL / 5oz measuring cup • Strainer Bag • 1 cup (150g) rolled or steel cut oats • 1400mL / 48oz water for blending • 1 tsp (5mL) of your favorite cooking oil Remove the lid from the pitcher. -
Page 28: Blending Tips
Blending Tips Blending Tips • Lightly toasting dry oats before blending gives them a more robust flavor. • Soak nuts and seeds before blending. The longer the soak, the creamier the texture! • Vanilla, cinnamon, salt, coconut or cocoa powder are all delicious additions, and may be added to flavor the milk before straining. -
Page 29: Care & Cleaning
Care & Cleaning Cleaning Method Part Cleaning Tip Remove lid cap from lid when cleaning. Lid & Lid Cap Remove black silicone seal from lid periodically for cleaning. Do not wet bottom side of the pitcher. Glass Pitcher Unplug and wipe clean with a soft, damp cloth. Blender Base 150 mL / 5 oz If dishwashing, place in top rack. -
Page 30: Pulse Cleaning
Pulse Cleaning Use the Pulse/Clean function to remove superficial food debris and residue from your pitcher. Remove the lid from the pitcher. Fill the pitcher with 1000mL / 34 oz of hot water. Secure the lid to the pitcher. Press Pulse/Clean to lift the majority of food contents. Discard dirty water after the last Pulse cycle has completed. -
Page 31: Deep Cleaning
Deep Cleaning Minerals in water may deposit at the bottom of the pitcher. Periodic deep cleaning will ensure the longevity of the blender. Add 1 cup (250mL / 8 oz) of white vinegar or citric acid, and 1 cup (250mL / 8 oz) of warm water to the pitcher. Allow the solution to sit for at least an hour, then press the Pulse/Clean key. -
Page 32: Troubleshooting
Troubleshooting The issues in the following tables do not always indicate a faulty blender. Please examine your blender carefully. If you require support, please contact the Instant Pot® Customer Care Team: • Online: www.support.instantpot.com • Live Chat: www.instantpot.com/#Chat • Email: support@instantpot.com... - Page 33 Troubleshooting Possible Problem Solution Reason Thermostat • Remove and re-seat pitcher has failed • Contact the Customer Care Team Dry heat • Remove and re-seat pitcher in pitcher • Add liquid when using a cooking function Error code “Lid” Lid is not secure Remove and reposition the lid on the appears on screen pitcher...
-
Page 34: Warranty
Warranty Limited Warranty This Limited Warranty is effective for one year from the date of original consumer purchase. Proof of original purchase date and, if requested by an authorized representative of Instant Brands Inc. (“Instant Brands”), return of your appliance, is required to obtain service under this Limited Warranty. - Page 35 Warranty Disclaimer of Implied Warranties EXCEPT AS EXPRESSLY PROVIDED HEREIN AND TO THE EXTENT PERMITTED BY LAW, INSTANT BRANDS MAKES NO WARRANTIES, CONDITIONS OR REPRESENTATIONS, EXPRESS OR IMPLIED, BY STATUTE, USAGE, CUSTOM OF TRADE OR OTHERWISE WITH RESPECT TO THE APPLIANCES OR PARTS COVERED BY THIS WARRANTY, INCLUDING BUT NOT LIMITED TO, WARRANTIES, CONDITIONS, OR REPRESENTATIONS OF WORKMANSHIP, MERCHANTABILITY, MERCHANTABLE QUALITY, FITNESS FOR A PARTICULAR PURPOSE OR DURABILITY.
- Page 36 Ottawa, Ontario K2T 1C1 Canada Telephone: 1.800.828.7280 Web: www.InstantPot.com Store: www.Store.InstantPot.com US & Canada Email: Support@InstantPot.com Download Free Recipe App: Join the Official Instant Pot Community www.facebook.com/groups/instantpotcommunity @instantpot @instantpot @instantpotofficial @instantpot @theinstantpot Copyright © 2018 Instant Brands Inc. ™ 670-0101-62...
Need help?
Do you have a question about the Ace and is the answer not in the manual?
Questions and answers
How to change a fuse
The context does not provide specific instructions on how to change a fuse in an Instant Pot Ace. It suggests that a blown fuse could be the issue, but it does not explain how to replace it. The user mentioned submitting a warranty claim, implying that self-replacement may not be supported or recommended.
Therefore, based on the available information:
You may need to go through the Instant Pot warranty process to address a blown fuse, as there is no clear method provided for replacing it yourself.
If under warranty, contacting the manufacturer is advised.
This answer is automatically generated