Table of Contents
Advertisement
Advertisement
Table of Contents

Related Manuals for MedTec AutoBlot 3000H

Summary of Contents for MedTec AutoBlot 3000H
- Page 1 AutoBlot 3000H Guide to Operation MedTec, Inc. November 2010...
- Page 2 Disclaimer Information in this document is subject to change without notice. MedTec makes no warranty of any kind with regard to this material, including, but not limited to, the implied warranties or merchantability and fitness for a particular purpose. MedTec shall...
-
Page 3: Table Of Contents
CONTENTS Setting Up the AutoBlot Page 5 General Description Safety Normal Operating Conditions Unpacking the AutoBlot 3000H Keypad Conventions Validating for Cross Contamination Design of the AutoBlot System Running an Assay Page 11 Prepare for an Assay Run Start the Test... -
Page 5: Setting Up The Autoblot
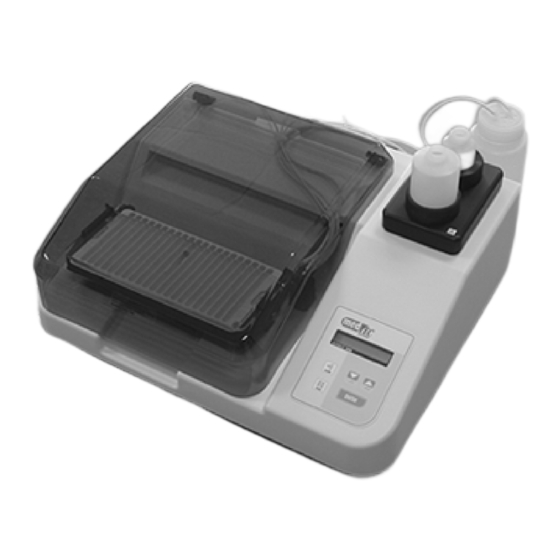
SETTING UP THE AUTOBLOT 3000H General Description The AutoBlot 3000H fully automates the Western blot assay. Following the manual addition of test samples, the AutoBlot incubates, washes, and performs subsequent reagent additions as defined by the operator during the programming phase. -
Page 6: Safety
Set-Up Safety The AutoBlot 3000H is designed for safe operation. However, for your safety and the safety of others, the AutoBlot should be operated as specified in the Guide to Operations. Failure to do so could result in injury to yourself or others, or damage to the equipment. There are various symbols on the unit relating to safety. -
Page 7: Unpacking The Autoblot 3000H
Set-Up Normal Environmental Conditions The AutoBlot 3000H is designed to be safe under the following environmental conditions. • Indoor use. • Altitude up to 2000m. • Temperature 5°C to 40°C. • Maximum relative humidity 80% for temperatures up to 31°C decreasing linearly to 50% relative humidity at 40°. - Page 8 – this could present a hazard). Plug the power supply into the back of the unit. Connect the power cord to a grounded receptacle. NOTE: It is important that the AutoBlot 3000H is set up in a location that is away from windows and radiators and free from drafts.
-
Page 9: Keypad Conventions
Set-Up Included with your unit are 4-6 clear straws that can be attached to the end of the tubing that goes into the bottles. These straws help the tubing stay down in the bottle. Cut the flexible tubes to the minimum length needed to place the tubing in the bottles. - Page 10 Set Up Design of the AutoBlot 3000H System Ready for a New Test? Yes or No Recall Assay Name Enter Edit Mode? Run Assay Yes or No Check Heaters? Yes or No Calibration Mode? Yes or No Purge Tubing? Yes or No Ready for a New Test is the first prompt you receive when the AutoBlot is turned on.
-
Page 11: Validating For Cross Contamination
Set-Up Calibration Mode is used to calibrate the volume dispensed from each pump. The platform temperature can also be verified in the Calibration routine. Purge Tubing is used to clean and empty the pump lines after an assay run (see Purge Tubing Routine on page 20). Validating for Cross Contamination Before running patient samples, the instrument needs to be validated for the absence of cross channel contamination with each manufacturers’... - Page 12 Running an Assay The AutoBlot starts pre-heating the tray platform and bottle plate as soon as an assay is selected. It is important that the aspirate cover remains closed during preheat. In addition, the reagent bottles should be in place on the heated bottle plate.
-
Page 13: Positive And Negative Controls
Running an Assay It is important that you prepare enough solution to dispense into the troughs that contain strips as well as into the center trough and in one additional trough next to the last strip. In order to regulate the temperature, liquid is dispensed into the center trough and in one empty trough just aside the last strip. -
Page 14: The Pause Key
Running an Assay The PAUSE Key The PAUSE key may be pressed any time the tray platform is rocking (the tray rocks during incubation) in order to tweeze a strip, prime a pump, or skip to another step in the program. 1:Stop Rocking Temporarily stops the platform from rocking. -
Page 15: End Of Assay Alarm
Running an Assay End of Assay Alarm The end-of-assay alarm comes on at the completion of an assay. Press ALARM to turn off this alarm and acknowledge the end of the assay. The alarm automatically turns off after two (2) minutes and then prompts Purge Tubing? If you have completed all assay runs for the day, it is important the tubing be cleaned via the Purge Tubing (see Purge Tubing... -
Page 16: Assay Steps
Programming NOTE: If your assay is pre-loaded and locked, you cannot unlock it, change the pumps names, or change the assay. You can, however, change the assay name and view the assay steps. Assay Steps Assay programs in the AutoBlot are made up of a series of individual steps, or tasks, that are defined through the Edit routine. -
Page 17: Alarms
Programming NOTE: If you program an unheated step between two heated steps, then the unheated step should be no longer than one (1) minute in duration or the heater shuts off and the fans turn on (to cool the unit). It is important that a consistent temperature be maintained for your heated cycles. -
Page 18: Edit Mode Pause
Programming The AutoBlot then prompts: Continue Incubation Press No to Stop Substrate incubation continues until NO is pressed. Edit Mode PAUSE Enter Edit Mode? When PAUSE is pressed at the prompt, the AutoBlot enters a routine where the following features can be changed: Erase An Assay Erase an assay. -
Page 19: Maintenance
In addition, it is recommended that the AutoBlot receive a more thorough Preventive Maintenance checkup annually by a MedTec trained Service Technician. Daily Maintenance • Wipe down the instrument with a damp paper towel. - Page 20 Maintenance • Clean both the aspirate and dispense tips with an alcohol swab. These tips must be kept clean in order to prevent clogs and to ensure that fluids are properly aspirated and dispensed. In order to prevent possible contamination, DO NOT use the same swab on the dispense tips that was used on the aspirate tips.
- Page 22 (as required). All PM’s and Service must be performed by a MedTec trained Service Technician in order to maintain warranty coverage. •...
- Page 23 Maintenance • Replace the platform ribbon cable (it is located under the tray platform). In order to ensure the platform heaters are working properly, this ribbon cable should be changed every 12 months. The ribbon cable can be ordered directly from the manufacturer. Parts and Contact Information on page 29.
- Page 24 NOTE: Proper tube lengths and installation are critical for proper performance of the arm assembly. When you order a Tubing Kit from MedTec you will receive detailed instructions on how to replace the tubing. Pump Tubing The pump tubing is the short length of tubing that wraps around the pump.
- Page 25 All tubing is exercised by the manufacturer before the instrument is shipped. Battery Life The AutoBlot 3000H is equipped with a rechargeable lithium battery that has a shelf-life of one (1) year. If the AutoBlot is stored for more than...
-
Page 27: Troubleshooting Guide
In the event you are experiencing problems with your AutoBlot, refer to the following table for troubleshooting assistance. If you cannot find the solution to the problem using this guide, please call the MedTec Service Department. Under no circumstances should the instrument be opened. - Page 28 2. Check to make sure there is nothing blocking the movement of the carriage mechanism. If problem still persists, contact MedTec Service. Rock Motor 1. Rock motor fails to rock 1. If platform is rocking – Steps Error platform correctly...
-
Page 29: Technical Specifications
TECHNICAL SPECIFICATIONS AutoBlot 3000H Specification Description Dimensions 22 in x 18 in x 7.5 in. 559 mm x 457 mm x 191 mm Weight 35 lbs (15.9 kg) Capacity 20 strips Power 100-240V, 50 or 60Hz, 3.2amp max Software Updates... -
Page 30: Parts And Contact Information
AutoBlot 3000H Preventive Maintenance Checkup MT07002 Call for current pricing or to request service. Please contact MedTec Customer Service for a Return Authorization Number prior to shipping units back to MedTec for any reason. MedTec, Inc. Contact Information Shipping address:...
Need help?
Do you have a question about the AutoBlot 3000H and is the answer not in the manual?
Questions and answers