
Subscribe to Our Youtube Channel
Summary of Contents for Big Dog ALPHA
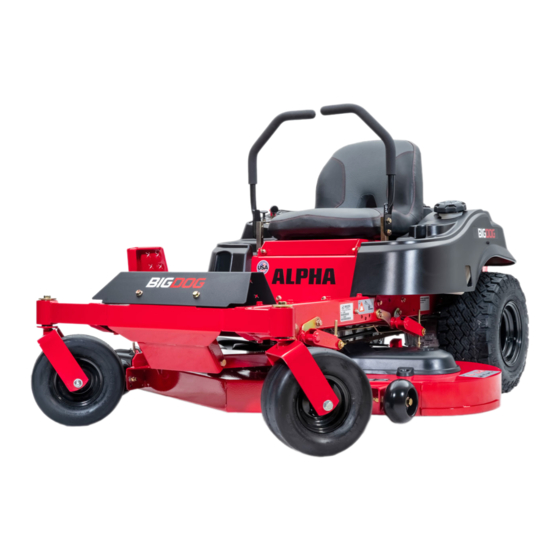
- Page 1 BIG DOG MOWER CO. ALPHA ® ® General Service Manual 200 South Ridge Road Hesston, Kansas 67062 119293 REV E...
- Page 2 WARNING The engine exhaust from this product contains chemicals known to the state of California to cause cancer, birth defects or other reproductive harm. NOTICE OF REQUIREMENT OF SPARK ARRESTER MUFFLER This equipment may create sparks that can start fires around dry vegetation. California Public Resources Code Section 4442.6 provides that it is unlawful to use or operate an internal combustion engine on any forest-covered, brush-covered, or grass-covered land unless the engine is equipped with a spark arrester maintained in effective working order.
-
Page 3: Table Of Contents
General Information ..........1-1 ® Big Dog Mowers Service Program ......1-1 Maintenance Introduction. - Page 4 Electrical Schematic — Kohler ....... . . 7-3 Maintenance ........... 8-1 Maintenance Locator Chart.
-
Page 5: General Information
® Mowers Service Program in the engine compartment and under the seat platform areas; minute dust particles are abrasive to close-tolerance This manual is part of a service package for the Big Dog ® engine and hydraulic assemblies. ALPHA mowers. Use of this manual in conjunction with ®... - Page 6 REV E 119293...
-
Page 7: Safety
SAFETY • Allow engine to cool before storing machine inside a building. • Keep fuel away from open flame or spark and store machine away from open flame or spark or pilot light such as on a water heater or appli- This safety alert symbol is used to call attention to a mes- ances. -
Page 8: Operation Precautions
Carefully read the operator’s manual and all manuals Always keep engine and machine clean, removing furnished with the attachments. Learn the location accumulated dirt, trash and other material from and purpose of all controls, instruments, indicators machine. and labels. ... -
Page 9: Maintenance Precautions
Always disconnect the negative (black) battery cable(s) before dis- Use original Big Dog Mower replacement parts or ® connecting the positive (red) cable(s). Always parts that are equivalent in overall performance. - Page 10 tive (black) battery cable(s) before disconnecting the If you spill acid on yourself: positive (red) cable(s). Always connect the positive • Flush your skin with water. (red) battery cable(s) before connecting the negative • Apply baking soda or lime to help neutralize the (black) cable(s).
-
Page 11: Torque
TORQUE Standard Torques The following chart lists the standard torque values for the threaded fasteners found in this manual. Torque all cap screws, nuts and set screws to these values unless a different torque is shown in the Special Torques section. Size ft-lbs N•m... - Page 12 REV E 119293...
-
Page 13: Power Unit Maintenance
POWER UNIT MAINTENANCE Steering Adjustments Untrained maintenance personnel should never attempt to make any adjustments or repairs to the Steering control lever neutral adjustment mower’s drive system while the engine is running. The mower’s steering has been factory adjusted to elimi- The following procedures should be performed by nate creeping when the steering control levers are in the neu- trained maintenance personnel only. - Page 14 A. Align handles ± .125" Figure 4-4 Control lever stops adjustment A. Bushing B. Nuts Figure 4-2 Keep hands, hair, clothing, etc., clear of the rotat- ing drive wheels/hubs during this process. Exer- cise extreme caution. The steering control lever stops may be adjusted to help drive straight when the steering control levers are pushed forward against the stops.
-
Page 15: Park Brake Spring Adjustment
connecting the two mower harness female spades 10. IMPORTANT: With the engine off, disconnect the two together. Figure 4-6 female spade connectors from each other (from step #4) and reconnect them to the seat switch. This must be completed so that the safety circuit is functioning Do not operate (drive) the mower without plugging properly. -
Page 16: Transaxle Drive Belt
4. Reconnect the negative battery cable. Never pry a belt to get it on a pulley as this will cut or dam- age the fibers of the belt covering. 5. Close seat platform and re-install seat platform hard- ware. Keep oil and grease away from belts, and never use belt dressings. - Page 17 Belt replacement Never work under the machine or attachment unless it is safely supported with jack stands. • Make certain machine is secure when it is raised and placed on the jack stands. • Use only certified jack stands. Use only appropriate jack stands, with a minimum weight rating of 2000 pounds (907 kg) to block the unit up.
-
Page 18: Tires
Viewed from the top of the mower A. Spring mount C. Tension spring hook B. Tension idler spring (604462) Figure 4-12 A. Transaxle drive belt C. Tension idler arm 8. Remove the transaxle drive belt from the transaxle B. Transaxle drive pulley drive pulleys and the engine pulley. -
Page 19: Engine Maintenance
ENGINE MAINTENANCE General Engine Maintenance IMPORTANT: All oil drips or spills must be cleaned off of the engine plate and exhaust system before operat- ing the machine. Detailed instructions and recommendations for break-in 8. Clean the oil drain hose and store it appropriately. and regular maintenance are specified in the Engine Owner’s Figure 5-1 &... -
Page 20: Fuel Evaporation System Filter
Fuel Evaporation System Filter Kawasaki engine shown These mowers have a fuel evaporation system filter. This filter must be checked and replaced every 100 hours or annu- ally whichever comes first. Figure 5-3 A. Fuel tank B. Fuel lines A. Fuel evaporation system filter Figure 5-4 Figure 5-3 Kohler engine shown... - Page 21 Kawasaki engine shown A. Fuel tank C. Fuel evaporation sys- B. Vapor lines tem filter Figure 5-6 Kohler engine shown A. Fuel tank C. Fuel evaporation sys- B. Vapor lines tem filter Figure 5-7 119293 REV E...
-
Page 22: Engine Rpm Settings
Engine RPM Settings The engine rpm’s are set at the factory for maximum mowing efficiency. Occasionally it may be necessary to check and adjust the settings. The idle speeds should be set as follows: Kawasaki FR651 / FR691 ENGINE SPEED MODEL NO. -
Page 23: Deck Adjustments
DECK ADJUSTMENTS Deck Leveling 1. Park the mower on a hard, flat surface. 2. Check tire pressures (8–12 psi) to make certain the tires are properly inflated before starting to level deck. Stop engine. Make sure deck clutch switch is in the down (OFF) position. - Page 24 A. Measure to top of deck A. Measure to top of deck Figure 6-3 Figure 6-4 12. Level the front of the deck by turning the lock nut, at the front of the mower, until the correct distance from the ground to the top of the deck is attained. Figure 6-11 A.
- Page 25 Tighten the inner nut to prevent slipping of the adjustment. A. 3/8” drive extension B. Cam Figure 6-6 Hold the bolt and outer nut so cam does not move while tightening the inner nut. A. Inner nut Figure 6-8 Hold the bolt so cam does not move while tightening the inner nut.
- Page 26 A. Front center of deck Figure 6-10 A. Lock nut Figure 6-11 REV E 119293...
-
Page 27: Blades
Blades Lay the blade on a flat surface and check for distortion (Figure 6-13 & Figure 6-14). Replace any distorted blade. Mower blade maintenance Refer to the Mower blade replacement section for blade removal and installation. Check the mower blades daily as they are the key to power efficiency and well groomed turf. - Page 28 End view of blades, comparing twisted and straightened blades. A. Blade lock tool B. Blade A. Twisted blade edge — C. Cutting plane replace blade D. Cutting edge Figure 6-15 B. Straight blade edge 4. Use a 5/8" wrench to remove the 7/16” cap screw hold- ing the blade to the spindle shaft.
- Page 29 10. Raise the front of the mower and remove the jack bottom of the groove. Replace the pulley when this is the stands. case, otherwise, the belt will lose power and slip excessively. 11. Lower the mower. Never pry a belt to get it on a pulley as this will cut or dam- age the fibers of the belt covering.
- Page 30 Deck belt replacement Allow the engine and muffler to cool before proceed- ing with the following procedure. Exercise caution when releasing spring tension from the belt idler. 1. Park the mower on a flat surface and stop the engine. A. Deck cover B.
- Page 31 8. Re-tension the deck drive belt by pulling on the deck belt idler spring and hooking it in the spring mount on the deck. NOTE: On 36” decks a tension spring hook (Excel part number 604462) can be used to connect the tension idler spring to the spring mount.
-
Page 32: 36"/42" Deck Belt Routing
The following notes are the same for the different decks shown. There is no tension adjustment of this belt 2. Route belt as shown. 36"/42" Deck Belt Routing Figure 6-23 52" Deck Belt Routing Figure 6-24 REV E 6-10 119293... -
Page 33: Electrical
ELECTRICAL Electrical Schematic — Kawasaki (Prior to S/N 14014077) 119293 REV E... - Page 34 Electrical Schematic — Kawasaki (S/N 14014077 & higher) REV E 119293...
-
Page 35: Electrical Schematic - Kohler
Electrical Schematic — Kohler 119293 REV E... - Page 36 REV E 119293...
-
Page 37: Maintenance
MAINTENANCE Maintenance Schedule Refer to Fig. 8-1, Fig. 8-2, Fig. 8-3, Fig. 8-4, Fig. 8-5, & Fig. 8-6 WEEKLY * ANNUALLY SERVICE AT OR 40 OR 100 INTERVALS INDICATED HOURS HOURS Prior to each use Verify safety start interlock system Prior to each use Visually inspect unit for loose hardware and/or damaged parts Prior to each use... -
Page 38: Maintenance Locator Chart
Maintenance Locator Chart Fig. 8-1 Mowers with Kawasaki engines 1. Engine Oil Fill & Dipstick 2. Fuel Filter 3. Engine Air Cleaner 4. Engine Oil Drain Valve 5. Battery 6. Fuel Tank 7. Engine Oil Filter 8. Park Brake Switch (2) 9. - Page 39 Fig. 8-4 Fig. 8-5 Fig. 8-3 36”/42” Deck 52” Deck 1. Engine Oil Fill & Dipstick 2. Fuel Filter 3. Engine Air Cleaner 4. Engine Oil Drain Valve 5. Battery 6. Fuel Tank 7. Engine Oil Filter 8. Park Brake Switch (2) 9.
- Page 40 REV E 119293...
-
Page 41: Troubleshooting
TROUBLESHOOTING SUGGESTED SYMPTOMS PROBABLE CAUSES REMEDIES SUGGESTED SYMPTOMS PROBABLE CAUSES REMEDIES Mower creeps when Steering linkage needs Adjust linkage steering control levers are adjustment Starting motor does not Steering control levers not Place steering control in neutral crank in park brake position or levers in park brake posi- switch not adjusted tion or re-adjust switch... - Page 42 REV E 119293...
- Page 43 INDEX PAGE PAGE Avoid Acid Burns ............2-4 Maintenance Locator Chart ........8-2 Avoid Fire Hazards Maintenance Precautions ..........2-2 .......... 2-3 Belt Adjustment Mower Blade Maintenance ............4-4 ........6-5 Belt Replacement Mower Blade Replacement ............4-5 ........6-6 Blades ...............6-5 Operate Machine Safely ..........
Need help?
Do you have a question about the ALPHA and is the answer not in the manual?
Questions and answers