Advertisement
®
0W E
AL
'S
MODEL #
SERIAL #
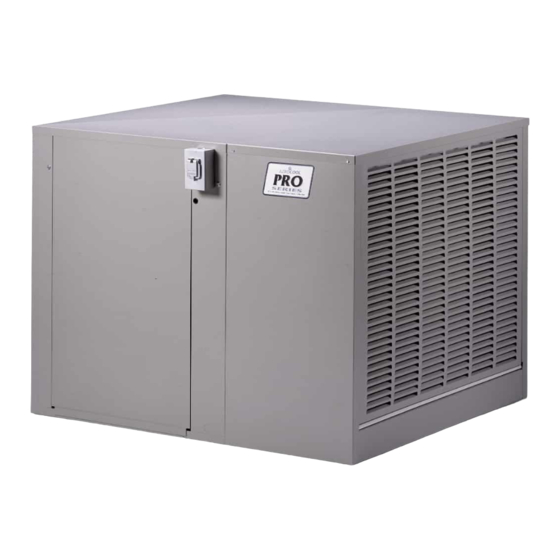
PD/PH 4801
PD/PH 6801
PD/PH 623,1
PD/PH 4231
READ AND
SAVE THESE
[LEA Y CONSERVE
ESTAS
INSTALLATION
INSTALACION
MAINTENANCE
MANTENIMtENTO
|NSTRUCT[ONS
|NSTRUCC|ONES
D SAFETY
SEGURIDAD
D TROUBLE
SHOOTING
TRAZANDO
FALLAS
Ce_ratuladons:
You have purchased
a product
of superior
performance
and design,
which
will
give the best service when
properly
installed,
operated
and maintained.
FELICITACIIONE$:
Usted acaba de comprar
un producto
con un disefio
y rendimiento
superior,
que [e dar_ e[ meier
servicio
cuando
sea propiamente
instaiado,
operado,
y mantenido.
WARNING
. WARNING: To Reduce The Risk Of Fire Or Electrical Shock,
Do Not Use This Fan With Any SoW State Speed Control
Device.
* A[ways disconnect electrical power to the cooler beforeworking
on cooler
, Do not remove side panels while cooter is running,
• Do not _ocate cooler near exhaust or vent pipes as odors or
fumes may be drawn into the unlt:.
, Be sure cooier is connected to proper line voltage stamped on
b_ower motor and pump motor specification plate, NOTE:
iMPROPER VOLTAGE WILL VOID MOTOR WARRANTY,
* ]'HE USEOF AN ANODE DEVICE OR C}iEMiCAL ADDITIVES
OR COOLER TREATMENTSIN THiS COOLER WILL VOID THE
WARRANTY.
ADVERTENC[A
ADVERTENC[A: Para Reducir E[ Riesgo De [ncendio O toque
Eiectrico, No Use £ste Enffiador Con Ningun Dispositivo Para
Controlar La Ve[ocidad
, Meier de| enfriador, bomba_ gabiaete Y ca_a de empa|me
tlenen que set cenedades a t_erra e[e_trica de acuerde con
redes lOSCodigos _ocales f naclona|es.
• Siempre desconecte [a corriente de[ enfdador antes de cuaiquier
reparation.
No remueva los filtros cuando [a unidad esta funcionando.
No instale e_enffiador cerca de extractores o tubes de venteo
ya que otores o vapores pueden entrar a [a unidad,
Asegurese que e[ enffiador sea conectado a la [inea de voltaje
apropiado come Io indica la p/aca de e[ motor Y ia bomba,
Nora: ELUSO DE VOLTAJEIMPROP[O ANULA L& GARAN"TIA
DEL MOTOR,
)
ELuse DE ANODES, LiM_ [ADORES, TRATAMIENTOS PARA
ENFRIADORES EN ESTA UNIDAD ANULA LA GARANT[A.
1-999_2049
Advertisement
Table of Contents

Subscribe to Our Youtube Channel
Summary of Contents for Aerocool AeroCool PD4801
- Page 1 MODEL # SERIAL # PD/PH 4801 PD/PH 6801 PD/PH 623,1 PD/PH 4231 READ AND [LEA Y CONSERVE INSTALLATION INSTALACION MAINTENANCE MANTENIMtENTO Ce_ratuladons: You have purchased give the best service when FELICITACIIONE$: Usted acaba de comprar que [e dar_ e[ meier servicio WARNING .
-
Page 2: Installation
iNSTALLATiON Typlo_l S_dO D|schsrge [nsta!lat[on demands con_ection of blower opening to existing air ducting system or to a dropper duct with a ceiiing diffuser. In either insta_ce, building modification is ne(ess[tated. The bottom discharge cooler is always moul_ted on the roof of the structure_ You will require a roof stand, roof jack, flexible duct and collar to connect to existing ductwork. -
Page 3: Water Connection
iNSTALLATION Water Connection i. Install float i nhoieintheside ofbottom pan opposite the pump. Seeparts tOroute the water line. Connect i llustration perabove sketch. 2. Turn on the waterto the cooler and setfloat valve to maintain 2 1/_, inchwater depth. The float v alve isadjusted by bending the float valve rod, 3. -
Page 4: Main Power Supply
ELECTRICAL CONNECTIONS FIELD WiRiNG iNSTRUCTiONS 1.MAiN POWER SUPPLY THiS COOLER iS PREWIRED FOR 115 VOLT OR 230 VOLT, 6OHZ POWER ONLY. MAKE SURE YOU CONNECT YOUR COOLER TO THE CORRECT VOLTAGE. Remove the control box cover- (4)screws. Remove 2"x 4" water tight junction box (3},junction Box Cover (5), switch (4) and 1/2_chase nipple (1) and jam nut (2) from the parts ca_ton. - Page 5 Jl. THERMOSTAT CABLE |NSTALLATION The thermostat for this cooler is connected means of a 6 conductor thermostat Type CL2, 18 or 20 gauge, UL listed recommended. Route one end of the thermostat cable (9) through the 1/2 '_ hole in the corner post on the left side of the access door and then through the 1/2_'hole in the left end of the control box.
- Page 6 MAiN The cooler should be servicedat least once a year and more often if required. This includes cleaning,oiling, belt adjustment (if required) and pad repJacemenL Cleaning: Remove access doors and inlet air louvers. 2. Remove the overflow standpipe from the drain bushing and allow the reservoir to empty, 3.
-
Page 7: Thermostat Control
OPERATING iNSTRUCTiONS FOR THE PROi=STAT THERMOSTAT CONTROL SPECIAL FEATURES ®All information is saved during system shut-down system operating mode when power is restored ®Programmable presets and 24 hour de}ay timer ®Programmed "soft" transition from high to !ow fan ®Automatic Pro Clean System ®No batteries required ®Large LCD display... - Page 8 SPECIAL FUNCTIONS KWIKSET Presets Press the KWIKSET button to display the DAY or NITE preset or to return to the standard display mode. Pressing the KWIKSET button to either the DAY or NITE preset causes the set point, FAN and COOL settings to assume the values stored in memory.
- Page 9 CLEAN FULL AUTOMATIC: Fresh water for your evaporative coo]er every 5 hours of operation! How i! works.., The Pro Cleaning System (PCS) will automatically cycle every 5 hours of co®[er pump operation to empty the water reservoir within 1 _/!_ mhwtes. This cycle allows the cooler to re_ fiii with fresh water.
-
Page 10: Troubleshooting
Shourd a_ obvious probIem occur with your cooler consult the foiiowing table, ff you cannot correct the problem, contac_ a q_Ja[if_edsewice representative, PROBLEM Water Overflow Blower will operate Fuse blown or circuit breaker tripped Dry Pads Cooler noisy Inadequate air flow En caso de alguna fa


Need help?
Do you have a question about the AeroCool PD4801 and is the answer not in the manual?
Questions and answers