Table of Contents
Advertisement
Advertisement
Table of Contents

Summary of Contents for Easy Clocking EC 200
- Page 1 Basic Software Setup Guide www.easyclocking.com...
-
Page 2: Table Of Contents
Table of Contents Software registration ……………………………………………………………………………………………… 3 How to connect the time clock ……………………………………………………………………………….. 5 How to turn the time clock on ………………………………………………………………………………… 5 Defining the type of connection …………………………………………………………………..…………. 5 TCP/IP Connection …………………………………………………………………………………………………. 5 ... -
Page 3: Software Registration
Step # 1 – Software Registration After installing the Easy Clocking software the next step is to register the software and time clock for warranty and technical support purposes. The purchase includes a 2 year manufacturer’s warranty for the time clock and 30 days... -
Page 5: How To Connect The Time Clock
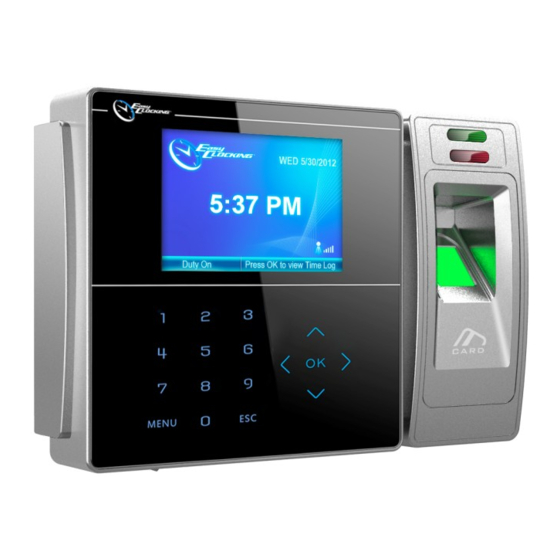
Step # 2 – Establishing a connection between the time clock and PC A connection between the Easy Clocking software and the EC200 time clock must be established to be able to download information stored on the time clock such as Employee ID numbers, employee fingerprint/card information and employee IN/OUT time records. -
Page 7: Software Setup To Connect To The Time Clock
How to setup the software to connect to the time via TCP/IP Network... -
Page 10: Adding Employees In The System
Overview Employees that will use the Easy Clocking time and attendance system will be added in two different places, at the time clock and in the Easy Clocking software. When employees are initially enrolled at the time clock they are assigned an ID number for their fingerprint and profile which can be downloaded to the software using the connection established to the time clock. - Page 11 How to enroll RFID cards and/or pin numbers to clock in or clock out Press Menu Select User and press OK Select Enroll and press OK Enter the ID number for the employee you wish to add an RFID card or pin/password and then press OK ...
-
Page 12: Adding An Administrator To The Time Clock
Adding an administrator to the time clock Overview The time clock factory setting allows anyone on its menu options by pressing the MENU key. To avoid this from happening employee fingerprint profiles already enrolled in it can be set to either the Administrator or Manager Level. -
Page 13: How To Enable/Disable Administrators From The Software
As described on the previous page administrators can be assigned to the time clock to restrict access to the Menu options, however the same results can be accomplished using the features in the Easy Clocking Download Manager software. In addition to this, the Easy Clocking Download Manager software has a feature to disable all Administrators/Managers in the time clock and basically when using this function the software communicates to the time clock and sets all profiles in the time clock to the Employee Level. - Page 14 For this information to be updated in the time clock, the employee profiles with the new level must be uploaded to the time clock. The upload can be done one employee at a time or all at once. To upload check mark one or more employees then click on Upload, then check mark the clock(s) and then click upload once again.
-
Page 15: Setting All Profiles To The Employee Level On The Time Clock
As explained on previous pages, employee profiles can be set as administrators to restrict access to the menu options. A feature in the Easy Clocking Download Manager allows settings all profiles registered on the clock to the Employee Level that way the clock allows anyone to the menu options by pressing the Menu key. -
Page 16: How To Download Employee Data Information
Step # 4 – Downloading employee data from the time clock to the software Log in to the easy Clocking software and click on Easy Clocking Download Manager. In the Download Manager check mark the time clock connection(s) and then click on Download User’s button;... - Page 17 Highlight each number and then click Edit to update the employee name and to add other employee information. Make sure not to change the Employee ID #, as this was the number assigned to this employee on the time clock and if changed will create conflicts. After clicking edit enter all relevant information and then press Save.
-
Page 18: How To Upload Names To Display On The Time Clock
How to upload names to display on the time clock when punching in and out Once Employee names have been updated in the software as described on the last two pages, check mark the employee(s) from the list, and then click on Upload Users button, then check mark the time clock(s) you wish to upload information to and click Upload Users once again and the software will return with the number of employee profiles updated to the time clock and a confirmation message will follow. -
Page 19: How To Download Time Records
How to download employee time records Log in to the easy Clocking software and click on Easy Clocking Download Manager. In the Download Manager check mark the time clock connection(s) and then click on Download Time Records button. Choose whether to Download New or Download All records from the time clock and then click Download Check Marked Selection and a confirmation message will display. -
Page 20: Usb Download Feature
Second enroll the employee on the software as follows: Adding employees in the software Log in to the easy Clocking software and click on Easy Clocking Download Manager In the Download Manager click on Users... - Page 21 Click the Add button Enter the employee profile information such as Employee ID, first name, last name, department, user level and employee status, and then click Save and the employee will display on the list.
-
Page 22: How To Download Time Records To A Usb Memory
How to upload attendance records to the software using the USB memory flash Save the information in the USB as shown on this page and then plug the USB to the PC. Log in to the easy Clocking software and click on Easy Clocking Download Manager... - Page 23 Add the time clock to the software as shown on page 7-8 On the Easy Clocking Download Manager click USB Memory Upload and then select In/Out Time Records (ALOG*.TXT) Locate the ALOGxxx.TXT file on your PC and then click open, and the process will start. A confirmation with the...
Need help?
Do you have a question about the EC 200 and is the answer not in the manual?
Questions and answers