Table of Contents
Advertisement
CONTENTS
Laws to follow (for Italy only)
Identification labels and their settings
OPERATING INSTRUCTIONS
Pag.
1
ORIX 70
pag. 3
pag. 4
pag. 5
pag. 6
pag. 7
pag. 7
pag. 7
pag. 8
pag. 9
pag. 10
pag. 11
pag. 11
pag. 12
pag. 15
pag. 15
pag. 18
pag. 21
pag. 22
pag. 24
pag. 27
pag. 29
pag. 30
pag. 33
pag. 33
pag. 34
pag. 35
pag. 36
pag. 36
pag. 37
pag. 38
pag. 38
pag. 40
pag. 41
Advertisement
Table of Contents

Summary of Contents for ARDET ORIX 70
-
Page 1: Table Of Contents
ORIX 70 OPERATING INSTRUCTIONS CONTENTS GENERAL INFORMATIONS Introduction pag. 3 General conditions of warranty pag. 4 Laws to follow (for Italy only) pag. 5 Warnings pag. 6 Ionizing radiations pag. 7 General protection against x-rays pag. 7 Ambient and use conditions pag. - Page 2 ORIX 70 OPERATING INSTRUCTIONS Assembly x-ray generator and pantograph arm pag. 45 Friction adjustment pag. 47 Double jointed spring pantograph arm pag. 48 Technical checkings pag. 50 Possible troubles and their solutions pag. 51 Spare parts pag. 53 X-ray control electric drawing pag.
-
Page 3: General Informations
Disconnect the equipment, releasing the main switch, during maintenance service. ARDET Dental & Medical Devices s.r.l. in order to continually develop its equipments reserves the right to make changes without. NO PART OF THIS MANUAL IS TO BE REPRODUCED, STORED IN A RETRIVAL... -
Page 4: General Conditions Of Warranty
The x-ray tube installed follows the warranty conditions issued by the manufacturer. During this period, in case of defects, the client must return back to ARDET Dental & Medical Devices s.r.l. the material, adequately packed, at his own expense. ARDET Dental & Medical Devices s.r.l. - Page 5 ORIX 70 OPERATING INSTRUCTIONS LAWS TO FALLOW (FOR ITALY ONLY) OGGETTO: POSSESSO E/O IMPIEGO DI GENERATORI DI RADIAZIONI IONIZZANTI 1) Inviare entro 10 giorni denuncia di detenzione dell’apparecchio ai sensi dell’art. 92 DPR 185/64 alla ASSL territorialmente competente e, nel caso di presenza di lavoratori dipendenti, come specificato dall’art.
-
Page 6: Warnings
ORIX 70 OPERATING INSTRUCTIONS WARNINGS Certain instructions are preceded by “WARNING” with a triangle at the side. Whenever this symbol appears, carefully read the relevant paragraph before performing any operations Type of protection against direct and indirect contacts: class II Degree of protection against direct and indirect contacts: unit with applied part type B. -
Page 7: General Protection Against X-Rays
X-rays are harmful, if improperly used. Therefore, the instructions contained herein must be strictly observed. ARDET Dental & Medical Devices s.r.l. produces x-ray equipments which conform with the most restrictive worldwide rules of radio protection in force. Aim of an x-ray equipment is the emission of x-rays for medical diagnosis by means of a film or an “Imaging”... -
Page 8: Reference Rules
REFERENCE RULES The ORIX 70 dental x-ray equipments conform with the following rules: CEI EN 60601-1 (2007) Third edition + Corr. IEC:2007+IS IEC:2008 – Medical electrical equipment - Part 1: General requirements for basic safety and essential performance... -
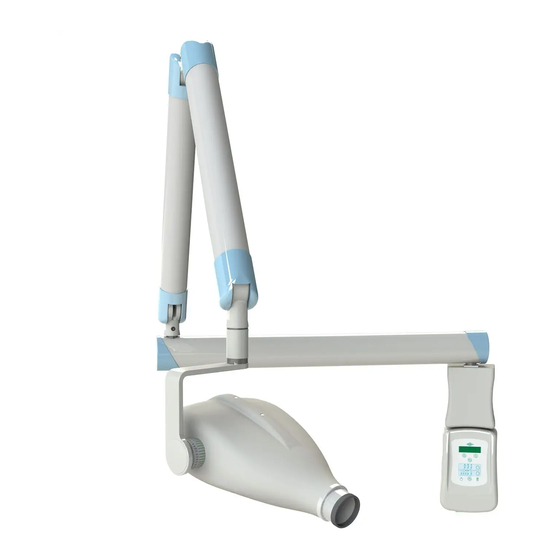
Page 9: Description Of The X-Ray Equipment
ORIX 70 OPERATING INSTRUCTIONS DESCRIPTION OF THE X-RAY EQUIPMENT DESCRIPTION X-RAY GENERATOR (TUBE HEAD) CENTERING CONE FSD 20 CM. COUNTER BALANCED ARM X-RAY CONTROL REMOTE CONTROL BASE WITH WHEELS COLOUMN Pag. -
Page 10: Technical Data Orix-70
ORIX 70 OPERATING INSTRUCTIONS TECHNICAL DATA ORIX-70 Main 230 VAC +/- 10% - 50 Hz. Primary consumption 6 A. max at 230 VAC Total consumption 1380 VA. - 230 VAC Line impedance 0.8 Ohm Rated high voltage 70 KVP Power rating 0,414 KW - 230 VAC... -
Page 11: Technical Data Selematic
ORIX 70 OPERATING INSTRUCTIONS TECHNICAL DATA SELEMATIC Power 230 VAC Frequency 50 Hz Minimum selectable time 0.03 seconds Maximum selectable time 1,32 seconds On “DEAD MAN” Exposure switch RESET to the last exposure value Automatic Error signal In the case of immediate or anticipated release of the x-ray key “Sleeping mode”... - Page 12 ORIX 70 OPERATING INSTRUCTIONS IDENTIFICATION LABES AND THEIR POSITIONS 1) Collimator: data are engraved on the collimator, indicating: identification number, specifications, manufacturer name 2) X-ray control plate: located above the covering carter. It indicates: name of equipment, serial number, manufacturer 3) Balanced spring arm plate (Pantograph arm): located in the back side of the holding hub of the generator.
- Page 13 ORIX 70 OPERATING INSTRUCTIONS Pag.
- Page 14 ORIX 70 OPERATING INSTRUCTIONS Pag.
-
Page 15: X-Ray Tubehead
ORIX 70 OPERATING INSTRUCTIONS X-RAY TUBE HEAD X-ray tube head Collimator Fork and support Coaxial male connector Coaxial female connector Identification plate Angular scale DIGITAL X-RAY CONTROL BOARD SELEMATIC X-ray control controlled by a microprocessor for the setting, management and activation of the exposure times for dental x-ray systems. - Page 16 ORIX 70 OPERATING INSTRUCTIONS type of tooth possibility to automatically adjust the exposure time programmed pre-heatig time of the x-ray tube filament controlled by quartz digital system. ZVS static switch for x-ray generator start The static switch guarantees the opening and closing of the power circuit without transitory or ...
- Page 17 ORIX 70 OPERATING INSTRUCTIONS CONTROL PANEL 1. Bipolar ON/OFF main switch 2. Enter key - confirms the set technical data 3. Film sensitivity selection key 4. PATIENT selection key 5. TEETH selection key – each tooth is displayed with the relative international number 6.
-
Page 18: User's Manual
ORIX 70 OPERATING INSTRUCTIONS USER’S MANUAL INSTRUCTIONS FOR USE - SELEMATIC 1) Switch on the main switch (green light) placed on the bottom of the x-ray control (right side) ref. n.1 2) Select the sensitivity of the radiographic film by pushing the button sequentially (ref. n. 3) until... - Page 19 ORIX 70 OPERATING INSTRUCTIONS CAUTION! The SELEMATIC x-ray control is programmed by default on D film sensitivity which corresponds to DIGITAL - Film D - 0,05 secs-patiente medium-incisor-maxillary arcade. When the main switch is activated (green light - ref. n.7) the following data, memorised by the microprocessor, are displayed on the symbols relative to patient and tooth Changing the sensitivity of the film with the relative key (ref.
- Page 20 ORIX 70 OPERATING INSTRUCTIONS The inactivity time is shown by the blinking of all the leds on the control panel. At the end of the pause time, the microprocessor will reset the parameters of the last exposure which may be maintained or modified according to the new x-ray which have to be taken.
-
Page 21: Programmed Exposure Times
ORIX 70 OPERATING INSTRUCTIONS PROGRAMMED EXPOSURE TIMES SENSITIVITY 1 0,34 0,29 0,29 0,29 SMALL PATIENT 0,34 0,29 0,39 0,58 0,51 0,44 0,44 0,44 MEDIUM PATIENT 0,51 0,44 0,59 0,88 0,68 0,59 0,59 0,59 LARGE PATIENT 0,68 0,59 0,79 1,18 SENSITIVITY 2... -
Page 22: Radiographic Techniques: Bisector Technique
ORIX 70 OPERATING INSTRUCTIONS RADIOGRAPHIC TECHNIQUES: BISECTOR TECHNIQUE Vertical incidence angle of the main beam In order to obtain a precise image if the tooth, the main beam must be perpendicular to the bisector of the angle created between the longitudinal axis of the tooth and of the film. Having positioned the tube head and the film an average incidence angle can be used for each area. - Page 23 ORIX 70 OPERATING INSTRUCTIONS BISECTOR TECHNIQUE – MANDIBLE INCISORS -15° CANINES -15° PEMOLARS -10° MOLARS -5° BISECTOR TECHNIQUE – OCCLUSIVE JAW +65° PREMOLARS -10° INTERPROXIMAL POSITION – BITE WING Pag.
-
Page 24: Radiographic Techniques: Long Cone Technique
ORIX 70 OPERATING INSTRUCTIONS RADIOGRAPHIC TECHNIQUES: LONG CONE TECHNIQUE With the long cone technique, the film surface is set parallel to the axis of the teeth. The film is normally placed away from the portion of teeth that comes in contact with tongue with the exception of the lower molars. - Page 25 ORIX 70 OPERATING INSTRUCTIONS a) Place the anterior side of the film on the median line of the lateral incisors. The contact point of the canine must be visible on the x-ray image. b) Place the film at a sufficient distance from the tongue as to reproduce the whole tooth.
- Page 26 ORIX 70 OPERATING INSTRUCTIONS b) Place the film in the deepest area of the mouth and at a sufficient distance from the tongue. c) Place the film parallel to the longitudinal axis of the premolars and parallel to the oral surfaces of the crowns.
-
Page 27: Typical Inconveniences Of Intra Oral Films
ORIX 70 OPERATING INSTRUCTIONS TYPICAL INCONVENIENCES OF INTRA ORAL FILMS 1) FILM TOO LIGHT No evident structure – short contrast cause: under exposure exposure time too short - insufficient developing time - cold developing bath - too much diluted solution - developing bath exhausted. - Page 28 ORIX 70 OPERATING INSTRUCTIONS incidence angle of central beam too horizontal. 13) X-RAY WITH ANATOMICAL STRUCTURES OVER EXPOSED cause: wrong x-ray technique 14) BLURRED AND CROOKED IMAGES cause: film bent during x-ray emission 15) LIGHT AND TRANSPARENT SPOTS cause: wrong manipulation fixing drops have been sprayed before putting in bath - grease or oil on the x-ray film.
-
Page 29: Storage Of The Film
ORIX 70 OPERATING INSTRUCTIONS 25) VEILING ON WIDE SURFACE AND ON MORE X-RAY FILMS WITH THE SAME SIZE cause: wrong preservation the packing has been accidentally exposed to x-rays 26) BROWN COLOUR ON X-RAY FILM cause: wrong manipulation insufficient fixing - final washing too quick... -
Page 30: Dark Room
ORIX 70 OPERATING INSTRUCTIONS DARK ROOM A suitable preparation of the dark room and the organization of its work is fundamental in order to obtain goods results. The light does not filter inside the room turned into dark room. Any infiltration of white light must be eliminated by means of suitable collisions. - Page 31 ORIX 70 OPERATING INSTRUCTIONS A) Dry AREA The following operations are executed: Loading/unloading of x-ray cassettes. Manipulation of virgin films. Manipulation of films impressed but not developed. CAUTION! THIS AREA MUST ALWAYS BE KEPT PERFECTLY CLEANED. B) Damp AREA This area is relative to the developer and the washing of the film.
- Page 32 ORIX 70 OPERATING INSTRUCTIONS Obtained the result requested, dip the film in the intermediate washing tank. Rinse very well to stop the developing process and pass the film in the fixing bath. Generally, the fixing bath is approximately twice the time necessary for film transparency.
-
Page 33: Ordinary And Special Maintenance
If the movement of setting should be too much hard, do not insist to avoid any problem of damaging. Any servicing should be carried out by qualified personnel authorized by ARDET Dental & Medical Devices s.r.l. Every twelve months check:... -
Page 34: Instructions For Use - E-Arm
ORIX 70 OPERATING INSTRUCTIONS INSTRUCTIONS FOR USE - E-ARM Remove, from the 'REST' position the horizontal arm and turn it towards of the dental unit. Hold the fork of the generator and open the pantograph arm till reaching the side of the face to be... -
Page 35: Installation Manual
INSTALLATION PROCEDURE The equipment described in this manual refers to the mobile stand type. ARDET Dental & Medical Devices s.r.l. provides the equipment ORIX-70 with a digital x-ray control model SELEMATIC. The equipment, disassembled in different parts, is normally forwarded in an one card box packing. -
Page 36: Packing (Card Box Packing, American Type)
ORIX 70 OPERATING INSTRUCTIONS PACKING (CARD BOX PACKING, AMERICAN TYPE) Packing container dimensions mm. W1145 x D605 x H265 Unit with double arm gross weight Kg 60,000 CAUTION! Compressed springs SHIPMENT AND STORAGE Instruction concerning shipment and storage are found on the outside of the box. -
Page 37: Description Of The Equipment
ORIX 70 OPERATING INSTRUCTIONS REQUIRED AMBIENT CONDITIONS FOR STORAGE: a) temperature: between -10°C a +70°C b) relative humidity: from 10% to 90% c) atmospheric pressure: from 500 to 1060 hPa DESCRIPTION OF THE EQUIPMENT Model stand mobile, double arm net weight Kg. 50,000 N°... -
Page 38: Tools Needed For Installation
ORIX 70 OPERATING INSTRUCTIONS TOOLS NEEDED FOR INSTALLATION Tools not included in tool kit: n.1 digital or analogical multi-meter (VAC – A. –mA. dc – Ohm) n.1 small screwdriver for electrical connections.. n.1 medium-seized screwdriver. n.1 cross screwdriver. - Page 39 ORIX 70 OPERATING INSTRUCTIONS Insert the threaded bar into the appropriate holes placed laterally on the column. Proceed with the assembling and tighten strongly the two black bakelite handles Go ahead with the tubehead mountig BROWN YELLOW/GREEN SELEMATIC BLUE Pag.
-
Page 40: Electrical Requirements
ORIX 70 OPERATING INSTRUCTIONS ELECTRICAL REQUIREMENTS The wiring and the electrical installation of the system, must respect the enforced international norms as far as the isolation degree, section of the feeding conductors, coloration of the same ones and it must have an adequate connection of earth protection. -
Page 41: General Diagram
ORIX 70 OPERATING INSTRUCTIONS GENERAL DIAGRAM ELECTRICAL CONNECTIONS This connection allows the ignition of the “ready” warning light in a remote position from the x-ray equipment when the main switch of the x-ray control is switched ON. Pag. - Page 42 ORIX 70 OPERATING INSTRUCTIONS The external “ready” light, if connected, lights on, showing the presetting of the equipment to take the x-ray. The “ready” light is not furnished while are already preset on the power cards the electric links. TECHNICAL CONTROL DURING INSTALLATION Check that power supply is 230 VAC +/- 10% ...
- Page 43 ORIX 70 OPERATING INSTRUCTIONS DIAGRAM C2 – CONNECTIONS POWER CONNECTION CAUTION! The L/N conductors from the bipolar switch are already connected to the terminals N. 1/3 of the M2 terminal board The terminals of the power cable are connected with the...
- Page 44 ORIX 70 OPERATING INSTRUCTIONS RX TUBEHEADS CONNECTION CONNECTION External x-ray control GENERATOR GENERATOR TERMINAL N°. N° RX 1 RX 2 RX 3 Pag.
-
Page 45: Assembly X-Ray Generator And Pantograph Arm
ORIX 70 OPERATING INSTRUCTIONS ASSEMBLY X-RAY GENERATOR AND PANTOGRAPH ARM Withdraw the x-ray generator from its packing and check the integrity of the coaxial electrical contact. Eliminate any probable remains of packing material DESCRIPTION 1) X-ray generator 2) Cylindrical centering device... - Page 46 ORIX 70 OPERATING INSTRUCTIONS CAUTION! 1) The safety tie-band must NOT be removed until the x-ray generator is aassembled. 2) Loosen the fixing screw of covering tube using an appropriate screwdriver. 3) Push upwards the covering tube till the brass half-moon holding the pivot of the tube head is discovered 4) Remove the brass wedge from its holding.
-
Page 47: Friction Adjustment
ORIX 70 OPERATING INSTRUCTIONS FRICTION ADJUSTAMENT If it’s necessary, regulate the fiction of the x-ray generator rotation on its fork, removing the lateral plastic cap by means of a 5 mm. screwdriver, levering between the plastic cap and the fork and act... -
Page 48: Double Jointed Spring Pantograph Arm
ORIX 70 OPERATING INSTRUCTIONS DOUBLE JOINTED SPRING ARM SETTING Ref. A 1) Bring side “A” of th double jointed arm in STOP position upowards, forming an angle of 90° with side “B”. 2) Remove the locking cap. 3) Insert inside the arm the tube key M13 provided and push it softly till the end. - Page 49 ORIX 70 OPERATING INSTRUCTIONS 1) Let side “B” in vertical STOP position 2) Remove the locking cap 3) Insert inside the arm the tube key M13 provided and push it softly till the end. 4) Hook the nut M.8 5) TURN: to the RIGHT to increase load.
-
Page 50: Technical Checkings
ORIX 70 OPERATING INSTRUCTIONS TECHNICAL CHECKINGS CAUTION! Pag. -
Page 51: Possible Troubles And Their Solutions
ORIX 70 OPERATING INSTRUCTIONS IONIZING RADIATION DURING TEST. Keep always in the back of the x-ray generator as to not be in direct correspondence with the primary beam at a distance of at least 2 meters. 1) To exactly estimate the results of the controls, it is important to verify the line voltage. Its drop, during the functioning, must not be higher than 3%. - Page 52 Microprocessor out of service. out of work. Do not use the x-ray control and No LEDS switched ON. send it back to ARDET Dental & Medical Devices s.r.l. Continuously or now and then, X-ray tube vacuum losing Send the x-ray generator back is heard a sound similar to a to ARDET Dental &...
-
Page 53: Spare Parts
Adjust again the compression of keep the position required. the spring by means of the tube key provided. In case of failure, send the arms back to ARDET Dental & Medical Devices s.r.l. Error Code E 01 X-ray key released during the pre-... -
Page 54: X-Ray Control Electric Drawing
ORIX 70 OPERATING INSTRUCTIONS 3100065 X-ray generator ORIX70 complete with centering device and fork 3300650 X- ray control SELEMATIC 3000558 Mobile stand complete 03CAVO1051 Extension coil cable for timer 3500036 Centering device FSD cm.20 3500040 Complete base with wheels 3500040R... - Page 55 ORIX 70 OPERATING INSTRUCTIONS GENERAL ELECTRICAL SCHEME Pag.
- Page 56 ORIX 70 OPERATING INSTRUCTIONS Pag.
Need help?
Do you have a question about the ORIX 70 and is the answer not in the manual?
Questions and answers