Table of Contents
Advertisement
Quick Links
Advertisement
Table of Contents

Summary of Contents for AxleTech TA277
- Page 1 SERVICE MANUAL ASM-0277E October 2018 Trans Axles TA277...
-
Page 2: Table Of Contents
Table of Contents Table of Contents Brake Assembly ..........25 Service Notes ...........ii Exploded View ..........25 Asbestos and Non-Asbestos Fibers Warning ..iii Disassembly ..........27 Service Precautions .......... v Pad Removal ..........28 Caliper Overhaul ........... 29 General Assembly Instructions ......vii Caliper Assembly .......... -
Page 3: Service Notes
AxleTech shall have no liability of any kind for damages arising out of (or in connection with) any other use of the information contained in this manual. -
Page 4: Asbestos And Non-Asbestos Fibers Warning
Asbestos and Non-Asbestos Fibers Warning Asbestos and Non-Asbestos Fibers Warning OSHA Toxic and Hazardous Substances 29 CFR 1910.1001 Work practices and engineering controls for automotive brake and clutch inspection, disassembly, repair and assembly -- Mandatory This mandatory appendix specifi es engineering controls (4) A HEPA-fi... - Page 5 Asbestos and Non-Asbestos Fibers Warning (5) The brake support plate, brake shoes and brake com- [D] Wet Method ponents used to attach the brake shoes shall be thor- (1) A spray bottle, hose nozzle, or other implement capa- oughly washed before removing the old shoes. ble of delivering a fi...
-
Page 6: Service Precautions
Every eff ort has been made to ensure the accuracy of all JACK CAN SLIP OR FALL OVER. SERIOUS PERSONAL INJURY CAN RESULT. information in this manual. However, AxleTech makes no expressed or implied warranty or representation based on •IMPROPER JACKING AND SUPPORT METHODS CAN the enclosed information. - Page 7 RESULT IN SERIOUS PERSONAL INJURY AND DAMAGE additional repairs and expense. TO COMPONENTS. ALWAYS REPLACE DAMAGED OR OUT-OF-SPECIFICATION COMPONENTS. • Always use genuine AxleTech replacement parts. • When disassembling various assemblies, lay all parts Cleaning on a clean bench in the same sequence as removed to simplify assembly and reduce the possibility of 1.
-
Page 8: General Assembly Instructions
General Assembly Instructions General Assembly Instructions During assembly: • Install bearings in a clean environment, free from Tapered Roller Bearings dust, debris, moisture, and other contaminants. • Machining, fi ling, soldering, grinding, etc. should CAUTION be kept away from the assembly area to prevent contaminating the bearings. -
Page 9: Fasteners
General Assembly Instructions • Lipped seals: All disassembled seals shall be rejected • Clean and carefully degrease surfaces (any lubricant and replaced by a new seal. prevents setup therefore making the product ineff ective) using a solvent or by washing the parts. •... -
Page 10: Introduction
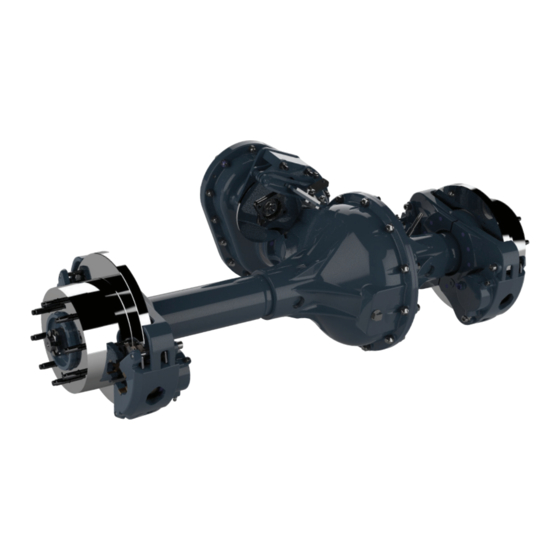
TA267 with a modern and elegant design to increase axle life and serviceability. Featuring a quieter and stronger diff erential, full-fl oating axle shafts, and an all-new wheel-end design, the TA277 is the next generation axle of an industry standard with the intent to raise market expectations by reducing downtime and total cost of ownership. -
Page 11: Identifi Cation Tag
Introduction Identifi cation Tag All products are identifi ed by the model and serial number. This information is stamped on the identifi cation tag and affi xed to the case. Have reference numbers handy when ordering replacement parts or requesting service repairs. DO NOT REMOVE OR DESTROY THE IDENTIFICATION TAG. -
Page 12: Maintenance & Inspection
Lubrication Maintenance & Inspection Lubrication To keep a vehicle running properly, it is important to per- With any product containing gears, lubrication is possibly form preventive maintenance on the vehicle components. the most important component eff ecting the product life This ensures the vehicle and its subassemblies will operate cycle. -
Page 13: Checking Carrier Oil
Lubrication Draining Carrier Checking Carrier Oil Draining should be done immediately following vehicle 1. Remove the oil fi ll plug located in the center of the operation when the oil is warm. carrier housing. 1. Place a drain pan underneath the unit. 2. -
Page 14: Filling Carrier
Lubrication Filling Carrier Checking Gearbox Oil 1. Ensure the vehicle is parked on a level surface. 1. Remove the oil level plug (see Oil Level location below). 2. Remove the oil fi ll plug located on the front of the Gear Box carrier case. -
Page 15: Draining Gearbox
Lubrication Draining Gearbox Filling Gearbox Draining should be done immediately following vehicle 1. Ensure the vehicle is parked on a level surface. operation when the oil is warm. 2. Remove the oil fi ll plug located on the front of the 1. -
Page 16: Illustrations
Illustrations Illustrations Top View Bleeder 1x75 Brake Carrier Short Shaft Long Shaft Assembly Assembly Wheel End Assembly Gear Box Input Shaft Front View Parking Brake Assembly Breather Carrier Oil Fill Plug Carrier Oil Drain Plug... -
Page 17: Rear View
Illustrations Rear View Gear Box Oil Fill Plug Gear Box Oil Drain Plug... -
Page 18: Housing
Housing Housing Exploded View 89 62 57 58 39 37 38 37... - Page 19 Housing Item Description Item Description Torque Plate Capscrew Torque Plate OIl Fill Plug Carrier Flange Half & Tube Weldment Capscrew Lock Nut Gearbox Cover Washer Dowel Input Flange Oil Seal Assembly Lock Plate Parking Brake Assembly Driven Gear Bushing Washer Washer Capscrew Thrust Washer...
- Page 20 Housing Item Description Item Description Diff erential Assembly Spacer Bearing Cup Oil Seal Assembly Hub Assembly Thrust Block Magnetic Plug Washer Carrier Plain Half & Tube Weldment Breather Assembly Axle Shaft Coupling Shaft Assembly Nipple Cotter Pin Bearing Cone Sleeve Bearing Cone Washer Bearing Cup...
-
Page 21: Disassembly
Housing Disassembly See “Draining Carrier” on page 4. See “Draining Gearbox” on page 6. -
Page 22: Gearbox Assembly
Gearbox Assembly Gearbox Assembly Exploded View... - Page 23 Gearbox Assembly Item Description Item Description Lock Nut Washer Washer Capscrew Flange Oil Fill Plug Oil Seal Assembly Capscrew Stud Gearbox Cover Gearbox Case Dowel Washer Woodruff Key Bearing Driven Gear Input Gear Spacer Lock Plate Magnetic OIl Drain Plug Bearing Washer Snap Ring...
-
Page 24: Disassembly
Gearbox Assembly Disassembly... - Page 25 Gearbox Assembly...
-
Page 26: Assembly
Gearbox Assembly Assembly * After applying Loctite to the pinion cage, check that the oil passage through the pinion cage is not blocked by the sealant. - Page 27 Gearbox Assembly...
-
Page 28: Axle Sub-Assemblies
Axle Sub-Assemblies Axle Sub-Assemblies Exploded View... - Page 29 Axle Sub-Assemblies Item Description Item Description Cotter Pin Nipple Coupling Brake Assembly Breather Assembly Slide Pin Capscrew Hub Assembly Washer Sleeve Capscrew Torque Plate Carrier Plain Half & Tube Weldment Carrier Flange Half & Tube Weldment Bearing Cup Parking Brake Assembly Washer Gearbox Assembly Diff...
-
Page 30: Disassembly
Axle Sub-Assemblies Disassembly... - Page 31 Axle Sub-Assemblies...
-
Page 32: Assembly
Axle Sub-Assemblies Assembly... - Page 33 Axle Sub-Assemblies...
-
Page 34: Brake Assembly
Brake Assembly Brake Assembly Exploded View 12 11... - Page 35 Brake Assembly Item Description Item Description Stator Clip Rubber Ring Outboard Pad Assembly Caliper Assembly Inboard Pad Assembly Protective Plug Stator Clip Rubber Ring Piston Boot Sleeve Seal Slide Pins Piston Bleeder Screw...
-
Page 36: Disassembly
Brake Assembly Disassembly see “Disassembly” on page 39. -
Page 37: Pad Removal
Brake Assembly Pad Removal see “Disassembly” on page 39. -
Page 38: Caliper Overhaul
Brake Assembly Caliper Overhaul... -
Page 39: Caliper Assembly
Brake Assembly Caliper Assembly... -
Page 40: Pad Installation
Brake Assembly Pad Installation... -
Page 41: Assembly
Brake Assembly Assembly... -
Page 42: Disc Brake Assembly
Disc Brake Assembly Disc Brake Assembly Exploded View Alternate Brake Option... - Page 43 Disc Brake Assembly Item Description Item Description Capscrew Adjusting Bolt Capscrew Torque Plate, Rear Parking Brake Assembly Spring Brake Disc Sleeve Seal Capscrew Torque Plate, Front Washer Bracket Mounting Bolt Lock Nut CCW Cam Spacer Boot Bushing ID Seal Lever Thrust Washer Washer Adjustment Nut...
-
Page 44: Disassembly
Disc Brake Assembly Disassembly... -
Page 45: Assembly
Disc Brake Assembly Assembly... -
Page 46: Hub Assembly
Hub Assembly Hub Assembly Exploded View... - Page 47 Hub Assembly Item Description Item Description Wheel Hub Washer Wheel Stud Bearing Housing Oil Seal Assembly Spacer Bearing Cone Bearing Cup Bearing Cup Bearing Cone Capscrew O-ring...
-
Page 48: Disassembly
Hub Assembly Disassembly... -
Page 49: Assembly
Hub Assembly Assembly... -
Page 50: Diff Erential Assembly
Diff erential Assembly Diff erential Assembly Exploded View... - Page 51 Diff erential Assembly Item Description Item Description Bearing Cone Bearing Diff erential Case - Plain Half Pinion Thrust Washer Bearing Cone Side Gear Spacer Pinion Gear Bearing Cup Thrust Washer Pinion Cage Ring Gear Capscrew Diff erential Case - Flange Half Spider Washer Washer...
-
Page 52: Disassembly
Diff erential Assembly Disassembly... - Page 53 Diff erential Assembly...
-
Page 54: Assembly
Diff erential Assembly Assembly... - Page 55 Diff erential Assembly...
-
Page 56: Housing
Housing Housing Assembly... -
Page 57: Appendix
Appendix Appendix Torque Specifi cations... - Page 58 Appendix...
-
Page 59: Tools
Tools Hub Bearing / Cup Driver (TC-80324) Hub Base (TC-80275) Hub Bearing Pilot (TC-80277-1) Hub Bearing Driver (TC-80277-2) Bearing Housing Base (TC-80278-DET1) Hub Seal Driver (TC-80077) - Page 60 Bearing Housing Leg (TC-80278-DET2) Seal Driver (TC-69097) Bearing Cone Driver (TC-66987) Cap (TC-80278-DET3) Bevel Gear Torque Fixture (TC-79556- Adjusting Ring (TC-80321) DET4) Bearing Cup Driver (TC-67676)
- Page 61 ...
- Page 62 © 2018 AxleTech International LLC. All rights reserved. AxleTech and AxleTech International are registered trademarks of AxleTech International LLC. All other brands and product names are trademarks or registered trademarks of their respective owners. Information supplied by AxleTech is believed ASM-0277E 10/18 to be accurate and reliable.
Need help?
Do you have a question about the TA277 and is the answer not in the manual?
Questions and answers