
Related Manuals for IrisVision IrisVision

Summary of Contents for IrisVision IrisVision
- Page 1 User Guide V 2.65 Please read this guide before operating your IrisVision device and keep it for future reference.
-
Page 3: Table Of Contents
Inside This Guide • About IrisVision • What’s Included • Device Overview • Using IrisVision • IrisVision Modes • Recommendations for Use • Charging IrisVision • Setting Up Wifi • Audio Prompts & Rebooting... -
Page 4: About Irisvision
Welcome Thank you for purchasing an IrisVision Low Vision Aid system. This guide provides the essential information you need to set up and use your new IrisVision unit. For help with specifics and troubleshooting, you will receive a faster response by contacting your specialist at IrisVision, who is already acquainted with your needs. -
Page 5: What's Included
What’s Included Your IrisVision Low Vision Aid system comes with the following items: 1. IrisVision Display Unit 2. Goggles/Headset 3. Wireless Charging Pad 4. Fast Charger & Cable 5. Magnetic USB Cable 6. Carrying Case 7. Warranty Card 8. Lanyard... - Page 6 What’s Included IrisVision Display Unit...
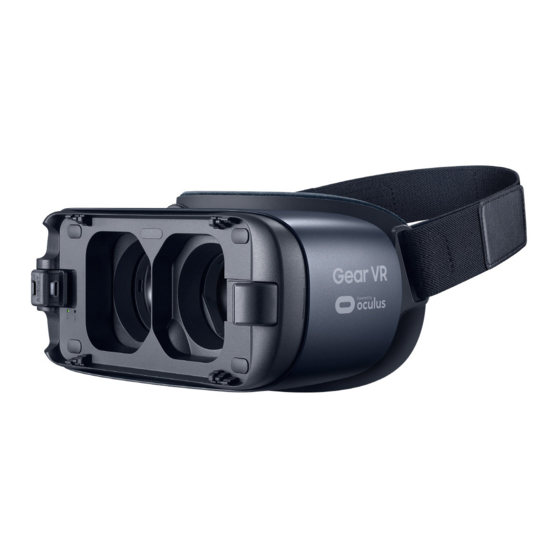
- Page 7 What’s Included Goggles/Headset with adjustable straps...
- Page 8 What’s Included Wireless Charging Pad...
- Page 9 What’s Included Fast Charger & Cable (will be white)
- Page 10 What’s Included Magnetic USB Type-C Connector & Cable...
- Page 11 What’s Included Carrying Case...
-
Page 12: Device Overview
Device Overview Goggles/Headset Focus Wheel (on top of headset) Mode Button Power Tab Screenshot/ Standby Button ↑ ↑ ↑ Brightness Buttons Touch Pad USB Type C Port Note: Some headset models don’t include brightness control buttons. You can control brightness using the “Config Menu”. Visit the FAQ section of our website to learn how to use the Config Menu. - Page 13 Device Overview IrisVision Display Unit Volume Power Button Button ↑ Micro USB Type C Port (for charging)
-
Page 14: Using Irisvision
Using IrisVision: Step 1 - Power Up Power on the Display Unit by pressing the white tab for a few seconds. Wait for the vibration to indicate the device is powering on. - Page 15 Using IrisVision: Step 2 - Wear Headset In order for the buttons/touchpad to work on the Headset, the Headset needs to be on your head. Place the device over your eyes and pull the straps over your head. Adjust the velcro straps to achieve the best fit.
- Page 16 Using IrisVision: Step 3 - Set Up Focus The first screen you will see is the Focus Screen. Use the focus wheel on the top center of your goggles to adjust the focus, similar to using binoculars. You may try turning the wheel in either direction until you get the clearest picture.
- Page 18 After focusing the device with the focus screen, press the mode button to enter the first mode called the Scene Mode. IrisVision has been set up with 3 modes: Scene, Television & Reading Mode. IrisVision also has the capability of enabling 6 additional modes.
- Page 19 Mode Button Brightness Buttons...
- Page 20 Using IrisVision: Step 5 - Taking a Snapshot While in any mode you can press the Screenshot/Standby button to take a screenshot of what you are looking at. The image you are looking at will freeze, and you will see a yellow camera icon appear in the top left.
- Page 21 Screenshot Standby Button...
- Page 22 Using IrisVision: Step 6 - Zoom In/Out Next, place your right index finger on the touch pad. The touch pad is located on the right side of the headset. Be sure to take your finger off the touch pad in between swipes.
- Page 23 Touch Pad...
-
Page 24: Irisvision Modes
IrisVision Live View Modes... - Page 25 Scene Mode Scene Mode with Bubble...
- Page 26 Bioptic/Split Screen Mode Reading: Black/ White Line Reading Mode Reading: Inverted Reading Mode: Green Reading Mode: Yellow...
- Page 27 RP (Retinitis Pigmentosa) Mode This mode allows you to change the Field of View (FOV) of the screen. This helps individuals with Retinitis Pigmentosa or Glaucoma to be able to see better by shrinking the image into a smaller viewing area.
- Page 28 Bioptic/Split Screen Mode This mode provides a rectangle at the top center of the screen that allows you to magnify a specific section of the screen without losing the greater context of the view in front of you. Using the touch pad, swipe towards you to increase the magnification inside the rectangle.
- Page 29 Television Mode Television mode is identical to Scene mode except that it will not cause the device to enter sleep mode automatically after a period of disuse (such as when you are watching a movie or a television show.) Reading Mode: Black/White This mode is for reading text material like books or papers without color.
- Page 30 Reading Mode: Inverted This mode is helpful for many different eye conditions by providing white letters on a black background. This enhances the contrast and also provides reduced glare on the screen, which can be helpful for those overwhelmed by bright scenes. Line Reading Mode The reading line mode, similar to the first reading mode, presents text in black letters...
- Page 31 pad to decrease the bar size to isolate one or two lines of text. Reading Mode: Green This mode provides black text on a green background. This may also help by providing good contrast without the brightness of a white background. Use the toggle switch to make the green background brighter or darker.
-
Page 32: Recommendations For Use
The bubble feature is only available in the scene mode. Remember: do not walk around while wearing IrisVision. Reading: While reading, hold your reading material in front of you in a normal reading position and move your head, not your arms, to scan the text. - Page 33 By bringing the IrisVision up to your face and pushing the mode button, the screen will turn back on. This allows the Display Unit to conserve its battery power.
-
Page 34: Charging Irisvision
Wireless Charging Instructions For additional help with wireless charging, please visit: www.irisvision.com/faq After centering the IrisVision unit face down on the included wireless charging pad, you will hear a verbal prompt and see a blue light illuminate the pad when the unit is properly placed and the pad is plugged into the wall. - Page 35 After setting the device on the charger, the screen will turn black in a few minutes. When the Display Unit is fully charged, the blue light on the charging pad changes to green and you will hear a verbal prompt. If the blue light is not on or if it is flashing, the device is not charging.
- Page 36 By using this method the Display Unit will charge faster, usually within one hour. NOTE: The IrisVision’s battery lasts 3 hours. It can last 3+ hours with continuous use, and all day (8 to 10 hours) on standby.
- Page 37 Powering the IrisVision using the USB Type-C Port on Headset This power port can be used if you want to use the product for extensive and continous use beyond what the built-in battery can provide. You may use the magnetic cord included in your kit which will allow you to use an external cell phone battery (not included).
-
Page 38: Setting Up Wifi
Step 1: Remove IrisVision Display Unit from Headset Release the IrisVision display unit from the goggles by pushing the clip to the right of the display unit’s camera away from the display unit. Carefully remove the display unit and set aside the headset. - Page 39 Step 2: Power on Display Unit If the display unit is not already powered on, you will need to power it on by pressing the power button on the right side when you are looking at the screen as shown.
- Page 40 It is recommended that you also select Auto Reconnect so that your device remembers this network in the future. Once the IrisVision display unit has connected to Wi-Fi, you will be ready to proceed to the next step.
- Page 41 Name of Your Network Other Network...
- Page 42 The headset has a connector and a clip with two positions: A & B. For the current model of IrisVision, it should remain in the A position. Also notice the small lock/unlock switch. The switch should always remain in the lock position.
-
Page 44: Audio Prompts & Rebooting
How to Turn off Your Device To turn off your IrisVision, hold the white power button on the headset for a few seconds. The screen will soon go black and the unit will power off. - Page 45 You can reboot your device on any mode. To reboot your IrisVision, go to the brightness toggle switch on the front right of the headset. Hold the brightness down button for 15 - 20 seconds.
- Page 47 Speak With an IrisVision Advocate IrisVision Advocates are standing by to assist you with any questions you may have about setting up or using your IrisVision system. Call Toll Free...
Need help?
Do you have a question about the IrisVision and is the answer not in the manual?
Questions and answers