Advertisement
Quick Links
Advertisement

Related Manuals for Dongfeng Sokon; C35

Summary of Contents for Dongfeng Sokon; C35
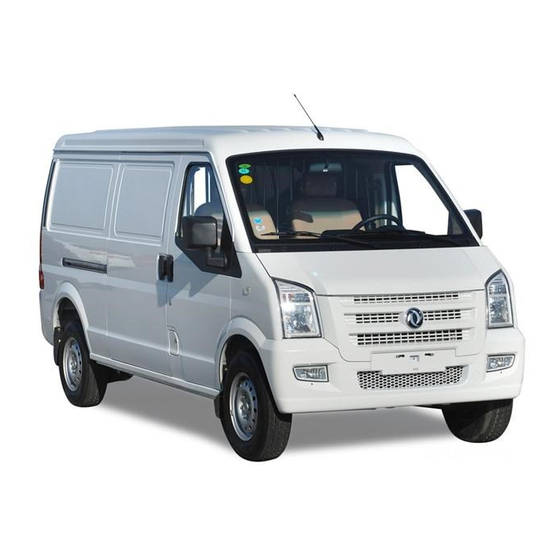
- Page 1 Dongfeng Sokon Mini Automobile Repair & Maintenance Handbook 维 C Series (C35)
-
Page 2: Chapter 1 Use And Maintenance
Chapter 1 Use and Maintenance Unit 1 Main technical Parameter 1.1 Basic Parameter 1.1.1 Basic dimension & Weight Parameter (Form 1-1) Form 1-1 Basic dimension & Weight Parameter Items Parameters 1. Dimension (mm) Total Length 4500 Total Width 1680 Total Height (empty) 2000 Wheelbase (mm) 2515... - Page 3 Four Stroke, Water Cooling, Single Four Stroke, Water Cooling, Single Types Top camshaft, Petrol engine with Top camshaft, Petrol engine with electric control fuel jet,16vavles electric control fuel jet Cylinder Dimension 69.6 Piston Stroke 84.5 Exhaust 1493 1248 Compression Ratio 9.5:1 8.8:1 Rating Power...
- Page 4 Unit 2 Use and Notices Basic Knowledge for New Car Use 2.1.1 Checking the new car In order to ensure safe driving, before using the car, it must be checked as follows: (1) Check the connection and strength of the key and essential parts to see whether they accord with requirements, especially on steering devices and braking system.
- Page 5 using car will affect much on its using length of life, its working fiduciary level and economical efficiency. Therefore, the new car must strictly execute the rules when used. (1)The rules of breakingin when driving less than 1000km 1) Driving at full speed is absolutely not allowed 2) Drive generally less than 100km/h 3) Avoid driving at high speed in each gear.
- Page 6 (10) Check the performance of tyre’s braking system to see whether it is reliable. (11) Check whether the moving of each pedal is flexible, whether the free stroke is within the demanding scope, whether position shift is free, and whether there is stuck. (12) Check whether tools along with the car are complete, and whether there is an amount of fusing wires and bulbs.
- Page 7 (4) When running into a traffic jam, we should switch off the engine. (5) Check the tyre’s inflating pressure terminally, when the pressure of the tyre is too low, it will increase the rolling resistance, speed up tyre wear and distort steel ring. (6) Clean up the unnecessary things in the luggage on time.
- Page 8 (6) Once the towed car starts the engine, we should step the clutch and get to neutral position to avoid bumping to the front car. 2.3 Right Use of Fuel, lubricant & Various Fat Liquid 1.Add fuel correctly The quality of the fuel influence the performance of driving, engine and its life use, and fuel additive can ameliorate the performance above, so it is necessary to adopt the fuel with high quality additive.
- Page 9 3.Accurate use of cooling liquid The cooling system is not need maintenance normally. When the car left the factory, the cooling system had been put with permanent cooling liquid. This kind of cooling liquid is unnecessary to change. The cooling liquid is mixed with half glycol and half water, its anti-freeze capacity is -35°C and it has an excellent performance of antisepsis.
- Page 10 The level should be between the max and min mark of the tank. There is a friction facing in the brake system of the car. So when we drive the car, the brake liquid level may decrease a bit, this phenomenon is natural, do not worry about it. However, if the level of the liquid is apparently decreased a lot or below the lowest mark, which means that the brake system is in trouble, at this time we should drive to the service station of the company to repair the brake system immediately.
- Page 11 2.4 Use of Body Establishment & Accessory 1.Open and close of the vehicle door (1) Outside the car, when we open the vehicle door, we should pull the door handle. Both of the front doors can be opened or locked by keys outside the car. (2) Inside the car, all the vehicle doors(the left front door must be locked)can be locked through safe cage knob.
- Page 12 the backrest: we should adjust the front seats to a proper position in case that the front seat will hit the rear ones. And pull the plastic rod which is on the top of the backrest, then we can turn the backrest ahead. The method of turning the cushion: firstly pull the plastic drawstring lightly, and then we can turn it freely.
- Page 13 4—4.Timing switch — — — — — — ︱ ︱ 4—5.The device of subordinate electronic — — — ︱ — — — ︱ adjustment 5.fuel 5—1. — — — — — — ︱ ︱ 5—2.The proportion of idle speed and rotate (︱) ︱...
- Page 14 Bad condition Opera Maintenance Intermittent time for maintenance code -tion every 20,000km or 12 months ︱ -BC--- transmission strap every40,000km or 24months generator A-CDE- every 5,000kms or 3 months cleaner releasing pipe AB-D-- every10,000km or 6 months installing stuff ︱ every 2,500kms --C--- Air cleaner core...
- Page 15 Attention: The tensility regulation is, when replacing a new strap: press at the middle, a 7-10mm sink Water pump strap replacing 1) Cutting off the cathode of the battery. 2) Remove the compressor transmission strap, if air conditioner is available(details please as per driving strap of air conditioner compressor) 3) Replacing water pump strap with a new one.
- Page 16 Cold engine Hot Engine Coolant temperature Coolant temperature The gap of 15—25°C 60—68°C the valve (gap “a”) Intake 0.13—0.17mm 0.23—0.27mm Required tech Exhaust 0.15—0.18mm 0.25—0.28mm 4) Install the cover of the cylinder head, screw down bolt according the technical requirement. 5) Link the ventilative soft pipe to crankcase.
- Page 17 However, according to different situations (temperature, viscidity, etc.), please be noted that the real oil level may be not the same as the figures showed in the right form. 9) Check whether the oil filter and drain out plug leak oil. Oil level of the engine Oil mass of the oil sump About 3.0L...
- Page 18 Warming: Don’t touches exhaust system when it is still heat, to avoid scalded. Any maintenance work should be done after the exhaust system has cool down. Inspection When repair or other regular maintenance as following steps, inspect exhaust system firstly. ·Check whether there are damages or wears on rubber components.
- Page 19 Spark plug Replacement 1) Remove the dust on the cylinder head around spark plug. 2) Cut the high damping line of spark plugs. Note you only can pull the spark plugs cover. 3) Use spark plug wrench, loosen spark plugs and then remove it. 4) Install new spark plugs 1.
- Page 20 Notice: If the car is driving on dusty road very often, clean or replace the filter every 2,500 kms. Fuel filter 1. Fuel pump; 5. Drain out valve 2. Fuel pump filter; 6.Two-way single valve 3. Fuel filter; 7. Fuel disconnecting valve 4.
- Page 21 Brake disc and pad (front) Check 1) Discharge the wheel and caliper, but do not take away brake pipe from the caliper. 2) Change the brake disc and its gasket when it is over damaged (details please as per chapter 6). Tightening torque of caliper’s bolt should meet the technical requirements.
- Page 22 The oil which is out of date, used or not served in the unsealed container is not allowed. Replacement Change the oil as per the following requirements. Drain out all the oil of the brake system and add the oil recommended above, then exhaust the air. The air exhaust process refers to chapter 6.
- Page 23 Chapter 4 “front suspension inspection”. 2) Check the rear wheel bearing to see whether it is abraded, damaged or has abnormal noise or Kata noise. Detail as per section 1 in Chapter 4 “rear suspension inspection”. Wheel nut Check the wheel nut is tight or not. If not, tighten it according to the specified torque. Suspension 1.
- Page 24 If found the oil level is not enough, filling up with the stipulate oil to the hole. Oil requirements, see Chapter V "car maintenance", which shows the replacement. 3) Tighten the oil Cypriot as regulated. 1. Oil drain-out plug Replacement 2.
- Page 25 For example: Front door Gearshift lever and axial Check Check whether the rod gearshift control lever is flexible, and noise. If the operation of the lever is difficult, please lubricate it according to the following requirements. Use chassis control rod with waterproof grease for lubrication of bearings and shaft sleeve. 8.Final check Warning For road tests, in order to avoid any incidents, please choose road with no passerby and...
- Page 26 Shift gearlever to “N” gear; trample the clutch half to get ready to start. Only when the clutch is trampled to the bottom can we start the engine. Check the exhaust system Check whether the exhaust system is leaking, cracking or loosening. Clutch Check the following conditions: ·...
- Page 27 Chapter 3 Engine Fuel Injection System Section I Brief Introduction of Development of Engine Fuel Injection and Electronic Control System Question appeared With the quick development of the automobile industry, the crisis of energy sources and exhaust pollution become serious day by day. Now the countries all over the world pay much attention to this, especially in the United States where the autos is widely used, the United States parliament has passed a decision of ‘Zero Pollution of Automobile Exhaust’...
- Page 28 In 1950, the gasoline jet type engine was installed on the racing car by Benz Company German. In 1952, Germany Benz company pushed out the 300BL gasoline jet type engine, which adopts direct injection system inside the combustion chamber produced by ‘Bosch Company’ that is similar to diesel injection system.
- Page 29 1) Brief Chart & Stitch Function: The intake manifold pressure is related to the opening of the throttle, which reflects the size of the engine loading, so it can be considered as information of Since the intake temperature has some effect on the quality of the intake air, the intake air temperature should be measured so as to correct...
- Page 30 Technical Specification of Intake Pressure Sensor Operational Temperature:—40/+125 4) Reason for General Failure: 1、There is abnormal high voltage or reverse big electric current in the course of working. 2、The vacuum component is damaged in the course of maintaining. Maintenance Notice: 1、...
- Page 31 Fault Symptom & Judgment Method Value Scope Unit least typical most resistance(stitch 1-2) kΩ slide arm protect resistance 1380 Ω (sldie arm in the zero,stitch 2-3) running temperature -40 ℃ voltage of power the voltage ratio of right electrode end 0.04 0.093 position...
- Page 32 Scope vlaue unit sensitivity of new sensor to the 5kHz signal 26±8 mV/g the linearity between 3 to 15kHz 5kHz±15% the linearity of resonance 15-39 mV/g resistance >1 MΩ impedance capacitance 1200±400 cable capacitance 280±60 pF/m resistance leakage the resistance between two output stitches of 4.8+15%...
- Page 33 2)Working Principle The sensing head of oxygen sensor is a kind of earthenware conduit with hole, outside conduit surrounded by emission air, inside circulate atmosphere . the wall of earthenware conduit is zirconium dioxide, electrical heating pipe inside. The work of oxygen sensor is to transfer the difference of oxygen ion concentration between inside and outside of earthenware.
- Page 34 4) Fault Symptom&Judgment Fault Symptom: Poor idle speed, off gas over standard and big fuel consumption etc Reasons: 1、 Steam into sensor causing abrupt change of temperature and the probe breaks. Oxygen 2, (Pb,S,Br,Si) sensor Oxygen sensor”poisoning” (Pb,S,Br,Si) Notice: Do not use cleaning liquid, nctuous liquid and volatile solid on the oxygen sensor.
- Page 35 to stitch 2 and stitch 3, the resistance value under 20 should be 860 Ω 土 10%. ℃ 2、(Contact tie-in) make the digital multimeter in A/C voltage gear, the two needles should be connected to stitch 2 0and stitch 30, then start the engine, there will be voltage output. (Advice: check by oscillograph) 6.Phase Sensor The phase sensor is to check the sensor of engine timing phase which is usually got by checking the turning angle of the position of the camshaft.
- Page 36 proportional. 3)Technical Specification 4)Fault Symptom & Judgment Fault Symptom:the exhaust is beyond the standard and the fuel consumption increases etc. Reason: man-made malfunction Easy Measure Method: (Connect the tie-in) Start the ignition switch but not the engine, put the digital multi meter to the direct voltage gear, two tips connect with stitch 3#,1# of sensor, insure it has reference voltage 12V.
- Page 37 cylinder) 9(J2-B8) to guard against theft output 50(J1-A11) fan control 1 output 51(J2-B1) electrical 2 earth 12(J1-C5) continuing power input 53(J1-D16) electrical 1 earth 13(J1-C16) ignition switch input main relay output rotate speed sensor 15(J2-B14) input engine A switch of air condition 16(J1-D5) throttle position sensor input...
- Page 38 Sensor earth 3 earth 76(J2-A8) blower switch input sensor earth 2 earth headlight switch input Intake pressure input Sensor phase sensor input 39(J2-B3) Engine Coolant Sensor input Intake air temperature 40(J2-B4) input sensor 4)Technical Specification value Scope unit least typical most normal 16.0...
- Page 39 2、 (Discharge the tie-in) Check if the ECU connecting wire is good; especially check the power supply of the ECU and the earthing wire. 3、Check if the outer sensor works well, the output signal is reliable and the wire is ok. 4、Check if the actuator works well and the wire is ok? 5、Finally, replace the ECU to test.
- Page 40 Electric Fuel Pump Circuit Diagram of EF Stitch: The electric fuel pump has two stitches to connecting the fuel pump relay and there are “+”and “-” carved on the fuel pump beside the two stitches showing to connect anode and cathode. 2.Working Principle The electric fuel pump is composed of DC electromotor;...
- Page 41 2、the bushing of fuel pump and the armature locking 3、The abrasion of component of the oil face sensor Notice for Maintenance: 1、 The electric fuel pump has different flow according to the demand of the engine. The fuel pump with same shape and which can fit well will not be the right one.
- Page 42 3. Technical Specification Special fuel The fuel injector can only use the fuel which meets the national standard of people republic of china GBl7930-1999<<lead-free petrol for vehicle>> and national standard of environment protect GWKBl—1999 <<control standard of motor petrol hazardous substance>> stated fuel. 4.
- Page 43 function is to keep the pressure difference between oil distribution and suction manifold in a constant number. So the fuel mass from oil atomizer is only determined by oil atomizer opening time, in order to control the consistency of flammable mixture accurately. 2.
- Page 44 1 Using high pressure gas shock the diaphragm component is forbidden. 2. Using strongly corrosion liquid for washing is forbidden. 3. Distortion by external force is forbidden. Simple measure: The sucker connect with fuel pressure gauge,start engine,under the idle speed condiction, check the fuel pressure whether around 260kPa;...
- Page 45 1. Air Cleaner Assy 2. Bolt, Air Cleaner 3. Bracket 1# (upper), Air Cleaner 4. Bracket 2# (Lower), Air Cleaner 5. Bolt, Bracket 6. Resonator Assy 7. Bracket, Resonator 8. Bolt, Bracket 9. Bolt, Resonator 10. Big Washer, Assemble Resonator Air Cleaner Illustration 2, maintenance This engine air cleaner filter is kind of dry type...
- Page 46 warm air.when wax sensor feels the entering air temperature is going up ,it will let the baffle moving, in order to close the warm air access 2. maintenance Check step a.remove the air cleaner upper cover. b.blowing the cold air into the hot wax sensor ,like the picture showing,check the baffle opening warm air pipen and closing cold air pipe situation.
- Page 47 (2)entering air temperature sensor: inspect the entering air temperature。 (3)air throttle position sensor: inspect air throttle open degree. (4) idle speed valve: control engine idle speed. Idle speed controlling valve 1. Idle speed controlling valve function a. can keep the idle speed in the previous decided rotate speed; b.can auto improving the idle speed under the accelerator pedal relaxing situation, in order to use A/C.
- Page 48 Maintenance principle: 1. Never exert any force on axial direction to try to get the axes in or out. 2. Before the idle speed regulator the one with step motor install in the air damper, its axes must in a total retractive position.
- Page 49 Section Ⅴ fuel vapor gathering system The function of fuel vapor gathering system A great lot fuel will evaporate when the fuel heat up by running circumstance( hot summer) or fulsome surge(running on a long rough road) or be heated up during the fuel injector circulation .if vent these steam out, not only waste fuel but also easy to arose fire,...
- Page 50 Flow Rate while the pressure Difference is 200mbar and take up 100% air ratio 3.Examine and Maintenance 1) Canister aa). The connection between rubber tube and carbon jar, throttle body, fuel tank shall be checked frequently, whether fastness, loose. falloff. rubber tube broken is not allowed.
- Page 51 check the carbon jar state. 3. Avoid the water ,fuel and other liquid enter into valve during the maintenance. 4. For avoiding the solid-borne sound, suggest hanging the carbon jar in the air, installing on the soft tube. Simple measure method: (Take down the stitches) put the DMM gear to ohm, two instrument pens connect with the carbon jar control valve stitches separately, at the 20 ,the rating resistance is 26±4 ℃...
- Page 52 1. Jumper Wire Simple jumper wire is one passage stranded conductor, at its ends connect with crocodile clips or different type plugs, it has different types .In the tool box ,there must has different type jumper wire, for the specific place test, like the picture showing rightside.
- Page 53 out whether exist source voltage on the circuit somewhere, and get the electric drop after circuit through electric part. Attention: Only use high-impedance (above10MΩ) DMM; don’t measure resistance in a hot-line work way, otherwise easy to burn DMM out. 3. Hand-held vacuum air pump There are many vacuum control system be used on modern vehicles, for diagnose , clearing vacuum control system fault, can use hand-held vacuum pump to test.
- Page 54 1) Cleaning instrument of cleaning under vehicle 2) Cleaning instrument of cleaning inside vehicle 7.Special tester When check the engine control system, use diagnose tester to help finding source of fault is effecitive. Currently, in the vehicle repairing market most diagnose tester are table type engine fault analysis meter. Also on the market distributed portable type engine computer tester is applied.
- Page 55 (4) Crank case force ventilation or pipe blocked up. (5) Spark plug high voltage wire has defects. (6) Spark plug ablate or crase. (7) Actived carbon jar system’s wash water valve has crack or other defects. (8) Exhaust gas recycle valve keep opening because its locked. b.
- Page 56 microcomputer or sensor get damage , except any instruction. Usually should use high impedance digital tester. (9) When people enter carriage, body’s static discharge may produce very high voltage , so when operate digital tester for repairing or close to this type meter, should take metal tape , one head coil on wrist ,the other one clip on the car body.
- Page 57 1. Failure of fuel injector Fuel injector is one of main execute components of injection system, when fuel quality fall short of request, easy blind and seizure. Failure usually performance like : magnet coil work bad, fuel injector seizure, wear, water-clock and atomization not good so on. Fuel injector perform above failures will cause some cylinder not working or not working fine.
- Page 58 Minor failure——when a failure shows up, failure code be recorded, but the alarm lamp no light, this type called minor failure. In the computer’s failure storage, usually major failure has the priority compare to the minor failure. When already stored 15 failures, if one major failure appear, then this major failure will instead of one saved minor failure.
- Page 59 Failure code read and deletes method EQ474Ibg13-20 engine system used standard diagnose tie-in(like picture right side), failure diagnose interface is installed under the panel. Engine manage system EMS using stitches 4.7.16 of standard diagnose tie-in. NO.4 stitch connects with groundwire, No.7 stitch connects with No.71 stitch of ECU, namely engine date line “K”, No.16 stitch connects with the storage cell anode.
- Page 60 unit code after 1s. For example, the flicker way of the No.27 failure code is: Flicker twice continuously (showing 20), then flicker seven times in a successive way after holding a second, which refers to No.27. The flicker way of the No.55 self-diagnose code for failure is: Flicker five times continuously (showing 50), then flicker five times in a successive way after holding a second, which refers to No.55.
- Page 61 Input P0113 TA_MN_CDC Intake Air Temp.Circ. High Input P0116 TM_NP_CDC Engine Coolant Temp.Circ. Range/Performance P0117 TM_MX_CDC Engine Coolant Temp.Circ. Low Input P0118 TM_MN_CDC Engine Coolant Temp.Circ. High Input P0122 DK_MN_CDC Throttle/Pedal Pos.Sensor A Circ. Low Input P0123 DK_MX_CDC Throttle/Pedal Pos.Sensor A Circ. High Input P0130 LSV_NP_CDC...
- Page 62 PCOD Index DFP_Bosch Description of PCODE Cylinder 3- Injector Circuit P0268 EV2_MX_CDC High P0270 EV3_MN_CDC Cylinder 4- Injector Circuit Low Cylinder 4- Injector Circuit P0271 EV3_MX_CDC High P0300 MD_MN_CDC Random/Multiple Cylinder Misfire Detected P0300 MD_MX_CDC Random/Multiple Cylinder Misfire Detected P0300 MD_NP_CDC Random/Multiple Cylinder Misfire Detected Cyl.1 Misfire...
- Page 63 Error Knock Control System P0324 KRTP_NP_CDC Error Knock Sensor 1 Circ. Low P0327 KS1_MN_CDC Input P0328 KS1_MX_CDC Knock Sensor 1 Circ. High Input P0340 PH_SI_CDC Camshaft Position Sensor Circuit Camshaft Pos.Sensor Circ. P0341 PH_NP_CDC Range/Performance Camshaft Pos.Sensor Circ. Low P0342 PH_MN_CDC Input Camshaft Pos.Sensor Circ.
- Page 64 Fuel Pump “A” Control Circuit P0628 KPE_MN_CDC Fuel Pump “A” Control Circuit P0629 KPE_MX_CDC High P0645 KOSE_SI_CDC AC clutch relais circuit P0646 KOSE_MN_CDC A/C Clutch Relay Control Circuit Low A/C Clutch Relay Control Circuit P0647 KOSE_MX_CDC High P0650 MILE_MN_CDC Malfunction Indicator Lamp Control Circ. P0650 MILE_MX_CDC Malfunction Indicator Lamp Control Circ.
- Page 65 1、After confirm steady state failure currently, then can do the following examine and repair, otherwise will make mistake in diagnose. 2、Not allowed use finger type multimeter to check circuit of electric injection system. 3、 During check vehicle with guard against theft system ,if there is a replacing ECU situation in the blank of “after steps”, then do the programming after replacing ECU.
- Page 66 Diagnosis help: 1、 Confirm engine no any failure record. 2、 Confirm reported failure exist. 3、Already do the check following above steps, and no abnormal situation. 3、 Replacing ECU, do the test. If the failure code can be cleared, the failure part is in the ECU, if it can not be cleared, replace it with the original ECU, repeat this procedure, and test again.
- Page 67 General diagnose procedure: 2. Start difficulty General failure parts 1. Fuel with water 2. Fuel pump 3. Cooling temperature sensor 4. Vacuum hose of fuel pressure regulator 5. Ignition loop General diagnose procedure: Start difficulty. Test Operation Step Follow-up step Result Connecting fuel pressure gauge(point is the forepart of inlet pipe of fuel Next step...
-
Page 68: Chapter 4 Transmission System
Chapter 4 Transmission System Section 1 Transmission Structure 5TH Transmission is a synchronous transmission. It has five onward gears and one reverse gear. It shifts gears through three synchronous sits and four shafts (input shaft, main shaft, centre shaft and reversing gear shaft). All of the onward gears are joggle style and reverse gears are gild or annulus structure. - Page 69 ·the quantity of the lubricant oil inadequate or the kind of the oil improper makeup or replace ·bearing wear or damaged replace noise ·gear damaged or wear replace ·synchronous gear ring damaged or wear replace · Inverse gear in the gear cover or gear replace damaged or wear...
- Page 70 On board maintenance 1. Replacing the oil 1)Before changing or examine the oil, be sure of turning off the engine and uprising the automobile levelly. 2)After uprising the automobile, examine the amount of the oil and make sure whether the oil leaks.
-
Page 71: Section 2 Four-Speed Transmission
discharging oil and tighten it to the required torsion. 4)Adding required band oil according required quantity of oil.(until the level of the oil hole) 5) In accordance with the following provisions, tighten the tuck discharging oil and the tuck adding oil. Four-speed Transmission Section 2 Composition... - Page 72 change it according to the table shows. Notes: Don’t circumrotate the driven gear more than one circle, because it will violate the exact of the examination. 3.Assembly Assemble steps are opposite to the disassembly steps. Pay attention to the following requirements: Notes: Supply the initiative gear and the driven gear as a set of groupware.
- Page 73 Differential bearing Suppress the bearings to the inner of the differential Shell correctly with special implements, not allowing to knock the bearing into the inner of the shell. Special implements (A):09940—53111 Special Implements...
-
Page 74: Chapter 5 Suspension System
Chapter 5 Suspension System Section 1 Front Suspension Ⅰ。Components The front suspention is Macpherson strut suspention as shown below. The top of strut is mounted to the vehicle boy through a rubber mounting. The strut and the rubber mounting are connected through a rubber bracing. - Page 75 times continuously. Try and control the pushing at the same power and pay attention to the performance of the shock-absorber. you should count the times the vehicle sways as you stop pushing. To check shock-absorber of the other side, just repeat the act above. Compare the performances and the times the shock absorbers rebound.
- Page 76 1)Jack up the vehicle. 2)Loose the nuts and washers. 3).Loose the bolts from bushing bracket. 4).Loose stabilizer bar and tie-in. 5).Loose the tie-in from the stabilization bar. When loosing the tie-in nut, nip the bolt with spanner. Fixing Fix all the parts loosely so that you can assure the right position of the stabilizer bar.
- Page 77 (a);55 N·m (b):65 N·m (c):95N·m 3.Front Strut Assy3. Disassemble it as follows : 1). Remove the negative from the battery. 2)Jack the vehiecle. 3)Remove the tyres. 4)Remove the E-ring which is used to fix the brake pipe, loose down the pipe from the bracket as shown from the illustration.
- Page 78 Special Tools (A):09943—17912 (B):09942—15510 9)Remove the bolts of the wheel-hub. Attention: Don't’t loose the bolts except for changing new parts. Be sure of using new bolts when changing parts. 除 Fixing Fixing Of bolts Of Wheel-Hub Insert the new bolts into the slot of wheel-hub. Turn Properly to make sure the tiny-teeth accord with the former ones.
- Page 79 Disassemly 1)Lift the vehiecle and remove the wheels. 2)Remove the front screw of reinforcer from the swing bar. 3)Remove ballpin and the nuts. 4)Remove the bolts and nuts of swing bar. 5)Remove the swing bar. 6)Removal of bushing Special Tool (A):09943—77910 Fixing 1) Fixing of bushing...
- Page 80 buts of the sway bar according to the described torque under the condition of non-loading. Torque: (c):73N·m 7)Check and adjust the toe-in according to the manul. 6.Knuckle Disassembly 1)Lift the vehiecle and remove the tyres. 2)Remove the wheel-hub. Refer to “Disassembly” of “Hub/ tyre bolt” order 2)-8) from this section.
-
Page 81: Section 2 Rear Suspension
2)Fix the wire harness. 3)Fix the bolts of the turning-gear box. And tighten the bolts according to the described torque Torque (b):25 N·m 4)Fix the sway bar(L&R), refer to “Fixing of the sway bar” of the section 2)-6). 5)Check the alignment of the tyres. Section 2 Rear Suspension Ⅰ.Components The rear suspention is uint frame beam axle type which uses leaf springs as shown from illustration... - Page 82 1.Leaf Spring 2.Limit Stop 3.Telescopic Shock Absorber 4.Bumper Ⅱ.Disassembly And Fixing 1. Lock Washer 2.Bolt(Top Mounting)3.Washer4.Bushing, Shock absorber5.Shock Absorber 6.Washer7.Lock Washer8.Bolt(Bottom Mounting)9.Bolt, Top Mounting10.Bolt, Bottom Mounting 2. 1.Shock absorber Diassembly. 1)Jack up the vehiecle. 2)Remove the bolts of bottom bracket. 3)Remove the shock absorber.
- Page 83 2.Leaf Spring2. Disassembly Leaf Spring 1)Lift the vehiecle. When operating, don’t touch the rear suspension or suspension-related elements with jack or lift. When using jack, put a security platform under the chasis to support the lifted vehiecle. Attention: Don’t hang the rear axle housing on the brake pipe. Otherwise, the brake pipe may be torn. To avoid it, make use of safty block to support the rear axle housing.
- Page 84 4)Loose the hand brake. 5)Draw out the brake drum with 8mm bolt. 6)Rotate the lock pin of brake disk and remove the lock spring as shown from the illustration. 7)Release the hand brake and remove brae shoe. 8)Remove the hand brake cable from the chasis.
- Page 85 1.Hand-brake cable 2.Clip 9)Draw out the brake oil. Then detach brake pipe from brale cylinder. Cover the head of the pipe to avoid the leakage of the brake oil. 10)Detach the nuts of base-plate of brake from the rear axle housing.
- Page 86 11)Use special tools (A&B) to draw out the differential axle with brake base plate. 12) Draw out the wheel axle. 13). In order to loose closing ring from the wheel axle, make use of muller to rub the parts of the closing ring until it is thin enough. Attention:小心:...
- Page 87 5)Wipe water-proof seal-glue between rear axle and base-plate of brake. 6)Fix the rear axle into rear axle housing before tightening brake base plate according to the described torque. 7)Connect the brake pipes with sub-cylinder and tighten the nuts according to the escribed torque.
- Page 88 Rear Shock-Absorber 1)Distortion and spoilage. 2)Check the bushing. 3)Check wheather there is leakage. Chang the parts which are abnormal. Leaf spring and cushioned stop Check wheather there are cracks or spoilages. Change the abnormal ones. Meanwhile, the sushioned stop should befixed in the proper position. Oterwise, it should be replaced. Bushing of leaf spring.
- Page 89 7.Connecting nuts of brake pipe. 14—18 8.Nuts of rear wheel. 50—80 9,Drain screw of rear axle housing. 40—70 10.Filler screw of rear axle housing. 35—50 Section 2 Wheels and Tyres Ⅰ.Components Attention: All the closing elements are very important to the vehiecle. They even affenct the performance of some key parts.
- Page 90 Appropriate pressure and drving habit affects the life-span of the tyres awfully. Sudden turn, sudden acceleration and unnecessary sudden brake may increase the wear degree. 2.Wheel2. The hub of wheel is either stealiness or aluminum: 13*41/2J. 3.3.Tyres For Replacement Use the same tyres as old ones. Refer to the tyre schedule. The size, structure and the load-range of the new tyres should accord with the old tyres.
- Page 91 All the vehiecles use metric eye-screws and wheel bolts(Model:M12*12.5). Ⅱ .Trouble Diagnosis 1.Trouble Diagnosis Table. Refer to Section one Chapter five 2.Balance [A]:Before Balancing [B]:After Balancing 1.Jerking caused by fauty tyres. 2.Location of balance plate. 3.Central line of axle There are two types of balances for tyres and wheels: static-balance and dynamic-balance. Static-balance, as shown from the right illustration: it diatributes the weight equally around the tyre.
- Page 92 1.Wheel and Tyre. Don’t use weld, heating or blast to repair any wheels. All the spoiled wheels should rereplaced. Bolts. Any spoiled bolts should be replaced. Build-up Wheel and Tyre Tyres and wheels are built-up from factory. Tyre and wheel are fixed as a unit when doing balance examination.
- Page 93 10,000kms and adjust the pressure. 1.Front tyres 2.Rear tyres 3.Spare tyre Ⅳ.Repair 1.Wheels1. Disassembly 1).Loose the screws 180 degrees.(half circle) 2)Jack up the vehiecle. 3)Remove the tyres. Torque of bolts:50-80N.M Attention: Don’t follow the way of heating to loose the over-tight wheels because heating can reduce the life-span of the wheels and harm to the bearing of the wheels.
Need help?
Do you have a question about the C35 and is the answer not in the manual?
Questions and answers
Left said handle broken iam from KSA Riyadh how can purchase you I introduce