Table of Contents
Advertisement
S TAT E B O U R N E
c r y o g e n i c s
18 Parsons Road,
S TAT E B O U R N E
Parsons Industrial Estate,
c r y o g e n i c s
Washington, Tyne and Wear
NE37 1EZ
S TAT E B O U R N E
c r y o g e n i c s
S TAT E B O U R N E
c r y o g e n i c s
E l e c t r o n i c S e t - u p a n d I n s t a l l a t i o n
Tel: +44 (0) 191 416 4104
U s e r M a n u a l
Biosystem Series
Biosystem Access Series
Biosystem Archive Series
Fax: +44 (0) 191 415 0369
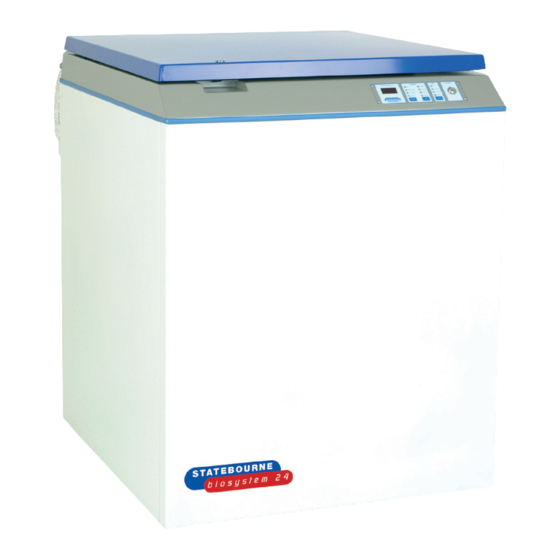
Biosystem 12
Biosystem 24
Biosystem 50
Biosystem 36
Biosystem 40
Biosystem 45
Biosystem 55
Biosystem 60
Biosystem 80
Biosystem 100
Biosystem 100 Plus
Email: info@statebourne.com
Advertisement
Table of Contents

Summary of Contents for Statebourne cryogenics Biosystem Series
- Page 1 S TAT E B O U R N E c r y o g e n i c s U s e r M a n u a l Biosystem Series Biosystem Access Series Biosystem 12 Biosystem 24...
-
Page 2: Table Of Contents
CONTENTS SAFETY INTRODUCTION CONNECTION TO LIQUID NITROGEN SUPPLY INITIAL FILL WHEN USING LIQUID PHASE SETTINGS DESCRIPTION OF LEVEL CONTROLLER COMPONENTS CONTROLLER INSTALLATION INITIAL SETTING UP SYSTEM SETUP PROCEDURE CLOCK SETTINGS - READJUSTMENT NORMAL OPERATION ALARM REPORTING TESTING SYSTEM FAULTS DATA LOGGING PRINTING THE DATA LOG CLEARING THE DATA LOG DATA RECOVERY... - Page 3 Appendix A SENSOR POSITIONING Appendix B OPTION SWITCH SETTINGS Appendix C CONNECTION TO A PRINTER/PC Appendix D CALIBRATION OF TEMPERATURE READOUT Appendix E SIMULTANEOUS FILL CONNECTION Appendix F ALARM CODES/TROUBLESHOOTING Appendix G MAINTENANCE Appendix H REPLACEMENT PARTS MANUAL REVISION INDEX AND APPROVAL Page 3...
-
Page 4: Safety
SAFETY Introduction In all cryogen handling the following appropriate safety guidelines are essential if damage to equipment and personal injury are to be avoided. The following guidelines provide a basic level of instruction in the precautions necessary but are by no means exhaustive, a comprehensive approach involving staff training on a recognised course is strongly recommended. - Page 5 Protective Equipment Cryogloves The wearing of a suitable pair of gloves is essential for day to day operations with liquefied gases. Gloves generally fall into two categories. Those for handling objects in cold gas vapours are usually gauntlets of mid-arm or shoulder length. For handling liquid dispensing hoses and tanks, heavy duty leather wrist length gloves can be used.
-
Page 6: Introduction
INTRODUCTION All Biosystem Series refrigerators utilise the M265CE microprocessor based liquid nitrogen level controller. The M265CE will perform the following functions. *Level monitoring and automatic filling of refrigerators. *Level display (High/Normal/Low). Temperature monitoring and display. Generation of local and remote alarms for:... -
Page 7: Connection To Liquid Nitrogen Supply
CONNECTION TO LIQUID NITROGEN SUPPLY The Biosystem Series refrigerators should be supplied with liquid nitrogen ONLY, from a liquid cylinder or bulk tank operating at between 10psiG and 20psiG maximum. Operating pressures in excess of this will increase transfer losses and could cause the liquid level in the sensor tube to fluctuate and send false signals to the controller, thus causing the refrigerator to underfill. -
Page 8: Description Of Level Controller Components
DESCRIPTION OF LEVEL CONTROLLER COMPONENTS The M265CE System consists of the following items:- Controller (M266CE) Part Number 8601044 Connector PCB + Cable Assembly (M267CE) Part Number 8601045 Sensor Assembly with Thermocouple (M268CE) _ Part Number 8601046 Safety Transformer (M269CE) Part Number 8601973 M265CE Controller The Control panel features four function keys, Alarm, Level and Fill LEDs, and a 3 digit LED display. - Page 9 Page 9...
-
Page 10: Controller Installation
CONTROLLER INSTALLATION The Controller will normally be installed by the manufacturer of the Refrigerator. If installing the Controller check that the option switches are correctly set for the installation. These are located just behind the display, on the Controller PCB. Details of the options and switch settings are given in Appendix B. -
Page 11: System Setup Procedure
After a couple of seconds the digital display will show the temperature and the Level LEDs will show the Level. The temperature readout is calibrated at the factory and should be correct. If not, it may be re-calibrated as per Appendix D. - Page 12 Fill Timer The LN2 SUPPLY LED will light and a number will be displayed. This is the Fill Timer setting in minutes. Use the TEST key to increase the Fill Timer setting. Use the MUTE key to decrease the Fill Timer setting. The Fill Time is adjustable in 5 minute steps between 0 and 125 minutes.
- Page 13 The Lid Timer sets the maximum time that the lid may be left open before the alarm sounds. Note that a lid switch must be fitted to utilise this option. Press the FILL key when finished. Defog Timer The digital display will show (e.g.) (‘d’...
- Page 14 The Chill Timer is adjustable in 5 second steps between 0 and 90 seconds. Note that a lid switch must be fitted if this function is required. If a lid switch is fitted but the Chill feature is not required, set the time to 00 sec. Press the FILL key when finished.
- Page 15 Press the FILL key when finished. Display will show (e.g.): (month) Use the TEST key to increment the month. Use the MUTE key to decrement the month. Press the FILL key when finished. Display will show (e.g.): (‘y’ indicates year) Use the TEST key to increment the year.
- Page 16 Use the MUTE key to decrement the minute. Press the FILL key when finished. Log Interval Display will show (e.g.): (‘L’ indicates Log Interval) The logging interval is selectable from 5, 10, 15, 30, 60 minutes or 2, 4, 6, 12, 24 hrs or No Logging. At each logging point the Time and date, Temperature and Level are recorded.
-
Page 17: Clock Settings - Readjustment
CLOCK SETTINGS - READJUSTMENT Follow the same procedure as in the System Set-up Procedure, skipping over the timer settings etc. It is suggested that the clock is left to GMT. If it is adjusted for BST there will be overlaps or gaps in the data log when the hourly change is made. -
Page 18: Testing
After a pre-set period from the first alarm the Remote Alarm relay will be de-energised, the audible alarm will be reactivated and the REMOTE LED will flash. This may be muted in the same way as the other alarms. Clearing the alarm conditions will switch off the relevant alarm LEDs and audible alarm, re-energise the Remote Alarm relay and return the display to Temperature readout mode. -
Page 19: System Faults
SYSTEM FAULTS If a fault disrupts the operation of the controller and it fails to restart itself correctly the SYSTEM LED will flash and the alarm will sound. The Remote Alarm may also be de-energised. If this occurs the controller should be reinitialised by performing a System Reset as described in the section on Initial Setting Up. -
Page 20: Data Logging
DATA LOGGING Data logging can take two forms:- Printer permanently connected. At the pre-set intervals a status is sent to the printer. Events such as filling and lid opening are reported as they occur. Alarms are also reported as they occur. If required, the entire data log can be printed on demand. - Page 21 To access the printer routine press the MUTE and SECRET keys simultaneously. The following message will appear. Press the FILL switch and the display will change to:- (Data Log.) PRESS AND HOLD the TEST switch to print the Data Log (There will be a bleep followed by a gap and 3 further bleeps before printing commences).
- Page 22 (Fill Activity Log.) PRESS AND HOLD the TEST switch to print the Fill Activity Log (There will be a bleep followed by a gap and 3 further bleeps before printing commences). Or… Press the FILL switch to select the next option. If the FILL switch is pressed (i.e.
-
Page 23: Clearing The Data Log
CLEARING THE DATA LOG Once the data log has been successfully printed it may be cleared. Note that clearing the log does not erase any data. It merely sets a pointer in the memory to tell the printer where to start the next printout. The DATA RECOVERY option may be used to retrieve data even after it has been cleared. -
Page 24: Data Recovery
DATA RECOVERY To Recover the data log: Enter the Printer menu by pressing the MUTE and SECRET keys simultaneously. Use the FILL key to work through the printer menu until the display reads:- (Data Recovery.) Press and hold the TEST Switch. The sounder will bleep once and the display will change to:- This is the start of the printer menu. -
Page 25: Simultaneous Filling
SIMULTANEOUS FILLING Where two or more refrigerators are connected to the same Liquid Nitrogen supply, economies in the use of Nitrogen may be realised by synchronising the filling of refrigerators. This reduces the number of fill cycles required and hence the losses due to nitrogen being trapped in the common supply pipework and vented at the end of a fill cycle. - Page 26 APPENDIX A SENSOR POSITIONING The position of the sensors in the sensor tube determines the level of Liquid Nitrogen to be maintained. The longest lead with a single sensor pod is the low level sensor assembly. The upper bead in the pod is the Low sensor and the lower bead is the Extra Low Sensor.
- Page 27 The sensor positions are set in the factory prior to despatch to suit standard Statebourne inventory control systems (liquid or vapour phase) or can be set at any height in between to customers own specification, although the height between each sensor is fixed and cannot be altered. Standard Statebourne liquid phase ICS/level sensor heights –...
- Page 28 The Biosystem Archive Series which have revolving turntables are factory set to fill to the levels shown below. Because the turntable is a sealed unit this means that these are all vapour phase settings. Other settings including liquid phase are available upon request. BM36 BM40 BM55...
- Page 29 APPENDIX B OPTION SWITCH SETTINGS An 8 way switch allows the M265 to be configured for different installation types and languages. The switch is located on the circuit board, just behind the display. The six retaining screws on the white PCB cover will have to be removed to allow access to the switch.
- Page 30 Page 30...
- Page 31 Printer Not Permanently Connected (S4 off, S5 on) If a printed data log is required but the printer is not permanently connected select this option. Events and alarms are logged but not printed as they occur. At intervals, depending on the frequency of logging a printer is connected and the entire log is printed. This option may be selected for example if two or more refrigerators share a printer via a data switch.
- Page 32 APPENDIX C M265CE PRINTER /PC CONNECTION DETAILS. NOTES TO CONNECT TO A PRINTER USE MALE CONNECTOR. TO CONNECT TO A PC USE A FEMALE CONNECTOR. IF CONNECTING TO A 9 PIN SERIAL PORT WIRE CONNECTORS PIN TO PIN. USE OF A SCREENED CONNECTOR HOUSING IS RECOMMENDED. CONNECT SCREEN AT REFRIGERATOR END ONLY.
- Page 33 APPENDIX D CALIBRATION OF TEMPERATURE READOUT The temperature readout circuit is calibrated at the factory and should only be re-calibrated as indicated in the recommended maintenance schedule or if the thermocouple or M265 controller chassis is replaced, or if the temperature reading is judged inaccurate for other reasons.
- Page 34 APPENDIX E Page 34...
- Page 35 APPENDIX F ALARM CODES / TROUBLESHOOTING Code Alarm Probable Cause Corrective Action High Temperature Refrigerator temperature higher Change temperature alarm setting than temperature alarm setting. (see systems set-up procedure) or (On initial fill, refrigerator will take raise sensor positions to increase approx.
- Page 36 APPENDIX G MAINTENANCE It is essential that a regular maintenance program is initiated in order to prevent the Biosystem Series Refrigerators from developing unnecessary faults. Most common faults are caused by a build up of frost and ice which all liquid nitrogen storage vessels are subject to.
- Page 37 APPENDIX H REPLACEMENT PARTS DESCRIPTION PART NUMBER QTY PER VESSEL 5 Bar Relief Valve 1801110 Bronze Y Strainer 4901015 Liquid fill line assembly (Archive series) 9701461 Liquid fill line assembly (BM50) 9701409 Liquid fill line assembly (BM12) 9701298 Liquid fill line assembly (BM24) 9701299 Controller 8601044...
- Page 38 MANUAL REVISION INDEX AND APPROVAL Issue No. Revision Summary Authorised Date Issue 06 / 97. Issue Sections on safety, connection to liquid nitrogen supply, initial liquid 05 / 99. phase filling, sensor position diagram and maintenance added. Causes and corrective action added to alarm code table. Issue Page 6 - Note added regarding disabled functions.
Need help?
Do you have a question about the Biosystem Series and is the answer not in the manual?
Questions and answers