
Related Manuals for Easy@Home VC 2016


Summary of Contents for Easy@Home VC 2016
- Page 1 User Manual Manual del usuario HANDHELD WET/DRY VACUUM ASPIRADOR DE MANO RECARGABLE English... Page 06 Español...Página 27 ID: #05007...
- Page 2 QR codes take you where you want to go quickly and easily Whether you require product information, spare parts or accessories, de- tails on warranties or aftersales services, or if you want to watch a product demonstration video, our QR codes will take you there in no time at all. What is a QR code? A QR code (QR = Quick Response) is a type of matrix that can be read with a smartphone camera and that contains a link to a website or contact details,...
-
Page 3: Table Of Contents
Contents Overview ................4 Use ..................5 Product contents/device parts .......... 6 General information ............7 Reading and storing the user manual ........7 Explanation of symbols ............7 Safety ...................8 Proper use ................. 8 Safety notes ................8 Checking the vacuum cleaner and product contents ..12 First use ................12 Mounting the wall bracket ............ -
Page 6: Product Contents/Device Parts
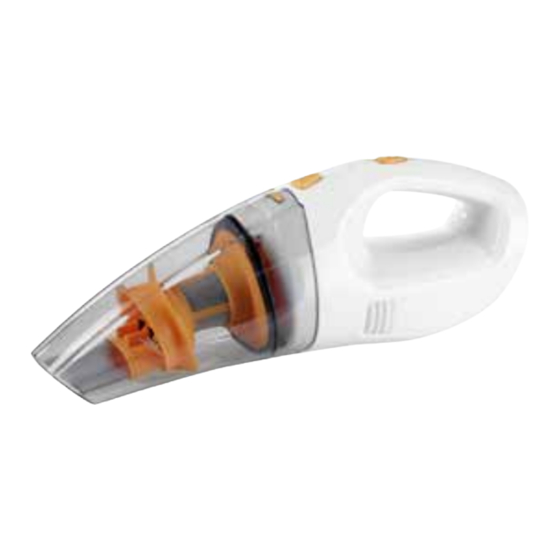
Product contents/device parts Locking button Power indicator light On/Off switch Motor housing Vents, 3× Maximum fill level for liquids Slot for the charging plug Screw hole, 2× Wall bracket/charging station Screws, 2× Crevice nozzle Dowels, 2× Fine dirt nozzle Suction nozzle with rubber lip/wet vacuuming Charging plug Mains adapter Suction opening/receptacle for the suction nozzles... -
Page 7: General Information
General information General information Reading and storing the user manual This user manual accompanies this handheld wet/dry vacuum. It contains important information on use and handling. For improved readability, the handheld wet/dry vacuum will be referred to only as the “vacuum cleaner” below. Before using the vacuum cleaner, read the user manual carefully. -
Page 8: Safety
Safety Products marked with this symbol have positive polarity. They should only be connected with products that also have posi- tive polarity. Safety Proper use The vacuum cleaner is only designed for vacuuming up loose, dry dirt such as dust, lint, crumbs on floor surfaces and cushions around the home and in your car. - Page 9 Safety − A damaged connector cord cannot be replaced. Dispose of a damaged mains adapter and replace it with a mains adapt- er of the same type. Regularly check the mains adapter and the connector cord for damages to prevent risks. −...
- Page 10 Safety − Always switch the vacuum cleaner off and disconnect it from the charging cable if you don’t use or charge the vacuum cleaner, clean it or in the event of a fault. − Pull the mains adapter each time before cleaning and maintenance.
- Page 11 Safety NOTICE! Risk of damage! Improper handling of the vacuum cleaner or the mains adapter may result in damage to the vacuum cleaner or the mains adapter. − Do not place the vacuum cleaner on the edge of the work surface.
-
Page 12: Checking The Vacuum Cleaner And Product Contents
Checking the vacuum cleaner and product contents Checking the vacuum cleaner and product contents NOTICE! Risk of damage! If you are not cautious when opening the packaging with a sharp knife or other pointy objects, you may damage the vacuum cleaner. −... - Page 13 First use Select the area where you would like to mount the wall bracket so that the vacuum cleaner can be easily removed from the bracket when you need it. When mounting the wall bracket, make sure that it is close to a properly installed socket so that you are still able to reach the socket with the mains adapter after installing the charging plug in the wall bracket.
-
Page 14: Operation
Operation Operation Charging the vacuum cleaner NOTICE! Risk of damage! Improperly charging the vacuum cleaner could damage it. − Only charge the vacuum cleaner at an ambient temperature of at least 0 °C and no more than 40 °C. − Once you have finished charging, pull the power plug out of the socket. -
Page 15: Vacuuming
Operation Vacuuming WARNING! Risk of fire and explosion! If you use the vacuum cleaner to vacuum up embers or substances that pose a fire or explosion hazard or are harmful to health, there is a risk of fire and explosion! −... -
Page 16: Overview Of Suction Nozzles
Operation 1. Make sure that the vacuum cleaner is sufficiently charged (see chapter “Charging the vacuum cleaner”). 2. Take the vacuum cleaner out of the wall bracket. 3. Check whether the dust filter has been correctly inserted as described in the chapter “Cleaning”. 4. -
Page 17: Cleaning
Cleaning Suction nozzle Suction nozzle with rubber lip • Is inserted in the suction open- ing so that the inscription “Top” is up. • Used for vacuuming up liquids. Cleaning WARNING! Risk of short circuit! Water in the housing can cause a short-circuit. −... - Page 18 Cleaning NOTICE! Risk of damage! If the dust bin is too full or the amount of liquid has exceeded the MAX mark, dust or liquid could penetrate the motor housing and damage the vacuum cleaner. − When vacuuming up liquids, the dust bin must be emptied no later than once the “MAX”...
-
Page 19: Storage
Storage 10. Wipe the dust bin and the filter housing with the coarse dirt filter off with a damp cloth. 11. Clean the dust filter. If heavily soiled, wash it with soapy water and rinse it thoroughly with clean water. 12. -
Page 20: Removing The Battery Pack
Removing the battery pack Fault Cause Solution The suction The dust bin is full or the − Empty the dust bin. power is low. filters are plugged. − Clean the filters and the vents as described in the chapter “Cleaning”. The vacuum cleaner is not Charge the vacuum cleaner fully charged. -
Page 21: Technical Data
8. Properly dispose of the vacuum cleaner as described in the chapter “Dispos- ing of the vacuum cleaner”. Technical data Base unit: Model: VC 2016 Article number: 93099 Charging voltage: 10 V Charging current: 200 mA Water volume: max. -
Page 22: Fcc Declaration Of Conformity
FCC Declaration of Conformity Mains adapter: Model: K05S100020U Supply voltage: 100 – 240 V~ Frequency: 50/60 Hz Input current: 200 mA Output voltage: 10 V Output current: 200 mA FCC Declaration of Conformity (This only applies to the power adapter) Warning: Changes or modifications to this unit not expressly approved by the party responsible for compliance could void the user’s authority to operate the equipment. -
Page 23: Disposal
Disposal Disposal Disposing of the packaging − Sort the packaging before you dispose of it. Dispose of paperboard and cardboard with the recycled paper service and wrappers with appropriate collection service. Disposing of the vacuum cleaner − Should the vacuum cleaner no longer be capable of being used at some point in time, dispose of it in accordance with the regulations in force in your state or country. - Page 24 AFTER SALES SUPPORT 1-800-886-8506 hup-service@h-u-p.com...
-
Page 25: Warranty Card
* We recommend you keep the receipt with this warranty card. Location of purchase Description of malfunction AFTER SALES SUPPORT Return your completed warranty card together with the faulty product to: hup-service@h-u-p.com 1-800-886-8506 HUP Customer Service MODEL: VC 2016 PRODUCT CODE: 93099 03/2016 Phone: 1-800-886-8506 Email: hup-service@h-u-p.com YEARS WARRANTY... -
Page 26: Warranty Conditions
Warranty conditions Dear Customer, The ALDI warranty offers you extensive benefits compared to the statutory obligation arising from a warranty: Warranty period: 3 years from date of purchase. 6 months for wear parts and consumables under nor- mal and proper conditions of use (e.g. rechargeable batteries). - Page 27 Contenido Contenido Vista general ..................4 Uso ......................5 Contenido de la caja/piezas del equipo...........28 Código QR ..................29 Generalidades ...................30 Leer y guardar este manual del usuario ........30 Descripción de símbolos ..............30 Seguridad ..................31 Uso apropiado ..................31 Indicaciones de seguridad ..............32 Comprobación del aspirador y del volumen de suministro ...35 Primera puesta en servicio ..............36 Montaje del soporte de pared ............
-
Page 28: Contenido De La Caja/Piezas Del Equipo
Volumen de suministro/piezas del equipo Volumen de suministro/piezas del equipo Botón de bloqueo Piloto de control de red Interruptor de encendido/apagado Carcasa del motor 3 ranuras de salida de aire Límite de llenado máximo para líquidos Hueco de conector de carga 2 orificios de los tornillos Soporte de pared / estación de carga 2 tornillos... -
Page 29: Código Qr
Códigos QR Los códigos QR le ayudan a encontrar la información que busca fácilmente y rápidamente Si busca información sobre el producto, recambios o accesorios, datos sobre garantías o soporte posventa, o si quiere ver un video de demostración del producto, los códigos QR le ayudan a encontrar lo que busca rápidamente. -
Page 30: Generalidades
Generalidades Generalidades Leer y guardar este manual del usuario Este manual del usuario pertenece a este aspirador de mano recargable para seco y mojado. Contiene información importante relacionada con la utilización y el manejo. Para incrementar la inteligibilidad, el aspirador de mano recargable para seco y mojado se denominará... -
Page 31: Seguridad
Seguridad Los productos identificados con este símbolo solo se pueden usar en interiores. Los productos identificados con este símbolo tienen una polaridad positiva. Solo se pueden conectar a productos con polaridad también positiva. Seguridad Uso apropiado El aspirador está concebido únicamente para aspirar suciedad esparcida y seca como, p. -
Page 32: Indicaciones De Seguridad
Seguridad Indicaciones de seguridad ¡ADVERTENCIA! ¡Peligro de descarga eléctrica! Una instalación eléctrica defectuosa o una tensión demasiado alta pueden producir descargas eléctricas. − Conecte el adaptador de red solo cuando la tensión de red de la toma de corriente coincida con los datos proporcionados en la placa de tipos. - Page 33 Seguridad − Nunca tire del cable de conexión del adaptador de red para desconectarlo de la toma de corriente; agarre siempre el adaptador de red. − Nunca use el cable de conexión como asa de transporte. − Mantenga el aspirador, el adaptador de red y el cable de conexión alejados del fuego abierto y de superficies calientes.
- Page 34 Seguridad ¡ADVERTENCIA! Riesgos para niños y personas con capacidades físicas, sensoriales o mentales reducidas (por ejemplo, personas parcialmente discapacitadas, personas mayores con limitación de sus capacidades físicas y mentales), o falta de experiencia y conocimiento (por ejemplo, niños mayores). − Este aspirador puede ser utilizado por niños mayores de ocho años, y por personas con capacidades psíquicas, sensoriales o mentales reducidas, o falta de experiencia y conocimiento, siempre que estén bajo supervisión o...
-
Page 35: Comprobación Del Aspirador Y Del Volumen De Suministro
Comprobación del aspirador y del volumen de suministro − Nunca exponga el aspirador, el adaptador de red o el cable de conexión a temperaturas altas (calefacción, etc.) o influencias climatológicas (lluvia, etc.), y no deje que entre en contacto con piezas calientes. −... -
Page 36: Primera Puesta En Servicio
Primera puesta en servicio Primera puesta en servicio Montaje del soporte de pared ¡ADVERTENCIA! ¡Peligro de descarga eléctrica! Si daña conductos de electricidad o agua durante el montaje en la pared, se puede producir una descarga eléctrica. − Asegúrese de que, por el lugar donde quiere perforar, no pasen conductos eléctricos ni de agua. -
Page 37: Manejo
Manejo 8. Para guardarlo, meta el aspirador con la parte trasera hacia el soporte de pared (véase la fig. C). Ahora puede recargar el aspirador como se describe en el capítulo “Recarga del aspirador”. Manejo Recarga del aspirador ¡AVISO! ¡Riesgo de daños! Al cargar el aspirador de forma inapropiada, este puede deteriorarse. -
Page 38: Aspiración Del Polvo
Manejo Aspiración del polvo ¡ADVERTENCIA! ¡Riesgo de incendio y explosión! ¡Si aspira brasas o sustancias nocivas para la salud, inflamables o explosivas con el aspirador, existe peligro de incendio o explosión! − No aspire sustancias corrosivas, tóxicas, nocivas para la salud, inflamables o explosivas con el aspirador. - Page 39 Manejo 1. Asegúrese de que el aspirador esté suficientemente cargado (consulte el capítulo “Recarga del aspirador”). 2. Saque el aspirador del soporte de pared. 3. Compruebe si el filtro de polvo está bien montado como se describe en el capítulo “Limpieza”. 4.
-
Page 40: Vista General De Las Boquillas Aspiradoras
Limpieza Vista general de las boquillas aspiradoras Boquilla aspiradora Utilización Boquilla para juntas • Sirve como adaptador para la boquilla de suciedad fina. • Sirve para limpiar las juntas y succionar en seco. Boquilla de suciedad fina • Se monta sobre la boquilla para juntas. - Page 41 Limpieza ¡ATENCIÓN! ¡Riesgo de quemaduras! El pack de batería del aspirador se puede calentar durante el funcionamiento. − Antes de cada limpieza, deje que el aspirador se enfríe por completo. ¡AVISO! ¡Riesgo de daños! Si limpia el depósito del polvo muy ocasionalmente o de forma inadecuada, el aspirador puede dañarse o se puede ver afectada la potencia de aspiración.
- Page 42 Limpieza − Nunca meta el aspirador en el lavavajillas, pues podría provocarle desperfectos. 1. Apague el aspirador y desconecte el adaptador de red de la toma de corriente. Retire el aspirador del soporte de pared o, dado el caso, desenchufe el conector de carga de la toma de carga del aspirador (véase la fig.
-
Page 43: Almacenamiento
Almacenamiento Consejo: El filtro de polvo está diseñado para un uso continuo. No obstante, si se dañase y se debiera sustituir, puede solicitar un nuevo filtro de polvo a través de la dirección de servicio técnico indicada en la tarjeta de garantía. Para garantizar una potencia de aspiración constante, se debe limpiar periódicamente el filtro de polvo. -
Page 44: Retirada Del Pack De Batería
Retirada del pack de batería Si no pudiera solucionar el fallo de su equipo con estas medidas, diríjase al fabricante a través de la dirección del servicio técnico indicada en la tarjeta de garantía. El manual del usuario se puede solicitar a nuestro servicio al cliente en formato PDF. -
Page 45: Datos Técnicos
“Eliminación del aspirador”. 8. Elimine el aspirador conforme a la normativa como se describe en el capítulo “Eliminación del aspirador”. Datos técnicos Unidad básica: Modelo: VC 2016 Número de artículo: 93099 Tensión de carga: 10 V Corriente de carga:... - Page 46 Datos técnicos Declaración de conformidad de la FCC (Sólo aplicable al adaptador de red) ADVERTENCIA: Los cambios o modificaciones de esta unidad no aprobados ex- presamente por la parte responsable del cumplimiento podrían anular la auto- ridad del usuario para usar el equipo. Nota: Este equipo se ha probado y ha demostrado que cumple con los límites para un dispositivo digital de la clase B, conforme al apartado 15 de las normas de la FCC.
-
Page 47: Eliminación
Eliminación Eliminación Eliminación del embalaje − Separe las partes del embalaje antes de botarlo. El cartón y las láminas han de llevarse a un punto de recogida de papel usado y un punto de recogida de materiales respectivamente. Eliminación del aspirador −... - Page 48 AFTER SALES SUPPORT 1-800-886-8506 hup-service@h-u-p.com...
-
Page 49: Tarjeta De Garantía
Descripción del defecto: SERVICIO DE POSVENTA Envíe la tarjeta de garantía re- llenada junto con el producto hup-service@h-u-p.com 1-800-886-8506 defectuoso a: HUP Customer Service NO DEL MODELO: VC 2016 CÓDIGO DEL PRODUCTO: 93099 03/2016 Phone: 1-800-886-8506 Email: hup-service@h-u-p.com AÑOS DE GARANTÍA... -
Page 50: Condiciones De Garantía
Condiciones de garantía Estimado cliente: La garantía de ALDI le ofrece amplias ventajas en comparación a la obliga- ción legal a la que está sujeta una garantía: Periodo de garantía: 3 años a partir de la fecha de compra. 6 meses para piezas de desgaste y consumibles bajo condiciones normales y reglamentarias de uso (p. - Page 52 DISTRIBUTED BY • DISTRIBUIDO POR: ALDI INC., BATAVIA, IL 60510 www.aldi.us AFTER SALES SUPPORT • SERVICIO DE POSVENTA hup-service@h-u-p.com 1-800-886-8506 YEARS WARRANTY AÑOS DE GARANTÍA MODEL: VC 2016 PRODUCT CODE: 93099 03/2016...
Need help?
Do you have a question about the VC 2016 and is the answer not in the manual?
Questions and answers
where can I get a replacement filter
You can order a new dust filter by contacting the manufacturer at the service address specified on the warranty card.
This answer is automatically generated
@Mr. Anderson I don't have a warranty card !