Table of Contents
Advertisement
Advertisement
Table of Contents

Summary of Contents for Gekkeikan Sake Machine
- Page 1 Gekkeikan Sake Machine ® Owner’s Manual...
-
Page 2: Registration Information
NOTICE The Gekkeikan Sake Machine is not intended for use by persons (including children) ® with reduced physical, sensory or mental capabilities, or lack of experience and knowledge, unless they have been given supervision or instruction concerning the use of the Gekkeikan Sake Machine by a person responsible for their safety. ® Children or individuals under the age of 21 are not permitted to use the machine. Children should be supervised to ensure that they do not play with the Gekkeikan ® Sake Machine. The Gekkeikan Sake Machine’s intended use is to dispense Gekkeikan sake and ® ® should be operated in accordance with the laws and regulations of the location in which such use takes place. -
Page 3: Carton Contents
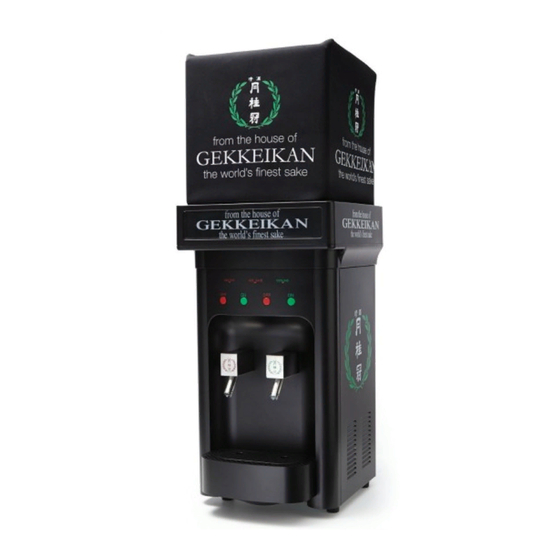
Get to know your Gekkeikan Sake Machine ® Model GK Sake Unit Dimensions 15.5” W x 13.5” D x 25” H Unit Net Weight 15.5 KGS / 34 LBS Power Required 110V–120VAC / 60HZ Current Draw 3A at start / 1.5 A steady Electrical Cord 6 Ft. - Page 4 UNPACKING & SET UP INSTRUCTIONS 1. Remove the included retaining ring and Sake Machine cap. Retaining ring Sake Machine cap 2. Remove foam inserts to reveal the machine. 3. Carefully remove the machine by lifting it straight up out of the box. ® DO NOT HOLD THE GEKKEIKAN SAKE MACHINE BY THE FRONT FAUCETS! 4. Place the machine on a flat surface in a desired location with 4 inches of clearance on all sides. 5. Before plugging in, make sure the power switches in the back are in the OFF position. (The Warming & Cooling functions are OFF, when 0 symbol on rocker switch is depressed) 6. Insert drip tray in the lower front side of the machine. The drip tray is adjustable for different size Tokkuri. Large Tokkuri Medium Tokkuri Small Tokkuri...
- Page 5 INSERTING THE 18L CUBE 1. Remove original 18L cube cap & freshness foil. 2. Place retaining collar on 18L cube neck. 3. Tightly screw on 18L cube adaptor over retaining collar. 4. Turn the 18L cube upside down on the Gekkeikan Sake Machine, ® with 18L cube retaining ring and Sake Machine cap engaging the circular inlet. (As depicted in the below illustration) 5. Plug in, and turn the rocker switches ON. (The unit is ON when — symbol is depressed) 6. 18L cube is inserted correctly when the sake begins to drain from the bottle, into the cooling & warming tanks. (Make sure the sake cube is seated flush with the top of the machine)
- Page 6 ® DISPENSING FROM YOUR GEKKEIKAN SAKE MACHINE FOR THE FIRST TIME OR AFTER A CLEANING Priming the machine: In order to deliver the freshest sake, our machine is vacuum sealed and the system requires priming to dispense product. 1. Make sure the sake cube is seated flush with the top of the machine. A gentle push may be required to ensure proper contact. 2. Insert glassware into HOT faucet stem and gently push in glassware. The faucet stem will now be in a 90 degree angle activating pump. 3. Allow pump to run for 2 to 3 minutes, or until sake begins flowing. 4. To STOP, remove glassware from faucet stem and set at original position (45 degree angle) or press RED stop button on faucet control panel.
- Page 7 ® DISPENSING FROM YOUR GEKKEIKAN SAKE MACHINE Depending on your needs from time to time you may choose to automatically or manually dispense product from your machine. 1. To dispense automatically insert glassware into desired faucet stem and gently push in glassware. The faucet stem will now be in a 90 degree angle activating the dispense pump. Once the sake from the glassware comes in contact with the faucet sensors, the pump will turn off automatically. 2. To engage manual mode insert glassware into desired faucet stem and gently push in glassware. The faucet stem will now be in a 90 degree angle activating pump. 3. Sake will begin flowing automatically. Press the RED “OFF” button to stop the flow of product. 4. Leaving the faucet in a 90 degree angle can now override the auto stop by pressing the GREEN “ON”...
-
Page 8: Cleaning Instructions
CLEANING INSTRUCTIONS 1. Turn switches in rear of machine to the off position and remove existing 18L cube. 2. Drain remaining sake from BOTH the Warm & Cold faucets. 3. Remove drip tray to expose drain ports & air vent. a) Hot drain marked with a RED cap (CAUTION: contents may be hot) b) Cold drain marked with a GREEN cap c) Air vent marked with a WHITE cap 4. Refill the empty 18L cube with at least 4L of water & FDA cleaning solution mix. Please mix the FDA approved cleaning solution per the manufacturer’s recommended dilution. Flush cleaning solution through the system from BOTH the Warm & Cold faucets as well as both drain ports. Examples of an FDA approved solutions are Beer Line Cleaner, One Step, IO Star, etc. 5. Repeat step 4 with warm water, until system is clear. 6. Drain remaining water from BOTH Warm & Cold faucets. 7. Make sure to clean the 18L cube adaptor and retaining collar with warm water. 8. Wipe down both HOT/COLD faucets & sensors with warm water. CLEANING SHOULD TAKE PLACE AFTER MACHINE HAS NOT BEEN USED FOR AN EXTENDED PERIOD OF TIME, OR ONCE A MONTH DURING REGULAR USE. NOTE: THE 6 LITER SAKE BARREL MAY ALSO BE USED FOR CLEANING. -
Page 9: Warnings And Important Notices
IMPORTANT When setting up your new Gekkeikan Sake Machine, place it on a level surface, ® indoors, with 4 inches of space on all sides to allow for adequate airflow from the refrigeration system. DO NOT PLACE MACHINE ON AN ANGLE. FAILURE TO PROVIDE ADEQUATE CLEARANCE AROUND THE MACHINE WILL RESULT IN IMPROPER FUNCTIONING OF THE MACHINE OR POSSIBLE DAMAGE TO INTERNAL COMPONENTS.
Need help?
Do you have a question about the Sake Machine and is the answer not in the manual?
Questions and answers