Table of Contents
Advertisement
D
L
E
®
Machine Serial Number :
Head Serial Numbers :
Date Purchased :
Model M27 Stitcher
OPERATION AND MAINTENANCE MANUAL
M27-AST Stitcher.....................115V and 60HZ
M27-BST Stitcher.....................230V and 50HZ
M27G20-AST Stitcher..............115V and 60HZ
M27G20-BST Stitcher...............230V and 50HZ
Before using this Stitcher, all operators must study this manual and follow the safety
warnings and instructions. Keep these instructions with the M27 Stitcher for future
reference. If you have any questions, contact your local DeLuxe Stitcher Graphic Arts
Representative or Distributor.
S
UXE
TITCHER
C O M P A N Y
I N C .
Advertisement
Table of Contents

Related Manuals for DeLuxe Stitcher M27 Series

Summary of Contents for DeLuxe Stitcher M27 Series
- Page 1 Before using this Stitcher, all operators must study this manual and follow the safety warnings and instructions. Keep these instructions with the M27 Stitcher for future reference. If you have any questions, contact your local DeLuxe Stitcher Graphic Arts Representative or Distributor.
- Page 4 W A R N I N G ! Model M27 Stitchers Operators and others in the work area should always wear safety glasses to prevent serious eye injury from fasteners and flying debris when loading, operating, or unloading this machine. Do not operate this stitcher without all guards in place.
-
Page 5: Table Of Contents
Table of Contents Introduction ..........................4 Assembly ..........................7 Belt Guard Removal and Assembly ..............8 Cycling Machine Manually .................. 9 Operating Adjustments ........................10 Adjusting the Machine for Thickness of Work ............ 10 Recommended Wire Sizes ................. 11 Adjustments and Settings ........................13 Adjusting the Clincher Points ................ -
Page 6: Introduction
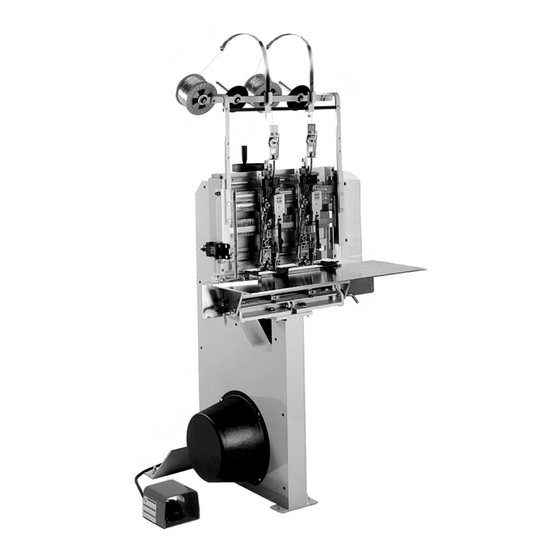
Introduction The DeLuxe Stitcher M27 Stitcher Machine is a multi-head stitcher designed to accommodate both light and heavy-duty work, stitch both flat and saddle and is recognized for being the highest capacity multiple head stitcher due to its ability to reliably stitch any thickness of stock from 2 sheets to 3/4”... - Page 7 Specifications Weight Shipping Weight ....580 lbs (263 kg) 18D Stitcher Head ..18 lbs. (8 kgs) (each) G20 Stitcher Head .
- Page 8 Stitcher. If the container is broken, damaged or has been tipped over and there is evidence that the machine may be damaged, immediately notify the carrier who delivered the machine and the DeLuxe Stitcher Graphic Arts Representative from whom the M27 was purchased. Inspection As you carefully unpack the machine, check to make sure all components were delivered and are in good working order.
-
Page 9: Assembly
CORRECT P2731 M11009 PAYOFF PG10271 15150LA 7691 7693 17280 17289 7690 PW38 17282 (2) HN3816 WIRE SPOOL LW38 P3318 (4) 17161A 17149 63 (2) A1185 425 (3) 63 (2) G30164A (3) A1178 17145FA 16148 (2) 17111 Figure 1 - Assembly ... -
Page 10: Belt Guard Removal And Assembly
(7690) from the Spool Stud. Slide the Wire Spool over the Spool Stud, making sure that the Flat Washer (PG10271) is between the Spool and the Wire Spool Bracket. Also verify that the wire payoff is identical to the payoff in Figure 1; from left to right. Improper wire payoff will result in poor stitch- ing. -
Page 11: Cycling Machine Manually
WARNING Always disconnect the power supply before making any adjustments or servicing the stitcher. Cycling Machine Manually / Adjusting the V-Belt (Figure 3) To turn the machine manually, it 850677 or is first necessary to disconnect the 850678 power and remove the Belt Guard 7678 (7676), see the section “Belt Guard Removal”... -
Page 12: Operating Adjustments
Operating Adjustments The quality and quantity of work that can be stitched on the M27 is dependent upon the operator making the necessary operating adjustments as accurately as possible. The following information and instructions are provided so that the operator will clearly understand how to make the required operating adjustments. -
Page 13: Recommended Wire Sizes
Anytime the thickness of work changes, a sample should be tested in the M27 so no serious damage is caused to the machine. If the machine is operated on work thicker than it is set to handle, damage will result and the stitcher machine will not operate properly. ... - Page 14 Stitcher Head Parts * Wire Gauge Used Max Capacity 20 Gauge ....23 Round ....2 Sheets to 1/8” .
-
Page 15: Adjustments And Settings
Adjustments and Settings Adjusting the Clinchers (Figures 7 and 8) If the staples are not clinching properly the Clincher Points (7024B, 7024C or 7257B) will need to be adjusted within the Clincher Plate (7650A). Make sure the Table Assembly (17145FA) is in a flat work position. - Page 16 not be aligned with the Stitcher Head’s Driver. Refer to both Figure 7 and Figure 8 and the following instructions for directions on center- ing the Clincher Points. Loosen the two (2) Screws (UA3310.3 or 9081B) securing the Clincher Plate to the Retaining Plate in the M27’s Clincher Rail.
-
Page 17: Troubleshooting
Troubleshooting The following is a brief list of problems and solutions which should cover the majority of situations encountered when stitching with the M27. The quality and quantity of work that can be produced with the M27 Stitcher is dependent upon the operator making all adjustments as accurately as possible and carefully maintaining the machine. -
Page 18: Maintenance
Maintenance Lubrication (Figure 9) Your M27 Machine has been fully lubricated at the factory, but regular preventative maintenance will result in superior performance and a longer life of the machine. Machines that are in constant use should be lubricated weekly where as machines that are only operated periodically should be lubricated just prior to use. -
Page 19: Ordering And Replacing Spare Parts
In time, you may need to replace some parts of the M27 Stitcher Machine. To do this locate the DeLuxe Stitcher part number in one of the following diagrams and contact your Graphic Arts Representative to order the replacement by part number, description and quantity. -
Page 20: Mounting & Removing The Head
Mounting & Removing Heads The M27 Stitcher Machine can accommodate up to four (4) Stitcher Heads. The time may come when additional Heads have to be added or removed from the stitcher. The following are guidelines for mounting and removing both an 18D and a G20 Stitcher Head to or from the M27. -
Page 21: Clutch-Brake Maintenance
Clutch-Brake Maintenance WARNING Always disconnect the power supply before making any adjustments or servicing the stitcher This stitcher is equipped with a solenoid actuated, continuous trip, wrap spring clutch-brake unit. It is a dependable device and seldom needs service. But should a malfunction occur, the following information is a service and troubleshooting guide for the maintenance of this unit. - Page 22 Clutch and Brake Springs With the brake engaged (full limit of output), the input hub should be free to rotate by hand. With the clutch engaged, the input and output hubs should rotate together. If the unit does not rotate in either of these modes, the clearance between the hubs of the unit on the shaft may have been disturbed or damaged.
- Page 23 Disassembly (Figure 12) To disassembly the Clutch-Brake unit (850677 or 850678) it will be necessary to remove the Drive Pulley (7678) from the stitcher by removing the V-Belt (850730), Retaining Ring (P7863), and Clutch Anchor Screw (7681). Disconnect the Ground and Solenoid wires, and swing the anchor strap (FC9656) clear of the Drive Pulley Assembly and slide it off of the Drive Shaft.
- Page 24 Note: At this point it may be necessary to reselect one (1) of the nine (9) Control Collar slots for the Brake Spring Tang (release Actuator Lever, remove the Clutch Spring tang from the slot, then move Control Collar axially toward the Input Hub end and rotate it opposite to the drive direction to pick up the next slot).
- Page 25 Lubrication The clutch-brake unit is designed with the bearing parts made from sintered metal that has been impregnated with oil and normally do not need to be re-lubricated. In cases where there is severe duty, the unit may be re-oiled or flushed out with minimal or no disassembly by using a light bearing oil as used in manufacture (Shell Bearing Infusion Oil #33).
-
Page 26: Assembly Drawings
Wiring Diagram Complete Wiring with Detail... - Page 27 Wiring Diagram AST - 115V Models BST - 230V Models...
- Page 28 Motor Assemblies...
- Page 29 Guard Assembly...
- Page 30 Internal Assemblies PW516 PW12.3 (2) G30013A CB837E G30049 *G30053 (2) *G30050 G30168A (ASSY) *G30054 G30021 G30151 *G30056 (4) G30024B G30017A (2) PW716.2 (2) G30101B G30167A *G30054 (2) G30049 (2) G30011A (2) *G30057 PW516 G30018A G30130 *G30056 (2) G30006A *G30050 *G30062 *G30054 G30049 G30025 (2)
- Page 31 External Assemblies...
- Page 32 Wire and Guard Assemblies...
- Page 33 Driver and Bender Rail Assemblies...
- Page 34 The M27 Stitcher Machine...
-
Page 36: Part Number / Description Cross-Reference
Part Number / Description Cross-Reference PART NO. DESCRIPTION QUANTITY PART NO. DESCRIPTION QUANTITY 072005 Screw, M6X1.0X25 850678 Electric Clutch 230V 16148 Table Lock Pin 850730C V-Belt 1/2x60 17110B Lever 850731 Pulley - AK15-5/8 17111 Pivot 850732 Pulley - AK17-5/8 17145FA Work Table Assembly 851005 Strain Relief... - Page 37 Part Number / Description Cross-Reference PART NO. DESCRIPTION QUANTITY PART NO. DESCRIPTION QUANTITY LW14 Lock Washer 1/4 G30100B Adjuster Crank Shaft Insert LW38 Lock Washer 3/8 G30101B Adjuster Yoke M11009 Plastic Washer G30102B Adjuster Shaft P2582 Connector 3/8x90 Degrees G30103 Adjuster Stop P2731 Thumb Screw 1/4-20x3/4...
-
Page 38: Declaration Of Conformity
Declaration of Conformity DeLuxe Stitcher Company, Inc. 6635 West Irving Park Road Chicago, Illinois 60634-2410 U.S.A Telephone 773-777-6500 Facsimile 773-777-0156 hereby declare under our sole responsibility that the Stitching /Stapling Machines M27-BST to which this declaration relates is in conformity with the... -
Page 41: Warranty
This warranty is in lieu of all other express warranties. Any warranty of merchantability or fitness for a particular purpose is limited to the duration of this warranty. DeLuxe Stitcher shall not be liable for any incidental or consequential damages. - Page 42 NOTES...
- Page 44 DBSM27 -0415...
Need help?
Do you have a question about the M27 Series and is the answer not in the manual?
Questions and answers