
Related Manuals for Snibe MAGLUMI 2000

Summary of Contents for Snibe MAGLUMI 2000
- Page 1 ® MAGLUMI Chemiluminescence Analyzer Operating Instructions Shenzhen New Industries Biomedical Engineering Co., Ltd...
-
Page 3: Table Of Contents
Safety Notes Safety Notes 1 CAUTION ON ELECTROMAGNETIC WAVE INTERFERENCE ----------------------------------------------2 1.1 E MAGLUMI® ---------------2 LECTROMAGNETIC NTERFERENCE GIVEN BY TO OTHER QUIPMENT 1.2 E MAGLUMI® A -------2 LECTROMAGNETIC NTERFERENCE THAT MAY BE GIVEN TO THE NALYZER 2 INSTALLATION, MOVEMENT, AND SERVICE -------------------------------------------------------------------3 3 OTHER CAUTIONS-------------------------------------------------------------------------------------------------------3 3.1 H -------------------------------------------------------------------------------3... -
Page 4: Caution On Electromagnetic Wave Interference
Electromagnetic Wave Interference. Installation and service of the system or changes in the installation may never be performed by persons not authorized by SNIBE, especially never connect devices in the system with movable multiple plug sockets. ® However, there is no guarantee that the MAGLUMI Analyzer will not cause Electromagnetic Wave Interference. -
Page 5: Installation, Movement, And Service
Analyzer after the delivery, contact SNIBE to avoid trouble related to the movement. Make sure to use only equipment such as printers or screens, which have been released by SNIBE. A complete system check-up ® has to be performed after changes in the MAGLUMI Diagnostic System. -
Page 6: Common Cautions For 5 Danger Of Fire
Installation at the delivery is performed by Service Engineers of SNIBE or Technicians certified by SNIBE, or performed under the supervision of them to offer a safe and precise Analyzer. -
Page 7: Danger Of Explosion Of Flammable Vapor
For keeping safety, only use wash buffers, starter reagents and diagnostic kits approved by SNIBE to assure not using flammable chemicals in the working process. This instrument is not explosion-proof type. Do not use organic solvent in the direct surrounding of the analyzer whose ignition point is lower than 65°C. -
Page 8: Deterioration Of Users State Of Health
Safety Notes 7.2 Electric Shock caused by Improper Grounding ® Use Power Cable furnished with the MAGLUMI Analyzer. Use of Power Cable other than the specified one can cause Electric Shock. 8 Deterioration of users state of health 8.1 Injury to Hand caused by Needle or Mechanism While running the Analyzer, do not insert your hand or anything into the Apparatus, your hand, finger or arm can be injured Capped sample tubes can cause a crash of the needle , therefore... -
Page 9: Laser Burns Caused By
Kit) is to be read thoroughly and followed by the user. For keeping safety, only use wash buffer and starter reagents approved by SNIBE. Loading the Starter Reagents it is essential to ensure correct connection to starter 1 and starter Different Starter Systems can cause chemical reactions leading to chemical burns and other deteriorations of health. -
Page 10: Infections Caused Byp
Safety Notes Fig. 8.3-1: No-Pooling Warning Labels on Starter Reagent housing 8.4 Infections caused by Patient Samples The patient samples included in the Sample Tubes can be potential infectious and therefore can deteriorate health of the users. The reaction modules come into contact with the potentially infectious material of the patient samples, therefore the reaction ®... -
Page 11: Affected Processing Of Maglumi
4.Safe and intended function of the MAGLUMI Diagnostic System can only be expected with the use of cuvettes, integrals, disposals and other acessories approved by SNIBE 5.Pooled Starter Systems can cause higher uncertainties in the creation of the diagnostic results; therefore, Starter Reagents may never be pooled. - Page 12 Safety Notes 7.For keeping safety and correctness of the diagnostic results only new and non contaminated cuvettes may be used. 8.The Handling and Routine Maintenance of the Tubing System with bleeching liquid is to be done according to the ® MAGLUMI Operating Instructions.
-
Page 13: Common Cautions For
Fig. 9.3-1: Warning Label on Starter Reagent container on the right side of the analyzer 9.4 Common Cautions for Waste Bag 1.For keeping safety, only Waste Bags approved by SNIBE. may be used 2.The instructions for loading, handling and disposal of Waste Bag, in ®... -
Page 14: Common Cautions For 10 Working Conditions Of Maglumi
Safety Notes 9.6 Common Cautions for Computer system and Software Never install Software not released by SNIBE 1. For keeping safety and correctness of the diagnostic results each Laboratory has to define a hierarchie of Access Rights for the ®... - Page 15 Safety Notes Danger of Electric Shock by Touching Inside of the Analyzer Danger of Acid Liquids Danger of Laser Burns Danger of Laser Burns, additional Information Danger of potentially infectious biological material Operating instructions Page 13...
- Page 16 Safety Notes Do not pool Starter Reagents Page 14 Operating instructions...
- Page 17 Operating instructions Content Content Page Intended Use 1.1 Authorization------------------------------------------------------------------------------------------------------------- 2 1.2 Notation ------------------------------------------------------------------------------------------------------------------- 2 1.3 Version Information ---------------------------------------------------------------------------------------------------- 2 Measuring Principle 2.1 Test procedure 1-step assay ---------------------------------------------------------------------------------------- 2 2.2 Test procedure 2-step assay ---------------------------------------------------------------------------------------- 3 2.3 Measuring Function description------------------------------------------------------------------------------------- 4 2.4 Measuring principle ---------------------------------------------------------------------------------------------------- 5 2.5 Calibration ---------------------------------------------------------------------------------------------------------------- 6 System Description...
- Page 18 Operating instructions Content 4.5.2 Steps of Coordinates -----------------------------------------------------------------------------------------------14 4.5.3 Reference positions adjust----------------------------------------------------------------------------------------15 4.5.3.1 Adjustment of the reference left position -----------------------------------------------------15 4.5.3.2 Adjustment of the reference right position----------------------------------------------------16 4.5.4 Left Pipetting Position Adjust-------------------------------------------------------------------------------------17 4.5.4.1 Adjustment of the left needle in left pipetting position -------------------------------------18 4.5.4.2 Adjustment of the right needle in left pipetting position -----------------------------------20 4.5.5 Right Pipetting Position Adjust-----------------------------------------------------------------------------------22 4.5.5.1 Adjustment of the left needle in right pipetting position -----------------------------------23...
- Page 19 Operating instructions Content 7.2.5.6 [User Specific Assay Data] – frequency of control runs-----------------------------------20 7.3 <Control> icon in detail-----------------------------------------------------------------------------------------------21 7.3.1 [Control Selection] icon, <OK> in detail------------------------------------------------------------------------22 7.3.2 [Control Selection] icon, <Add>, & <Edit> in detail ---------------------------------------------------------23 7.3.2.1 [Control Data Input] – Saving and Canceling------------------------------------------------23 7.3.2.2 [Control Data Input] –...
- Page 20 Operating instructions Content 9.1 System Test in overview ---------------------------------------------------------------------------------------------- 2 9.2 System Test in detail -------------------------------------------------------------------------------------------------- 3 9.2.1 [System Test] dialog [Priming] section in detail--------------------------------------------------------------- 3 9.2.2 [System Test] dialog [System test] section in detail --------------------------------------------------------- 4 9.2.3 [System Test] dialog exiting, confirmation, and information ----------------------------------------------- 5 9.3 Placing Light Check on the analyzer------------------------------------------------------------------------------- 7 9.3 1 Manual programming of the Light Check on the analyzer-------------------------------------------------- 7 Menu [Results] in detail...
- Page 21 15.2.1 Physical construction of the sample rack-----------------------------------------------------------------------2 15.3 Loading samples--------------------------------------------------------------------------------------------------------4 15.3.1 Sample rack preparation -------------------------------------------------------------------------------------------5 15.3.2 Loading SNIBE External reagents in sample racks ---------------------------------------------------------7 15.3.3 Placing sample racks on the analyzer --------------------------------------------------------------------------7 15.3.4 Removing Sample racks from the analyzer--------------------------------------------------------------------9 Host Result Management 16-1 16.1 Host Result Management in Overview----------------------------------------------------------------------------2...
- Page 22 Operating instructions Content 16.3.2.2 Results transmitted without validation on MAGLUMI® as manual sending of results--------------------------------------------------------------------------------------------------------------5 16.3.2.3 Results transmitted without validation on MAGLUMI® as an automatic sending of results--------------------------------------------------------------------------------------------------------------6 16.4 MAGLUMI® software communication format--------------------------------------------------------------------7 16.4.1 Inquiry Reagent Information---------------------------------------------------------------------------------------7 16.4.2 LIS return the assay information----------------------------------------------------------------------------------8 16.4.3 Sending test results--------------------------------------------------------------------------------------------------9 Quality Control 17-1...
-
Page 23: Intended Use
Chapter 1 Intended Use Chapter Intended Use 1.1 AUTHORIZATION -------------------------------------------------------------------------------------------------------2 1.2 NOTATION-----------------------------------------------------------------------------------------------------------------2 1.3 VERSION INFORMATION ---------------------------------------------------------------------------------------------2 Operating instructions Page 1-1... -
Page 24: Authorization
Chapter 1 Intended Use 1.1 Authorization ® The user manual and the operation of the MAGLUMI Chemiluminescence analyzer are to be used by authorized personnel only. 1.2 Notation To facilitate the use of this handbook, the following repeatedly occurring symbols will be used: ·... -
Page 25: Measuring Principle
Chapter 2 Measuring Principle Chapter ® Measuring Principle of the MAGLUMI Immunoassays 2.1 TEST PROCEDURE 1-STEP ASSAY ------------------------------------------------------------------------------2 2.2 TEST PROCEDURE 2-STEP ASSAY ------------------------------------------------------------------------------3 2.3 MEASURING FUNCTION DESCRIPTION-------------------------------------------------------------------------4 2.4 MEASURING PRINCIPLE ---------------------------------------------------------------------------------------------5 2.5 CALIBRATION------------------------------------------------------------------------------------------------------------6 Operating instructions Page 2-1... -
Page 26: Test Procedure 1-Step Assay
Chapter 2 Measuring Principle 2.1 Test procedure 1-step assay A 1-step assay refers to a test or assay that has: · 1 incubation sequence (the time of incubation may range depending on the assay). · 1 wash sequence (the amount of washing for this sequence is assay dependent). -
Page 27: Test Procedure 2-Step Assay
Chapter 2 Measuring Principle 2.2 Test procedure 2-step assay A 2-step assay refers to an assay that has: · 2 incubation sequences (the time of incubation may range depending on the assay). · 2 wash sequences (the amount of washing for each sequence is assay dependent). -
Page 28: Measuring Function Description
Chapter 2 Measuring Principle 2.3 Measuring Function description · The chemically emitted light is measured by a selected high- sensitive, low-noise photo multiplier [PMT]. The linear measuring range of the photo multiplier is 300 - 650 nm. The light peak of the chemiluminescence is emitted at a wavelength of 420 ·... -
Page 29: Measuring Principle
Chapter 2 Measuring Principle 2.4 Measuring principle · After the last wash cycle has been completed, the reaction module is transported into the measuring chamber. · When the first cavity of the reaction module reaches the position under the injection head, starter reagent 1 will be injected into the first cavity. -
Page 30: Calibration
Chapter 2 Measuring Principle 2.5 Calibration Data reduction is performed using a master curve with 2-point recalibration. The starting point of data reduction is the master curve, stored in RFID Tag of the reagent kit.. To compensate differences between reagent lots, different analyzers and environmental conditions, assay calibration must be run and validated according to the indications reported in the assay Instructions for Use (indications may vary per assays). - Page 31 Chapter 2 Measuring Principle Fig. 2.5-1: Calibration concept: example For keeping safety of the diagnostic results, quality control measures are to be realized, such as routine controls or calibration issues, which are defined in this Operating Instruction. Operating instructions Page 2-7...
- Page 32 Chapter 2 Measuring Principle Page 2-8 Operating instructions...
-
Page 33: System Description
Chapter 3 System description Chapter System Description 3.1 AN OVERVIEW OF THE SYSTEM COMPONENTS ------------------------------------------------------------2 3.2 ANALYZER ----------------------------------------------------------------------------------------------------------------4 3.2.1 S -----------------------------------------------------------------------------------------------------6 AMPLE STATION 3.2.2 R ---------------------------------------------------------------------------------------------------8 EAGENT STATION 3.2.3 B RFID ------------------------------------------------------------------------- 11 ARCODE READER AND READER 3.2.3.1 Barcode reader ----------------------------------------------------------------------------------------------- 11 3.2.3.2 RFID Reader-------------------------------------------------------------------------------------------------- 13 3.2.4 P ------------------------------------------------------------------------------------------------- 14... -
Page 34: An Overview Of The System Components
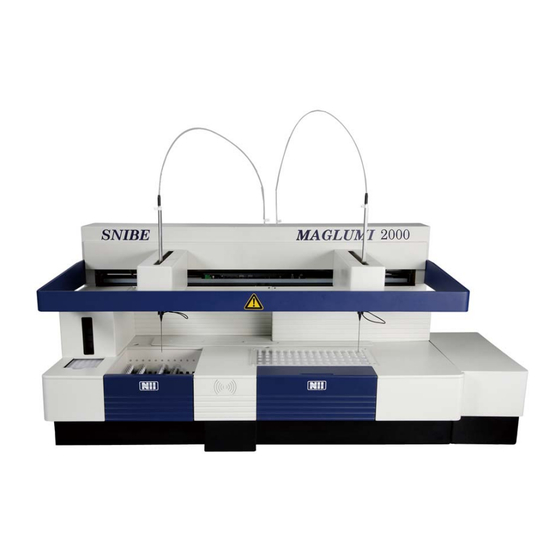
Chapter 3 System description 3.1 An overview of the system components ® The MAGLUMI Analyzer is a system consisting of the following components: · Analyzer · HP PC-compatible computer with a minimum of 3 serial interfaces · Keyboard · Mouse ·... - Page 35 17.Waste bag 18.Starter Area Note: a) MAGLUMI 1000 only has 1 Pipettor (Part No.1) and it doesn’t include the Barcode reader(Part No.15) and Stacker(Part No.3) b) MAGLUMI 2000 PLUS contents a cupboard below as a base. Operating instructions Page 3-3...
-
Page 36: Analyzer
Chapter 3 System description 3.2 Analyzer ® The MAGLUMI Analyzer is a fully automatic system, whose operation is timed in cycles. A differentiation is made between the machine cycle (duration of the processing of a reaction module) and the microcycle (1 machine cycle corresponds to 7 microcycles). The bottom bar on the screen shows the cycle that the analyzer has currently reached (e.g. - Page 37 Chapter 3 System description Explanations re Fig. 3.2-1: Pipetting area: a) 1st pipetting (also called left pipetting position) b) Pipetting for 2-step assays (also called right pipetting or mixing step) Tube connections: (1) Wash / system liquid [System Liquid] (pipetting system) (2) Wash / system liquid [Washing Solution] (Washer) (3) Waste 1 (4) Waste 2...
-
Page 38: Sample Station
Chapter 3 System description 3.2.1 Sample station The sample station is accessible from the front via a swivel flap. Opening the flap automatically loads the sample-loading dialog in the operating software. The sample station contains 12 guide rails for sample racks and a light-emitting diode (LED) for each track on the rear panel. - Page 39 Only supplied, MAGLUMI® approved sample racks may be used. The use of unauthorized rack types are forbidden and may cause damage to the analyzer! Refrigerated function of the Reagent Area Reagent cooling(8-15℃) with independent power swith (*when you choose the MAGLUMI 2000 PLUS) Operating instructions Page 3-7...
-
Page 40: Reagent Station
RFID Reader or be entered by hand. The handle for inserting and removing the integral from the reagent area. The clamp for correct position holding of integrals inside the reagent area. *25 tracks for Reagent Integrals in MAGLUMI 2000 PLUS Page 3-8 Operating instructions... - Page 41 Chapter 3 System description Fig. 3.2.2-2: Reagent station with 15 tracks for Reagent Integrals MAGLUMI 1000/2000. Operating the reagent station: Open the swivel flap of the reagent station only briefly for loading purposes to maintain the refrigerated ambient of the reagent station. Remove the protection foil from the Reagent Integral.
- Page 42 Chapter 3 System description Reagent loading dialog The tracks (1-15) on MAGLUMI 1000/2000 or (1-25) on MAGLUMI 2000 PLUS for Reagent Integrals are displayed in the [Reagent Loading] dialog. Each track occupied appears as a button and bears the assay name of the Reagent Integral and the number of remaining determinations.
-
Page 43: Barcode Reader And Rfid Reader
Chapter 3 System description 3.2.3 Barcode reader and RFID reader 3.2.3.1 Barcode reader The barcode reader is a laser beam. Never look directly into thebarcode reader, as this can damage the eyes! The barcode reader is located between the sample and reagent stations. - Page 44 Chapter 3 System description 2. Press the <Globals> icon to open the [Globals] dialog 3. Press the <Barcode> icon to open the [Barcode] dialog 4. According to your type ,change the corresponding value of the <CheckSum> Note: MAGLUMI 1000 didn’t include the Barcode reader Page 3-12 Operating instructions...
-
Page 45: Rfid Reader
Chapter 3 System description 3.2.3.2 RFID Reader When the RFID Tag side of the reagent kit faces the sensing area of the RFID reader within 30mm , the RFID Reader will beep once signifying a correct reading.Then choose an unoccupied lane to insert the reagent kit into ,and the information will be shown on the [Reagent loading] dialog When there are some reagent kits to be loaded,the procedure should be operated by the steps above one by one ! -
Page 46: Pipetting System
Chapter 3 System description 3.2.4 Pipetting system The aspiration and dispensing of samples and reagents is carried out by two pipetting units with special Teflon coated pipetting needles. Left pipetting unit Used for patient samples, controls, sample diluent and calibrators. The pipetting needle is primed/cleaned in wash station 1 (see Fig. -
Page 47: Incubator
Chapter 3 System description 3.2.5 Incubator The reaction modules filled with sample and reagent are incubated according to the assay requirements in the incubator at 36°C ± 1°C. The incubator has 16 receptacles for the reaction modules. Loading, incubation time are controlled via the software and dependent on assay type. -
Page 48: Washer
Chapter 3 System description 3.2.6 Washer The reaction modules are washed in the washing system (washer) where excess reaction compound is aspirated. Three independently controlled injection pumps administer the wash liquid to three separate dispensing (injection) probes. All pumps operate with a constant volume of 400 µl. -
Page 49: Measuring Chamber
Chapter 3 System description 3.2.7 Measuring chamber The chemiluminescence measurement is carried out in the measuring chamber with the aid of a highly sensitive photomultiplier. The measuring chamber is sealed from all outside light influences. Outside the measuring chamber are two independently controlled injection pumps* for injection of the starter reagents. -
Page 50: Pump Systems
Chapter 3 System description 3.2.8 Pump systems ® The MAGLUMI Analyzer is provided with a series of independently operating pump systems, which are needed for the highly precise requirements of pipetting, washing and suction. One section of the pump systems is located on the right side of the system between starter reagent container and reagent area and is inaccessible to the user: ·... -
Page 51: Stacker
Chapter 3 System description 3.2.9 Stacker The stacker is located to the far left of the analyzer. It is used for the storage of reaction modules .there are seven levels in the stacker , and holds approximately 110 reaction modules at one time. Note: MAGLUMI 1000 did not include the Stacker Loading reaction modules The loading station for reaction modules is on the left front side of the... - Page 52 Chapter 3 System description Status and warning displays on the monitor screen The icon (system reservoir symbol) is responsible for all reservoir parameters of the system and thus also for the stacker volume (See chapter 5 for reservoir icon details). This icon combines two functions: a) Warning display with ‘traffic light’...
- Page 53 Chapter 3 System description Transport of the reaction modules during a cycle · The incubator loader fork on the left transports the reaction modules out of the stacker and into the left pipetting position and then into a vacant position in the incubator, taking into account the analyzer cycle.
-
Page 54: Starter Reagents
Chapter 3 System description 3.2.10 Starter reagents ® The reagent reservoir contains the starter reagents (MAGLUMI Starter Kit) and is located on the right side of the analyzer. The various positions are marked S1, S2. The numbers “1” and “2” refer respectively to starters 1 and 2. - Page 55 Chapter 3 System description In each case, press the icon to check which reservoir is NOTE running out and take countermeasures. There is no loss of either reagent or data when the analyzer is stopped by a system reservoir running out b) Status display When the icon is pressed, the dialog box [Status Reservoir] shows the reservoir of liquids..
-
Page 56: Supply Connections For Wash / System Liquid
Chapter 3 System description 3.2.11 Supply connections for wash / system liquid ® The supply connections for wash / system liquid (MAGLUMI Wash / System Liquid) are on the right side of the analyzer. [System Liquid] for cleaning the pipetting needles and flushing the tubing system. - Page 57 Chapter 3 System description In each case, press the icon to check which reservoir is NOTE running out and take countermeasures. There is no loss of either reagent or data when the analyzer is stopped by a system reservoir running out b) Status display When the icon is pressed, the dialog box [Status Reservoir] shows the reservoir of liquids..
-
Page 58: Disposal
Chapter 3 System description 3.2.12 Disposal Reaction modules ® The holder for the waste bag (MAGLUMI Waste Bag) for used reaction modules is located on the right side of the analyzer next to the measuring chamber. It is essential to ensure that the waste bag fits correctly underneath the reaction module exit, otherwise there is a risk that the analyzer operation will be interrupted due to blockage of the next reaction module at the edge of the waste bag... - Page 59 Chapter 3 System description Biological waste must be disposed of separately according to domestic regulations. Ensure that protective gloves are worn! Both waste canisters contain volume status monitoring devices. The waste material status can be called up on the monitor screen with the <Waste Status>...
-
Page 60: Electrical And Electronic Connections
Chapter 3 System description 3.2.13 Electrical and electronic connections The connection to the serial interface (PC system), the power supply connection and the power switch are located on the left side of the analyzer. Fig. 3.2.13-1: Electrical and electronic connections. Page 3-28 Operating instructions... -
Page 61: Computer System
Chapter 3 System description 3.3 Computer system Recommended requirements: HP PC , including: · Intel Pentium(R) Dual-Core CPU E5300 · 160 GB hard drive or more · 1G RAM or more · DVD ROM · Touch-screen · Microsoft Windows XP ·... -
Page 62: Monitor
Chapter 3 System description 3.4 Monitor A touch-screen color monitor is included with the analyzer. Touching the monitor screen (with a finger or pen) has the same function as when using the mouse. Example: Touching a button carries out the associated command. Touching an entry field activates this entry. -
Page 63: Software
Chapter 3 System description 3.5 Software · Windows XP Professional · Analyzer software 1.10 for control and operation of the analyzer. Operating instructions Page 3-31... -
Page 64: Connecting Cables
Chapter 3 System description 3.6 Connecting cables · 9 Pin RS232 Serial interface cable for PC → Analyser · 9 Pin RS232 Serial interface cable for PC → Host computer (optional) ® · Power cord for MAGLUMI Analyzer Touch-screen model may vary depending on availability. Page 3-32 Operating instructions... -
Page 65: Consumables
Chapter 3 System description 3.7 Consumables Consumables with part numbers ® 1) Starter reagents (MAGLUMI Starter Kit) (630001) ® 2) Wash / system liquid (MAGLUMI Wash / System Liquid) (630002) ® 3) Reaction modules (MAGLUMI Reaction Modules) (630003) ® 4) Reagent light check (MAGLUMI Light Check) (630004) ®... - Page 66 Chapter 3 System description Page 3-34 Operating instructions...
-
Page 67: Installation And Start Up
Chapter 4 Installation and Start up Chapter Installation and Start up 4.1 INSTALLATION OF THE EQUIPMENT ---------------------------------------------------------------------------3 4.1.1 E --------------------------------------------------------------------3 LECTRICAL CONNECTIONS OF THE SYSTEM 4.1.2 C ------------4 ONNECTING SUPPLY CONTAINERS FOR WASH SYSTEM LIQUID AND WASTE CONTAINERS 4.1.3 C (MAGLUMI®... - Page 68 Chapter 4 Installation and Start up 4.5.9 Z-D ---------------------------------------------------------------------------------- 53 ISPENSE POSITION ADJUST 4.5.9.1 Adjustment of the left needle in Z-Dispense position --------------------------------------- 54 4.5.9.2 Adjustment of the right needle in Z-Dispense position ------------------------------------ 55 4.5.10 Z-S ------------------------------------------------------------------------------------ 56 TART POSITION ADJUST 4.5.10.1 Adjustment of the left needle in Z- Start position ------------------------------------------- 57 4.5.10.2 Adjustment of the right needle in Z- Start position ----------------------------------------- 58 Page 4-2...
-
Page 69: Installation Of The Equipment
Analyzer. The original installation of the analyzer will be accomplished by a certified technician,trained in accordance with SNIBE regulations. In this chapter, the user will be led step by step for all necessary installation processes to the setting up of the system. -
Page 70: Connecting Supply Containers For Wash / System Liquid And Waste Containers
Chapter 4 Installation and Start up 4.1.2 Connecting supply containers for wash / system liquid and waste containers ® The supply connections for wash / system liquid (MAGLUMI Wash / System Liquid) are on the right side of the analyzer. The system liquid should be prepared in accordance with the delivered IFU (Instructions For Use). -
Page 71: Fitting The Waste Bag For Reaction Modules (Maglumi® Waste Bag)
Chapter 4 Installation and Start up 4.1.4 Fitting the waste bag for reaction modules (MAGLUMI® Waste Bag) The holder for the waste bag (MAGLUMI® Waste Bag) for used reaction modules is located on the right side of the analyzer next to the measuring chamber. -
Page 72: Switching On And Starting The System
Chapter 4 Installation and Start up 4.2 Switching on and starting the system Before the system may be turned on, it is necessary to ensure that all steps in section 4.1.1 “Electrical connections of the system” have been completed. There are several different processes when starting the ®... -
Page 73: Starting The System After A Period Of Three Or More Days Of Inactivity
Chapter 4 Installation and Start up The system is ready when no further pop-ups appear on the monitor. 1. Insert all necessary integrals in the analyzer according chapter 14. 2. From the [Main Menu] select the icon <System Test>, and follow the instructions listed in chapter 9. - Page 74 Chapter 4 Installation and Start up 7. When the Priming has been completed, repeat the “System Test” in accordance to values listed in the Fig 4.2.4-2. Fig 4.2.4-2: Start up Priming Table (2 run) Section Type Values Cycles Pipettor Washer Chamber Set A Reaction modules LC - le...
-
Page 75: Starting The Maglumi® Software & System
Chapter 4 Installation and Start up 4.3 Starting the MAGLUMI® software & system The normal icon for entering the MAGLUMI® software is located directly on the windows desktop. When entering the software anytime the analyzer has been shut off, it must be ensured that the analyzer remains off until prompted to do so. -
Page 76: Shutting Down The Maglumi® Software & System
Chapter 4 Installation and Start up 4.4 Shutting down the MAGLUMI® software & system There are several different processes when shutting down the ® MAGLUMI software & system. The type of shut down preparation is ® dependent on the future usage of the MAGLUMI analyzer. -
Page 77: Shutting Down For 3 Or More Days Inactivity
Chapter 4 Installation and Start up 2. Select the icon Another window appears as shown below. 3. Select the icon and the software will end. 4. Turn off the monitor. 4.4.3 Shutting down for 3 or more days inactivity Upon completion of the working day whereas the analyzer will be inactive for a period of more than two days (consisting also of prolonged weekends) the following steps should be completed: It is possible to carry out this procedure for short periods of inactivity... -
Page 78: Coordinates
Chapter 4 Installation and Start up 4.5 Coordinates After installment of the analyzer and computer ,the pipettors’ plane position should be coordinated at first . 4.5.1 Preparation for coordinate: Using two reaction modules fill 75μl of water each into positions 1 and 6. - Page 79 Chapter 4 Installation and Start up Press <Initialize> button on the top center of the dialog to execute initialization of the plane assemblies. When the initialization is finished ,press <Inc.load> button to open the [Incubator Loader] dialog. Fig. 4.5.1-2: [Incubator Loader] dialog Press <Move>...
-
Page 80: Steps Of Coordinates
Chapter 4 Installation and Start up 4.5.2 Steps of Coordinates Press the <Coordinates> button in the main menu to open the [Needles Adjust] dialog. Fig. 4.5.2-1: [Needles Adjust] dialog Page 4-14 Operating instructions... -
Page 81: Reference Positions Adjust
Chapter 4 Installation and Start up 4.5.3 Reference positions adjust Position the teacher to the right rear corner of the patient rack area. 4.5.3.1 Adjustment of the reference left position Click the icon in the [Needles Adjust] dialog to open the [Ref.Left Adjust] dailog. - Page 82 Chapter 4 Installation and Start up After coordinates of the left needle,press <OK> button to exit. Page 4-16 Operating instructions...
Need help?
Do you have a question about the MAGLUMI 2000 and is the answer not in the manual?
Questions and answers