Table of Contents
Advertisement
Available languages
Available languages
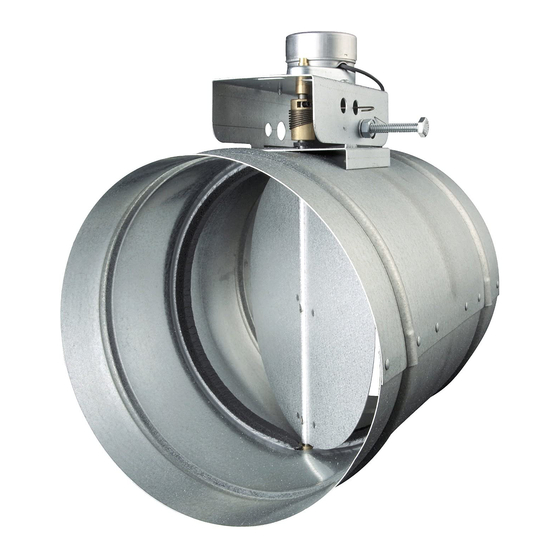
AUTOMATIC MAKE-UP AIR DAMPER WITH
TRANSFORMER & PRESSURE SWITCH
Register this product at www.broan.com/register. For Warranty Statement, or to order
Service Parts: go to www.broan.com and type the Model in the "Model Search" field
at the top of the page.
Broan, 926 W. State Street, Hartford, WI 53027 800-637-1453
READ AND SAVE THESE INSTRUCTIONS
!
FOR RESIDENTIAL USE ONLY
WARNING
TO REDUCE THE RISK OF FIRE, ELECTRIC SHOCK, OR INJURY TO PERSONS,
OBSERVE THE FOLLOWING:
1. Installation work and electrical wiring must be done by a qualified
person(s) in accordance with all applicable codes and standards, including fire-
rated construction codes and standards.
2. Validated performance testing certified for use with BEST, Broan, and Broan Elite
range hoods.
3. This unit is not designed to provide combustion air for fuel-burning appliances.
4. Do not connect the unit directly to a combustion appliance of any type.
5. Sufficient air is needed for proper combustion and exhausting of gases through
the flue (chimney) of fuel burning equipment to prevent backdrafting. Follow the
heating equipment manufacturer's guideline and safety standards such as those
published by the National Fire Protection Association (NFPA), and the American
Society for Heating, Refrigeration and Air Conditioning Engineers (ASHRAE), and
the local code authorities.
6. Before servicing or cleaning unit, switch power off at service panel and lock the
service disconnecting means to prevent power from being switched on accidentally.
When the service disconnecting means cannot be locked, securely fasten a
prominent warning device, such as a tag, to the service panel.
7. When performing installation, servicing or cleaning the unit, it is recommended to
wear safety glasses and gloves.
8. During extreme weather events including snow storms, ensure that the intake
area for the outside air duct is not blocked and able to provide a clear pathway for
outside air to enter the system.
9. When cutting or drilling into wall or ceiling, do not damage electrical wiring or other
hidden utilities.
10. When notching or drilling into framing including floor supports, rim joists, and wall
studs, comply with code and manufacturer limitations on allowable modifications
to these structural members.
11. This unit is intended to be installed within the home in a location protected from
moisture.
12. This unit must be in an accessible location which allows for inspection of the unit.
13. Use this unit only in the manner intended by the manufacturer. If you have
questions, contact the manufacturer at the address or telephone number listed in
this document.
14. When federal, provincial or state legislation comprises more restrictive installation
and/or certification requirements, the aforementioned requirements prevail on
those of this document and the installer agrees to conform to these at his own
expense.
!
CAUTION
1. Do not locate outside air inlet near hazardous materials or explosives.
2. Unit shall not be installed to introduce air from crawlspaces, garages, attics,
adjacent dwelling units, or other locations within the building shell. Unit shall be
installed to introduce air directly from outdoors.
3. Do not run the outside air duct directly above or closer than 2 ft to any furnace or
its supply plenum, boiler, or other heat producing appliance.
4. Any ductwork used in conjunction with the Damper must be installed in compliance
with all local and national codes that are applicable.
5. Do not operate the Damper for fresh air introduction until all system filters,
including the central duct system filter, have been installed per the system design.
6. Please read the unit specification label on the product for further information and
requirements.
7. The Damper's outdoor air intake, ducting, and any filters should be inspected and
maintained on a regular basis.
8. Insulate the duct and damper to prevent build-up of condensation in cold weather
climates. Vapor barriers on both sides of insulation are recommended.
MODELS
MD6TU • MD8TU • MD10TU
!
PLAN THE INSTALLATION
Planning the installation first requires selecting the most appropriate installation ap-
proach. The chart below offers suggestions for the most effective installation approach
by considering a few important factors. Further details on the two main types of instal-
lations are provided below.
• House has central duct work?
Yes
• Return-air side of duct work is
accessible -either the return-air trunk
or return - air plenum?
Yes
Damper connected to
return side of central
duct system
Outside Air Intake Location
Proper design and location of the outside air intake location is critical in ensuring that
the Damper can safely and reliably provide an opening for fresh air to enter the home.
The following requirements for the location of the outside air intake must be met:
•
Outside air intake is located a minimum of 10' from combustion appliance vents,
chimneys, plumbing stacks, and bathroom or kitchen exhaust vents. If local codes
have more stringent separation requirements, they shall apply.
•
Outside air intake is placed high enough above grade to prevent blockage from
snow or other debris such as leaves, and at a minimum of 1' above grade.
•
Make-up air damper should not draw air from crawlspaces, garages, attics, adja-
cent dwelling units, or any enclosed part of the building. The Damper should be
installed to draw air directly from outdoors.
Outside Air Intake Opening Protection
Because the Damper, together with the end cap and outside air duct which are installed
with it, will allow outdoor air into the indoor environment, it is important to meet the
following requirements:
•
Model 641FA (6") and 643FA (8") fresh air inlet wall caps include protective bird
screens to keep out animals and outside debris. Clean screens often and do not
remove.
•
If a protective bird screen other than the screen provided is used, it must cover the
entire opening of the outside air duct. This screen must also have openings of at
least ¼" but no larger than ½".
•
The outdoor air intake opening should meet local code provisions for the protection
of openings in exterior walls, including steps to prevent moisture intrusion around
the opening.
Note that the screen over the outside air opening is not a filter. It is intended to prevent
the intake of leaves, animals, or debris into the outside air duct. A downstream filter is
necessary to remove pollen, dust, and other airborne particles. Potential filter locations
are shown below in the Typical Installations section.
Minimum Return Air Temperature Requirements
HVAC equipment manufacturers may have minimum requirements for the air tempera-
ture in the return air plenum. Introducing outdoor air to the return side of the central
duct system may impact this temperature. The installer should adjust both the size of
the outside air duct and the location of its connection to the return side of the central
duct system in a manner so that minimum air temperature requirements are satisfied
under design conditions.
WHAT IS INCLUDED IN THE PACKAGE
- Motorized Damper
- Transformer
- Pressure Switch Kit which includes:
- Pressure Switch
- Probe
- 12" PVC tubing 1/4" I.D.
- Gasket
- (6) Sheet Metal Screws
TOOLS REQUIRED
- 1/4" Socket Drive
- Flathead or Phillips Screw Driver
- 3/8" Drill Bit
- Duct Tape
- Low Voltage Wire (2 Conductor)
- (2) 1/4" Female Spade Terminals
1
- Wire Nuts
No
No
Damper ducted directly
to a ceiling, floor, or wall
register
Advertisement
Table of Contents

Related Manuals for Broan MD6TU

Summary of Contents for Broan MD6TU
- Page 1 TRANSFORMER & PRESSURE SWITCH Register this product at www.broan.com/register. For Warranty Statement, or to order Service Parts: go to www.broan.com and type the Model in the “Model Search” field • House has central duct work? at the top of the page.
- Page 2 More than one damper may be required to balance the system. If more than one is HOOD PRESSURE FLUE required use (1) MD6TU or MD8TU and then use the MD6 or MD8 dampers as ad- SWITCH ditional dampers. PROBE EXHAUST...
-
Page 3: Wire The System
MOUNTING POSITIONS OF PROBE & WIRE THE SYSTEM (Continued) PRESSURE SWITCH MAKE-UP AIR DAMPER MAKE-UP AIR DAMPER DUCTWORK DUCTWORK PRESSURE FLOW SWITCH PRESSURE SWITCH TUBING PROBE (air flow arrow TUBING pointing in direction PROBE of air flow) (air flow arrow DUCTWORK pointing in HORIZONTAL... -
Page 4: Frequently Asked Questions (Faqs)
It facilitates air exchange between indoors and outdoors, by helping to allow fresh air into the home to replace air which is exhausted out of the home. 6. Can I use the Broan Automatic Make-Up Air Damper with other equipment in my •... -
Page 5: Outils Requis
Enregistrez ce produit sur www.broan.ca/register. Pour la déclaration de garantie ou pour commander des pièces de rechange: allez sur www.broan.ca et tapez le modèle dans le • L’habitation comporte-t-elle un champ “Recherche Modèle# :”... - Page 6 Pour que la sonde et le manocontacteur fonctionnent correctement, le capuchon mural vous guider dans l’installation. Respectez toujours les exigences des codes dans ou de toit doit avoir un clapet à ressort. Les produits Broan suivants sont recommandés : toute situation où un détail indiqué ci-dessous contredirait les codes locaux. Ceux-ci ont préséance.
-
Page 7: Tester Le Système
POSITIONS DE MONTAGE DE LA SONDE ET CÂBLAGE DU SYSTÈME (a continué) DU MANOCONTACTEUR CLAPET D'AIR DE COMPENSATION CLAPET D'AIR DE COMPENSATION CONDUIT CONDUIT DÉBIT MANOCONTACTEUR D'AIR MANOCONTACTEUR SONDE TUBE (la flèche TUBE pointe dans le sens du SONDE débit d’air) CONDUIT (la flèche pointe dans... -
Page 8: Foire Aux Questions (Faq)
Non. Le Clapet automatique d’air de compensation Broan est uniquement compatible avec les hottes BEST, Broan Elite ou Broan. D’aut\res renseignements sur les modèles Bref, le clapet permet à votre appareil d’évacuation Broan, Broan Elite ou BEST de exacts de clapets et d’appareils d’évacuation compatibles se trouvent dans le Guide fonctionner avec plus d’efficacité... -
Page 9: Herramientas Requeridas
Registre este producto en www.broan.com/register. Para Declaración de garantía, o para • ¿La casa tiene conducto central? pedir piezas de servicio: vaya a www.broan.com y escriba el modelo en el campo “Model Search” en la parte superior de la página. -
Page 10: Instalaciones Típicas
VENTILADOR EN LÍNEA Tal vez se requiera más de un regulador para equilibrar el sistema. Si se requiere más de uno, use (1) MD6TU o MD8TU y luego use los reguladores MD6 o MD8 como reguladores adicionales. CONDUCTO TUBO DE DE EXTRACCIÓN... -
Page 11: Prueba Del Sistema
POSICIONES DE MONTAJE DE LA SONDA Y EL CABLEADO DEL SISTEMA (continuado) INTERRUPTOR DE PRESIÓN CONDUCTO CONDUCTO FLUJO DE AIRE INTERRUPTOR INTERRUPTOR REGULADOR DE AIRE DE REPUESTO REGULADOR DE AIRE DE REPUESTO DE PRESIÓN DE PRESIÓN SONDA (la flecha del flujo TUBERÍA TUBERÍA de aire apunta... -
Page 12: Preguntas Frecuentes
En algunas circunstancias limitadas, esta norma requiere que se limiten los o Broan compatible, con lo cual se genera un punto conocido y controlado para que entre el flujos de extracción netos de una casa. Por ejemplo, la sección 6.4 de la norma limita aire fresco a la casa mientras se extrae el aire del edificio mediante la campana.
Need help?
Do you have a question about the MD6TU and is the answer not in the manual?
Questions and answers