
Subscribe to Our Youtube Channel
Summary of Contents for Qiagen QIAsymphony SP
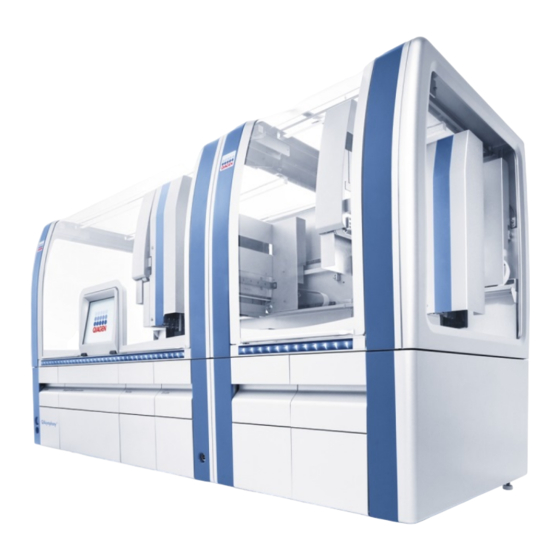
- Page 1 December 2017 QIAsymphony SP/AS ® Consolidated Operating Guide For use with software versions 4.0 and 4.1 Version 1 QIAGEN GmbH, QIAGEN Strasse 1, 40724 Hilden GERMANY 1112127 Sample to Insight__...
-
Page 2: Table Of Contents
Waste disposal ....................17 Biological safety ...................17 2.5.1 Samples ....................17 Chemicals....................18 2.6.1 Toxic fumes ..................18 Mechanical hazards ..................19 Heat hazard ....................19 Maintenance safety ..................19 2.10 Radiation safety ..................21 2.11 Symbols on the QIAsymphony SP/AS instruments .........22 QIAsymphony SP/AS Consolidated Operating Guide 12/2017... - Page 3 Setting up the USB stick and transferring language files from the USB stick ..34 4.3.2 Transferring files using the QMC ............35 4.3.3 Changing the language on QIAsymphony SP/AS ........35 4.3.4 Changing the language in QIAsymphony Management Console (QMC) ..36 QIAsymphony SP/AS User Interface .................37 QIAsymphony SP/AS screen layout ..............37...
- Page 4 Loading the “Waste” drawer .................55 8.2.1 Tip park station ..................56 8.2.2 Liquid waste container ................56 8.2.3 Tip chute .....................57 8.2.4 Tip waste collection ................57 8.2.5 Unit boxes ...................58 8.2.6 Closing the “Waste” drawer ..............59 QIAsymphony SP/AS Consolidated Operating Guide 12/2017...
- Page 5 End of working day ..................88 QIAsymphony SP Run Definitions ................89 Configuring a sample type ................89 Use of virtual bar codes ................89 Defining a batch/run (queuing) ..............90 9.3.1 Samples loaded in the tube carrier ............90 QIAsymphony SP/AS Consolidated Operating Guide 12/2017...
- Page 6 12.4.1 Defining an independent assay run ............128 12.4.2 Defining/checking sample rack(s) ............132 12.4.3 Defining assay(s) to be processed in the run ......... 136 12.4.4 Assigning selected assays to sample positions ........139 QIAsymphony SP/AS Consolidated Operating Guide 12/2017...
- Page 7 General errors that do not have error codes ..........166 13.5.1 File handling errors ................167 13.5.2 File errors ..................167 13.5.3 Tip waste errors ................. 170 13.5.4 Maintenance errors ................170 13.5.5 Configuration menu errors ..............170 QIAsymphony SP/AS Consolidated Operating Guide 12/2017...
- Page 8 13.6.4 “Reagents and Consumables” drawer ..........172 13.6.5 Errors that may occur when starting a batch/run ........173 13.6.6 Protocol errors ................... 173 13.6.7 Errors that may occur while operating the QIAsymphony SP ....173 13.6.8 Protocol interruption ................174 13.6.9 Inventory scan errors ................174 13.7...
- Page 9 Weekly maintenance (SP/AS) ..............187 14.5.1 File management ................187 14.5.2 Cleaning the touchscreen ..............187 14.5.3 Cleaning the QIAsymphony SP/AS hoods ..........188 14.5.4 Cleaning the tube carriers (SP) ............188 14.5.5 Cleaning the optical sensor (SP) ............188 14.5.6 Magnetic head (SP) ................
-
Page 10: Introduction
1.1.1 Technical assistance At QIAGEN, we pride ourselves on the quality and availability of our technical support. Our Technical Services Departments are staffed by experienced scientists with extensive practical and theoretical expertise in molecular biology and the use of QIAGEN ®... -
Page 11: Version Management
4.0 and 4.1). 1.2 Intended use of QIAsymphony SP/AS Note: The QIAsymphony SP and AS instruments are intended for use by professional users, such as technicians and physicians trained in molecular biological techniques and the operation of QIAsymphony SP and AS instruments. -
Page 12: Requirements For Qiasymphony Sp/As Users
QIAGEN 1.3.1 Training for QIAsymphony SP/AS users Customers are trained by a QIAGEN representative upon installation of the QIAsymphony SP/AS instrument(s). The training takes 1–3 days, depending on the subject and the knowledge level of the customer. -
Page 13: User Manual References
For a glossary of terms used in this consolidated operating guide, refer to Section 11 of the QIAsymphony SP/AS User Manual — General Description. 1.7 QIAsymphony SP/AS accessories For information about QIAsymphony SP/AS accessories, refer to Appendix C of the QIAsymphony SP/AS User Manual — General Description. QIAsymphony SP/AS Consolidated Operating Guide 12/2017... -
Page 14: Safety Information
2 Safety Information This consolidated operating guide contains information about warnings and cautions that must be followed by the user to ensure safe operation of the QIAsymphony SP/AS instruments and to maintain the instruments in a safe condition. Possible hazards that could harm the user or result in damage to the instrument are clearly stated at the appropriate places throughout this consolidated operating guide. -
Page 15: Electrical Safety
WARNING/ Risk of personal injury and material damage CAUTION Improper use of the QIAsymphony SP/AS may cause personal injuries or damage to the instrument. CAUTION Damage to the instrument Avoid spilling water or chemicals onto the QIAsymphony SP/AS. Instrument. Damage caused by water or chemical spillage will void your warranty. -
Page 16: Environment
period. The QIAsymphony SP/AS has been subjected to severe transport stresses. Liquids have come into direct contact with electrical components of the QIAsymphony SP/AS. The power cord has been exchanged with a non-official power cord. 2.3 Environment 2.3.1... -
Page 17: Waste Disposal
OSHA: Occupational Safety and Health Administration (United States of America). ACGIH: American Conference of Government Industrial Hygienists (United States of America). † COSHH: Control of Substances Hazardous to Health (United Kingdom). ‡ QIAsymphony SP/AS Consolidated Operating Guide 12/2017... -
Page 18: Chemicals
Toxic fumes WARNING Do not use bleach to clean or disinfect QIAsymphony SP/AS instruments. Bleach in contact with salts from the buffers can produce toxic fumes. Toxic fumes WARNING Do not use bleach to disinfect used labware. -
Page 19: Mechanical Hazards
Make sure to install the magnetic-head guards before operating the QIAsymphony SP. 2.8 Heat hazard The QIAsymphony SP supports a lysis station that can be heated, if required by the protocol. In addition, both the QIAsymphony SP and the QIAsymphony AS support a UV lamp. Hot surface WARNING The lysis station and the UV lamps can reach temperatures of up to 70°C... - Page 20 CAUTION Do not use spray bottles containing alcohol or disinfectant to clean surfaces of the QIAsymphony SP/AS instruments. Spray bottles should be used only to clean items that have been removed from the worktables. Damage to the instrument hood(s) or side panels...
-
Page 21: Radiation Safety
WARNING/ Risk of personal electric shock CAUTION Do not open any panels on the QIAsymphony SP/AS instruments. Only perform maintenance as described in this consolidated operating guide. Damage to the instrument(s) CAUTION Make sure to install the tip guards correctly before operating QIAsymphony SP/AS instruments. -
Page 22: Symbols On The Qiasymphony Sp/As Instruments
2.11 Symbols on the QIAsymphony SP/AS instruments The following symbols appear on both the QIAsymphony SP and QIAsymphony AS instruments, except the heat hazard symbol, which appears only on the QIAsymphony SP. Symbol Location Description Lysis station Heat hazard — the temperature of the lysis station can reach up to 70ºC (158ºF) - Page 23 WEEE mark for Europe instrument Type plate on the back of the Legal manufacturer instrument On the worktable Consult instructions for use *Position 1 for laser light warning label. Position 2 for laser light warning label. † QIAsymphony SP/AS Consolidated Operating Guide 12/2017...
-
Page 24: Startup Procedure
QIAGEN Field Service Specialist. A member of your group who is familiar with laboratory and computer equipment should be present during the installation. See “Packing List QIAsymphony SP” and “Packing List QIAsymphony AS” for a full list of components that are supplied with each instrument. -
Page 25: General Features
QIAsymphony SP). New protocols, Assay Control Sets, new labware files (e.g., files enabling new types of tubes to be used with the QIAsymphony SP), and work lists can be uploaded to the QIAsymphony SP via the USB port. Data files, such as system log files, report files, loading information files, and rack files can also be transferred via the USB port from the QIAsymphony SP to the USB stick. -
Page 26: Network Interface
3.2.4 Network interface The network interface allows connections of the QIAsymphony SP/AS instruments to a network via a CAT5 ethernet network cable. 3.2.5 Status LEDs Light-emitting diodes (LEDs) at the front of QIAsymphony SP/AS instruments are illuminated when sample preparation or assay setup is in progress. The status LEDs flash when a batch/run is finished or if an error occurs. -
Page 27: Logging Out
After successful startup, QIAsymphony SP/AS instruments are ready for use. The Sample Preparation screen will be displayed. Note that the image above was made with a QIAsymphony SP instrument (not a QIAsymphony SP/AS instrument). Before using the QIAsymphony SP/AS, the user must log in. -
Page 28: Switching Off The Qiasymphony Sp/As
3.3.3 Switching off the QIAsymphony SP/AS To switch off the QIAsymphony SP/AS instruments, press the power switch at the front of the QIAsymphony SP in the lower left corner. We recommend switching off the instruments after use. Do not switch off the instruments during sample preparation or assay setup unless you need to stop the instruments due to an emergency. -
Page 29: User Settings
4 User Settings 4.1 Configuration settings The “Supervisor” can configure the systems settings. Important For more information, refer to Section 6, “Configuration”, of the QIAsymphony SP/AS User Manual — General Description. 4.2 User accounts The QIAsymphony SP/AS recognizes 2 different user roles: The “Supervisor”... -
Page 30: Create New Users
8. Select the role of the user account to be created. The selected role will be highlighted inverse. 9. Press the arrow button to assign the selected role to the newly created user account. The new user will be added to User Roles. QIAsymphony SP/AS Consolidated Operating Guide 12/2017... -
Page 31: Activate/Inactivate User Accounts
5. Activation: Select the user name from the list in the Deactivated Users package and press the Yes button. The selected user will be removed from the list and transferred to the Activated Users list. 6. Press Save to confirm the changes. QIAsymphony SP/AS Consolidated Operating Guide 12/2017... -
Page 32: System Request For Password Change
3. Press Confirm new Password text field. The Keyboard screen appears again. 4. Enter the new password again to confirm it. 5. Press OK. The Login/Please enter your new password screen will appear again. QIAsymphony SP/AS Consolidated Operating Guide 12/2017... -
Page 33: User Request For Password Change
8. Enter a new password in the Keyboard screen and press OK. The User Overview/Please enter your new password screen appears again. 9. Press Confirm new Password text field. 10. Confirm the new password and press OK. The new password is now active. QIAsymphony SP/AS Consolidated Operating Guide 12/2017... -
Page 34: Language Package Installation
Important version 4.1. Only the “Supervisor” role has the ability to upload the language package provided by QIAGEN. The language package can be installed on QIAsymphony SP/AS using the USB stick or the QIAGEN Management Console (QMC). 4.3.1 Setting up the USB stick and transferring language files from the USB stick Add the /data/translation folder to the USB stick and copy the language package *.tar.gz file... -
Page 35: Transferring Files Using The Qmc
The “Translation” file has been introduced for QIAsymphony software version 4.1. Each “Translation” file represents a language package for one language. “Translation” files can be transferred by the “Supervisor” role to the QIAsymphony SP/AS using the file transfer tool of the QIAsymphony Management Console (QMC) version 4.1 and are visible in the respective selections. -
Page 36: Changing The Language In Qiasymphony Management Console (Qmc)
5. Navigate to the location of the downloaded language pack. 6. Select the zipped language pack file. 7. Click Open. 8. Click Install. 9. Select the language. 10. Click OK. 11. Close (FileExit) and restart the QMC. QIAsymphony SP/AS Consolidated Operating Guide 12/2017... -
Page 37: Qiasymphony Sp/As User Interface
5 QIAsymphony SP/AS User Interface 5.1 QIAsymphony SP/AS screen layout This section gives a quick introduction of the user interface of QIAsymphony SP/AS software menus. Descriptions of the tabs, tools, and buttons are listed in separate tables. For more detailed information, see Section 16. - Page 38 Drawer buttons If a QIAsymphony AS module is installed, a button for each QIAsymphony AS drawer appears in the status bar of the common SP/AS user interface adjacent to the QIAsymphony SP drawer buttons. Press the “S” button to open the Sample Preparation/Define Sample Rack Type screen.
-
Page 39: Tab Menus
View information about the QIAsymphony AS (including the progress and status of assay setup) Remove completed assays The Tools tab provides access to several menus required for operation of QIAsymphony SP/AS instruments. QIAsymphony SP/AS Consolidated Operating Guide 12/2017... -
Page 40: Software Symbols
A protocol is a set of instructions that allows the QIAsymphony SP to perform a molecular biology application. The handbook supplied with your QIAsymphony Important Kit will tell you which protocol you should use. 5.2 Software symbols During operation of QIAsymphony SP/AS instruments, messages may appear that provide the user with general information, inform the user that operator input is required, or provide information about warnings and errors. -
Page 41: Handling Files
From USB stick to QIAsymphony SP/AS instruments (uploading) Rack files Work lists Concentration data files Synchronization of file types between QIAsymphony SP/AS and USB stick Rack files Work lists Concentration data files Files can be handled directly using a USB stick or, alternatively, using the File Transfer tool in the QIAsymphony Management Console. -
Page 42: Data Transfer Via The Usb Stick
To transfer files from QIAsymphony SP/AS instruments to the USB stick, follow the steps below. 1. Log in to the QIAsymphony SP/AS instruments. 2. Insert the USB stick into one of the USB ports at the front of the QIAsymphony SP. QIAsymphony SP/AS Consolidated Operating Guide 12/2017... - Page 43 3. Press File Transfer in the Tools screen. The In-/Output Files tab of the File Transfer menu opens. 4. Select one of the file transfer tabs (In-/Output Files, Process Files, Instr. Setup Files). QIAsymphony SP/AS Consolidated Operating Guide 12/2017...
-
Page 44: Transferring Files From The Usb Stick
Alternatively, if you are not connected to the network, you can transfer files using the USB stick. To transfer files from the USB stick to QIAsymphony SP/AS instruments, follow the steps below. 1. Copy the files to be uploaded to the corresponding directory on the USB stick. -
Page 45: Synchronizing Files
3. Insert the USB stick into one of the USB ports at the front of the QIAsymphony SP. 4. Press File Transfer in the Tools screen to enter the In-/Output Files tab. 5. Select one of the file transfer tabs (In-/Output Files, Process Files, Instr. Setup Files). -
Page 46: Synchronizing Files On Instruments With Files On The Usb Stick
/data/Worklists/). 2. Insert the USB stick into one of the USB ports at the front of the QIAsymphony SP. 3. Press File Transfer in the Tools screen to enter the In-/Output Files menu. -
Page 47: Deleting Files
To synchronize files on a USB stick with files on the QIAsymphony SP/AS, follow the steps below. 1. Log in to the instrument with the “Supervisor” user ID. 2. Prepare the USB stick for synchronization. Insert the USB stick into one of the USB ports at the front of the QIAsymphony SP. -
Page 48: Qiasymphony Sp Features
7 QIAsymphony SP Features The section describes how to operate the QIAsymphony SP instrument, including how to load and unload the worktable. The QIAsymphony SP performs fully automated purification of nucleic acids using magnetic- particle technology. Samples can be processed in batches of up to 24 samples. The instrument controls integrated components including a lysis station, 4-channel pipetting system, robotic gripper, and an array of magnetic rods that are protected by rod covers. -
Page 49: Basic Principle
7.1.1 Basic principle Sample preparation using the QIAsymphony SP usually consists of 4 main steps: lyse, bind, wash, and elute. Samples are lysed in the lysis station, which can be heated, if required by the protocol. Nucleic acids bind to the surface of the magnetic particles and are washed to remove ... -
Page 50: Lysis Station
Important: To prevent liquid from entering the QIAsymphony SP, only operate Important the instrument with the magnetic-head guard installed. - Page 51 UV lamp A UV lamp is mounted on the robotic arm and is used to decontaminate the worktable of the respective instrument. See Section 14.6 for information about operating the UV lamp. QIAsymphony SP/AS Consolidated Operating Guide 12/2017...
-
Page 52: Bar Code Reader
Sample input bar code reader The QIAsymphony SP has an integrated bar code reader that can read bar codes on tube carriers and sample tubes. A default tube type must be defined for each type of insert used. The tube type is automatically assigned when the insert bar code is read. -
Page 53: Bar Code Types
The handheld scanner may be connected via USB connection to one of the USB ports of the QIAsymphony SP/AS instruments. When using the QIAsymphony Cabinet SP/AS, the handheld scanner is delivered with a magnetic holder. The magnetic holder can only be fixed to the metallic parts of the cabinet. -
Page 54: Loading Qiasymphony Sp Drawers
Loading internal controls It is possible to set up a run on the QIAsymphony SP with or without the Wizard. The Wizard can only be used for setting up independent sample preparation Important runs. It cannot be used to set up an integrated run. -
Page 55: Loading The "Waste" Drawer
Although the Wizard cannot be used with integrated runs, the steps for loading the QIAsymphony SP are the same for independent runs (which allow use of the Important Wizard) and integrated runs. If you need assistance for using the QIAsymphony SP, we recommend using the Wizard. -
Page 56: Tip Park Station
Make sure to remove the lid from the liquid waste container before you load the Important container into the drawer. Make sure to empty the liquid waste container at the end of each run. Important QIAsymphony SP/AS Consolidated Operating Guide 12/2017... -
Page 57: Tip Chute
For more information, refer to Section 9.6, “Mounting the tip disposal bag”, of the QIAsymphony SP/AS User Manual — General Description. If using the QIAsymphony SP in combination with the QIAsymphony Cabinet SP, refer to the QIAsymphony Cabinet SP/AS User Guide for information about tip disposal. -
Page 58: Unit Boxes
An empty unit box must be placed into slot 4. During initialization the handler goes down into the unit box in position 4. If the unit box is not empty, the Important handler will crash. QIAsymphony SP/AS Consolidated Operating Guide 12/2017... -
Page 59: Closing The "Waste" Drawer
Purified nucleic acids are transferred to the “Eluate” drawer. The “Eluate” drawer contains 4 slots that can be used for elution into plates or tubes. Slot 1 Slot 2 Slot 3 Slot 4 The “Eluate” drawer. “Elution slots 2–4” can accommodate plates or tubes in special adapters. QIAsymphony SP/AS Consolidated Operating Guide 12/2017... - Page 60 For more information about the types of 96-well plates and tubes that can be used in the “Eluate” drawer, visit www.qiagen.com/goto/QIAsymphony. Ensure that elution racks or tubes are compatible with the QIAsymphony SP. Important If multiple sample batches are being processed, eluted nucleic acids can be removed from the “Eluate”...
-
Page 61: Loading Procedure
Alternatively, press Rack ID, and enter the elution rack ID manually using the Keyboard screen that appears. This step is optional for some instruments, depending on the configuration. For more information, refer to the QIAsymphony SP/AS User Manual — General Important Description. - Page 62 “Eluate” drawer, ensure that the cooling temperatures are suitable for these eluates on the same elution rack. Otherwise, the eluates may be given the status “invalid”. The QIAsymphony SP cannot detect whether cooling temperatures are suitable for eluates that are already loaded from previous runs in the “Eluate”...
-
Page 63: Transfer Module
Transfer module Within the integrated mode, elution racks can be automatically transferred from the QIAsymphony SP via the transfer module to slot 2 of the “Eluate and Reagents” drawer of the QIAsymphony AS instrument. The transfer frame consists of a base frame and a handle. If you intend to use automatic transfer of an elution rack to the QIAsymphony AS via the transfer module, ensure that the transfer frame is installed before placing the relevant adapter onto slot 1 of the “Eluate”... -
Page 64: Unloading The "Eluate" Drawer
If using QIAsymphony SP/AS instruments in integrated run mode, an elution rack on “Elution slot 1” will be automatically transferred from the QIAsymphony SP to the AS module to start the reaction setup. Afterwards, the elution rack will be automatically transferred back to the QIAsymphony SP “Eluate”... - Page 65 When an elution rack is removed, the rack file for the elution rack is finalized and the result file for the elution rack is generated. The rack file and result file can be downloaded using the QIAsymphony Management Console or via file transfer from the QIAsymphony SP to the USB stick.
-
Page 66: Loading The "Reagents And Consumables" Drawer
The Eluate Drawer/Elution Slot/Configure Rack X screen appears. 8. Press OK. The QIAsymphony SP performs an inventory scan of the “Eluate” drawer. Afterwards the Sample Preparation/Overview screen is displayed. . If eluate cooling in “Elution slot 1” was turned on, it will be turned off as soon as Important the OK button or Yes button is pressed. -
Page 67: Loading Consumables
Loading consumables Unit boxes Consumables required for sample preparation are placed onto the QIAsymphony SP worktable in unit boxes. Unit boxes are provided with a lid. There are 4 slots for unit boxes. To load unit boxes, follow the steps below. - Page 68 Sample prep cartridges are provided in sealed unit boxes. Each unit box can hold a maximum of 28 cartridges. A specific pattern on the top and bottom edge of a sample prep cartridge enables automatic detection by the QIAsymphony SP during the inventory scan. The number of sample prep QIAsymphony SP/AS Consolidated Operating Guide 12/2017...
- Page 69 Unit box slots Tip racks. To load the QIAsymphony SP with tip racks, follow the steps below. 1. Hold the tip rack between 2 fingers by the recessed grips. 2. Gently squeeze the tip rack together and place it into a tip rack slot.
-
Page 70: Reagent Cartridges
8.4.2 Reagent cartridges The required reagent cartridges are determined by the QIAsymphony SP from the protocols that were chosen by the user. The reagent cartridges can be either from the same kit or from different kits. Reagents required for the purification procedure are provided in prefilled, sealed reagent ... -
Page 71: Buffer Bottle
Depending on the kit being used, an additional bottle of buffer may be provided. The bottle is prefilled with up to 60 ml of reagent. To load the QIAsymphony SP with the buffer bottle, follow the steps below. 1. Remove the screw-cap from the buffer bottle. -
Page 72: Accessory Trough
If additional ethanol is required, refer to the relevant kit handbook for the volume to be used. To load the QIAsymphony SP with an Accessory Trough, follow the steps below. 1. Fill the Accessory Trough(s) with the volume of ethanol stated in the handbook of the QIAsymphony Kit you are using. -
Page 73: Unloading Reagents And Consumables
The instrument will not be used for a long period of time. To remove a tip rack from the QIAsymphony SP, follow the steps below. 1. Hold the tip rack between two fingers by the recessed grips. 2. Gently squeeze the tip rack together. -
Page 74: Loading The "Sample" Drawer
8–16 mm can be used with the QIAsymphony SP. 8.5.1 Loading tube carriers Loading samples using a tube carrier The QIAsymphony SP tube carrier can accommodate up to 24 sample tubes of the following outer diameter: 14–16 mm (no insert required) ... - Page 75 The status of each slot is shown by LEDs located behind the stop line. The LEDs may be illuminated in green, orange, or red. Green — slot is free and ready for loading Orange — tube carrier is loaded Red — slot is currently locked QIAsymphony SP/AS Consolidated Operating Guide 12/2017...
- Page 76 2. Gently slide the tube carrier into the appropriate slot. Insert up to the stop line, and wait until the bar code reader has moved forward. Sliding a tube carrier into the appropriate slot. QIAsymphony SP/AS Consolidated Operating Guide 12/2017...
- Page 77 “Slot 3”, or “Slot 4”. If you need to load two samples with the same bar code/ID in the same tube Important carrier, do not place them side by side. Otherwise an error will occur. QIAsymphony SP/AS Consolidated Operating Guide 12/2017...
- Page 78 Assay Control Sets that are compatible with the currently loaded reagent cartridge. Continuous loading on the QIAsymphony SP is possible for up to 96 samples in any number of batches, provided that the consumables drawer is fully loaded before commencing the first batch.
- Page 79 Assay Control Set. Assigning an Assay Control Set to a sample not only specifies which protocol should be used but also which internal control should be added to the sample. The QIAsymphony SP supports the use of internal controls only in combination with samples that are loaded in a tube carrier.
- Page 80 3. Select the internal control in the Internal controls: list. 4. Press OK to assign internal controls to the selected positions. 5. Press OK to confirm the overall assignments of internal control. QIAsymphony SP/AS Consolidated Operating Guide 12/2017...
- Page 81 Internal controls: list. If the internal control was not labeled with a bar Important code but the QIAsymphony SP detected that a tube was present, Unknown IC is displayed in the corresponding position. The internal control has to be manually assigned using the internal controls displayed in the Internal controls: list.
- Page 82 Unloading internal controls Internal controls in a tube carrier can be removed from the QIAsymphony SP when the carrier slot is unlocked. If batches are running and you need to load additional internal controls, press the IC button to ...
-
Page 83: Loading The Plate Carrier
An inventory scan of each drawer of the QIAsymphony SP must be performed before a sample preparation protocol can be run. The QIAsymphony SP uses a laser to check the type and number of consumables, and the type and location of adapters loaded in each drawer. A bar code detection system recognizes and scans 1D or 2D bar codes (e.g., on the reagent cartridge). - Page 84 This scan is only performed if the liquid level is not known (e.g., for a partially used reagent cartridge). Liquid-level scan of detected reagents. Liquid-level check of the buffer bottle (if detected). Liquid-level check of the Accessory Trough (if detected). QIAsymphony SP/AS Consolidated Operating Guide 12/2017...
-
Page 85: Inventory Scan Of The "Waste" Drawer
The unit box slots are scanned. First, each of the 4 unit box slots is scanned to detect whether a unit box is in the slot. Afterwards, the content of each box is determined (e.g., amount and type of consumables in each box). QIAsymphony SP/AS Consolidated Operating Guide 12/2017... -
Page 86: Inventory Scan Of The "Eluate" Drawer
Inventory scan of the “Eluate” drawer The QIAsymphony SP checks the elution slots to make sure that selected elution slots contain an elution rack. It is possible to select the elution slots on which the bar codes of adapters will be scanned in the Process SP 1 tab of the Configuration menu (i.e., none or 1–4). -
Page 87: Resuming A Run
Maintenance SP screen. After successful cleanup, it is necessary to empty all slot positions in the Important “Sample” and “Eluate” drawers. New runs can then be defined and started. QIAsymphony SP/AS Consolidated Operating Guide 12/2017... -
Page 88: End Of Batch Processing Or Run
3. Unload all elution racks. 4. Remove consumables, reagent cartridges, buffer bottle, and Accessory Troughs. 5. Perform maintenance procedures described in Section 9 of the QIAsymphony SP/AS User Manual — General Description. For more information about unloading the reagents and consumables, see Section 8.4.5. -
Page 89: Qiasymphony Sp Run Definitions
This section describes how to set up and configure a sample preparation run 9.1 Configuring a sample type By default, the sample type is “Sample”. If your QIAsymphony SP is not Important connected to a QIAsymphony AS, ignore this section. -
Page 90: Defining A Batch/Run (Queuing)
Assigning different Assay Control Sets to a sample batch To assign samples to a batch, follow the steps in sections “Without work list” or “With work list”, below. Without work list 1. After loading a tube carrier, press the SP Batch button QIAsymphony SP/AS Consolidated Operating Guide 12/2017... - Page 91 Only one protocol can be run within a batch of 24 samples. Important 8. Press Next to continue with the batch definition workflow. 9. Select the elution slot for the batch to be defined by pressing the corresponding slot button. QIAsymphony SP/AS Consolidated Operating Guide 12/2017...
- Page 92 (depends on the software configuration of the QIAsymphony SP), press the Next button to continue with the batch definition process. 2. The QIAsymphony SP checks whether there are any work list assignments for the loaded samples of the batch being defined.
- Page 93 5. For samples associated with a work list, the Assay Control Sets defined in the work list are automatically assigned. These samples display the indicator in the lower right corner. To process any samples that are not associated with a work list, Assay Control Sets must be assigned. QIAsymphony SP/AS Consolidated Operating Guide 12/2017...
- Page 94 8. To overwrite the default elution volume, select the required elution volume from the list by pressing the appropriate button. Use the up and down arrows to scroll through the list of available elution volumes. 9. Press the Queue button to finish the batch definition workflow. QIAsymphony SP/AS Consolidated Operating Guide 12/2017...
-
Page 95: Qiasymphony As Features
The QIAsymphony AS is provided with predefined protocols, specifically designed for use with QIAGEN real-time and end-point PCR kits. These protocols are called Assay Definitions. Assay Parameter Sets define the parameters for a protocol. These files, including other QIAsymphony AS files (e.g., cycler files, result files), can be transferred to/from... -
Page 96: Instrument Features
If the QIAsymphony AS hood is opened, the instrument will not immediately stop. The instrument will stop when processing of the current protocol step is finished. Important In some cases, this may take some time. QIAsymphony SP/AS Consolidated Operating Guide 12/2017... -
Page 97: Qiasymphony Status Leds
10.2.3 Robotic arm This feature is the same as for the QIAsymphony SP, except it does not support a robotic gripper. The QIAsymphony AS pipettor head can dispense 2–1500 µl (application- and liquid-dependent). As part of the inventory scan on the “Eluate and Reagents” and “Assays” drawers, the 2D bar code camera on the robotic arm identifies occupied/empty slots and the corresponding adapter types. -
Page 98: Qiasymphony As Drawers
Purified nucleic acids can be transferred to the “Eluate and Reagents” drawer from the “Eluate” drawer of the QIAsymphony SP by automatic transfer (via the transfer module) or by manual transfer. The “Eluate and Reagents” drawer has 3 positions — slots 1, 2, and 3 — that have options for cooling and can accommodate plates and tubes in special adapters. -
Page 99: Assays" Drawer
Glass capillaries (20 µl) (for use with the LightCycler ® For more information about the types of plates and tubes that can be used in the “Assays” drawer and the corresponding names used in the software, visit www.qiagen.com/goto/QIAsymphony. QIAsymphony SP/AS Consolidated Operating Guide 12/2017... -
Page 100: Qiasymphony As Basic Functions
QIAsymphony AS) at the same time, where neither run influences the other. It is also possible to perform an independent run on the QIAsymphony SP, and then transfer eluates via the transfer module to the QIAsymphony AS. Here, samples can be processed using an independent assay setup run. -
Page 101: Integrated Operation
12.1.2 Integrated operation An integrated run consists of a sample preparation run on the QIAsymphony SP and then an assay setup run on the QIAsymphony AS. Eluates are automatically transferred from the QIAsymphony SP to the QIAsymphony AS via the transfer module without user interaction. An integrated run is defined in the software for the complete workflow before starting the run. -
Page 102: Preparing A Run
“Integrated Setup” screen. 2. Select the assay to assign as a favorite. 3. Assign the selected assay to a selected blank Favorites button. The assay will be displayed on the assigned favorite button. QIAsymphony SP/AS Consolidated Operating Guide 12/2017... -
Page 103: Integrated Run
1. Open the QIAsymphony AS hood. 2. Insert the tip chute into the QIAsymphony AS. 3. After maintenance has been performed, load all items of the QIAsymphony SP/AS (e.g., tip chutes, drop catcher, magnetic-head guards, tip disposal bags, empty waste bottle, and tip park station). -
Page 104: Defining An Integrated Run
It is only possible to define an integrated run if an eluate rack and a transfer frame have been loaded on “Eluate slot 1” of the QIAsymphony SP. To save time, the system checks for the transfer frame during the rack carrier inventory scan. - Page 105 2. Edit samples (this includes resolving errors in the sample IDs of the sample tubes). 3. Assign an assay to all samples of a batch. 4. Define assays for a batch. 5. Create or remove AS batches from their related SP batch. QIAsymphony SP/AS Consolidated Operating Guide 12/2017...
- Page 106 3. Create an AS batch for the related SP batch(es). 4. Queue the integrated run. Assigning assays to sample positions Assays can be assigned to samples using: Favorite assays The Assay Assignment screen (manual assignment) Work lists QIAsymphony SP/AS Consolidated Operating Guide 12/2017...
- Page 107 For each assigned assay, there is a separate tab. When an assay tab is selected, all samples with this assigned assay are colored green and have the same assay-specific number in the bottom left corner of the sample position. QIAsymphony SP/AS Consolidated Operating Guide 12/2017...
- Page 108 4. Press one of these headings to view a list of parameters. To scroll through the list, use the up and down arrows. Depending on the assay, some headings are not visible. 5. Modify the desired parameter(s). QIAsymphony SP/AS Consolidated Operating Guide 12/2017...
- Page 109 If a work list(s) is used, assays are automatically assigned to samples via their written bar code(s), as defined in the work list(s). Those batches that have assays assigned to them by work lists are QIAsymphony SP/AS Consolidated Operating Guide 12/2017...
- Page 110 The created integrated batches are queued. Afterwards the Main Screen appears. To unlink an AS batch from an SP batch, press the SP batch(es) to select them, Important and then press Remove AS Batch. QIAsymphony SP/AS Consolidated Operating Guide 12/2017...
- Page 111 The Main Overview screen appears again. Starting an integrated run 1. Load the QIAsymphony SP worktable. 2. Start the integrated run by pressing Run. 3. While the integrated run is being processed, load the QIAsymphony AS worktable.
- Page 112 6. Use the Create AS Batch button to assign an AS batch to one or more SP batches. It is possible to change the order in which batches of an integrated run are processed by manually unloading, reloading, and redefining an integrated Important batch. QIAsymphony SP/AS Consolidated Operating Guide 12/2017...
-
Page 113: Loading An Integrated Run
AS batches were created before queuing the integrated run. For more detailed information, refer to Appendix A of the QIAsymphony SP/AS User Manual — Operating the QIAsymphony AS. - Page 114 To view information about all of the samples in the sample rack in tabular format, press List View. The sample rack is transferred from the QIAsymphony SP to the QIAsymphony AS. Therefore, the sample rack does not need to be loaded onto the Important QIAsymphony AS for an integrated run.
- Page 115 3. If an assay run includes a normalization step, up to 2 assay racks can be used. If a Rotor-Disc is used as an assay rack, slots 4–6 are covered by the Rotor-Disc Adapter Base Unit QS. A maximum of 2 Rotor-Discs can be used. QIAsymphony SP/AS Consolidated Operating Guide 12/2017...
- Page 116 The loaded slot is now blue. 6. If more assay racks have to be loaded, repeat steps 2–5 for the second assay slot. 7. Leave the “Assays” drawer open to enable loading of normalization rack (optional) and disposable filter-tips. QIAsymphony SP/AS Consolidated Operating Guide 12/2017...
- Page 117 1. Select a rack type from those listed on the right. The up and down buttons can be used to scroll through the list. 2. The assigned rack type is then displayed in the selected “Assay” slot. The list only displays rack types that have the same assay rack format. Important QIAsymphony SP/AS Consolidated Operating Guide 12/2017...
- Page 118 When using a Rotor-Disc, place the Rotor Disc onto the Rotor Disc adapter, the adapter onto the Rotor Disc Adapter Base Unit QS, and the base unit onto slot Important positions 4, 5, and 6. QIAsymphony SP/AS Consolidated Operating Guide 12/2017...
- Page 119 4. Press the “Reagent” slot(s) to view detailed information about the required reagents, tubes, and corresponding volumes. The Loading Reagents screen appears. A schematic of the reagent adapter that will be used is displayed on the screen. QIAsymphony SP/AS Consolidated Operating Guide 12/2017...
- Page 120 If ready-to-use master mix was selected for an Assay Parameter Set, the list contains information about the composition of the master mix, as shown in the screenshot below. 8. Load the required reagents and empty tubes in the defined positions. QIAsymphony SP/AS Consolidated Operating Guide 12/2017...
- Page 121 If the entered kit bar code does not follow a recognized format, a message will Important appear, asking whether to accept the bar code. Press OK to continue. QIAsymphony SP/AS Consolidated Operating Guide 12/2017...
- Page 122 It is possible to use customized kit bar codes. Validation of the lot number and expiration date is performed by QIAsymphony SP/AS instruments and is tracked in the result file. The bar code must have the following format (e.g., *123456;20151231).
-
Page 123: Checking Cooling Temperatures
The cooling settings for “Sample”, “Reagents”, and “Assay” slots can be switched on, if the rack is not yet loaded (precooling). The temperature of the cooling positions throughout an assay run is documented Important in the result file. QIAsymphony SP/AS Consolidated Operating Guide 12/2017... -
Page 124: Starting An Integrated Run
If a rack is loaded, cooling cannot be switched off. Important 12.3.4 Starting an integrated run 1. Press Run in the Integrated Run screen. 2. The status of an integrated run can be viewed in the Integrated Run View screen. QIAsymphony SP/AS Consolidated Operating Guide 12/2017... -
Page 125: Removing Assays After An As Run
3. Press Yes. Cooling is now switched off for all slots. Cooling for the eluate rack(s) is also switched off at this point. In an integrated run, the eluate rack is moved back to the QIAsymphony SP and is cooled there. -
Page 126: Procedure After Run Completion
Pausing a QIAsymphony SP or a QIAsymphony AS run A run on the QIAsymphony SP or the QIAsymphony AS can be paused by pressing the Pause SP or Pause AS button in the Integrated Run screen. If a QIAsymphony SP or a QIAsymphony AS run is paused, the pipetting step is completed before the run pauses. - Page 127 “unclear” as soon as the QIAsymphony SP/AS is paused and continued. Stopping a run If a QIAsymphony SP or QIAsymphony AS run is paused, press the Stop SP or Stop AS button to stop the integrated run. On pressing Stop SP, all batches currently being processed will be stopped, although AS batches previously started will be completed.
-
Page 128: Independent Run
ID will be automatically assigned when the rack file is assigned to the “Sample” slot. If no rack file is available, the rack type and rack ID must be manually assigned. QIAsymphony SP/AS Consolidated Operating Guide 12/2017... - Page 129 Be aware that some symbols may not be used in the rack file name and some Important symbols will be converted. If the rack type is changed after a rack ID has been entered the rack ID will Important remain the same. QIAsymphony SP/AS Consolidated Operating Guide 12/2017...
- Page 130 The software automatically assigns an ID in the format SlotNo._RunID_Suffix (e.g., S2_1000002_000). 3. A rack ID is automatically assigned to the selected “Sample” slot(s). If a rack type has already been assigned to the “Sample” slot(s), the slot(s) will now appear blue. QIAsymphony SP/AS Consolidated Operating Guide 12/2017...
- Page 131 The selected rack file will be assigned to the selected “Sample” slot. The rack type and rack ID that are defined in the selected rack file will be assigned to the selected “Sample” slot. The “Sample” slot will now appear blue and the Next button becomes active. QIAsymphony SP/AS Consolidated Operating Guide 12/2017...
-
Page 132: Defining/Checking Sample Rack(S)
Press the position (pale yellow) to select it, and then select Sample, EC+ or EC– to define the sample type (where EC is extraction control). The Next button becomes active after sample positions and volumes have been assigned to the sample rack. QIAsymphony SP/AS Consolidated Operating Guide 12/2017... - Page 133 3. Press Zoom in to view the name of sample IDs. Small fluctuations in the expected volume of eluate are dependent on the QIAsymphony SP protocol. This means that the maximum number of reactions Important that can be set up per sample may no longer correspond to the available volume of eluate.
- Page 134 1. Select the position(s) to be defined or modified in the displayed sample rack. 2. Press Volume. The Manual Input screen appears. 3. Enter a volume using the Keyboard screen. QIAsymphony SP/AS Consolidated Operating Guide 12/2017...
- Page 135 IDs, press Zoom In. Use the arrow buttons to scroll through the sample rack. If desired, the automatically assigned sample IDs can be edited. If a rack file was used, the sample IDs cannot be modified. Important QIAsymphony SP/AS Consolidated Operating Guide 12/2017...
-
Page 136: Defining Assay(S) To Be Processed In The Run
To define which assay(s) will be processed in the run, press Next in the Sample Rack Layout screen. The Assay Selection screen appears. Assay panels and Assay Parameter Sets can be selected using this screen. QIAsymphony SP/AS Consolidated Operating Guide 12/2017... - Page 137 In addition, Assay Parameter Sets can be sorted into different categories. All available panel(s) and categories are listed in the Available assays list. All Assay Parameter Sets that are not part of a category are listed in Other. QIAsymphony SP/AS Consolidated Operating Guide 12/2017...
- Page 138 4. Press the right pointing arrow in the center of the screen to move the selected assay panel. All Assay Parameter Sets related to the selected assay panel will automatically be displayed in the Selected assays list. QIAsymphony SP/AS Consolidated Operating Guide 12/2017...
-
Page 139: Assigning Selected Assays To Sample Positions
The Assay Assignment screen appears. This screen displays a schematic of the sample rack in the selected “Sample” slot. 2. If more than one “Sample” slot is defined, use the Slot 1 and Slot 2 buttons to switch between views of the two slots. QIAsymphony SP/AS Consolidated Operating Guide 12/2017... - Page 140 Important Assignment screen. If you press Cancel, all defined settings will be deleted. Press Yes to confirm. Manually assigning Assay Parameter Sets 1. Select an Assay Parameter Set to be assigned from the tabs. QIAsymphony SP/AS Consolidated Operating Guide 12/2017...
-
Page 141: Modifying Assay Parameters
The assigned Assay Parameter Set defines the default parameters for a run. To change the assay parameter(s), proceed as follows: 1. Press Specifications. The Assay Specifications screen will appear. 2. Select the tab for the Assay Parameter Set. The Assay Parameter Set list will be displayed. QIAsymphony SP/AS Consolidated Operating Guide 12/2017... - Page 142 For “Read only” Assay Parameter Sets, only the number of replicates can be Important modified. For user-defined output patterns, the number of replicates for assay controls and Important for assay standards cannot be modified. QIAsymphony SP/AS Consolidated Operating Guide 12/2017...
-
Page 143: Queuing An Independent Assay Run
12.4.7 Validating the assay run QIAsymphony SP/AS instruments validate all defined values for the assay run and determine whether the assay run can be loaded. The validation process includes the following checks: Checks that the number of assay positions required does not exceed the number of positions ... -
Page 144: Loading An Independent Run
If your independent run includes a normalization step, see the following sections. Viewing loading information (only for assay run with normalization) Press the Normalization slot in the Loading information screen to view detailed information about the required normalization rack. Assay Setup/Loading Information screen. QIAsymphony SP/AS Consolidated Operating Guide 12/2017... -
Page 145: Checking Cooling Temperatures
For instructions about how to check cooling temperatures, see Section 12.3.3. 12.4.10 Starting an independent run Wait until the cooling positions have reached their target temperatures (i.e., when they appear green in the assay setup Overview screen). QIAsymphony SP/AS Consolidated Operating Guide 12/2017... -
Page 146: Removing Assays After An Independent Run
It is possible to remove assays after an independent run in the same manner that they are removed after an AS run; see Section 12.3.5. Alternatively, follow the steps below. 1. Open the “Assays” drawer. The Assay Setup/Loading Information screen appears. QIAsymphony SP/AS Consolidated Operating Guide 12/2017... - Page 147 2. Press the first assay rack to be removed. The detailed screen for the slot appears. QIAsymphony SP/AS Consolidated Operating Guide 12/2017...
- Page 148 The Assay Setup/Loading Information screen appears again. The “Assay” slot now appears white and slot cooling is turned off. 4. Close the “Assays” drawer. 5. Press Scan. A dialog box appears. 6. Select Yes for Adapters right only. Press Scan. QIAsymphony SP/AS Consolidated Operating Guide 12/2017...
- Page 149 5. Unload the reagent rack from the drawer and then press Remove in the touchscreen. If there is a second reagent rack, repeat this process for the other rack. 6. If there is a normalization rack, press this slot. The detailed screen for that slot appears. QIAsymphony SP/AS Consolidated Operating Guide 12/2017...
-
Page 150: Pausing, Resuming, And Stopping An Independent Run
2. After pressing Pause AS, the Continue AS and Stop AS buttons appear. The run can now be resumed or stopped. Samples will always be flagged as “unclear” if the run has been paused. The QIAsymphony AS will complete the current pipetting step before pausing. QIAsymphony SP/AS Consolidated Operating Guide 12/2017... -
Page 151: Performing Inventory Scans (As)
12.5 Performing inventory scans (AS) An inventory scan of each drawer of the QIAsymphony AS must be performed before an assay run can be started. This is performed in the same way as for the QIAsymphony SP drawers. QIAsymphony SP/AS Consolidated Operating Guide 12/2017... -
Page 152: Inventory Scan Of "Eluate And Reagents" Drawer
This will be documented in the loading information file, and in the Important result file if user interaction was required. Pausing the run to reload tips will result in the samples being flagged as “unclear”. QIAsymphony SP/AS Consolidated Operating Guide 12/2017... -
Page 153: Inventory Scan Of The "Assays" Drawer
After the inventory scan has been performed, the inventory of the QIAsymphony SP/AS instruments is updated. The system switches off temporary cooling for the slots and switches on cooling for loaded slots. -
Page 154: Troubleshooting
13 Troubleshooting 13.1 Error messages and warnings If a problem occurs during operation of the QIAsymphony SP and/or AS, an error message or warning will appear on the touchscreen. See Section 3.2.3 of the QIAsymphony SP/AS User Manual — Operating the QIAsymphony SP for more information about the different symbols that may occur in error messages. -
Page 155: Messages With Help Button
2. Carefully read the instructions and then press OK. 3. Close the message and follow the instructions. Note: To read the message again, select Instrument Report in the Tools screen. Then select the Errors tab. Recent error messages will be listed there. QIAsymphony SP/AS Consolidated Operating Guide 12/2017... -
Page 156: Messages Without Help Button
13.2 Software help boxes In order to assist and guide the user, the QIAsymphony SP/AS provides a software help for all screens. To access the software help texts, press the Help button in the command bar, which appears in all screens. -
Page 157: Structure Of Software Help Boxes
To return to the original screen, press OK inside the help dialog. 13.2.1 Structure of software help boxes A help box consists of a maximum of 3 different tabs (in the following sequence): Information, Instruction, and Checklist. QIAsymphony SP/AS Consolidated Operating Guide 12/2017... -
Page 158: Contacting Qiagen Technical Services
Note: A software Help dialog may consist of fewer than the 3 types of text. 13.3 Contacting QIAGEN Technical Services If an error persists and you need to contact QIAGEN Technical Services, make a record of the incident and create an instrument report file. -
Page 159: Creating An Instrument Report File
2. Select Instrument Report in the Tools menu. The Overview tab of the Instrument Report menu appears and instrument data will be retrieved. 3. To create an instrument report for the QIAsymphony SP, select SP. To create an instrument report for the QIAsymphony AS, select AS. -
Page 160: Error Codes
See Error Code 70505. recommended for use with the ACS Y. 32010 Can't change batch, batch is in state Remove all samples from the QIAsymphony SP and insert them ON_HOLD. again. Redefine sample batch(es). 32015 The eluate cooling for slot X is not If the protocol requires cooling of the elution rack, use slot 1 supported. - Page 161 If there are no more adapters of that type available, reduce the number of replicates for samples, assay standards, and assay controls. If the error persists, contact QIAGEN Technical Services. 70110 A disk space overrun was The system detected that there is less than 15% free disk recognized.
- Page 162 It is not possible to assign the same rack file to more than one than one slot. A rack ID may have “Sample” slot. been used more than once. Deselect one “Sample” slot and repeat the assignment of the rack file. QIAsymphony SP/AS Consolidated Operating Guide 12/2017...
- Page 163 Yes in the Configuration menu. 76202 An unknown kit bar code has been Ensure that the entered bar code is either a QIAGEN bar code entered. or that it meets the requirements for a custom bar code, as described in “Defining customized kit bar codes”...
- Page 164 Not enough liquid available. Sample This error code can occur during operation of the volume is too small. QIAsymphony SP and during operation of the QIAsymphony Samples may be flagged as “unclear” or “invalid”. Not enough liquid available Slot x PosY Reagent Z.
- Page 165 The bar code was used for a sample rack on the therefore cannot be used on this QIAsymphony SP and was then used for an eluate rack on the drawer. QIAsymphony AS. The bar code was used for an eluate rack on the QIAsymphony SP and afterwards for a sample rack on the QIAsymphony SP.
-
Page 166: General Errors That Do Not Have Error Codes
QIAsymphony SP. Error occurs during a If a protocol was in progress on the QIAsymphony SP and an error occurs, the QIAsymphony protocol. SP/AS instrument must be switched off. Upon restarting the instruments, it is not possible to continue with the protocol or an assay run that was in progress on the QIAsymphony AS. -
Page 167: File Handling Errors
For more information about errors that may occur when using the Management Console, see the QIAsymphony Management Console User Manual. USB stick or other USB Only use the USB stick provided with the QIAsymphony SP. Try connecting the USB stick to the device was not other USB port. Restart the QIAsymphony SP/AS instruments. - Page 168 Ensure that the correct rack file has been transferred to the QIAsymphony SP/AS instruments before starting assay definition. The rack file must be in a format that can be recognized by the QIAsymphony SP/AS instruments (i.e., *.xml). Ensure that the rack file has been converted from *.csv format to *.xml format using the CSV Conversion tool of the QIAsymphony Management Console.
- Page 169 “unclear”. If problems occur during master mix or sample transfer, the sample status is “invalid”. If a QIAsymphony SP rack file is used on the QIAsymphony AS, the sample status will only be changed if errors/problems occur during the assay run. If sample status is changed, the reason for this change will be recorded in the QIAsymphony AS result file.
-
Page 170: Tip Waste Errors
The bar code of the Make sure that the handheld bar code scanner is properly connected to the QIAsymphony SP. elution slot/elution rack Try to read other bar codes with the scanner. Make sure that all bar codes can be easily read. -
Page 171: Sample" Drawer
Comments and suggestions Sample carrier locks do Make sure that the QIAsymphony SP is switched on and the LEDs in the “Sample” drawer are not release and/or bar illuminated green. Be sure to insert all tube/plate carriers with the bar codes oriented to the left. -
Page 172: Waste" Drawer
Error Comments and suggestions Sample bar codes are not Only use compatible bar codes. Refer to Appendix A of the QIAsymphony SP/AS User Manual read properly. — General Description for detailed information about compatible bar codes. Be sure that bar codes can be easily read and are oriented to the left. -
Page 173: Errors That May Occur When Starting A Batch/Run
Error Comments and suggestions Assay Control Set is not Make sure that the Assay Control Set was transferred to the QIAsymphony SP. Check all displayed. categories in the Assay Control Set list. If a problem occurred during transfer of the Assay Control Set from the USB stick to the QIAsymphony SP, see Sections 13.5.1 and 13.5.2. -
Page 174: Protocol Interruption
Do not initialize the QIAsymphony SP/AS instruments. because an 8-Rod Cover Switch off the QIAsymphony SP/AS instruments and try to remove the 8-Rod Cover or sample or sample prep cartridge prep cartridge from the QIAsymphony SP manually. If it cannot be removed manually, contact could not be released QIAGEN Technical Services. -
Page 175: Qiasymphony As Errors That Do Not Have Error Codes
Make sure that the Reuse Seal Strips have been removed from the troughs of the reagent not recognized. cartridge. If the error persists, contact QIAGEN Technical Services. Buffer bottle was not Check that the lid of the buffer bottle was removed. -
Page 176: Inventory Scan Errors
13.7.2 Inventory scan errors Error Comments and suggestions The inventory scan of the Do not expose the QIAsymphony SP/AS instruments to direct sunlight (see Section 4.2 of the drawers detects an QIAsymphony SP/AS User Manual — General Description). adapter on “slot X”... -
Page 177: Errors Occurring During An Assay Run
QIAsymphony AS. Positioning in xy direction Ensure that the workbench that the QIAsymphony SP/AS instruments are placed on meets the changes. requirements (see Section 4.2 of the QIAsymphony SP/AS User Manual — General Description). -
Page 178: Data Analysis Errors
Comments and suggestions Evaporation. If eluates/assays are left to stand on the QIAsymphony SP/AS instruments for a long time after a run is complete, evaporation will occur. Ensure that eluate racks and assay racks are removed immediately when a run is completed. -
Page 179: Integrated Run Errors That Do Not Have Error Codes
“Assay Setup” tab and press “Remove” in the “Overview” screen (see Section 2.9, “Removing assays after an AS run”, of the QIAsymphony SP/AS User Manual — Operating the QIAsymphony AS). After removing the AS batch, return to the “Integrated Run/Overview” and remove the Integrated run by pressing the “Integrated Batch X”... -
Page 180: Maintenance
Important Pay special attention to Section 2.9. 14.1 Cleaning If liquid is spilt on the QIAsymphony SP/AS worktables, wipe it away as soon as the run has finished in accordance with the required safety regulations. Do not Important allow the liquid to dry. - Page 181 — for cleaning surfaces and submerging worktable items. Do not use alcohol or alcohol-based disinfectants to clean the QIAsymphony SP/AS hoods or side panels. Exposure of the QIAsymphony SP/AS hoods and side panels to alcohol or alcohol-based disinfectants will cause surface cracking.
-
Page 182: Servicing
Important 14.3 Regular maintenance Regular maintenance is required after each run on the QIAsymphony SP/AS. A separate maintenance routine should be performed for the QIAsymphony SP and QIAsymphony AS. Before running a service protocol from the Maintenance SP or Maintenance AS Important menu, ensure that the QIAsymphony SP/AS hoods are closed. -
Page 183: Regular Maintenance Procedure For The Qiasymphony Sp
Important For detailed information, refer to the QIAsymphony Cabinet SP/AS User Guide. 14.3.2 Regular maintenance procedure for the QIAsymphony SP 1. Remove and safely store eluates from the “Eluate” drawer. As an optional step, download the result file(s) and ensure that the files have been backed up. -
Page 184: Regular Maintenance Procedure For The Qiasymphony As
After performing the last run of the day, perform the regular maintenance procedure and, in addition, the daily maintenance procedure. Before running a service protocol from the Maintenance menu, ensure that the Important QIAsymphony SP/AS hoods are closed. Pay attention to the safety information. Important QIAsymphony SP/AS Consolidated Operating Guide 12/2017... -
Page 185: Pipetting System Tip Guards (Sp/As)
5. Soak in a glyoxal and quaternary ammonium salt based disinfectant (e.g., Gigasept Instru AF) for at least 15 min. 6. Rinse with water and wipe dry with paper towels. Residual liquid from the tip disposal chute may drip. Important QIAsymphony SP/AS Consolidated Operating Guide 12/2017... -
Page 186: Drawers And Lysis Station (Sp)
2. Soak in a glyoxal and quaternary ammonium salt based disinfectant (e.g., Gigasept Instru AF) for at least 15 min. 3. Rinse with water and wipe dry with paper towels. The tray can also be autoclaved at 121°C for 20 min. Important QIAsymphony SP/AS Consolidated Operating Guide 12/2017... -
Page 187: Robotic Gripper (Sp)
5. Replace the liquid waste container in the “Waste” drawer. 14.5 Weekly maintenance (SP/AS) 14.5.1 File management 1. Download the result file(s) (for QIAsymphony SP and QIAsymphony AS) and loading information files (QIAsymphony AS only) as described in Section 6.3 and ensure that the files are backed up. -
Page 188: Cleaning The Qiasymphony Sp/As Hoods
14.5.3 Cleaning the QIAsymphony SP/AS hoods To clean the hoods of QIAsymphony SP/AS instruments, wipe the surface with a soft lint-free cloth moistened with deionized water, or use wipes soaked with Mikrozid Sensitive Liquid. Then wipe dry with a dry soft lint-free cloth or paper towel. -
Page 189: Liquid Waste Container (Sp)
14.6 UV decontamination of the worktable UV decontamination should be performed daily. It helps to reduce possible pathogen contamination of the QIAsymphony SP/AS worktables. The efficiency of inactivation has to be determined for each specific organism and depends, for example, on layer thickness and sample type. - Page 190 5. Confirm that all removable objects have been removed from the worktable by pressing OK. The UV irradiation procedure starts and the robotic arm moves over the worktable surface for the set irradiation duration. QIAsymphony SP/AS Consolidated Operating Guide 12/2017...
-
Page 191: Maintenance Of The Tip Adapter O-Ring
Cancel. The procedure will stop as soon as the robotic arm Important completes the current movement. UV irradiation of the QIAsymphony SP and AS must be performed sequentially and cannot be performed in parallel. The second irradiation may be left to run Important overnight. -
Page 192: Technical Data
100–240 V AC, 50/60 Hz, 600 VA QIAsymphony AS Mains supply voltage fluctuations are not to exceed 10% of nominal supply voltages. The inlet is on the QIAsymphony SP; in combined operation, the maximum power consumption is 1400 VA. Overvoltage category Air temperature 15–32ºC (59–89.6ºF) -
Page 193: Mechanical Data And Hardware Features
59 cm (23.2 in.) Height: 103 cm (40.6 in.) Depth: 73 cm (28.7 in.) Weight 90 kg (198 lb.) QIAsymphony SP and AS (integrated operation) Dimensions Width: 185 cm (72.8 in.) Height: 103 cm (40.6 in.) Depth: 73 cm (28.7 in.) Weight 265 kg (584 lb.) -
Page 194: User Interface Addendum
16 User Interface Addendum This section provides an overview of the QIAsymphony SP/AS user interface. The names of tabs, tools, and buttons are displayed in alphabetical order. The availability of the software options is denoted using the following abbreviations: AS = QIAsymphony AS application ... - Page 195 Sample Preparation/Sample ID/ Assay Setup Removes text from the text field. Integrated Setup Deletes the assigned Assay Parameter Set(s) from selected sample position(s). Consumables Switches back from the Sample Calculation to the Consumables view. QIAsymphony SP/AS Consolidated Operating Guide 12/2017...
- Page 196 Sample Preparation/Eluate Drawer/Integrated Setup Displays the Keyboard screen, enabling the user to manually enter sample IDs. Sample Preparation/Internal Controls Displays the Internal controls list, enabling the user to assign the correct internal control to the selected position. QIAsymphony SP/AS Consolidated Operating Guide 12/2017...
- Page 197 Sets the sample type of the selected samples to EC– (negative external control). Sample Preparation/Tools Opens the File transfer menu, enabling transfer of selected file types to the QIAsymphony SP/AS or to the USB stick. Rack browser/Sample Racks Rack browser/Eluate Racks Rack browser/Assay Racks Enables the user to manually enter and then search for IDs using the Keyboard screen.
- Page 198 Enables download/upload of QIAsymphony AS labware file(s). Tools Opens the Labware Browser menu. Instr. Setup Files Enables download/upload of the QIAsymphony SP labware file(s). Service SP/Service AS Opens script output. This button is enabled after an operator service script has been performed.
- Page 199 Sample Racks/Eluate Racks/Assay Racks Displays the rack files that were modified before 00:00 of Monday last week. Labware browser/Labware SP Opens the Output Racks dialog panel and provides information about which elution racks can be used. QIAsymphony SP/AS Consolidated Operating Guide 12/2017...
- Page 200 Sample View or Parameter View is open. Sample Preparation Pauses the QIAsymphony SP. The Pause button should only be pressed in an emergency. After pressing Pause, the QIAsymphony SP completes the current command being processed, pauses the protocol, and changes the sample state to “unclear”.
- Page 201 Opens the Reagent Holders view in which information about reagent holders is displayed. Sample Rack Layout Sets the sample type of the selected samples to “Sample”. Consumables Cartridges Opens the Sample Calculation dialog panel. QIAsymphony SP/AS Consolidated Operating Guide 12/2017...
- Page 202 Opens the Service AS menu under which special service functions (e.g., for maintenance or instrument re-initialization) can be initiated. Tools/Sample Preparation Opens the Service SP menu under which special service functions (e.g., for maintenance or instrument re-initialization) can be initiated. QIAsymphony SP/AS Consolidated Operating Guide 12/2017...
- Page 203 Opens/returns to the Tools menu. File transfer/Instr. Setup Files File transfer/Process Files File transfer/In-/Output Files Enables transfer of selected file types to the QIAsymphony SP/AS or to the USB stick. Labware SP Opens the Tube Carrier screen. QIAsymphony SP/AS Consolidated Operating Guide 12/2017...
- Page 204 Enables selected files to be synchronized when Transfer is pressed. Assay Setup Enables the user to magnify the rack grid view to display additional information. Assay Setup Enables the user to return to the normal view after zooming QIAsymphony SP/AS Consolidated Operating Guide 12/2017...
-
Page 205: Declaration Of Conformity
40724 Hilden Germany Declaration of conformity — QIAsymphony AS Name and address of the company QIAGEN GmbH QIAGEN Strasse 1 40724 Hilden Germany An up-to-date Declaration of Conformity can be requested from QIAGEN Technical Services. QIAsymphony SP/AS Consolidated Operating Guide 12/2017... -
Page 206: Waste Electrical And Electronic Equipment (Weee)
To recycle electronic equipment, contact your local QIAGEN sales office for the required return form. Once the form is submitted, you will be contacted by QIAGEN either to request follow-up information for scheduling collection of the electronic waste or to provide you with an individual quote. -
Page 207: Fcc Declaration
QIAGEN GmbH Germany is not responsible for any radio television interference caused by unauthorized modifications of this equipment or the substitution or attachment of connection cables and equipment other than those specified by QIAGEN GmbH, Germany. The correction of interference caused by such unauthorized modification, substitution, or attachment will be the responsibility of the user. -
Page 208: Liability Clause
Representations and warranties made by any person, including representatives of QIAGEN, which are inconsistent or in conflict with the conditions in this warranty shall not be binding upon the Company unless produced in writing and approved by an officer of QIAGEN. -
Page 209: Wen Quan Yi Micro Hei Font
License. If you modify this font, you may extend this exception to your version of the font, but you are not obligated to do so. If you do not wish to do so, delete this exception statement from your version. QIAsymphony SP/AS Consolidated Operating Guide 12/2017... - Page 210 Document revision history R2, December 2017 Updates related to standard 61010 were incorporated into the user manual. QIAsymphony SP/AS Consolidated Operating Guide 12/2017...
-
Page 211: Index
Independent operation, 100 external features, 96 Independent run, 128 principle, 95 Installation QIAsymphony SP site requirements, 24 features, 49 Instrument report file, 159 principle, 49 Integrated operation, 101 Wizard, 54 Queuing a run, 143 QIAsymphony SP/AS Consolidated Operating Guide 12/2017... - Page 212 Starting an independent run, 145 settings, 29 Starting an integrated run, 124 Validation, 143 Startup, 26 Ventilation, 16, 24 Storage conditions, 192 View loading information, 119 Switching off, 28 Warnings, 14 Waste disposal, 207 Wizard, 54 QIAsymphony SP/AS Consolidated Operating Guide 12/2017...
- Page 213 This page intentionally left blank QIAsymphony SP/AS Consolidated Operating Guide 12/2017...
- Page 214 This page intentionally left blank QIAsymphony SP/AS Consolidated Operating Guide 12/2017...
- Page 215 (Sarstedt AG and Co.). Registered names, trademarks, etc. used in this document, even when not specifically marked as such, are not to be considered unprotected by law. Dec-17 1112127 HB-1919-002 © 2012–2017 QIAGEN, all rights reserved . QIAsymphony SP/AS Consolidated Operating Guide 12/2017...
- Page 216 QIAsymphony SP/AS Consolidated Operating Guide 12/2017...
Need help?
Do you have a question about the QIAsymphony SP and is the answer not in the manual?
Questions and answers