Table of Contents

Related Manuals for EuroLite DPMX-1216 DMX Series

Summary of Contents for EuroLite DPMX-1216 DMX Series
- Page 1 BEDIENUNGSANLEITUNG USER MANUAL DPMX-1216 DMX Series 12-CHANNEL DIMMER PACK © Für weiteren Gebrauch aufbewahren! Copyright Keep this manual for future needs! Nachdruck verboten! Reproduction prohibited!
-
Page 2: Table Of Contents
3. BESTIMMUNGSGEMÄSSE VERWENDUNG ....................6 4. GERÄTEBESCHREIBUNG .......................... 7 4.1 Features ..............................7 4.2 Frontplatte des EUROLITE DPMX-1216 ....................7 4.3 Dimmer-Modul des EUROLITE DPMX-1216 ................... 8 4.4 Steuermodul des EUROLITE DPMX-1216 ....................8 4.5 Rückseite des EUROLITE DPMX-1216 ....................9 4.5.1 EUROLITE DPMX-1216 CEE ....................... - Page 3 3. OPERATING DETERMINATIONS ......................18 4. DESCRIPTION OF THE DEVICE ....................... 19 4.1 Features ..............................19 4.2 Front panel of the EUROLITE DPMX-1216 ................... 20 4.3 Dimmer module of the EUROLITE DPMX-1216 ..................20 4.4 Control module of the EUROLITE DPMX-1216 ..................21 4.5 Rear panel of the EUROLITE DPMX-1216 ....................
-
Page 4: Einführung
- sich die letzte Version der Anleitung im Internet herunter laden 1. EINFÜHRUNG Wir freuen uns, dass Sie sich für ein EUROLITE Dimmerpack der DPMX-1216 DMX Serie entschieden haben. Wenn Sie nachfolgende Hinweise beachten, sind wir sicher, dass Sie lange Zeit Freude an Ihrem Kauf haben werden. - Page 5 Das Gerät darf nicht in Betrieb genommen werden, nachdem es von einem kalten in einen warmen Raum gebracht wurde. Das dabei entstehende Kondenswasser kann unter Umständen Ihr Gerät zerstören. Lassen Sie das Gerät solange uneingeschaltet, bis es Zimmertemperatur erreicht hat! Bitte überprüfen Sie vor der ersten Inbetriebnahme, ob kein offensichtlicher Transportschaden vorliegt.
-
Page 6: Bestimmungsgemässe Verwendung
3. BESTIMMUNGSGEMÄSSE VERWENDUNG Bei diesem Gerät handelt es sich um einen elektronischen Dimmer, mit dem sich andere Geräte wie Scheinwerfer in Diskotheken, auf Bühnen etc. dimmen lassen. Dieses Produkt ist für den Anschluss an 230- 380 V, 50 Hz Wechselspannung zugelassen und wurde ausschließlich zur Verwendung in Innenräumen konzipiert. -
Page 7: Gerätebeschreibung
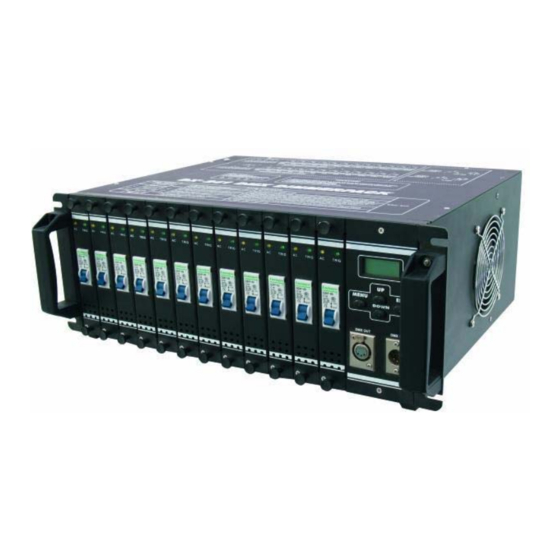
• Kanalausgänge an der Geräterückseite je nach Gerätetyp über Klemmleiste, Schutzkontaktstecker, CEE- Stecker oder 16-polige Hochlastbuchse • 19“ Einbaumaße mit 4 HE Die folgenden Kapitel beschreiben exemplarisch die Bedienelemente auf der Frontplatte des EUROLITE DPMX-1216 DMX. 4.2 Frontplatte des EUROLITE DPMX-1216... -
Page 8: Dimmer-Modul Des Eurolite Dpmx-1216
4.3 Dimmer-Modul des EUROLITE DPMX-1216 LOAD AC OUPUT 16 A MAX V AC INPUT N NEUTRAL CONTROL INPUT 4-12 V DC 1. Modulhalterung 2. AC-Anzeige Halter ziehen Modul 3. TRIG-Anzeige herauszuziehen und drücken um das 4. Sicherungsautomat Modul einzusetzen. Das Gerät muss Löst bei Überlast oder Kurzschluss aus. -
Page 9: Rückseite Des Eurolite Dpmx-1216
4.5 Rückseite des EUROLITE DPMX-1216 15. DMX-Anschlussbuchsen 16. Ausgänge Über den 3-poligen DMX OUT XLR- Kabeldurchführung für den Anschluss der Anschluss lässt sich DMX- Leuchten. Steuersignal an weitere Dimmerpacks 17. Netzanschluss weiterleiten. Die 3-polige DMX IN Kabeldurchfürung für den Anschluss ans XLR-Buchse dient zum Anschluss Netz. -
Page 10: Eurolite Dpmx-1216 Mp
4.5.2 EUROLITE DPMX-1216 MP 4.5.3 EUROLITE DPMX-1216 S 5. INSTALLATION Stellen Sie das Gerät auf einer ebenen Fläche auf oder installieren Sie es in Ihrem Rack. 5.1 Rackinstallation Dieses Gerät ist für ein 19"-Rack (483 mm) vorgesehen. Bei dem Rack sollte es sich um ein „Double-Door- Rack“... -
Page 11: Anschlüsse
Rückseite DMX OUT EUROLITE DMX Stage Control Frontseite Anschlussbeispiel des EUROLITE DPMX-1216 DMX und EUROLITE DPMX-1216 S DMX mit dem Controller EUROLITE DMX Stage Control, den Scheinwerfern EUROLITE PAR-64 (Dimmer-Modus) und der Nebelmaschine EUROLITE NX-150 (Switch-Modus). 6.2 Anschluss der Lampen... -
Page 12: Anschluss An Den Dmx-512 Controller / Verbindung Dimmerpack - Dimmerpack
Leitung International Schwarz Außenleiter 1 Braun Außenleiter 2 Grau Außenleiter 3 Blau Neutralleiter Gelb/Grün Schutzleiter Der Schutzleiter muss unbedingt angeschlossen werden! Wenn das Gerät direkt an das örtliche Stromnetz angeschlossen wird, muss eine Trennvorrichtung mit mindestens 3 mm Kontaktöffnung an jedem Pol in die festverlegte elektrische Installation eingebaut werden. Das Gerät darf nur an eine Elektroinstallation angeschlossen werden, die den VDE-Bestimmungen DIN VDE 0100 entspricht. -
Page 13: Bedienung
DMX Dimmerpack den Betrieb auf. Die Betriebsanzeige POWER leuchtet. In der ersten Zeile der LCD- Anzeige leuchtet „EUROLITE“ auf, in der zweiten „WELCOME TO USE“. Das Gerät führt während dieser Anzeige einen Selbsttest durch. Danach wird der letzte Betriebsmodus angezeigt; „Running Progxx“ oder „DMX MODE“. -
Page 14: Preheat (Vorheizen)
7.2.3 Preheat (Vorheizen) Hier können Sie den Wert der Vorheizspannung einstellen. Diese liegt ständig an den nachgeschalteten Geräten (z.B. Scheinwerfer) an, wodurch ein geringerer Einschaltstrom auf sie einwirkt und so die Lebensdauer der Leuchtmittel erhöht wird. Der Wert der Vorheizspannung kann im Modus All allen 12 Kanälen zugewiesen oder im Modus Single für jeden der 12 Kanäle einzeln festgelegt werden. -
Page 15: Manual (Manuelle Lichtsteuerung)
Curve All Value=[Linear] Curve SINGLE | Hier kann jedem Kanal eine eigene Dimmerkurve zugewiesen MENU CH[01] Value=[Linear] werden [Linear/Switch]. UP/DOWN MENU Curve Mit der Taste MENU wechseln Sie im Untermenü zwischen „Curve CH UP/DOWN CH[01] Value=[Switch] [XX]“ und „Value = [X]“. 7.2.6 Manual (Manuelle Lichtsteuerung) Das Dimmerpack kann im Manual-Modus auch ohne externen Controller betrieben und die Kanäle über das Tastenfeld unterhalb der LCD-Anzeige manuell gedimmt werden. -
Page 16: Technische Daten
9. TECHNISCHE DATEN Spannungsversorgung: 230-380 V AC, 50 Hz ~ Max. Gesamtleistung: 43470 W Max. Gesamtstrom: 189 A Max. Nennleistung/Kanal: 3680 W Max. Nennstrom/Kanal: 16 A Anzahl Steuerkanäle: Integrierte Programme: Sicherung: 12 x C 16 A, 230 V DMX-Ausgang: 3-polige XLR- Einbaubuchse 3-poliger XLR- DMX-Eingang:... -
Page 17: Introduction
1. INTRODUCTION Thank you for having chosen an EUROLITE Dimmer pack of the DPMX-1216 DMX series. If you follow the instructions given in this manual, we are sure that you will enjoy this device for a long period of time. -
Page 18: Operating Determinations
Please make sure that there are no obvious transport damages. Should you notice any damages on the A/C connection cable or on the casing, do not take the device into operation and immediately consult your local dealer. This device falls under protection-class I. The power plug must only be plugged into a protection class I outlet. -
Page 19: Description Of The Device
This device must never be operated or stockpiled in sourroundings where splash water, rain, moisture or fog may harm the device. Moisture or very high humidity can reduce the insulation and lead to mortal electrical shocks. When using smoke machines, make sure that the device is never exposed to the direct smoke jet and is installed in a distance of 0.5 meters between smoke machine and device. -
Page 20: Front Panel Of The Eurolite Dpmx-1216
The following chapters describe the control elements on the front panel of the EUROLITE DPMX-1216 DMX as a reference. 4.2 Front panel of the EUROLITE DPMX-1216 12 x Dimmer module Control module 4.3 Dimmer module of the EUROLITE DPMX-1216 LOAD AC OUPUT... -
Page 21: Control Module Of The Eurolite Dpmx-1216
4.4 Control module of the EUROLITE DPMX-1216 6. DMX Indicator Lights up when the device is receiving a DMX signal. 7. POWER Indicator Lights up as soon as the device is supplied with power. 8. LCD Displays all menus and values. -
Page 22: Eurolite Dpmx-1216 Cee
4.5.1 EUROLITE DPMX-1216 CEE 4.5.2 EUROLITE DPMX-1216 MP 4.5.3 EUROLITE DPMX-1216 S 22/29 00028935.DOC, Version 2.0... -
Page 23: Installation
EUROLITE DMX Stage Control front Connection example of the EUROLITE DPMX-1216 DMX and EUROLITE DPMX-1216 S DMX with the Controller EUROLITE DMX Stage Control, the theatre spots EUROLITE PAR-64 (dim mode) and the fog machine EUROLITE NX-150 (switch mode). 6.2 Connecting the lamps... -
Page 24: Connection With The Mains
6.3 Connection with the mains DANGER TO LIFE! The electric connection must only be carried out by a qualified electrician! The occupation of the connection-cables is as follows: Cable International Black Live1 Brown Live2 Grey Live3 Blue Neutral Yellow/Green Earth The earth has to be connected! If the device will be directly connected with the local power supply network, a disconnection switch with a minimum opening of 3 mm at every pole has to be included in the permanent electrical installation. -
Page 25: Addressing
7. OPERATION 7.1 Setting into operation After connecting the EUROLITE DPMX-1216 DMX Dimmer pack to the mains, the unit starts running. The POWR indicator lights up. „EUROLITE“ and “WELCOME TO USE” is indicated on the display. During this indication, the unit is conducting a self-test and recalls the previous memory record afterwards; „Running Progxx“... -
Page 26: Preheat
7.2.3 Preheat Here you can determine the preheat value, which is then continuously run to the devices connected in series (e.g. theater spots). This function results in lower start-up current requirement and prolongs the life of the illuminants. The preheat value can be assigned to all 12 channels in mode All or to each channel individually in mode Single. -
Page 27: Manual (Manual Light Control)
Value=[Linear] Switch]. Use the button MENU to navigate from „Curve CH [XX]“ to „Value UP/DOWN = [X]“. MENU Curve CH[01] UP/DOWN Value=[Switch] 7.2.6 Manual (manual light control) In manual mode, the Dimmer pack can be used without an external controller and the channels can be adjusted manually via the buttons below the LCD. -
Page 28: Technical Specifications
9. TECHNICAL SPECIFICATIONS Power supply: 230-380 V AC, 50 Hz ~ Max. power output: 43470W Max. current: 189 A Max. output/channel: 3680 W Max. current/channel: 16 A Number of control-channels: Integrated programs: Fuse: 12 x C 16 A, 230 V DMX output: 3-pin female XLR socket DMX input:... -
Page 29: Top View Of The Eurolite Dpmx-1216 Dmx
Top view of the EUROLITE DPMX-1216 DMX 29/29 00028935.DOC, Version 2.0...
Need help?
Do you have a question about the DPMX-1216 DMX Series and is the answer not in the manual?
Questions and answers