Table of Contents
Advertisement
Quick Links
Purpose
Note: Information for this document has been obtained from Kwikee® Products document number
1421330, Revision 0B, dated February 2008 and updated for current practices.
This document explains the removal of an existing door switch and installation of a replacement door switch
that will activate the Kwikee electric step when the door is opened and closed. A brief guide to replacement
parts is also included.
If the vehicle is driven with the step in the extended position, there is the possibility of causing major
damage to both the step and the unit. Always make sure that the step is fully retracted before traveling.
Step safely supports up to 300 lbs. Do Not overload the step assembly. Stepping on a partially extended
step can cause damage to the step frame. Continue pressing door switch until control unit shuts motor
Moving parts can pinch, crush or cut. Keep fingers, arms, and legs clear of the step mechanism while
performing these tasks. Failure to do so may result in personal injury. Keep clear and use caution.
Resources Required
• Two people
• Ruler or tape measure
• Pencil
• Screwdriver or cordless or electric drill
• Appropriate drill bits
• Utility knife or plastic scraper
• Wire stripper/cutter or similar tool
Rev: 10.04.18
KWIKEE
DOOR SWITCH STEP ACTIVATION
®
INSTALLATION GUIDE (1421330)
STEPS
off.
• Wire crimper or similar crimping tool
• Heat shrink butt connector
• Heat shrink gun
• Ring terminal
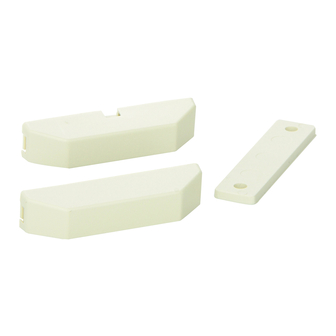
• Self-tapping screws
• Silicone rubber sealant
Page 1
CCD-0002274
Advertisement
Table of Contents

Summary of Contents for Lippert KWIKEE
- Page 1 This document explains the removal of an existing door switch and installation of a replacement door switch that will activate the Kwikee electric step when the door is opened and closed. A brief guide to replacement parts is also included.
- Page 2 STEPS Door Switch Installation Lippert Components, Inc. (LCI) recommends that the switch be installed on the latch side of the door. However, hinge-side installation is acceptable. Some experimentation with the switch position may be necessary to achieve proper step operation. The Kwikee Step assembly should begin to extend when the door is opened between one and four inches.
- Page 3 KWIKEE DOOR SWITCH STEP ACTIVATION ® INSTALLATION GUIDE (1421330) STEPS Reconnecting Wires Feed both new switch wires down through the existing hole in the door frame to the underside of the vehicle. Pull excess wires through the hole leaving enough wire to attach the switch to the door frame.
- Page 4 KWIKEE DOOR SWITCH STEP ACTIVATION ® INSTALLATION GUIDE (1421330) STEPS Note: Under no circumstances should the door switch be forced into its mounting position. Note: Before installing screws in the door switch to securely attach to the unit, perform a quick test to make sure step is functioning properly.
-
Page 5: Troubleshooting
STEPS troubleshooting The Kwikee Step assembly should begin to extend when the door is opened between one and four inches. The step assembly should retract when the door is closed. If, after installation of a new switch, the step does not operate properly, do as follows: Check to make sure that there are no obstructions in the path of the step assembly preventing its operation. - Page 6 White, normally closed, switches are used for all non-IMGL control units manufactured prior to February 1999. Note: Exceptions are non-IMGL, black-colored control units Kwikee 909506000 (obsolete, replaced by Kwikee 909510003 / LCI 379606) and Kwikee 909507000 / LCI 381044 which must use black, normally open, switches. Magnetic...
- Page 7 Black, normally open, switches are used for all black-colored (IMGL) control units manufactured since February 1999. Note: Also included are the following non-IMGL Kwikee control units manufactured prior to February 1999: 909506000 (obsolete, replaced by 909510003 / LCI 379606), 909507000 / LCI 381044 and 909508000 / LCI 381039.
Need help?
Do you have a question about the KWIKEE and is the answer not in the manual?
Questions and answers