Table of Contents
Advertisement
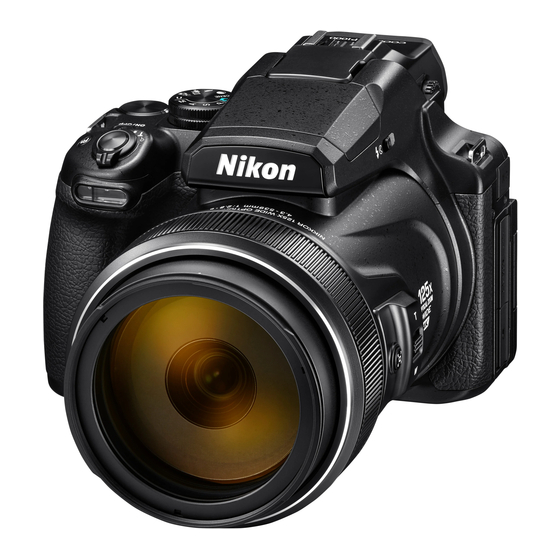
DIGITAL CAMERA
Quick Start Guide
Read this manual thoroughly before using the camera.
To ensure proper use of the camera, be sure to read "For
Your Safety" (page vi).
Be sure to read "Do Not Point the Lens at the Sun" (page
23) in "Caring for the Product."
After reading this manual, keep it in a readily accessible
place for future reference.
ii
1
2
8
15
En
19
Advertisement
Table of Contents

Related Manuals for Nikon Coolpix P1000


Summary of Contents for Nikon Coolpix P1000
-
Page 1: Quick Start Guide
DIGITAL CAMERA Quick Start Guide Introduction Parts of the Camera Getting Started Basic Shooting and Playback Operations Other Functions Technical Notes Read this manual thoroughly before using the camera. To ensure proper use of the camera, be sure to read “For Your Safety”... -
Page 2: Read This First
Introduction Read This First Thank you for purchasing the Nikon COOLPIX P1000 digital camera. Downloading the “Reference Manual” The Reference Manual (PDF format) provides details in various languages on how to use this product. Download the Reference Manual from our Download Center at the URL below and save it on your smart device or computer for reference. -
Page 3: Confirming The Package Contents
Confirming the Package Contents In the event that any items are missing, please contact the store where you purchased the camera. COOLPIX P1000 Digital Strap LC-77 Lens Cap Camera EN-EL20a Rechargeable EH-73P Charging AC UC-E21 USB Cable Li-ion Battery Adapter*... -
Page 4: Information And Precautions
Before taking pictures on important occasions (such as at weddings or before taking the camera on a trip), take a test shot to ensure that the camera is functioning normally. Nikon will not be held liable for damages or lost profits that may result from product malfunction. - Page 5 Nikon will not be held liable for any damages resulting from the use of this product. While every effort was made to ensure that the information in these manuals is accurate and complete, we would appreciate it were you to bring any errors or omissions to the attention of the Nikon representative in your area (address provided separately).
-
Page 6: For Your Safety
For Your Safety To prevent damage to property or injury to yourself or to others, read “For Your Safety” in its entirety before using this product. Keep these safety instructions where all those who use this product will read them. Failure to observe the precautions marked DANGER with this icon carries a high risk of death or... - Page 7 Keep this product out of reach of children. Failure to observe this precaution could result in injury or product malfunction. In addition, note that small parts constitute a choking hazard. Should a child swallow any part of this product, seek immediate medical attention.
- Page 8 Do not touch moving parts of the lens or other moving parts. Failure to observe this precaution could result in injury. Do not fire the flash in contact with or in close proximity to the skin or objects. Failure to observe this precaution could result in burns or fire. Do not raise the built-in flash when using a flash unit mounted on the camera accessory shoe.
- Page 9 WARNING for Batteries Keep batteries out of reach of children. Should a child swallow a battery, seek immediate medical attention. Do not immerse batteries in water or expose to rain. Failure to observe this precaution could result in fire or product malfunction. Immediately dry the product with a towel or similar object should it become wet.
- Page 10 Introduction...
-
Page 11: Parts Of The Camera
Parts of the Camera The Camera Body 1 2 3 8 9 10 11 12 13 141516 17 Command dial 13 Electronic viewfinder Power switch/power-on lamp (charge 14 Eye sensor lamp) 15 x (monitor) button Mode dial 16 o (AE-L/AF-L) button Built-in flash 17 Focus-mode selector Zoom control... -
Page 12: Getting Started
Getting Started How to Attach the Camera Strap Attach the strap to the left and right side of the camera. How to Attach the Lens Cap and Lens Hood When you are not shooting images, attach the lens cap to protect the lens. The lens hood cuts out light which adversely affects the image, and it also helps to protect the camera. -
Page 13: Inserting The Battery And Memory Card
Inserting the Battery and Memory Card Battery latch Memory card slot With the battery’s positive and negative terminals oriented correctly, move the orange battery latch (3), and fully insert the battery (4). Slide the memory card in until it clicks into place (5). Be careful not to insert the battery or memory card upside-down or backward, as this could cause a malfunction. - Page 14 Charging the Battery Charging AC Adapter* Electrical outlet Power-on lamp (charge lamp) USB cable (included) * A plug adapter is attached depending on the country or region of purchase. The shape of the plug adapter varies with the country or region of purchase. Charging starts when the camera is connected to an electrical outlet while the battery is inserted, as shown in the illustration.
- Page 15 Notes About the USB Cable Do not use a USB cable other than the UC-E21. Using a USB cable other than the UC-E21 could result in overheating, fire or electric shock. Check the shape and direction of the plugs and do not insert or remove the plugs at an angle.
-
Page 16: Camera Setup
Camera Setup Turn the camera on. Use the multi selector to select and adjust settings. Multi selector Left Right k button Power switch (apply selection) Down A language selection dialog will be displayed. Press Language H or I on the multi selector to highlight a language and press k to select. - Page 17 Enter the current date and time and Date and time press k. Press J or K to highlight items and press H or I to change. 2018 00 00 Select the minute field and press k to confirm the setting. Edit When prompted, press H or I to highlight Yes and press k.
-
Page 18: Shooting Images
Basic Shooting and Playback Operations Shooting Images A (auto) mode is used here as an example. A (auto) mode enables you to perform general shooting in a variety of shooting conditions. Rotate the mode dial to A. Number of exposures remaining Battery level indicator b: The battery level is high. - Page 19 Frame the picture. Move the zoom control or the side zoom control to change the zoom lens position. If you lose sight of the subject while shooting with the lens in telephoto position, press the p (snap-back zoom) button to temporarily widen the visible area so that you can frame the subject more easily.
- Page 20 Press the shutter-release button halfway. To press the shutter-release button “halfway” means to press and hold the button at the point where you feel a slight resistance. When the subject is in focus, the focus area or focus indicator is displayed in green. When you are using digital zoom, the camera focuses in the center of the frame and the focus area is not displayed.
-
Page 21: Recording Movies
Using the Built-in Flash In situations where a flash is needed, such as in dark locations or when the subject is backlit, move the K (flash pop-up) control to raise the built-in flash. When not using the built-in flash, gently push to lower the built-in flash until it clicks shut. - Page 22 Switching Between the Monitor and Viewfinder It is recommended that you use the viewfinder Viewfinder when bright conditions make it difficult to see the monitor, such as when outdoors in sunlight. When you bring your face close to the viewfinder, the eye sensor responds to it and the viewfinder turns on, and the monitor turns off (default setting).
-
Page 23: Playing Back Images
Playing Back Images Press the c (playback) button to enter playback mode. If you press and hold down the c button while the camera is turned off, the camera turns on in playback mode. Use the multi selector to select an Display the previous image image to display. -
Page 24: Deleting Images
Deleting Images Press the l (delete) button to delete the image currently displayed on the screen. Use the multi selector HI to select the desired deletion method and press the Delete k button. Current image Erase selected images To exit without deleting, press the d button. All images Select Yes and press the k button. -
Page 25: Other Functions
Other Functions Selecting a Shooting Mode You can rotate the mode dial to align the desired shooting mode with the indicator mark on the camera body. A (Auto) mode Select this mode to perform general shooting in a variety of shooting conditions. y, g, and L (Scene) modes When you select any one of the scene modes based on the shooting conditions, you can take pictures with the appropriate settings for those conditions. - Page 26 Setting Shooting Functions with the Multi Selector When the shooting screen is displayed, you can press the multi selector H (m) J (n) I (p) K (o) to set the functions described below. m Flash mode The flash mode can be set according to shooting conditions. n Self-timer/Smile timer The camera releases the shutter when the specified time elapses after you press the shutter-release button.
-
Page 27: Menu Operations
Menu Operations You can set the menus listed below by pressing the d (menu) button. 1, 2 A Shooting menu G Movie manual mode menu e Movie menu c Playback menu q Network menu z Setup menu Press the d button when the shooting screen is displayed. Menu icons and available setting options vary depending on the shooting mode. - Page 28 Select a menu option and Time zone and date press the k button. Slot empty release lock Certain menu options cannot be set Monitor settings depending on the current shooting EVF auto toggle mode or the state of the camera. Date stamp Items can also be selected by Self-timer: after release...
-
Page 29: Technical Notes
Technical Notes Notices Notices for Customers in Europe CAUTION: RISK OF EXPLOSION IF BATTERY IS REPLACED BY AN INCORRECT TYPE. This symbol indicates that electrical and electronic equipment is to be collected separately. The following apply only to users in European countries: This product is designated for separate collection at an appropriate collection point. - Page 30 (products purchased in the EU or EFTA can be used anywhere within the EU and EFTA). Nikon does not accept liability for use in other countries. Users who are unsure as to the original country of sale should consult with their local Nikon service center or Nikon-authorized service representative.
- Page 31 Precautions when Exporting or Carrying This Product Abroad This product is controlled by the United States Export Administration Regulations (EAR). The permission of the United States government is not required for export to countries other than the following, which as of this writing are subject to embargo or special controls: Cuba, Iran, North Korea, Sudan, and Syria (list subject to change).
- Page 32 Notice for Customers in Europe Declaration of Conformity (Europe) Hereby, Nikon Corporation declares that the radio equipment type COOLPIX P1000 is in compliance with Directive 2014/53/EU. The full text of the EU declaration of conformity is available at the following internet address: http://imaging.nikon.com/support/pdf/DoC_P1000.pdf.
-
Page 33: Caring For The Product
Caring for the Product Observe the precautions described below in addition to the warnings in “For Your Safety” (Avi-ix) when using or storing the device. The Camera Do Not Apply Strong Impact to the Camera The product may malfunction if subjected to strong shock or vibration. In addition, do not touch or apply force to the lens. -
Page 34: The Battery
If you notice any abnormalities such as excessive heat, smoke, or an unusual smell coming from the battery, immediately discontinue use and consult your retailer or Nikon- authorized service representative. After removing the battery from the camera or optional battery charger, put the battery in a plastic bag, etc. -
Page 35: Storing The Battery
Carrying Spare Batteries Whenever possible, carry fully charged spare batteries when taking pictures on important occasions. Using the Battery When Cold On cold days, the capacity of batteries tends to decrease. If an exhausted battery is used at a low temperature, the camera may not turn on. -
Page 36: The Charging Ac Adapter
The Charging AC Adapter The EH-73P Charging AC Adapter is for use only with compatible devices. Do not use with another make or model of device. Do not use any USB cable other than the UC-E21. Using a USB cable other than the UC-E21 could result in overheating, fire or electric shock. -
Page 37: Cleaning And Storage
Cleaning and Storage Cleaning Do not use alcohol, thinner, or other volatile chemicals. Avoid touching glass parts with your fingers. Remove dust or lint with a blower (typically a small device with a rubber bulb attached to one end that is pumped to produce a stream of air out the other end). -
Page 38: Troubleshooting
Troubleshooting If the camera fails to function as expected, check the list of common problems below before consulting your retailer or Nikon-authorized service representative. Also, refer to the Reference Manual (PDF format) for further details on how to use this camera (Aii). -
Page 39: Memory Cards That Can Be Used
Corporation in the United States and/or other countries. ® word mark and logos are registered trademarks owned by Bluetooth SIG, Inc. and any use of such marks by Nikon Corporation is under license. Apple®, App Store®, the Apple logos, Mac, OS X, macOS, iPhone®, iPad®, iPod touch®... - Page 40 Alliance. All other trade names mentioned in this manual or the other documentation provided with your Nikon product are the trademarks or registered trademarks of their respective holders. “Made for iPod,” “Made for iPhone,” and “Made for iPad” mean that an electronic...
- Page 41 Technical Notes...
- Page 42 Nikon Europe B.V. will, without charge for labor and parts, repair the product in the terms and conditions set as below. Nikon reserves the right (at its sole discretion) to replace or repair the product.
- Page 43 Nikon, in order to comply with local or national technical standards in force in any other country than the ones for which the product was originally designed and/or manufactured.
- Page 44 No reproduction in any form of this manual, in whole or in part (except for brief quotation in critical articles or reviews), may be made without written authorization from NIKON CORPORATION. YP8G01(11) 6MQA6111-01...
Need help?
Do you have a question about the Coolpix P1000 and is the answer not in the manual?
Questions and answers