Table of Contents
Advertisement
Advertisement
Table of Contents

Summary of Contents for SainSmart Genmitsu CNC 3018
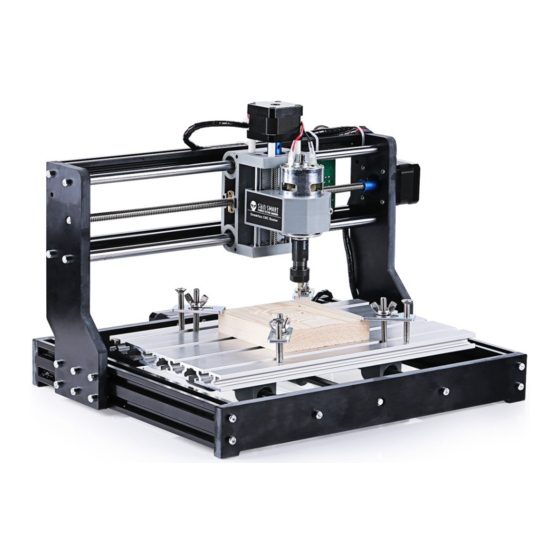
- Page 1 GENMITSU CNC ROUTER 3018 USER MANUAL...
-
Page 2: Table Of Contents
Part 1: Package List Name Size Picture 220mm 360mm 330mm Aluminum Mesa 2028 Corner connector 20M5 Slide nut 30M5 Axis support base SK10 325mm*10mm Linear axis 395mm*10mm 320mm Lead screw 395mm... - Page 3 Name Size Picture Copper nut Stepper motor mounting plate 5--8 Coupling Stepper motor Spindle ER11 and Holder Spindle motor line 4P motor line...
- Page 4 Name Size Picture 24V power supply Control board USB cable X-Z axis assembly X-axis bearing base Y-axis bearing base Y-axis slider Y-axis nut seat Cable-stayed connector...
- Page 5 Name Size Picture Spring M5*10 Bolt M3*6 Flat washer 1.5mm,2.0mm, Allen wrench 2.5mm,3.0mm, 4.0mm Plate clamp Cable tie Milling cutter Copper chuck Set screw...
- Page 6 Part 2: Assembly Instruction 1. Component: a. Motor...
- Page 7 b. Corner connector, Axis support base SK10, Bolt M5*10, Flat washer M5...
- Page 8 2. Frame Installation a. Base frame: 330mm×2, 360mm×3, b. Top frame: 220mm×2, 360mm×2, Corner connector×6, Bolt M5*10×12, Corner connector×4, Bolt M5*10×8, Flat washer M5×12, Slide nut 20M5×12 Flat washer M5×8, Slide nut 20M5×8...
- Page 9 c. Frame installation: Corner connector×6, d. Y-Axis support base dimensions: Bolt M5*10×16, Slide nut 20M5×16, Flat SK10x4, Slide nut 20M5×8 (Front view) washer M5×12, Cable-stayed connector×2...
-
Page 10: Mesa
e. X-Axis support base dimensions: f. Y-axis installation: Bolt M5*10×10, SK10x4, Slide nut 20M5×8(Side view) Slide nut 30M5×10, Y-axis slider x4, Y-axis nut seat x1, 325mm Linear axis x2, Mesa×1 (Elevation view) - Page 11 g. X/Y-axis Stepper motor mounting: Stepper motor x2, Stepper motor mounting plate x2, Bolt M3*6 x8, Bolt M5*10×4, Slide nut 20M5×4, Flat washer M5×4...
- Page 12 h. X-Z axis assembly installation: X-Z axis assembly x1, 395mm Linear axis x2...
-
Page 13: Copper Nut
i. Lead screw installation: 395mm X-axis Lead screw x1, 320mm Y-axis Lead screw x1, Copper nut x2, Spring x2... -
Page 15: Spindle
j. Coupling assembly: Coupling x2, Set screw M4 x4 k. Bearing & Spindle installation: X-axis bearing base x1, Y-axis bearing base x1, Bolt M5*10×3, Slide nut 20M5×3, Spindle x1... -
Page 16: Control Board
l. Install control board: Bolt M5*10×4, Slide nut 20M5×4, Control board x1... -
Page 17: Usb Cable
m. Wiring diagrams Step motor X Y Z Laser (12V 5Amax) Spindle 12-36V 12-36VDC 24V Power adapter Connect your CNC to computer using the bundled USB cable... - Page 18 n. Milling cutter installation Copper chuck: 1. Screw the M3 set screws into the copper chuck. 2. Install the copper chuck into the motor and tighten the screws. Set screw 3. Install the milling cutter into the copper chuck and tighten the set screws.
- Page 19 ER11: 1. Install the ER11 into the ER11 extension rod holder. 2. Install the ER11 extension rod holder into the motor. Generally, it's a little difficult to install. Installation: The aperture is smaller than the actual 0.02mm. According to the high-frequency heating (300 degrees Celsius), thermal expansion and contraction principle, to expand the hole, then insert the spindle and lock it, and then fix the shaft collet after cooling completely.
- Page 20 Part 3: Debugging 1. Install the driver ( software Driver CH340SER.exe )
- Page 21 2. To Determine your Machine's COM port: • Windows XP: Right click on "My Computer", select "Manage", select "Device Manager". • Windows 7: Click "Start" Right click "Computer" Select "Manage" Select "Device Manager" from left pane. • In the tree, expand "Ports (COM & LPT)" •...
- Page 22 3. Open Grblcontrol software(software Grblcontrol GrblControl.exe) choose the correct port...
- Page 23 • Console window print ” [CTRL+X] < Grbl 1.1f ['$' for help]” If the connection is successful. • Console window print ” Serial port error 1: No such file or directory “ indicate that the connection is failed. successful unsuccessful...
- Page 24 • Grblcontrol Use The spindle speed: It does not represent the actual speed, and it represents the ratio. And this percentage is not linear. 100 = 100/1000 spindle 1000 = 1000/1000 100% max on/off 100% The X Y Z axis jog...
- Page 25 • Tool setting spindle should be on when moving the bits zero XY zero Z Use the jog to move the milling cutter. Then click button zeroXY and zeroZ. Open the G-code file Start working End...
- Page 26 2711 Centerville Road, Wilmington, DE, 19808, United States...
Need help?
Do you have a question about the Genmitsu CNC 3018 and is the answer not in the manual?
Questions and answers