Table of Contents
Advertisement
Advertisement
Table of Contents

Subscribe to Our Youtube Channel
Summary of Contents for DigiQ DX3
- Page 1 DigiQ DX3 User Guide ® Rev. 1.0 for Version 1.1 Firmware...
-
Page 2: Table Of Contents
Contents Safety Warnings ............3 BBQ Guru Limited Warranty & Return/Repair Policy ........... 5 DX3 Features ..........6 DigiQ ® Probes ................ 7 Power Draft Fans ............. 8 Key Operation ............8 Powering Up ............. 8 The Display ............... 9 Setting The Setpoints .......... -
Page 3: Safety Warnings
Safety Warnings INSTALLATION/SAFETY INFORMATION: Read and understand this user’s guide completely before installing or using this product! WARNING: KEEP YOUR CONTROL DRY! Allowing the control to get wet can cause damage to its electronics and/or make it operate incorrectly, causing a hazardous condition. WARNING: FIRE HAZARD, BURN HAZARD! Even quality electronics... - Page 4 WARNING: PIT FIRES CAN OCCUR WHEN LIQUIDS ARE SPILLED OR WHEN SURFACES INSIDE THE PIT REACH THE IGNITION TEMPERATURE OF FATS! Never pour or toss water directly onto a fat fire. Reduce the temperature by cooling the fire in the firebox with a water spray.
-
Page 5: Bbq Guru Limited Warranty & Return/Repair Policy
(iii): items that have been used, altered or that show wear or damage; (iv): gift cards; (v): services. DigiQ DX3 controls and fans (2 year limited warranty) BBQ Guru warrants these products to be free from defect in workmanship and materials for a period of 2 years from the date of original purchase. -
Page 6: Digiq Dx3 Features
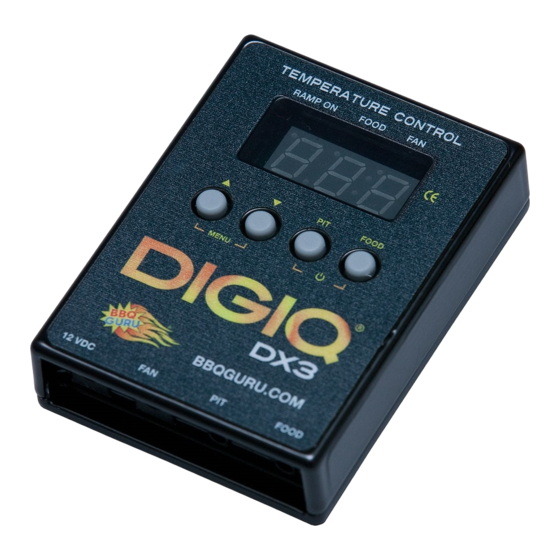
DigiQ DX3 Features ® • Smart Cook full-time adaptive control algorithm learns the pit for better stability and accuracy • Digital high intensity “Blaze Red” LED display • Armored high-temperature pit and food probes • Controls the pit and monitors the food temperature •... -
Page 7: Probes
If the food probe will not be used, it should be unplugged before applying power to the DigiQ DX3 , not during operation. This will allow the DigiQ DX3 time to configure its alarm operation to prevent false food alarms. The food probe can also... -
Page 8: Power Draft Fans
If there is a brief or sustained power interruption at any time while cooking, the DigiQ DX3 will automatically restart and continue to control the pit at the same settings that were originally set. -
Page 9: The Display
The Display The DigiQ DX3’s three digit LED display has three status indicators. Food temp is displayed when LED is on Ramp status LED Fan status LED on ON = Ramp Enabled & display blinks when BLINK = Ramp fan is energized... - Page 10 Food or Pit Temperature Displays The DigiQ DX3 can display either the Food or Pit temperature. The default is Pit. Press the Food button once to display food temperature, then press Pit to return.
-
Page 11: Setting The Setpoints
Setting the Setpoints To display the pit setpoint temperature, tap the UP or DOWN key while displaying the pit temperature. To set the pit setpoint simply press the UP or DOWN key. To display the food setpoint temperature, tap the UP or DOWN key while displaying the food temperature. -
Page 12: Setup Menu
Setup Menu Press the UP & DOWN keys simultaneously to enter the setup menu. The screens below are shown in the order they appear as the UP + DOWN keys are pressed again. When the F/C select is reached and the UP + DOWN keys are pressed again, the setup menu loops, so the pit temperature will be displayed again. - Page 13 10.1 Alarm Deviation Setpoint If the temperature of the pit deviates above the setpoint by the alarm deviation setpoint, the alarm will sound and the display will blink . If the temperature of the pit deviates below the setpoint by the alarm deviation setpoint, the alarm will sound and the display will blink The alarm will not sound when the control is first powered up and the pit is cold.
- Page 14 10.2 Ramp Mode When the ramp is set to (ramp yes), the low and slow ramp mode is enabled. This mode is used for slow cooks so the food never overcooks. This feature will gradually lower the pit temperature to the food setpoint temperature when the food is within 30 degrees of being done.
- Page 15 10.3 Beeper Intensity The Beeper Intensity can be adjusted from 0-10. 0 is off, 1 is a small, infrequent chirp and a 10 is a frequent, loud beep. The factory default is 4. If you have multiple pits, this feature is useful for distinguishing one pit from another, by giving each one a unique beep duration.
-
Page 16: Smart Cook Adaptive Control Strategy
For the DigiQ DX3 to work properly and determine how to adapt, the temperature inside the pit cannot oscillate up and down and the lid must stay closed. -
Page 17: Connections
Connections From left to right: Power Input, Fan Output, Pit Probe, Food Probe, per the diagram below: Food Temp Sensor Wall Adaptor Place inside of food Plug into AC wall outlet Pit Temp Sensor Clip inside of pit Power Draft Fan... -
Page 18: Building A Proper Fire For Good Control
ELIMINATING LARGE FLUCTUATIONS IN THE PIT TEMPERATURE Normally the DigiQ DX3 will be able to adjust the airflow via the fan to deliver precise control and no damper adjustment will be required. If the pit has become over-fired or if the fire was built too big, large temperature swings (+/- 10 degrees or more) may occur. -
Page 19: Fan Damper
Fan Damper With a fan-controlled firebox, you need to be able to adjust the amount of air being blown into the firebox. In addition, natural draft may affect cooking temperature when the fan is off. While arriving at final settings requires testing and experimentation, as a general rule it is good to start with the slide damper fully open on offset and large cabinet pits, halfway open on medium-size vertical or cabinet pits, and one-third to half open on kettles, bullet, and ceramic pits. -
Page 20: Stainless Steel Universal Bracket
Stainless Steel Universal Bracket Shape and bend the bracket to suit your needs. -
Page 21: Troubleshooting Guide
Troubleshooting Guide PROBLEM CAUSE REMEDY My GURU My GURU There isn’t power getting to the Make sure the POWER SUPPLY won’t power won’t power CONTROL UNIT. is securely plugged into the on or nothing CONTROL UNIT. is visible on Make sure that the outlet that the DISPLAY. - Page 22 PROBLEM CAUSE REMEDY My cooker My GURU is FAN isn’t running or making It’s possible debris has fallen into won’t reach attached and any noise. the FAN nozzle and is keeping or stay at the running but the FAN from turning. Unplug temp I have my cooker the FAN and remove the debris...
- Page 23 Troubleshooting Guide PROBLEM CAUSE REMEDY My cooker My GURU is Too much air is getting to the Inspect your cooker and make won’t reach overshooting fire and causing the PIT TEMP to sure that it’s sealed tightly at or stay at the my desired PIT spike.
- Page 24 PROBLEM CAUSE REMEDY PIT TEMP PIT TEMP It’s possible the PIT PROBE Swap the PIT PROBE with the is damaged and not reading FOOD PROBE in their respective Displayed on GURU properly. jacks. If the FOOD PROBE reads is wrong. is different correctly in the PIT JACK then (Cont’d)
- Page 25 Troubleshooting Guide PROBLEM CAUSE REMEDY FOOD TEMP FOOD TEMP FOOD TEMP on the GURU is 15- Make sure you have the FOOD displayed on GURU 20 degrees hotter than on my PROBE fully inserted into the is wrong. is different other food thermometers.
- Page 26 BBQ Guru I 359 Ivyland Road I Warminster, PA I 18974-2205 www.bbqguru.com I customerservice@thebbqguru.com...
Need help?
Do you have a question about the DX3 and is the answer not in the manual?
Questions and answers
DIGIQ DX3 - I cannot see how to change Fahrenheit to Celsius in the manual, is there an answer?