Table of Contents
Advertisement
Quick Links
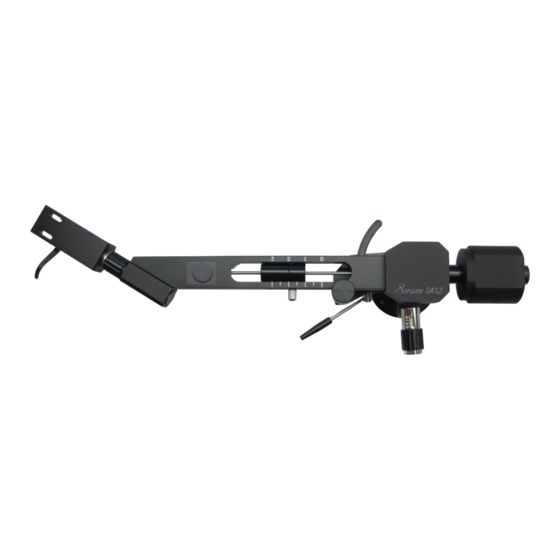
Total Length
Effective Length (Tonearm pivot to cartridge stylus)
Practical Length (Tonearm pivot to spindle)
Overhang
Offset angle
Horizontal moving sensitivity
Vertical moving sensitivity
Vertical Tracking Force (VTF) range
Cartridge plus Headshell weight range
Antiskating Adjustment
Vertical Bearing
Horizontal Bearing
Height Adjustment (Plinth to arm-wand centerline)
Output plug
Output cable
Tonearm Audio Lead wire
Headshell lead wire
Headshell
Tonearm Net Weight
Attached standard Headshell Net Weight
Headshell
Detachable phono cable
Screws, Washers and Wrenches
SA-1.2BCS
Instructions & Manual
Specifications
Included Accessories
1 / 7
310mm
239mm
223mm
16mm
22.25°
30mg
20mg
0-4.5g (3+1.5g)
15-45g
0-3g (Equivalent to Stylus VTF)
Miniature Radial Bearing
Miniature Radial Bearing
15-55mm
RCA (XLR as an Option)
Single core shielded copper
High Purity Silver (Internal Wiring)
Silver with gold plated terminal
Machine tooled Aluminum
755g
17g
Advertisement
Table of Contents

Summary of Contents for Sorane SA-1.2BCS
- Page 1 SA-1.2BCS Instructions & Manual Specifications Total Length 310mm Effective Length (Tonearm pivot to cartridge stylus) 239mm Practical Length (Tonearm pivot to spindle) 223mm Overhang 16mm Offset angle 22.25° Horizontal moving sensitivity 30mg Vertical moving sensitivity 20mg Vertical Tracking Force (VTF) range 0-4.5g (3+1.5g) Cartridge plus Headshell weight range 15-45g...
- Page 2 Template Marking pin and plastic centering bushing 1) Mounting the tonearm base to turntable plinth Determine where the arm base should be mounted by using the supplied arm mounting template. Put the larger hole of the template onto the center spindle. Take the attached marking pin supplied (as illustrated below) and push it through the small hole at the opposite end of the tonearm template (the hole opposite the spindle hole).
- Page 3 The cueing platform has already been set at the correct height but can be adjusted by using the supplied hex key. 4) Cartridge tracking force adjustment a) Verify that the anti-skating knob (number 3 below) is set at 0 grams. b) Ensure that the sliding tracking force adjustment knob (number 4 below) is set to zero (the point furthest to the back of the tonearm and closest to the pivot point).
- Page 4 Note: Because the tracking force mechanism (#4 above) of SA-1.2 is different from a standard counterweight system, the use of a separate VTF gauge for precise fine-tuning is recommended. The relative accuracy of the SA-1.2 tracking force mechanism is somewhat affected by the complex interaction of the mass of the main counterweight, its position, the mass of the cartridge, and the mass of the headshell.
- Page 5 6) Converting between “Positive” and “Negative” Counterweight stub There are two counterweight stubs supplied with the the SA1.2BCS. Inscribed on the back of both stubs will be “P” or “N”. P is for Positive, a reference to positive balance. “N” is for Negative, a reference to negative balance.
- Page 6 Starting Position C) Please note in the third illustration, there is a very fine nylon string between Anti-Skating device and tonearm Main Pillar. It should never be cut, even by accident, during this tonearm stub changing operation; Delicate nylon string D) Unscrew the two Allen head set-screws that secure the Cueing Device Base.
- Page 7 F) Do not lower the CDB too much since you could break the nylon string or even damage the Anti Skate device; G) Insert Allen key into Allen head set-screws; Removing Allen Head screws from stem H) After unscrewing 2 screws, carefully pull the stub from ABB. I) Prepare the other Balance Stub.
Need help?
Do you have a question about the SA-1.2BCS and is the answer not in the manual?
Questions and answers