Table of Contents
Advertisement
Advertisement
Table of Contents

Related Manuals for NAMCO PACMAN AIR HOCKEY 4P

Summary of Contents for NAMCO PACMAN AIR HOCKEY 4P
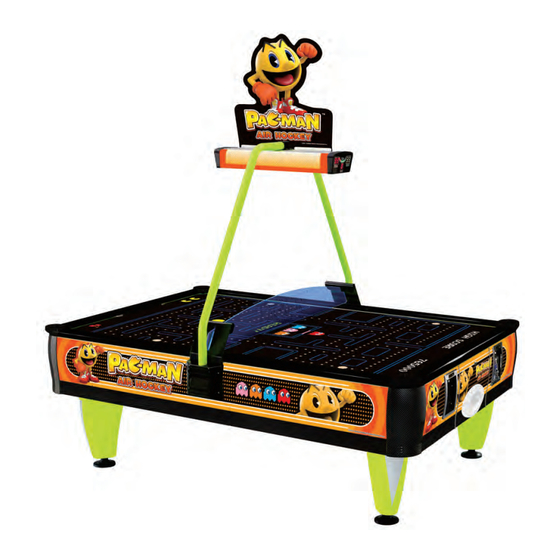
- Page 2 User’s Manual Introduction Thank you for purchasing the Namco 4-Player Air Hockey Table. This product is suitable for 2 or 4 players and we hope you enjoy it! This manual contains detailed information about how to operate and maintain your game machine properly and safely.
-
Page 3: List Of Parts
List of Parts Open the cardboard box and EPE(Expanded Polyethylene) and to ensure the wooden side is facing upwards. Take out the signboard (1) and the center guard (1). Use the screw driver to remove the screws on the panel labeled “... - Page 4 List of Parts Open the base door with this key , take all parts out. Use the key open door Signboard Bracket (2)
-
Page 5: List Of Screws
List of Screws < X 16 > < X 16 > Roundhead screw ( 8mm x 25mm ) Flat washer ( 8mm x 16mm ) Legs x 16 Legs x 16 < X 2 > < X 2 > Iron cap nuts ( M4 ) Carriage bolts ( 4mm x 12mm ) Signboard bracket x 2 Signboard bracket x 2... -
Page 6: Assembly Instruction
Assembly Instruction Turn the adjuster clockwise to lock the leg. Install the legs with bolt M8x25(16) and washer M8(16) as shown in the picture below. Adjuster Roundhead screw ( 8mm x 25mm ) Flat washer ( 8mm x 16mm ) - Page 7 Assembly Instruction 4 strong adults are required to turn the table over. Once the legs are tightly screwed onto the table base , flip and position the table by 90 degree angle ; then flip it again in the same manner to conclude with the upright position. Set table down all four legs at the same time.
- Page 8 Assembly Instruction ▪ Attach the center guard on one side with big flathead screw M5x15mm. ▪ As to the other side, insert center guard into the side guards before screw it tightly. Insert the center guard into one side first , then screw the side guard.
- Page 9 Assembly Instruction Connect the corresponding pins from the cable on bar to the scoreboard. Connect with the matching color and shape of the pin. Attach the overhead scoreboard to the bar with two medium screws. Attach the signboard bracket on the signboard with carriage bolts M4 x 12 and iron cap nuts M4.
- Page 10 Assembly Instruction Combine •Push rubber cover into overhead •Please use M5 x 15 screws , fasten bar. it into overhead bar bracket , but not too tight , fasten tight after both sides •Pay attention to connecting with are set. the matching color before insert the pin.
- Page 11 Assembly Instruction After assembly , revolve the adjuster to adjust the height of table. After assembling completely , open the door beside the coin acceptor where the mother board installed and set up the game. mother board installed and set up the game.
- Page 12 Description on locations of controls Power Supply PCBoard Counter Power Supply : Supplies the power to motherboard and other control cards. Separate the power point from +5V and +12V , in order not to influence other components when power falure or instable. Caution : Left for +5V ;...
-
Page 13: Dip Switch Adjustment
Description of light signals and DIP SW A B C D E Note : If these lights DIP SW 11 are on there DIP Switch 1 2 3 4 5 6 7 8 is an error . Adjustment DIP SW 12 1 2 3 4 5 6 7 8 Light A: Goal Sensor Signal. - Page 14 Description of light signals and DIP SW DIP SW 11 DIP SW 12 DIP SW 11 DIP Switch 1,2 and 3 adjust the numbers of inserted coins and game rounds. DIP Switch 4,5 and 6 adjust the numbers of lottery ticket. DIP Switch 7 and 8 adjust the numbers of sound strikes ;...
- Page 15 Explanation and Analysis of machine components Transformer Power Supply Platform connected Power switch box to Main body Scoreboard Counter...
- Page 16 Notices during Use and accessory disassembling 1. Watch for the power plug load during use to avoid short or fire. Do not overloading. 2. The power supply wire should be securely fixed to prevent stepping on or tripping. 3. This product is an electronic game;keep children off from power source plug.
- Page 17 Notices during Use and accessory disassembling...
-
Page 18: Care And Maintenance
Care and Maintenance 1. Please use a soft dry cloth and polishing spray to clean the table surface . DO NOT APPLY WATER. 2. Wax the table surface periodically to ensure smooth air hockey play. 3. Clean out the objects stuck in ventilation holes with a pin. 4.
Need help?
Do you have a question about the PACMAN AIR HOCKEY 4P and is the answer not in the manual?
Questions and answers