Table of Contents
Advertisement
Quick Links
Advertisement
Table of Contents

Related Manuals for XYZrobot K100


Summary of Contents for XYZrobot K100
- Page 1 Construct of Your Imagination...
- Page 3 Safety Guideline Please read the following information: failure to comply with provided information may lead to voiding the warranty. This document covers safety, proper handling, and regulatory information for use of your Robotic Arm. General Precautions Caution: To avoid injury, damage to the robot or equipment, please follow the provided guidelines. •...
- Page 4 XYZprinting Inc. products are not medical devices and are not listed under UL or IEC 60601 (or equivalent). You can find th User Guide, the Technical Guide and these Safety Instructions (“Documentation”), visit the following: http://www.xyzrobot.com You can contact XYZprinting Inc. support at: http://www.xyzrobot.com...
- Page 5 Safety Guideline Handling and Personal Safety Buttons • Before using, take a moment to locate the Power On/Off and directional buttons and familiarize yourself with the functions. Handling • Handle the robot with care at all times. • Pick up the robot by the bar in the event of the following situations: •...
- Page 6 Safety Guideline General IMPORTANT: • The robot requires a clean work space to move around and perform activities. • Do not insert any foreign objects into any of the component or internal cavities. • Generally, do not allow or cause the robot to fall down. •...
- Page 7 Safety Guideline Extension Cables CAUTION: To avoid electric shock: • Do not use multiple socket adapters or power extension cables that bypass the ground wire or disable grounding. • When using a power extension cable or a multiple socket adapter, make sure it is grounded and has sufficient current rating.
- Page 8 Safety Guideline Special Procedures General • Never oil the joints with any kind of lubricant. • Do not modify or open any of the actuators. • Do not drop, crush, bend, deform, puncture, shred, microwave, incinerate any of the components. Doing so can cause fire, electric shock, damage or personal injury. •...
- Page 9 Safety Guideline • If liquid has seeped inside the torso or battery casing: Disconnect all cabling from the power socket then disconnect the other cabling end from the robot. Turn off the robot. Place the robot in the default posture. Dry the robot as much as possible.
-
Page 10: Table Of Contents
Setup Your Robotic Arm ..............12 Setup Your Robotic Arm ................12 Requirements ....................12 Overview of Installation Process ..............12 Installing the XYZrobot Editor Software ............13 Overview......................13 Installing the XYZrobot Editor .................13 Uninstalling the XYZrobot Editor ..............15 Updating the Software ...................15 Arduino Application .................. - Page 11 Table of Contents Basic Editing ....................26 Creating a Pose .....................26 Creating a Sequence ..................28 Programming the Control Panel ..............29 Programming the Remote Control ..............30 Creating an AVR Format ................31 Installing Robotic Arm Default Firmware ............31 Advanced Editing ..................33 Before You Start ....................33 Programming the Control Panel ..............35 Programming the Remote Control ..............36...
-
Page 12: Prerequisites
Prerequisites Windows Operating System Requirements • Windows 7 or later. Including both 32-bit and 64-bit versions • Microsoft .Net Framework 4.5 Mac Operating System Requirements • Mac OS X 10.8 or later Arduino • Arduino IDE 1.0.6... -
Page 13: Getting Started
Getting Started Introduction The Firmware includes a XYZrobot Editor to help you define and edit action sequences. The XYZrobot Editor is easily installed on your computer, and designed to interface with current Bolide and future models. XYZrobot Editor The XYZrobot Editor is the software included with your Robotic Arm robot package. The software is compatible with both Windows and Mac OS operating systems. -
Page 14: Setup Your Robotic Arm
The following list outlines prerequisites for the installation process. Assembly the Robotic Arm; see the Robotic Arm Assembly Guide. Download the Firmware from www.xyzrobot.com. Overview of Installation Process Review all instructions and information prior to starting the actual installation, to avoid hardware damage, difficulty during installation, or personal injury. -
Page 15: Installing The Xyzrobot Editor Software
Installing the XYZrobot Editor Software Overview The XYZrobot Editor is designed specifically to allow for easy creation of poses and action sequences for use with the Robotic Arm. Prior to installation, you will need to have the Adruino software and the Bolide driver code installed on your computer system and MCU board, respectively. - Page 16 Setup Your Robotic Arm A status screen displays the installation status. Once the installation is complete, the XYZrobot Editor software opens. NOTE: The default screen may not reflect your actual device. NOTE: A security prompt may display requiring authorization to open the software. To continue with...
-
Page 17: Uninstalling The Xyzrobot Editor
NOTE: The screens and procedure may vary slightly depending on the operating system in use. Updating the Software During the course of normal operations, the XYZrobot Editor automatically checks for updates and installs them. When new updates are available, you are notified before the process starts. -
Page 18: Arduino Application
Setup Your Robotic Arm Arduino Application Before you begin using the XYZrobot Editor, install and configure the Arduino application. The application is required to install the Robotic Arm drivers on your computer. NOTE: Prior to connecting the Robotic Arm to your computer, it may be necessary to update the USB drivers on your system. -
Page 19: Installing The Robotic Arm Firmware
The Robotic Arm comes with a pre-installed firmware driver. To allow you to make full use of all its features, the Robotic Arm comes with XYZrobot Editor, which allows you to create single and sequenced movement steps. The XYZrobot Editor makes use of the Arduino open-source platform, requiring the installation of Arduino on your system (if not done so at this point), and synchronizing it to your Robotic Arm. - Page 20 Setup Your Robotic Arm From the menu toolbar, click Tools > Board and select the option XYZrobot-BOLIDE. Next, select the COM port associated with the Robotic Arm. From the menu toolbar, click Tools > Serial Port and select the associated option.
-
Page 21: Operations
Interface Menus Main Menu The main interface as described in the following figure is the initial display viewed when the XYZrobot Editor is opened. The following table provides a description of the menu names and a brief description of their function. - Page 22 Select the current communication port. Help Item Description About Show the information about the XYZrobot Editor. Serial number Show the serial number of the connected device. Language Select an interface language: English, Traditional Chinese, Simplified Chinese, Japaness, Deutsch, Español, Italiano, or Français.
-
Page 23: Pose Editor
Operations Pose Editor No Item Description Pose list Displays the list of all created pose descriptions. Rename Rename the selected pose. Remove Remove the selected pose. Create a new pose item. Live Pose Update Initiate to adjust the smart servo positions directly. Each setting adjustment directly moves the smart servo position. - Page 24 Operations No Item Description Smart servo ID Click to move the slide bar and change the smart servo’s actual position. By default, the neutral position is set at 512. A reading of 0 sets the desired position to 0° degrees, while a reading of 1023 defines a 330° turn.
-
Page 25: Sequence Editor
Operations Sequence Editor 11 10 No Item Description Sequence list List the sequences. Create a new sequence list. Remove Remove the selected sequence. Rename Rename the selected sequence. Pose list List the pose entries for the selected sequence. Delete Delete the selected pose from the sequence. Move down Move the order of the selected pose down in the order. -
Page 26: Sample Player
Operations Sample Player No Item Description Sample sequence Select a sequence entry to initiate the action sequences on the robot. Sample pose Select a pose entry to initiate the action on the robot. Halt Initiate a stop command when a sequence is running. Loop Initiate a continuous run command for the selected sequence. -
Page 27: Control Editor
Operations Control Editor No Item Description Robot button Click a drop-down menu to select the action entry to associate with the setting control panel button. Remote control Click a drop-down menu to select the action entry to associate with the setting remote control button. -
Page 28: Basic Editing
Operations Basic Editing The XYZrobot Editor provides a simple and effective method to create, edit and remove pose and sequence entries. The following section provides step-by-step instructions for creating complete pose and sequence entries. Creating a Pose Before you open the XYZrobot Editor, it is necessary to connect the Robotic Arm and computer through a USB cable. - Page 29 Operations 11. Select Tool > Pose Editor. 12. Under Pose List, click Add to create a new pose. 13. The New pose settings window displays. In the Pose name field, enter a name for the pose and click Ok to create the new entry. The New Pose is configured with the default settings.
-
Page 30: Creating A Sequence
(USB Type A), and the other end to the Robotic Arm (USB Type Mini-B). Power up the Robotic Arm; see “Testing the Robotic Arm” in the Assembly Manual. Locate and open the XYZrobot Editor application. From the toolbar select Tool > Sequence List. -
Page 31: Programming The Control Panel
Before starting make sure you have already defined any custom sequences, see “Sequence Editor” on page 23 . Open XYZrobot Editor. Select Tool > Control editor. The control editor screen displays. In the Music path field, click Search to select the source directory for audio source. Only WAV formats are supported. -
Page 32: Programming The Remote Control
Before starting, make sure you have already defined any custom sequences; see “Sequence Editor” on page 23 . Open XYZrobot Editor. Select Tool > Control editor. The control editor screen displays. In the Music path field, click Search to select the source directory for audio source. Only WAV formats are supported. -
Page 33: Creating An Avr Format
Connect the Robotic Arm and computer with a USB cable. Power up the Robotic Arm; see “Testing the Robotic Arm” in the Assembly Manual. Locate the Firmware and navigate to the following folder: Bolide_Y-01_Arduino_Support_File_20151201\Bolide_Y-01_Default (For the latest software visit http://www.xyzrobot.com) Double click RCK100_6DOF_Wheel.ino to run the application. - Page 34 Operations From the menu toolbar, click Tools > Board and select the option XYZrobot-BOLIDE. Next, select the COM port associated with the Robotic Arm. From the menu toolbar, click Tools > Serial Port and select the associated option. NOTE: If the device is not detected, the USB driver may not be recognized. The option to select the associated COM port will not be available.
-
Page 35: Advanced Editing
The Advanced Editing feature provides a method for configuring the buttons on the control panel and remote control. Once you’ve created a pose and sequence list using the XYZrobot Editor, you can save the list to an AVR format (see “Basic Editing” on page 26 ). The AVR file is necessary to cross reference and synchronize the pose definition library to the remote controller and buttons on the control panel. - Page 36 Operations Locate the Bolide software pack and navigate to the following folder: Bolide_Y-01_Arduino_Support_File_20151201\Bolide_Y-01_UserMotion (For the latest software visit http://www.xyzrobot.com) In the same folder, locate and open RCK100_6DOF_Wheel.ino file. Three main tabs display. Click the OTHERS_USER_MOTION.h tab. In the file body, locate the line section named //===== User Define Pose ====== or //===== User Define Sequence ======.
-
Page 37: Programming The Control Panel
The defined entries serve as the basis for the programming of the functions for each control panel button. You can customize the buttons on the control panel with the use of the XYZrobot Editor or the Arduino application. Customizing the control panel is explained further in the following section. -
Page 38: Programming The Remote Control
“Before You Start” on page 33 ), you can define the action to be associated with each button on the remote control. You can customize the buttons on the remote control with the use of the XYZrobot Editor or the Arduino application. Customizing the remote control is explained further in the following section. - Page 39 #define RCU_R2 #define RCU_R3 From the menu toolbar, click Tools > Board and select the option XYZrobot-BOLIDE option. 10. Next, select the COM port associated with the Robotic Arm. From the menu toolbar, click Tools > Serial Port and select the associated option.
- Page 40 Operations Remote Control Button Mapping RELEASE No. Item No. Item No. Item RCU_R3 RCU_R2 RCU_R1 RCU_RJU RCU_RJR RCU_RJD RCU_RJL RCU_LJD RCU_LJL RCU_LJU RCU_LJR RCU_L1 RCU_L2 RCU_L3...
-
Page 41: Programming The Wheels
Programming the Wheels NOTE: The following procedure is only available for the Robotic Arm 6DW model. You can customize the wheel control with the sequences you created in XYZrobot Editor with the use of the Arduino application. Customizing Wheels on Arduino To program a wheel control to a sequence: Before starting this procedure, see “Before You Start”... -
Page 42: External Applications
Robotic Arm. The APP is available on iOS and Android. To download your respective app, in Google Play or the APP Store use the keyword XYZrobot to locate and download the latest Robotic Arm application. To get further information on the user interface, control functions and programming, download the Robotic Arm APP user manual found on the XYZprinting Inc. -
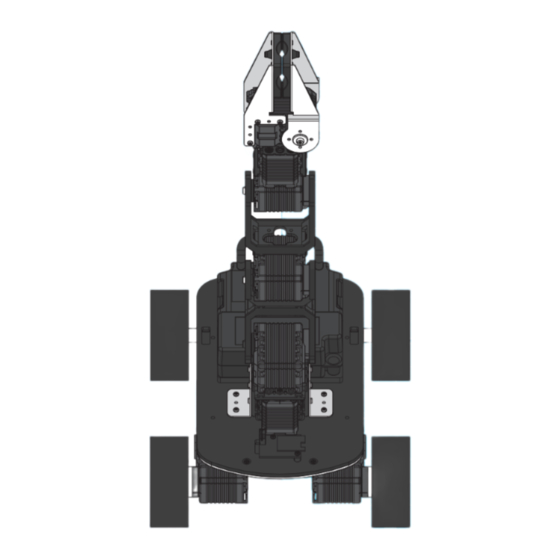
Page 43: Mechanical Components
Mechanical Components Additional Components Adapters Power cables may vary depending on regional requirements. -
Page 44: Control Panel
Mechanical Components Control Panel NOTE: The Robotic Arm 6DW model was used for the following procedure. Other models may be different. The control panel consists of the power switch button along with four function buttons found just above the battery; see the following illustration. The function buttons are pre-programmed for a specific action. -
Page 45: Maintenance
Maintenance LED Codes Definition List For the LED position, please refer to the Robotic Arm Assembly Manual. Eye LED The LEDs located on the eye sockets indicate the following states: • Power on: sequentially blinks red, green and blue. • Connection to remote control: sequentially blinks red, green and blue. -
Page 46: Usb Drivers
20. Select the file and tick the Include subfolders option, then click Next to continue. 21. Click Close to complete the Port driver installation. Both drivers are now installed. The Robotic Arm is available for selection through the COM port by both the Adruino software and the XYZrobot Editor. -
Page 47: Troubleshooting
Troubleshooting I can’t connect my robot to the PC. Open Device Manager on Windows. When the product is connected to the PC, please check whether the connected device’s port is found. If the port is not detected, you may need to install an FTDI serial driver. If you have problems with other products, or can’t solve the problem with the instructions above, please contact your regional manager.
Need help?
Do you have a question about the K100 and is the answer not in the manual?
Questions and answers