Sanyo KMS0972 Instruction Manual
Inverter-controlled split system air conditioner
Hide thumbs
Also See for KMS0972:
- Technical & service manual (85 pages) ,
- Installation instructions manual (27 pages) ,
- Installation instructions manual (24 pages)
Table of Contents
Advertisement
• INSTRUCTION MANUAL
• MODE D'EMPLOI
This air conditioner uses the new refrigerant R410A.
Save These Instructions!
Conserver ce mode d'emploi
Pub. OI-85264180806000
KMS0772
KMS0972
KMS1272
© SANYO 2006
Inverter-Controlled Split System Air
Conditioner
Climatiseur de type séparé contrôlé par
inverseur
COOL/DRY Model
Advertisement
Table of Contents

Related Manuals for Sanyo KMS0972


Summary of Contents for Sanyo KMS0972
- Page 1 • INSTRUCTION MANUAL • MODE D’EMPLOI This air conditioner uses the new refrigerant R410A. Save These Instructions! Conserver ce mode d’emploi © SANYO 2006 Pub. OI-85264180806000 Inverter-Controlled Split System Air Conditioner Climatiseur de type séparé contrôlé par inverseur KMS0772 KMS0972...
-
Page 2: Features
This air conditioner is an inverter type unit that automatically adjusts capacity as appropriate. Details on these functions are provided below; refer to these descriptions when using the air conditioner. • Microprocessor Controlled Operation The interior compartment of the remote control unit contains several features to facilitate automatic operation, easy logically displayed for easy use. -
Page 3: Table Of Contents
Troubleshooting... 24 Operating Range... 24 Product Information If you have problems or questions concerning your Air Conditioner, you will need the following information. Model and serial numbers are on the nameplate on the bottom of the cabinet. Model No. ______________________ Date of purchase ________________________________________________ Dealer’s address ________________________________________________... -
Page 4: Installation Location
Otherwise there is a risk of suffocation in an extreme case. • Do not turn the air conditioner on and off from the power mains switch. Use the ON/OFF operation button. • Do not stick anything into the air outlet of the outdoor unit. This is dangerous because the fan is rotating at high speed. -
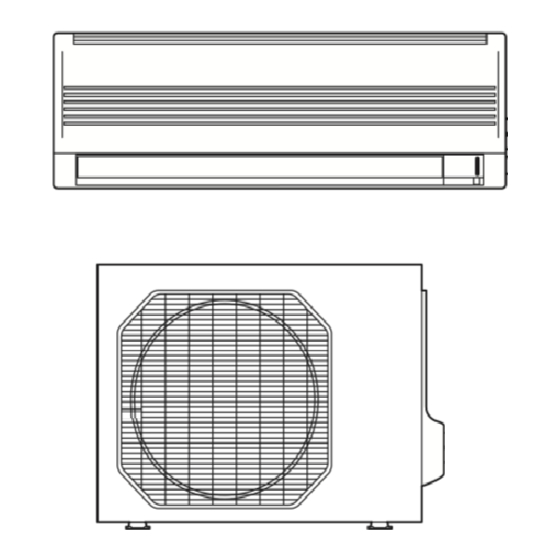
Page 5: Names Of Parts
Consequently, the shape may differ from that of the air conditioner which you have selected. This air conditioner consists of an indoor unit and an outdoor unit. You can control the air conditioner with the remote control unit. Air from the room is drawn into this section and passes through air filters which remove dust. -
Page 6: Unit Display And Operation Button
(within 4 ft.) the remote control receiver. Some radio equipment may cause malfunction of the unit. If the trouble happens, disconnect power and restart the air conditioner after a few minutes. REMOTE CONTROL receiver OPERATION button OPERATION lamp TIMER lamp... -
Page 7: Remote Control Display
Displayed when the time display is set to 12-hour time. (1) Operation mode MILD DRY ... COOL ... FAN ... (2) Fan speed Automatic operation ... HIGH ... MEDIUM... LOW ... (3) Temperature setting 60 – 86 °F When set to 80 °F temperature indication... -
Page 8: Remote Control Unit
The illustration above pictures the remote control unit after the cover has been opened. When you press the buttons on the remote control unit, the the display to transmit the setting changes to the receiver in the air conditioner. A temperature sensor inside the remote control unit senses the room temperature. - Page 9 : The air conditioner starts at the set time. : The air conditioner stops at the set time. : The air conditioner stops and starts, or starts and stops, at the set times every day. For details, see “Setting the Timer”.
-
Page 10: Using The Remote Control Unit
If the signal from the remote control unit stops for more than 15 minutes due to the loss of the remote control unit or other trouble, the air conditioner will switch to the temperature sensor which is built into the indoor unit and control the room temperature. In these cases, the temperature around the remote control unit may differ from the temperature detected at the air conditioner’s position. - Page 11 Where it may be subject to electrical or magnetic noise • Where there is an obstacle between the remote control unit and air conditioner (since a check signal is sent from the remote control unit every 5 minutes) Before mounting the remote control unit, press the ON/OFF operation button at the mounting location to make sure that the air conditioner operates from that location.
-
Page 12: Operation With The Remote Control Unit
Set the FAN SPEED selector button to the setting you want. STEP 5 Press the FLAP button and set the airflow direction as desired. (Refer to “Adjusting the Airflow Direction” on page 20.) To stop the air conditioner, press the ON/OFF operation button again. STEP 2 STEP 3 STEP 1 →... -
Page 13: Adjusting The Fan Speed
NOTE 2. Adjusting the Fan Speed A. Automatic fan speed B. Manual fan speed 3. Fan Only STEP 3 OI-806-13-EG Operation with the Remote Control Unit (continued) • Choose the best position in the room for the remote control unit, which also acts as the sensor for room comfort and transmits the operating instructions. -
Page 14: Night Setback Mode
To release the night setback function, press the NIGHT SETBACK button again. When the night setback mode is selected, the air conditioner automatically raises the temperature setting 2 °F when 30 minutes have passed after the selection was made, and then another 2 °F after another 30 minutes have... -
Page 15: Quiet Mode
5. QUIET Mode 6. HIGH POWER Mode 7. ION Mode OI-806-15-EG Operation with the Remote Control Unit (continued) QUIET Mode is used to reduce the fan sound of the indoor unit. Press the QUIET button. mark appears in the display. To cancel, press QUIET button again. -
Page 16: Special Remarks
In cooling operation, any plastic parts may shrink due to a sudden temperature change. In this event, a clicking sound may occur. This is normal, and the sound will soon disappear. • The remote control unit sends the setting condition to the air conditioner regularly at five minute intervals. OI-806-16-EG... -
Page 17: Setting The Timer
2. Press the Advance, Return ( , ) button until PM 10:30 is displayed. 3. Press the CLOCK button again. (Example) To stop the air conditioner at 11:00 am. 1. Press the OFF TIME setting button once. 2. Press the Advance, Return ( , ) button until AM 11:00 is displayed. - Page 18 ) button until AM 7:10 is displayed. 3. Wait a few seconds, and then the setting is complete. (Example) To start operation at 7:10 am. and stop the air conditioner at 11:00 am. 10:30 pm. 7:10 am. Present time 1. Set the timer ON/OFF times as shown in 2-1, 2, 3 and 3-1, 2, 3.
-
Page 19: Using The 1-Hour Off Timer
1. 1-Hour OFF Timer NOTE 2. Operation together with the DAILY ON/OFF REPEAT Timer Do not OI-806-19-EG Using the 1-Hour OFF Timer This function causes the unit to operate for one hour and then stop, regardless of whether the unit is on or off when this button is pressed. indicator in the display indicates that this function is operating. -
Page 20: Adjusting The Airflow Direction
Adjusting the Airflow Direction 1. Horizontal CAUTION 2. Vertical A. Sweep function The flap starts moving up and down to deliver air over the sweep range. C. Auto flap function The flap is set to the recommended position. NOTE CAUTION The horizontal airflow can be adjusted by moving the vertical vanes with your hands to the left or right. -
Page 21: Operation Without The Remote Control Unit
Auto. Care and Cleaning 1. For safety, be sure to turn the air conditioner off and also to disconnect the power before cleaning. 2. Do not pour water on the indoor unit to clean it. This will damage the internal components and cause an electric shock hazard. - Page 22 Anti-Mold Filter How to remove the anti-mold filter Cleaning How to replace the anti-mold filter NOTE Care and Cleaning (continued) The anti-mold filter behind the air intake grille should be checked and cleaned at least once every two weeks. 1. Grasp both ends of the air intake grille, and remove it by opening towards the front and pulling towards you.
- Page 23 Air Clean Filter How to install the air clean filter How to clean the air clean filter NOTE Cleaning the main unit and remote control unit Removing and remounting the air intake grille CAUTION Washing the grille with water Cleaning the negative ion generator NOTE OI-806-23-EG...
-
Page 24: Troubleshooting
If your air conditioner does not work properly, first check the following points before requesting service. If it still does not work properly, contact your dealer or service center. Trouble Air conditioner does not run at all. OPERATION lamp blinks and air conditioner does not operate.