Advertisement
20____
Year of Manufacture:
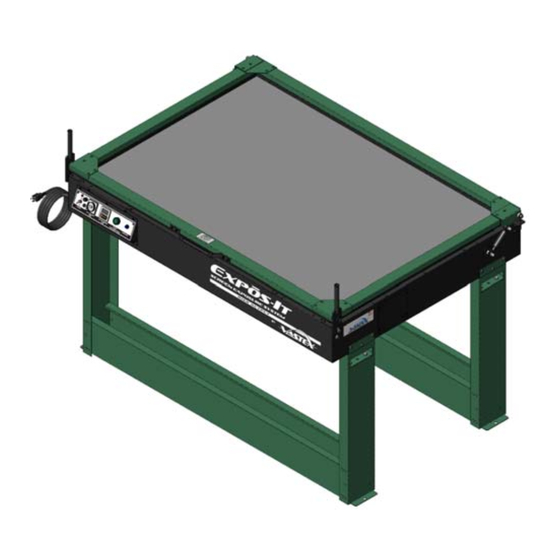
Fluorescent Exposing Units
E100-2128
Contents
Introduction, Machine Specifications
Safety Information
Assembly Instructions
Operating Instructions
Troubleshooting
Maintenance
Emulsion Tip
01-00-005/015 Warranty/Terms and Conditions
Electrical Drawing #:
Serial Number:
VTX
(Please log your machine's serial number and date of purchase for future reference.)
E-100 & E-1000
Assembly and Operation Instructions
E100-2331
Pg. #
2
3
4-5
6
7
8-9
10-11
12
Revision:
Date:
/
Vastex International, Inc.
1032 N. Irving St.
Allentown, Pa. 18109 USA
Phone# 610 434-6004 Fax# 610 434-6607
Web Site www.vastex.com
Authorized Representative in Europe:
Certification Experts BV
Nieuwstad 100 1381 CE Weesp,
The Netherlands
Tel : + 31 (0) 294 – 48 33 55
Fax : + 31 (0) 294 – 41 46 87
Vastex E-mail assistance
Purchasing & Product Info:
sales@vastex.com
Electrical Support:
stech@vastex.com
Tech Support, Mechanical Setup, and Operation:
techsupport@vastex.com
/
Screen Printing Issues & Support:
printech@vastex.com
Doc. # 01-04-021E
Original Instructions
E1-4731
Advertisement
Table of Contents

Related Manuals for VASTEX E-100-2128

Summary of Contents for VASTEX E-100-2128
- Page 1 Year of Manufacture: E-100 & E-1000 Fluorescent Exposing Units Assembly and Operation Instructions E100-2128 E1-4731 E100-2331 Vastex International, Inc. 1032 N. Irving St. Allentown, Pa. 18109 USA Phone# 610 434-6004 Fax# 610 434-6607 Contents Pg. # Web Site www.vastex.com Introduction, Machine Specifications...
-
Page 2: E100
Thank you for purchasing your printing equipment form Vastex International Inc. Vastex has been designing and building printing equipment since 1960. We have knowledge and experience, and are proud to supply the printing industry with quality equipment at an affordable price. You can be confident your purchase will give you years of trouble free service. -
Page 3: General Information
Tempered glass, although strong, can shatter if the edges are subject to an impact General Information Black UV light bulbs are used in Vastex exposing Exposing Unit must be on a flat surface to units. Ultraviolet output of bulbs will lessen over eliminate stress on the glass. -
Page 4: Steps
Doc. # 01-04-021E Assembly Getting started: Your Exposing Unit has been fully assembled and tested in our factory. Both lid lifting cylinders have been removed from their upper mounting stud and secured to the side of the cabinet. Follow the steps in this manual to reattach them. Be careful not to damage the rubber vacuum blanket when removing the Exposing Unit from it's crating. -
Page 5: Open End Wrenches And Tighten All Bolts Well
Doc. # 01-04-021E Assembly Cont’d 1) Install Legs on Exposing Unit (Model E1-4731 only) 2) Place Legs on a clear spot on the floor, 28.5” (72.5cm) apart as shown in picture 1a. Steps 1 & 2 3) Lock lid handles as shown. Carefully lower the exposing unit down onto the legs. -
Page 6: Operation
Doc. # 01-04-021F Operation Overview: Your Exposing Unit is equipped with Black UV bulbs, a vacuum and exposure timer, vacuum pump, and start button. The vacuum pump draws the air out from between the blanket and glass. This flattens the coated screen and positive to the glass making for a sharper exposed image. -
Page 7: Troubleshooting
1/16 of an inch. 6) There is a foam seal around the perimeter of the 7) Contact Vastex for technical support if these lid between the rubber blanket and lid frame. steps fail to resolve the problem. -
Page 8: Maintenance
Doc. # 01-04-021E Maintenance Glass Removal / Installation 4) Reinstalling the glass. There are three glass retainers. One on each Before installing the glass, switch the side to square the glass to the rear seal and one vacuum pump on and off to verify it is in the front with special cams. - Page 9 Doc. # 01-04-021E Maintenance Cont’d 5) Screen Stops E-100: Two Rear screen stops are installed at the factory. E1-4731: Rear stops are installed at the factory. Rear screen stops E100-2128 E100-2331 E1-4731 Pg. 9...
- Page 10 example would be that pure coat the squeegee side once over the Emulsion information photopolymer emulsions are available entire screen. Coat again the squeegee for the screen printer in very high solids content with low side on only two thirds of the screen, viscosity.
- Page 11 (emulsion up) on a hard flat surface. pressure stroke with a soft squeegee. (Fig. 7) (Fig. 9) The use of newsprint on your work surface will help with clean up. Fig. 4 Surface smoothness can affect your substrate to stencil gasket. The lower Rz numbers will be produced only by machine coating or film products.
- Page 12 The defective part or parts will be repaired or replaced at the discretion of Vastex International, Inc. If the equipment in question is less than one (1) year old, it will be shipped to the customer at no charge, with an RGA issued by Vastex for the defective part. The defective part must be shipped back to Vastex freight prepaid within 30 days or the account will be billed.
Need help?
Do you have a question about the E-100-2128 and is the answer not in the manual?
Questions and answers