Advertisement
Quick Links
Advertisement

Summary of Contents for MARSHELL DG12150-D
- Page 1 ’ ’ DG12150-D...
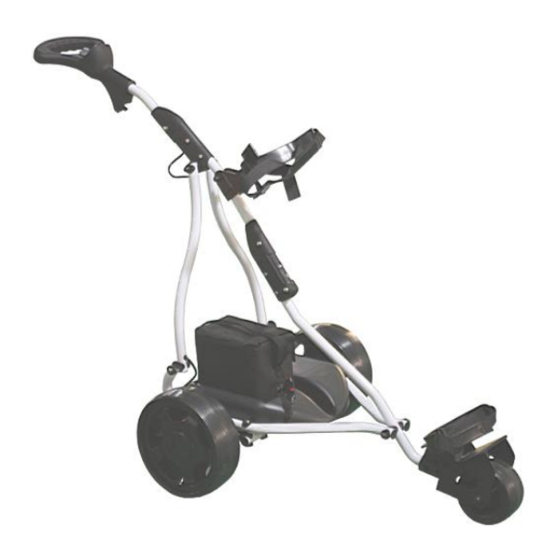
- Page 2 GOLF TROLLEY SKETCH MAP Handle bar Speed Controller knob Upper bag support Hook Folding joint Lower jointing Aluminium Tube Motor Battery Front bag support Controller Quick release clutch Rear wheel Front wheel...
- Page 3 GOLF TROLLEY INSTALLATION Take out trolley from carton, Place the wheels over the axle Whole trolley picture open battery and connect the same as shown. Please note the color battery wire terminal to the difference between the left trolley, charge the battery before and right, which are labeled operation, charging individually or respectively.
- Page 4 Secure the battery Connect the power wire to the motor. Turn the accelerator using the strap See the Maintenance section of this to the on position. provided. manual for instructions on charging the battery. Handle operation:: When turns the knob in anticlockwise Turn the speed knob in Seize the handle and press the left to -1, -2,-3.
-
Page 5: Operation
ASSEMBLY Your golf trolley model DG12150-D is shipped fully assembled. Carefully remove your golf trolley from it shipping carton. Keep carton in safe place. 1. Before using your electric golf trolley, ensure the battery has been fully charged with a battery charger. - Page 6 5. Connect the power cord to the motor. 6. Handle operation: Operate the handle as per above method. 7. After each round, disconnect the battery from the golf trolley and return the battery to the charger. Ensure the charger is plugged into the power outlet and leave the battery charging until the next time it is required.
-
Page 7: Maintenance
MAINTENANCE General: Clean off excess dirt after each use. Wipe the golf trolley with a damp cloth. Clean the wheels thoroughly with a damp cloth. Battery Maintenance: 1, NOTE : Please use the charger provided with this trolley to charge the battery to avoid damage to the trolley and the battery. - Page 8 PRECAUTIONS Do NOT sit on the golf trolley frame or unit. Keep the battery away from children. Never place battery in or near a fire. Never short the terminals.
-
Page 9: Specification
SPECIFICATION Basic Functions & Specifications: Model No.: DG-12150-D Material: Aluminium Full Dimensions( Inches): 44*22*36.5 Folded Dimensions (Inches): 32.5*22*12.5 Max Speed (Miles): 4MPH Net weight: 9.5KG Gross weight: 19 KG Distance Per Charge(KM): 9.5 Miles Tire: Airless Tire Charger: Model No. Input Output LC-6152... - Page 10 LET’S WALK, ENJOY THE GAME! CAUTION: Read and understand this manual thoroughly before operating the golf trolley.
Need help?
Do you have a question about the DG12150-D and is the answer not in the manual?
Questions and answers
Guten Tag Kann zu dem Golfwagen Typ DG12150-D ein Schirmständer und Scorekartenhalter montiert werden? Gibt es eine Produktübersicht der Zubehöre? Vielen Dank für Ihre Bemühungen Beat Kunz
The manual mentions the installation of a scorecard holder directly on the handlebar groove. However, it does not provide information about an umbrella holder or a product overview of available accessories.
This answer is automatically generated