
Summary of Contents for Ezodo PL-700AL
- Page 1 User’s Guide PL-700AL pH/ORP/Conductivity/TDS/Salt/DO/Temp. PL-700PC pH/ORP/Conductivity/TDS/Salt/Temp. PL-700PD pH/ORP/DO/Temp. PL-700PV pH/ORP/Temp.
-
Page 2: Table Of Contents
Index Features:................. 3 Specifications: ..............4 Accessories:................5 Functions of Keyboard:............7 Preparation: ................8 <pH, ORP, COND, TDS, Salt> ........8 <DO> ................8 Calibration: ................8 <pH>................. 8 <ORP> ................9 <COND, TDS, Salt> ............9 <DO> ................10 Measurement:.............. -
Page 3: Features
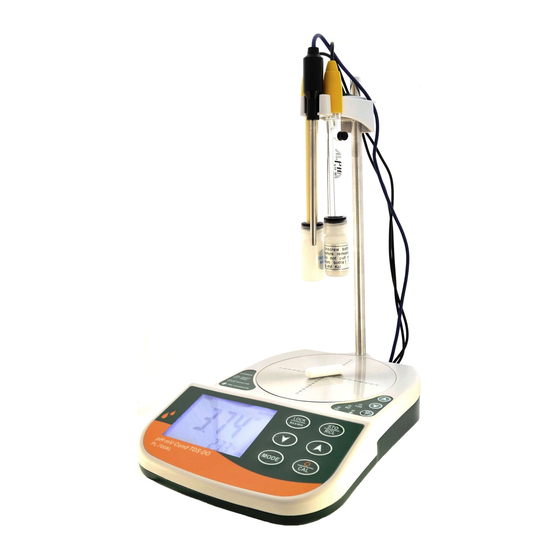
Introduction: We thank you for having purchased PL-700 series bench top multi-parameters meter. Before using the instrument, please note that the operation instructions should be read carefully, which will help you to operate and maintain the instrument, as well as to avoid trouble caused by unsuitable operation and maintenance. -
Page 4: Specifications
Specifications: Range -2.00~16.00 pH -1999 ~ -200 mV -199.9 ~ 499.9 mV 500 ~ 2000 mV Accuracy ±0.01+1 digit ±2+1 digit Resolution 0.01 pH 0.1/1 mV ATC: 0~100 ℃ Compensation Conductivity Salt Range 0.0~ 199.9µS 0.0~131.9 ppm 0.0~99.9 ppm 200~ 1999µS 132~1319 ppm 100~999 ppm 2.00~ 19.99 mS... -
Page 5: Accessories
Accessories: Please verify the corresponding accessories as below. PL700-AL, PL700-ALS pH glass electrode, Conductivity cell, DO probe, Temp. probe, Membrane cap x 4 pcs, Buffer 7.00 x 100ml, Buffer 4.01 x 100ml, 1413µS x 100ml, 12.88mS x 100ml, Electrolyte x 50 ml, Plastic burette, Sandpaper, Electrode clamp &... - Page 6 Display Description: Function Mode 1. Measuring Value 2. Calibration Mode 3. Calibration error indicator 4. Reading stored indicator 5. MAX & MIN Value 6. Recall Mode 7. Auto lock or manually lock current reading 8. Temperature Indicator 9. Auto Temperature Compensation 10.
-
Page 7: Functions Of Keyboard
Functions of Keyboard: Lock the current reading, press for 3 sec. to enter or exit MAX/MIN mode. In this mode, press to browse MAX and MIN reading. Store the current reading. Press 3 sec. to enter Recall mode. In Recall mode, browse records. Press both together 3 sec. -
Page 8: Preparation
Preparation: <pH, ORP, COND, TDS, Salt> 1. Connect AC adaptor with power source. 2. Remove the protection cap from the electrode and connect to input connector. 3. Connect the Temp. probe to meter and turn on the power switch. 4. Rinse the electrode with clean water and wipe it dry. <DO>... -
Page 9: Orp
3. Rinse the electrode with clean water and wipe it dry. Dip the electrode into the buffer solution pH 4.01 as previous steps. 4. After slope calibration, pH 4.01 or pH 10.01, the display will indicate the percentage of slope (PTS) to show the status of the electrode. - Page 10 hold for 3 sec. to enter calibration mode. The display will appear CAL and flashing 1413µS/cm. When the display stops flashing and indicates “SA", then "End” while calibration ends, and will return to measurement mode. Note: 1. Calibrated by 12.88 mS/cm standard solution would be better for measuring high conductivity solution.
-
Page 11: Measurement
sec. to enter calibration mode. The display will appear CAL and flashing 101.7%. When the display stops flashing and indicates “SA", then "End” while calibration ends, and will return to measurement mode. 4. Optional ’zero oxygen’ calibration: (improves measurement accuracy for very low or very high DO measurements). -
Page 12: Orp
<ORP> 1. Insert ORP electrode, and press to choose ORP mode. 2. Rinse the ORP electrode with clean water and wipe it dry. Dip the electrode into the sample solution which is going to be measured. Stir gently and wait until a stable reading can be obtained. - Page 13 4. Don’t touch or wipe the surface of the inner black plate of the conductivity cell. <DO> 1. Remove the protection cap and turn on the power and press to choose mode. Wait 10 minutes to 30 minutes for the probe to polarize. The reading should be approx.
-
Page 14: Store And Recall Mode
MAX/MIN mode: 1. Press and hold button until the display appear flashing MAX and MIN icons to enter MAX/MIN. Press lightly to browse MAX and MIN value during this mode. 2. To exit this mode, press and hold button again until the flashing MAX and MIN icons disappear and return to measuring mode. -
Page 15: Advanced Setting
Advanced Setting: 1. In pH, TDS or DO measuring mode, press together for 3 sec. will enter advanced setting. 2. In pH advanced setting, (1) Press to set “pH calibration type”, and to choose “USA” or “NIST”. Then press to confirm and return to measuring mode. - Page 16 to adjust the value from 0 to 50 ppt. Then press to confirm and return to measuring mode. (2) Press to set “Altitude Compensation”. to adjust the value from 0 to 20K ft. Then press to confirm and return to measuring mode. 5.
-
Page 17: Membrane Cap Replacement
Membrane Cap Replacement: 1. Do not touch the membrane as skin oils will interfere with the oxygen permeability rate of the membrane. Replace the cap carefully. 2. It is recommended that the probe remain attached to the meter during this replacement process. 3. - Page 18 the cap during this replacement since it minimizes the introduction of air pockets. Clean off the excess electrolyte before use. DO probe Anode Cathode Membrane Cap...
-
Page 19: Connect To Pc
Connect to PC: <System Requirement> 1. OS: Windows 2000, Windows XP, Windows Vista, Windows 7. 2. USB host controller. <Software Installation> 1. Open USB Driver folder and install USB “PL2303_Prolific_DriverInstaller_vXXXXX.exe” 2. Copy “GOnDO.exe” from the CD-ROM to the folder you want to put in. <Operations>... - Page 20 Choose the responding Port and then click OK. In normal situation, other settings do not need to be changed. 3. Fill in desired measuring interval seconds, and click set. 4. Click Connect to get readings and draw the curve.
- Page 21 5. Click the small graphs of each mode in the main window can enter a big window with detail reading information. Click MainPage to back to the main window. 6. In each big window, click SaveResult will export the readings to .txt file.
- Page 22 7. Click SaveData and then press and hold enter Recall mode. Press to export all the records to the program. The records can also be saved as a .txt file by clicking SaveResult in this window. Note: Please click Disconnect or close the program before turn off power or remove the USB cable.
Need help?
Do you have a question about the PL-700AL and is the answer not in the manual?
Questions and answers